


目录
Spring IOC、DI
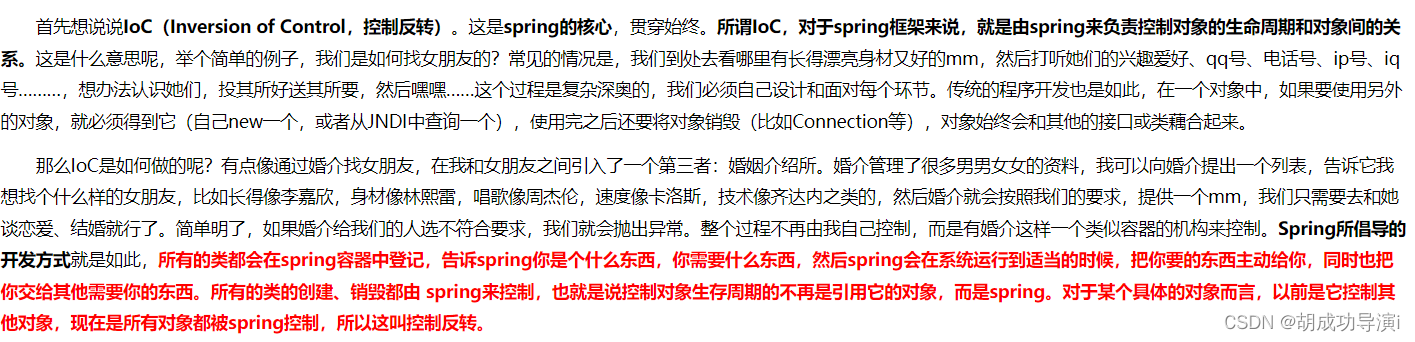
IOC概述
其思想是反转资源获取的方向,传统的JAVA程序设计,我们直接在对象内部通过new进行创建对象,是程序主动去创建依赖对象;而IOC是有专门的容器来创建这些对象,即由IOC容器来控制对象的创建;
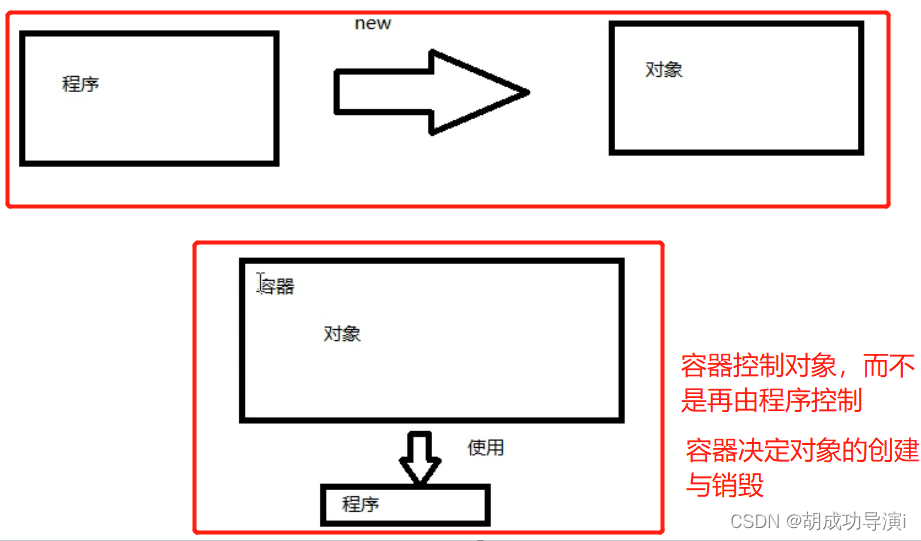

传统程序示意图

应用程序原本是老大,要获取都是主动出击,在IOC/DI中,应用程序就变成被动的了,既由IOC容器帮对象找相应的依赖注入,而不是由对象主动去找:“别找我们,我们找你”。
DI
既“依赖注入”,组件之间依赖关系由容器在运行期间决定
- 谁依赖谁:应用程序依赖IOC容器;
- 为什么需要依赖;应用程序需要IOC容器来提供对象需要的外部资源;
- 谁注入谁:IOC容器注入应用程序某个对象,应用程序依赖对象;
- 注入了什么:就是注入某个对象所需要的外部资源(包括对象,资源,常量数据)。
IOC在运行中,动态的向某个对象提供它所需要的其他对象,这一点是通过DI来实现的。怎么实现?通过反射实现。
ruiyo框架中的IOC
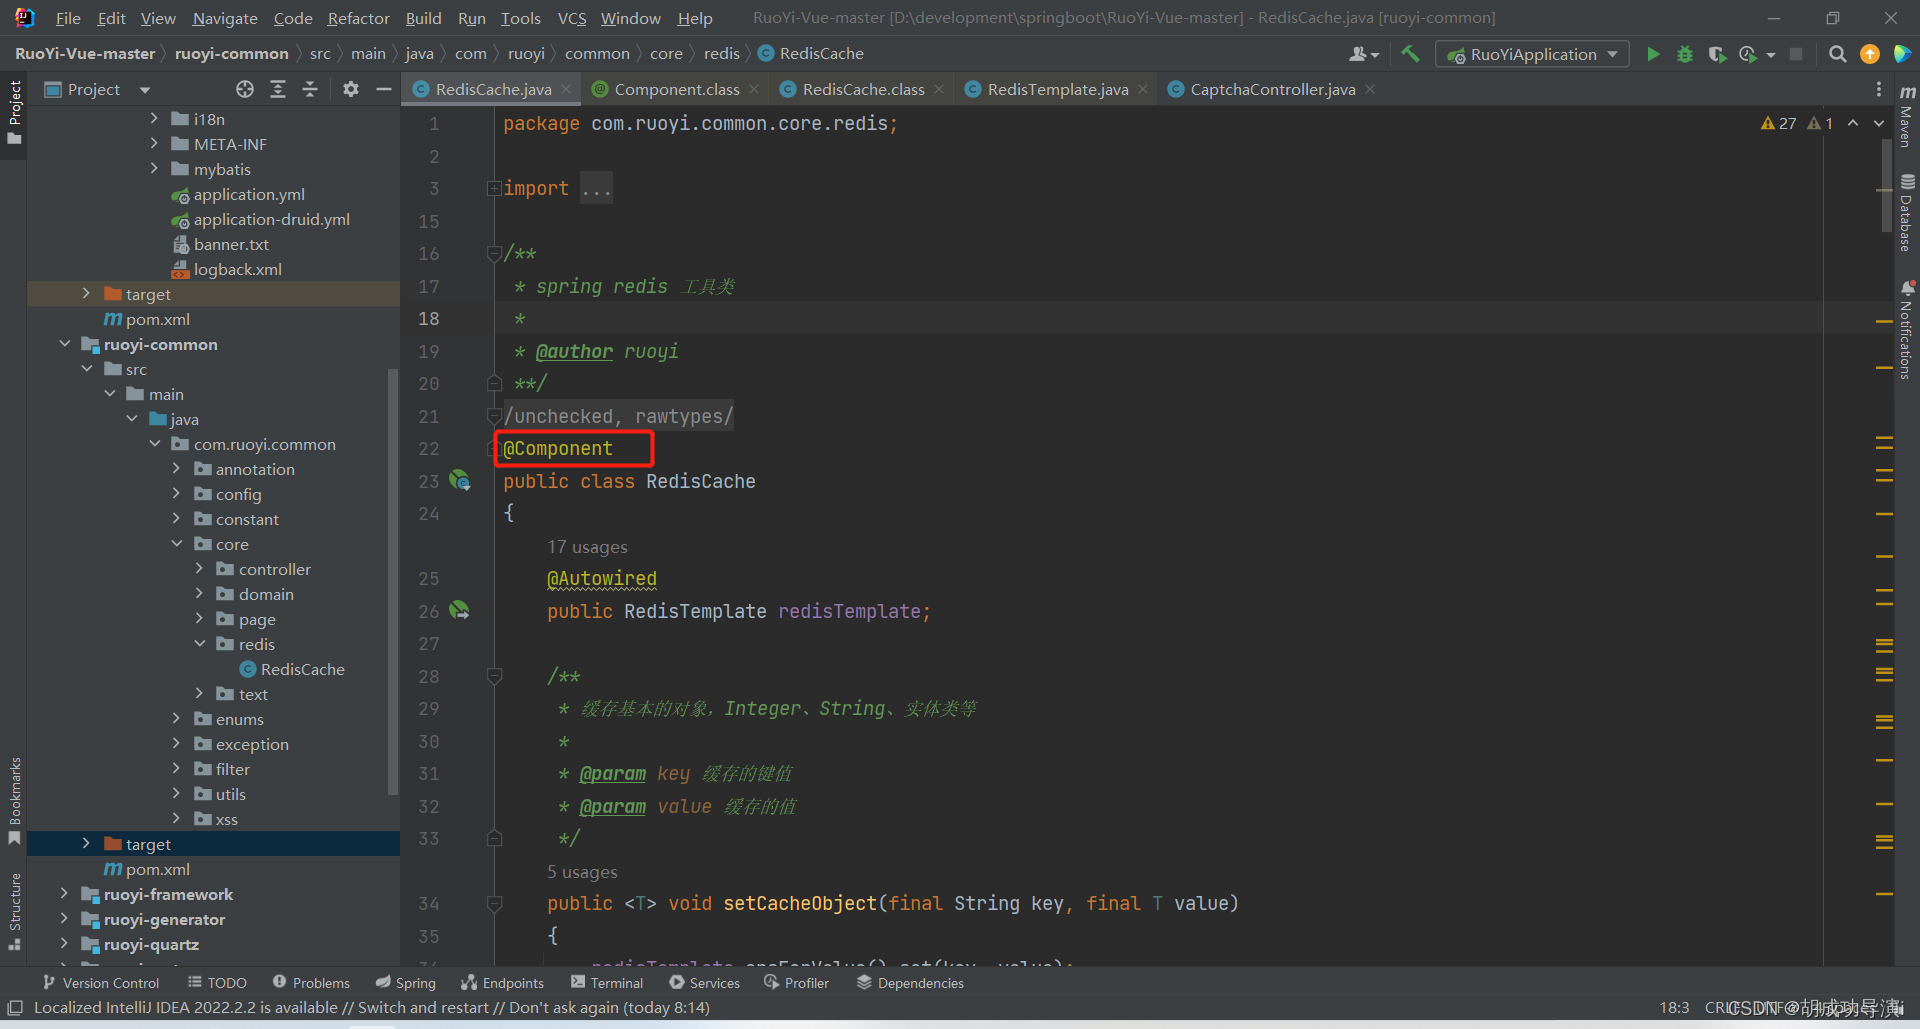
例子1
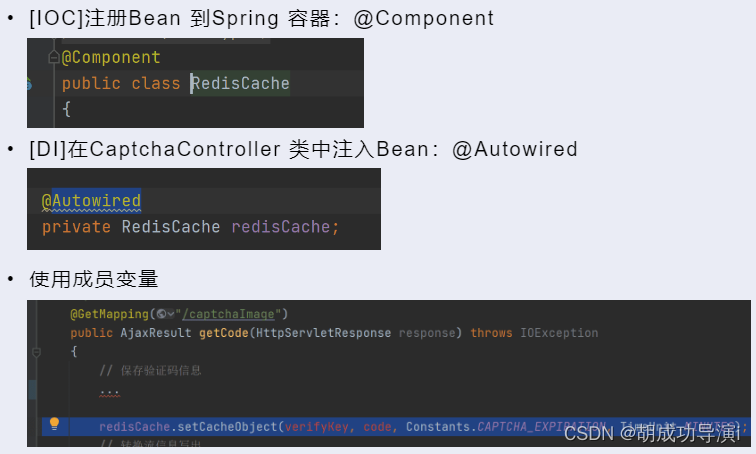
@Component
public class RedisCache{} 等价于 <bean id="redisCache" class="..RedisCache">
@Resource
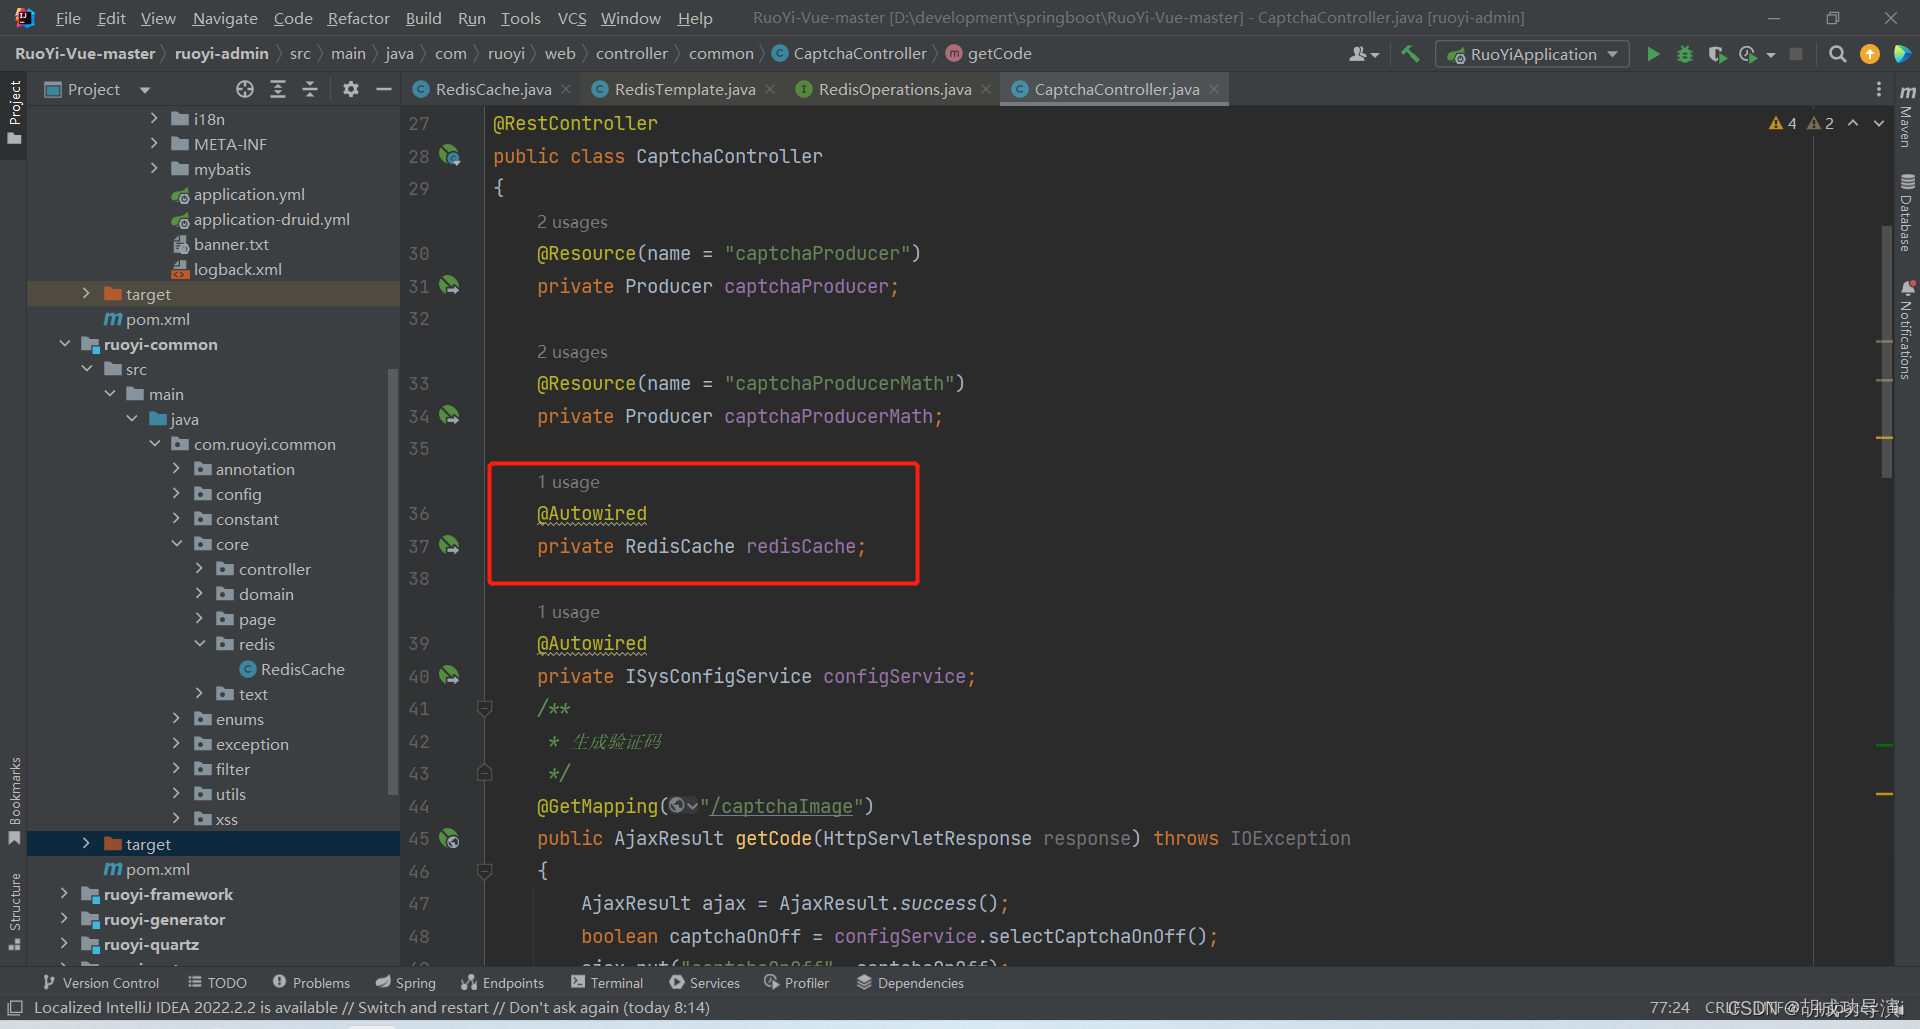
注意:这里我们在 private RedisCache redisCache;上面添加了注解 @Autowired,它首先会根据类型去匹配,它的实现类是 RedisCache,那么这里的意思就是:
RedisCache redisCache = new RedisCache();
调用RedisCache里的方法;

环境启动相关代码
例子2:
@SpringBootApplication
public class TomcatdebugApplication {
public static void main(String[] args) {
SpringApplication.run(TomcatdebugApplication.class, args);
}
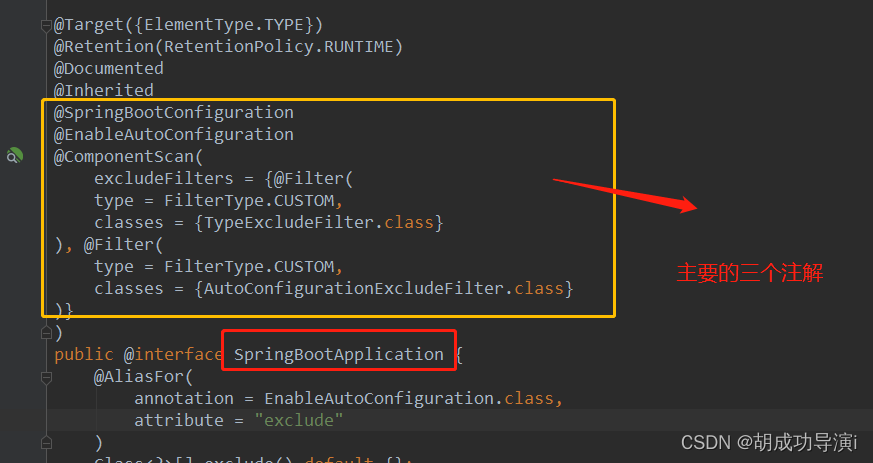
}@SpringBootApplication 注解
主要是由@ComponentScan, @EnableAutoConfiguration, @SpringBootConfiguration三个组成。
@SpringBootConfiguration继承自@Configuration,二者功能也一致,标注当前类是配置类, 并会将当前类内声明的一个或多个以@Bean注解标记的方法的实例纳入到spring容器中,并且实例名就是方法名。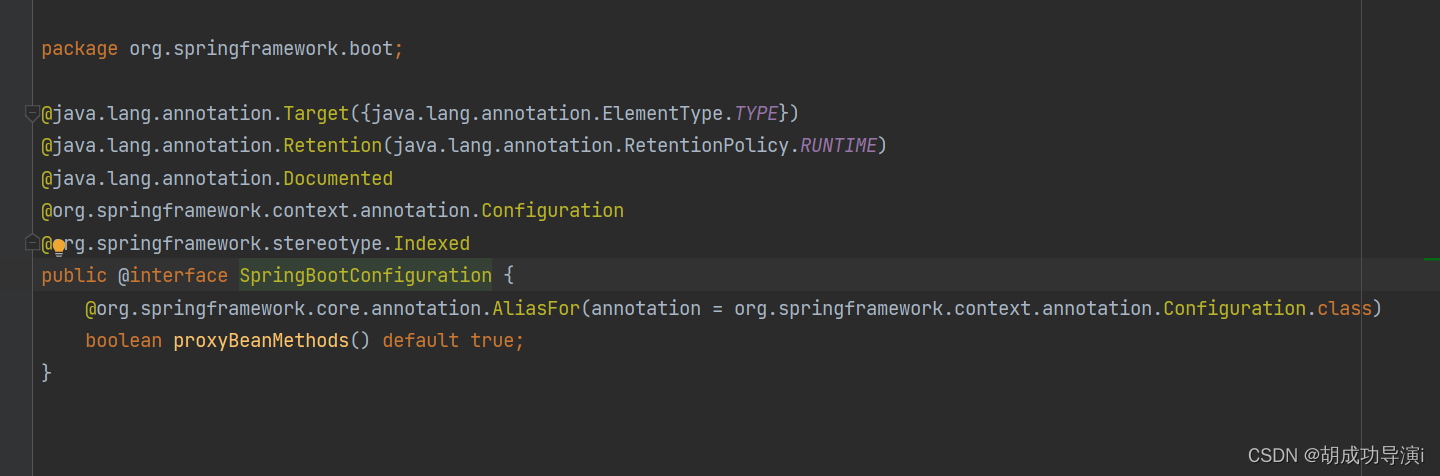
@EnableAutoConfiguration作用:从classpath中搜索所有的META-INF/spring.factories配置文件,然后将其中key为org.springframework.boot.autoconfigure.EnableAutoConfiguration的value加载到spring容器中。
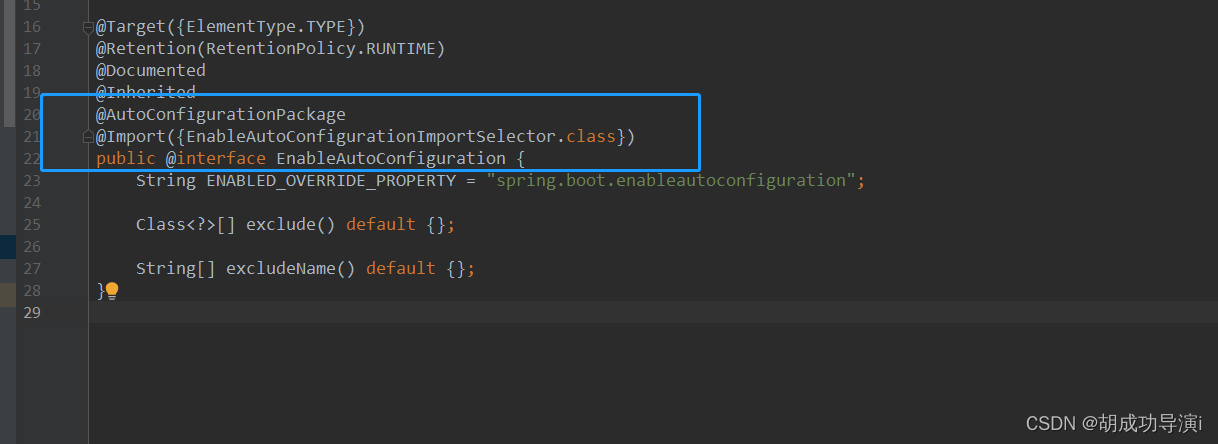
上图分析源码可知: @EnableAutoConfiguration = @Import + @AutoConfigurationPackage
@AutoConfigurationPackage: 主要作用是自动配置包
@Import: Spring底层注解@Import,给容器中导入一个组件;导入的组件由AutoConfigurationPackages.Registrar.class 将主配置类(@SpringBootApplication标注的类)的所在包以及下面所有子包里面的所有组件扫描到Spring容器。
总结:
springboot底层实现自动配置的步骤:
- 1.springboot应用启动
- 2.@SpringBootApplication起作用
- 3.@EnableAutoConfiguration
- 4.@AutoConfigurationPackage:这个组合注解主要是@Import(AutoConfigurationPackages.Registrar.class),它通过将Registrar类导入到容器中,而Registrar类作用是扫描主配置类同级目录以及子包,并将相应的组件导入到springboot创建管理的容器中
- 5.@Import(AutoConfigurationImportSelector.class):它通过将AutoConfigurationImportSelector类导入到容器中,AutoConfigurationImportSelector类作用是通过selectImports方法实现将配置类信息交给SpringFactory加载器进行一系列的容器创建过程,具体实现可查看上面的源码
Spring MVC
模型(Model)、视图(View)、控制器(Controller),各部分根据职责进行分离,使程序的结构更为直观,增加了程序的可扩展性、可维护性、可复用性。可以用如下的图形来表示三者之间的关系

Model层
是业务逻辑,可以将与数据处理相关的逻辑模块放在Model层中,实体、数据持久化等技术。
而在SpringBoot中对应的就是domain、Service、Entity等

View 视图
View层是界面,里面包含展示给用户看的东西,也就是页面。

Controller 控制器
Controller 层是将Model层和View层进行连接的模块,将View层的资源请求处理转发至Model层的业务逻辑中,然后将结果返回给View层进行展示。

Spring MV注解
@Controller
Spring MVC 的注解,表名该类用于处理 http 请求
@Controller 注解功能的增强是 @Controller 与@ResponseBody 的组合注解 。如果一个 Controller 类添加了@RestController,那么该 Controller 类下的所有方法都相当于添加了@ResponseBody 注解,大多数都是使用该注解代替 @Controller 与@ResponseBody 的组合注解
@GetMapping
RequestMapping 和 Get 请求方法的组合,表明该方法只支持 Get 请求 。
@PostMapping
RequestMapping 和 Post 请求方法的组合 只支持 Post 请求
@PutMapping
RequestMapping 和 Put 请求方法的组合,只支持 Put 请求
@DeleteMapping
RequestMapping 和 Delete 请求方法的组合 只支持 Delete 请求
实例运用Get,post,Put,Delete
package com.ruoyi.system.controller;

import java.util.List;
import javax.servlet.http.HttpServletResponse;
import org.springframework.security.access.prepost.PreAuthorize;
import org.springframework.beans.factory.annotation.Autowired;
import org.springframework.web.bind.annotation.GetMapping;
import org.springframework.web.bind.annotation.PostMapping;
import org.springframework.web.bind.annotation.PutMapping;
import org.springframework.web.bind.annotation.DeleteMapping;
import org.springframework.web.bind.annotation.PathVariable;
import org.springframework.web.bind.annotation.RequestBody;
import org.springframework.web.bind.annotation.RequestMapping;
import org.springframework.web.bind.annotation.RestController;
import com.ruoyi.common.annotation.Log;
import com.ruoyi.common.core.controller.BaseController;
import com.ruoyi.common.core.domain.AjaxResult;
import com.ruoyi.common.enums.BusinessType;
import com.ruoyi.system.domain.MyStudent;
import com.ruoyi.system.service.IMyStudentService;
import com.ruoyi.common.utils.poi.ExcelUtil;
import com.ruoyi.common.core.page.TableDataInfo;

/**
 * 学生信息Controller
 *
 * @author hu
 * @date 2022-10-12
 */
@RestController
@RequestMapping("/system/student")
public class MyStudentController extends BaseController
{
    @Autowired
    private IMyStudentService myStudentService;

    /**
     * 查询学生信息列表
     */
    @PreAuthorize("@ss.hasPermi('system:student:list')")
    @GetMapping("/list")
    public TableDataInfo list(MyStudent myStudent)
    {
        startPage();
        List<MyStudent> list = myStudentService.selectMyStudentList(myStudent);
        return getDataTable(list);
    }

    /**
     * 导出学生信息列表
     */
    @PreAuthorize("@ss.hasPermi('system:student:export')")
    @Log(title = "学生信息", businessType = BusinessType.EXPORT)
    @PostMapping("/export")
    public void export(HttpServletResponse response, MyStudent myStudent)
    {
        List<MyStudent> list = myStudentService.selectMyStudentList(myStudent);
        ExcelUtil<MyStudent> util = new ExcelUtil<MyStudent>(MyStudent.class);
        util.exportExcel(response, list, "学生信息数据");
    }

    /**
     * 获取学生信息详细信息
     */
    @PreAuthorize("@ss.hasPermi('system:student:query')")
    @GetMapping(value = "/{id}")
    public AjaxResult getInfo(@PathVariable("id") Integer id)
    {
        return AjaxResult.success(myStudentService.selectMyStudentById(id));
    }

    /**
     * 新增学生信息
     */
    @PreAuthorize("@ss.hasPermi('system:student:add')")
    @Log(title = "学生信息", businessType = BusinessType.INSERT)
    @PostMapping
    public AjaxResult add(@RequestBody MyStudent myStudent)
    {
        return toAjax(myStudentService.insertMyStudent(myStudent));
    }

    /**
     * 修改学生信息
     */
    @PreAuthorize("@ss.hasPermi('system:student:edit')")
    @Log(title = "学生信息", businessType = BusinessType.UPDATE)
    @PutMapping
    public AjaxResult edit(@RequestBody MyStudent myStudent)
    {
        return toAjax(myStudentService.updateMyStudent(myStudent));
    }

    /**
     * 删除学生信息
     */
    @PreAuthorize("@ss.hasPermi('system:student:remove')")
    @Log(title = "学生信息", businessType = BusinessType.DELETE)
	@DeleteMapping("/{ids}")
    public AjaxResult remove(@PathVariable Integer[] ids)
    {
        return toAjax(myStudentService.deleteMyStudentByIds(ids));
    }
}


 3954
3954


 被折叠的 条评论
为什么被折叠?
被折叠的 条评论
为什么被折叠?
 到【灌水乐园】发言


