


 文章介绍了如何在uniapp小程序中使用Vue3实现地图展示点位,包括引入地图组件、添加多个标记点、动态绑定数据以及调用openMapApp方法调起第三方应用导航的过程,同时解决了获取用户位置权限的问题。
小程序实现地图撒点、调起第三方app导航
需求描述
项目需要展示地图,并在地图上显示所有的地点的点位。点击点位弹出当前点位的位置信息,点击导航按钮选择app打开当前位置进行导航
实现思路
- 项目用的是uniapp + vue3,小程序中有
- 很多人可能和我一样,没有写过调起app的功能,所以不知道调起app通过什么触发,我查阅了一些资料,发现wx官方提供了
openMapApp()方法,后续会讲到 - 废话不多说,进正题
实现过程
首先自然得写个标签引入地图啦
<map class="maps" id="myMap" width="750rpx"
      height="600rpx" scale="10"
     :latitude="latitude"
     :longitude="longitude"
	 :markers="markers"
	 :show-location="true"
	 @markertap="markertap" />
	 //id:用于获取这个地图内容,后续用得着,理解成获取这个dom也行
	 //width、height:地图基础宽高,必填的
	 //latitude、longitude:经纬度,地图的中心点,也是必填
	 //markers:地图上的点
	 //show-location:当前位置
	 //@markertap:地图上的点的点击事件
	 //scale:地图缩放大小,数值越大越精确(嗯...应该算比例尺吧,我这么理解)
引入地图以后,可以把经纬度和markers写个假数据看看
	//我这用的vue3,直接写在setup里,vue2写在data里就好了
	<script setup>
	const longitude = ref(110.299121)
	const latitude = ref(25.274215)
	const markers = ref([{
		id:1, //id必须有一个
		latitude: 110.299121, //纬度
		longitude: 25.274215, //经度
		width:25, //markers的宽
		height:38 //markers的高
	}])
	</script>
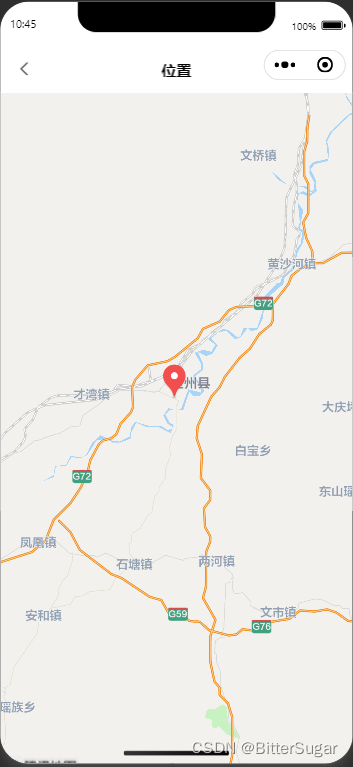
到这一步,编译代码预览一下,地图就已经出来了
需求是一次性在地图上展示所有点位,一个点肯定显然是不够的,那多个点怎么写入呢?很简单,观察一下,markers是一个数组类型,既然是数组那就可以无限push
//先写个测试看看
for(let i=0;i<6;i++){
			//for循环加markes点位
			markers.value.push({
				id:i,
				latitude:listData.value[i].latitude,
				longitude: listData.value[i].longitude,
				width:25,
				height:38
			})
}
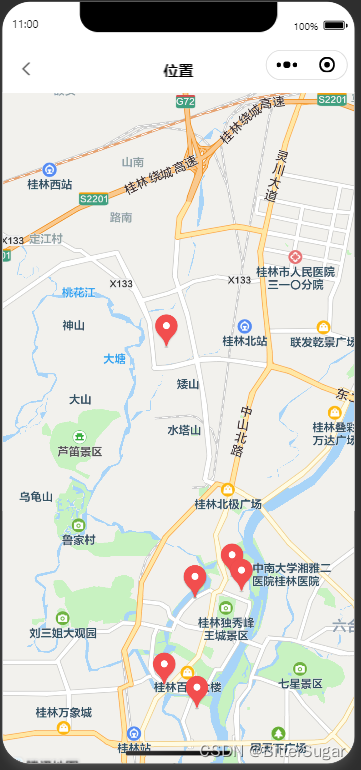
这时候地图上就拥有多个点了
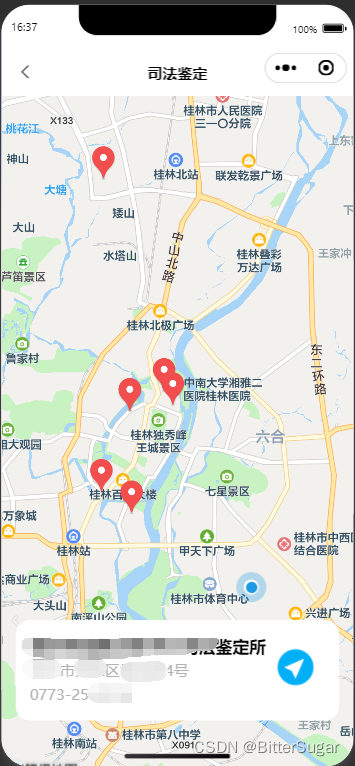
点位出来,功能完成一半了,用过小程序定位导航的都知道,正常会显示当前点位的地址名称、详细地址、以及导航按钮,像这样

其实想做到图片里这种效果,只需要调用uniapp的uni.openLocation()方法即可,具体参数可以看看官网uni.openLocation(OBJECT),但这个方法虽然省事,但点击以后他会跳转一个新的集成的页面,官方也说了“本API是一个非原子的封装界面,开发者如有定制需求,可自己做页面实现类似功能。”显然这个方法不适合我们,自己手搓吧
首先写一写样式布局,如果复制代码,记得把图片替换成你需要的
view部分
<!-- v-if主要用来切换当前视图是否展示 -->
<!-- adressName、adressphone、adressDetail下文会提到 -->
<!-- adressName——地址名称、adressphone——联系电话、adressDetail——详细地址
	 下文会提到 -->
<view class="btmbox" v-if="adressName != ''">
			<view class="maxbox">
				<view class="btmtit">
					{{adressName}}
				</view>
				<view class="btmadre">
					{{adressDetail}}
				</view>
				<view class="btmadre">
					{{adressphone}}
				</view>
			</view>
			<view class="rightbox">
				<view class="toapp"  @click="toMapApp">
				<!-- img 记得替换 -->
					<img src="../../../../static/img/daohang.png" alt="" srcset="" style="width: 100%;height: 100%;">
				</view>
			</view>

		</view>
CSS部分
.btmbox{
		width: calc(100% - 60rpx);
		box-sizing: border-box;
		margin: 30rpx;
		padding: 30rpx;
		border-radius: 30rpx;
		// height: 200rpx;
		background: white;
		border-color: black;
		position: absolute;
		bottom: 100rpx;
		line-height: 52rpx;
		box-shadow: #b1b1b1 10rpx;
		display: flex;
		.maxbox{
			width: 80%;
			.btmtit{
				width: 100%;
				font-size: 36rpx;
				font-weight: bold;
			}
			.btmadre{
				width: 100%;
				font-size: 32rpx;
				color: #b1b1b1;
			}
		}
		.rightbox{
			width: 20%;
			.toapp{
				margin: 30rpx auto;
				width: 80rpx;
				height: 80rpx;
				border-radius: 50%;
			}
		}

	}
把假数据adressName——地址名称、adressphone——联系电话、adressDetail——详细地址 一一对应写进去,就得到了这个样子的页面
大致页面效果就出来了,那怎么动态给所有的点绑定上数据呢?很简单,markers不是循环出来的嘛,循环的时候设置了id,id是唯一的,只要和后端数据对上就行了,我们把刚刚的循环语句改造一下,加上请求后端数据
	const listData = ref(null) //用于接收后端数据
	const markers = ref([]) //定义空的markers数组
	getAppraisalList().then(res=>{ //调接口取值
		listData.value = res.data //将后端的数据赋值给listData
		//如果需要将后端传过来的第一个点作为中心点,可以写下面两行代码给默认经纬度赋值
		longitude.value = listData.value[0].longitude
		latitude.value = listData.value[0].latitude
		for(let i=0;i<listData.value.length;i++){
			//for循环加markes点位
			markers.value.push({
				id:i,
				latitude:listData.value[i].latitude,
				longitude: listData.value[i].longitude,
				width:25,
				height:38
			})
		}

		//res.data的数据格式:
		[{
			address: "xx市xx路x号"
			divisionId: 2
			id: 5
			introduce: null
			latitude: 25.28727251510917
			longitude: 110.30042297938228
			name: "xx司法鉴定所"
			phone: "0773-2xxxx"}
		}]
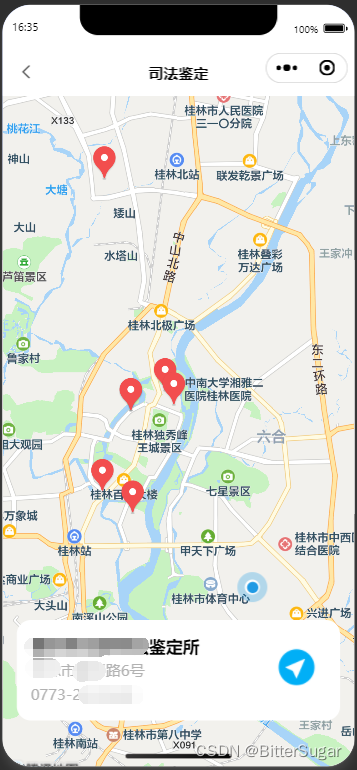
这时候,数据和点的信息就绑定上了,只需要给markers绑定上点击事件(也就是上文提到的@markertap),就可以对应展示数据了
const adressName = ref('') //事务所名称
const adressDetail = ref('') //详细地址
const adressphone = ref('') //联系电话
const adressLatitude = ref(0) //传给app的纬度
const adressLongitude = ref(0) //传给app的经度
const markertap = (e) =>{
	adressName.value = listData.value[e.detail.markerId].name
	adressDetail.value = listData.value[e.detail.markerId].address
	adressphone.value = listData.value[e.detail.markerId].phone
	adressLatitude.value = listData.value[e.detail.markerId].latitude
	adressLongitude.value = listData.value[e.detail.markerId].longitude
}
最后,只差点击右侧下方的导航按钮选择app打开位置进行导航了,查了很多资料,发现可以使用微信的 openMapApp()方法,首先需要获取这个地图对象,这时候,上文设置的*id=“myMap”*作用就来了
//使用uni.getLocation()方法获取自身定位,可以将地图默认中心定在自己所在位置,这个不是必须的,可以不用
uni.getLocation({
	        type: 'gcj02', // 指定坐标类型为国测局坐标系(GCJ-02)
	        success(res) {
	           latitude.value = res.latitude; // 获取纬度赋值
	           longitude.value = res.longitude; // 获取经度赋值
	        },
	        fail(err) {
	          console.error('获取经纬度失败:', err);
	        }
});
//使用uni.createMapContext()方法获取地图对象
const MapContext = uni.createMapContext('myMap')
//接着调用方法
//调起app
const toMapApp = () =>{
    //openMapApp()方法主要用于拉起地图app选择导航
	MapContext.openMapApp({
		//因为不保证经纬度在传输过程中类型是否是number类型,所以使用Number转换
		latitude: Number(adressLatitude.value),
		longitude: Number(adressLongitude.value),
		//destination地址名称
		destination: adressName.value,
		success: function(e) {
			console.log(e)
			console.log('成功')
		},
		fail: function(e) {
			console.log(e)
			console.log('失败')
		}
	})
}
如果你用了uni.getLocation()这时候你以为成功了,实际上大概率你会得到这么一条报错
获取经纬度失败:
{errMsg: "getLocation:fail the api need to be declared in the requiredPrivateInfos field in app.json/ext.json"}
很好解决,项目找到manifest.json文件,在文件中找到"mp-weixin" : {}这个对象,复制以下代码
"requiredPrivateInfos" : [ "getLocation" ],
        "permission" : {
            "scope.userLocation" : {
                "desc" : "你的位置信息将用于小程序位置接口的效果展示"
            }
}
搞定,直接上真机测试over~


 4600
4600

 被折叠的 条评论
为什么被折叠?
被折叠的 条评论
为什么被折叠?
 到【灌水乐园】发言


