


参考:
https://zhuanlan.zhihu.com/p/385370315
这篇文章中,告诉我们如何下载springboot源码
并且,2.2.9之后不在是maven构建
所以,这里下载2.2.9版本进行构建
下载后,导入IDEA中
并新建自己的modules:spring-boot-mytest
自己新建的modules的pom内容如下:
<?xml version="1.0" encoding="UTF-8"?>
<project xmlns="http://maven.apache.org/POM/4.0.0"
		 xmlns:xsi="http://www.w3.org/2001/XMLSchema-instance"
		 xsi:schemaLocation="http://maven.apache.org/POM/4.0.0 http://maven.apache.org/xsd/maven-4.0.0.xsd">
	<modelVersion>4.0.0</modelVersion>
	<parent>
		<groupId>org.springframework.boot</groupId>
		<artifactId>spring-boot-starter-parent</artifactId>
		<version>2.2.9.RELEASE</version>
		<relativePath/> <!-- lookup parent from repository -->
	</parent>

	<groupId>com.pzj</groupId>
	<artifactId>spring-boot-mytest</artifactId>
	<version>0.0.1-SNAPSHOT</version>
	<name>spring-boot-mytest</name>
	<description>Demo project for Spring Boot</description>

	<properties>
		<java.version>8</java.version>
	</properties>

	<packaging>jar</packaging>

	<dependencies>
		<dependency>
			<groupId>org.springframework.boot</groupId>
			<artifactId>spring-boot-starter-web</artifactId>
		</dependency>

		<dependency>
			<groupId>org.springframework.boot</groupId>
			<artifactId>spring-boot-starter-test</artifactId>
			<scope>test</scope>
		</dependency>

	</dependencies>

	<build>
		<plugins>
			<plugin>
				<groupId>org.springframework.boot</groupId>
				<artifactId>spring-boot-maven-plugin</artifactId>
			</plugin>
		</plugins>
	</build>
</project>
这里的parent是2.2.9.RELEASE。这样就可以直接引用我们本地的springboot代码。
此贴中,在spring-boot-mytest里创建自己的controller进行访问。
但是,失败了。
解决办法:
我们需要先构建项目,才能成功。
构建步骤:
第一步:
配置maven镜像地址:
    <mirror>
    <id>aliyun</id>
    <name>Nexus Aliyun</name>
    <url>http://maven.aliyun.com/nexus/content/groups/public/</url>
    <mirrorOf>central</mirrorOf>
    </mirror>

	<mirror>
    <id>ui</id>
    <name>Nexus UI</name>
    <mirrorOf>central</mirrorOf>
    <url>http://uk.maven.org/maven2/</url>
    </mirror>

	<mirror>
    <id>ibiblio</id>
    <name>Nexus Ibiblio</name>
    <mirrorOf>central</mirrorOf>
    <url>http://mirrors.ibiblio.org/pub/mirrors/maven2/</url>
    </mirror>

	<mirror>
    <id>jboss-public-repository-group</id>
    <name>Nexus JBoss</name>
    <mirrorOf>central</mirrorOf>
    <url>http://repository.jboss.org/nexus/content/groups/public</url>
    </mirror>

	<mirror>
    <id>repo2</id>
    <name>Nexus Repo2</name>
    <mirrorOf>central</mirrorOf>
    <url>http://repo2.maven.org/maven2/</url>
    </mirror>
第二步:进入spring-boot-2.2.9.RELEASE中。
下载maven-wrapper
https://github.com/bdemers/maven-wrapper
第三步:命令构建
下载完成后
执行以下命令:
Linux:
./mvnw clean install -DskipTests -Pfast
Windows
mvnw.cmd clean install -DskipTests -Pfast
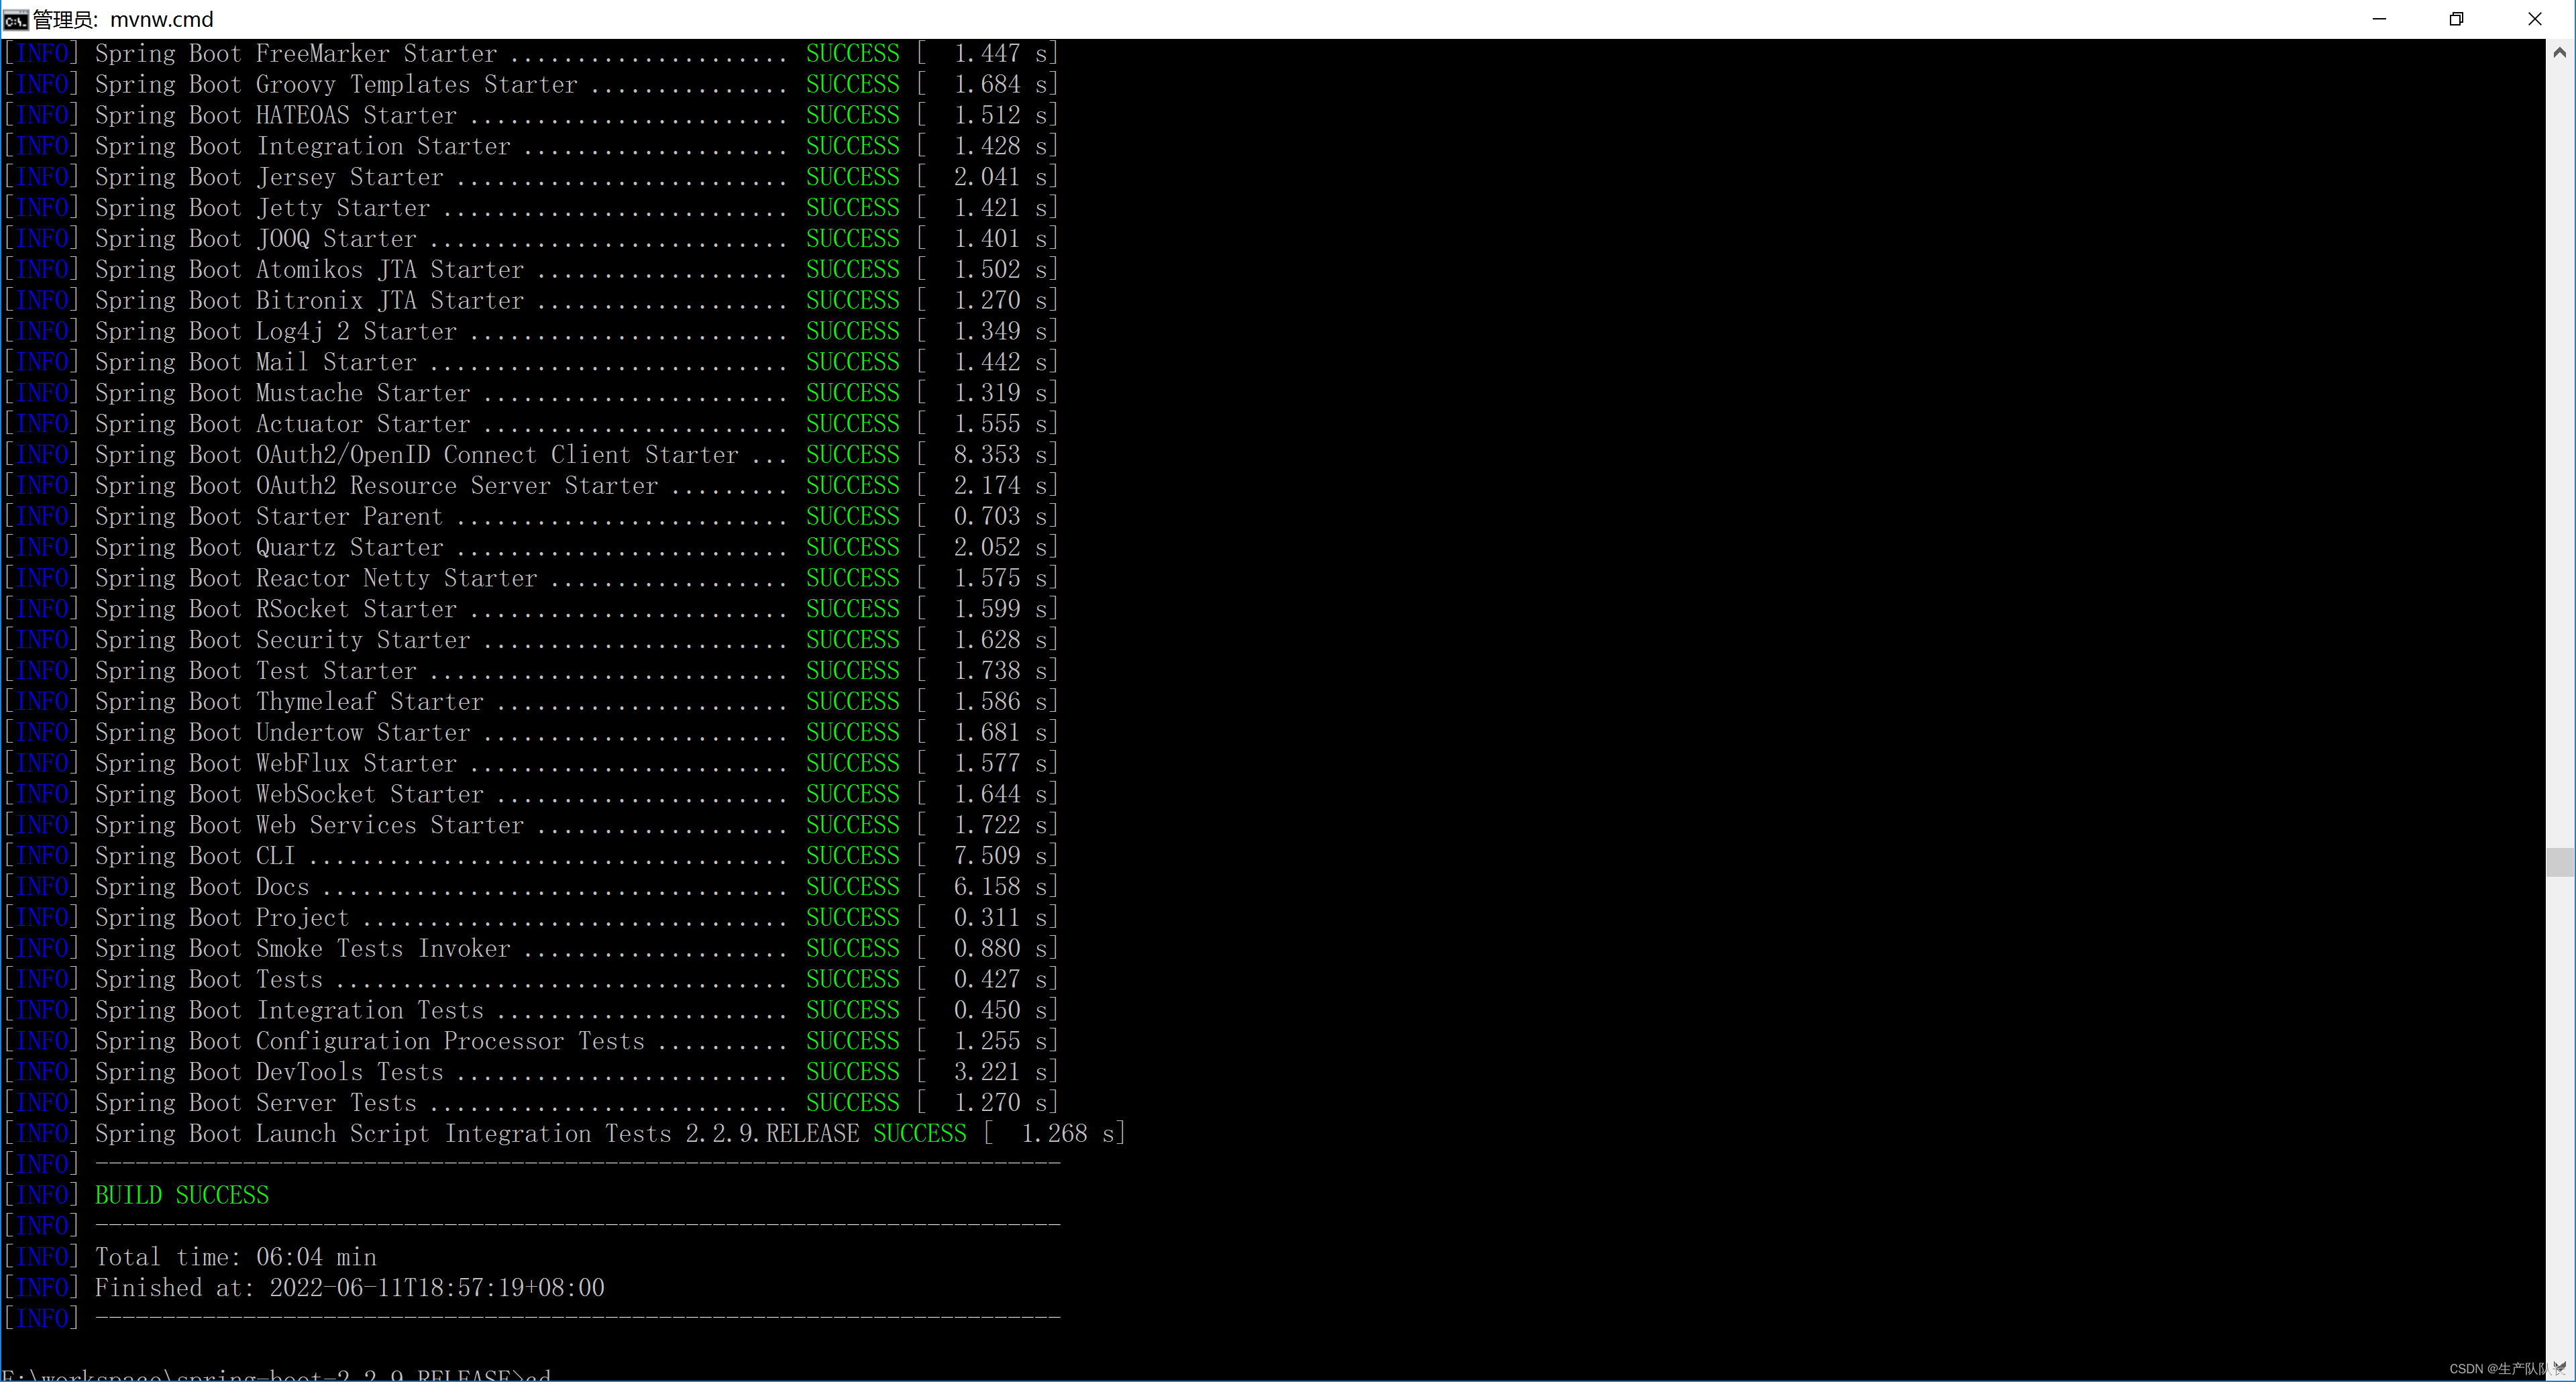
出现以上画面,就是构建成功。
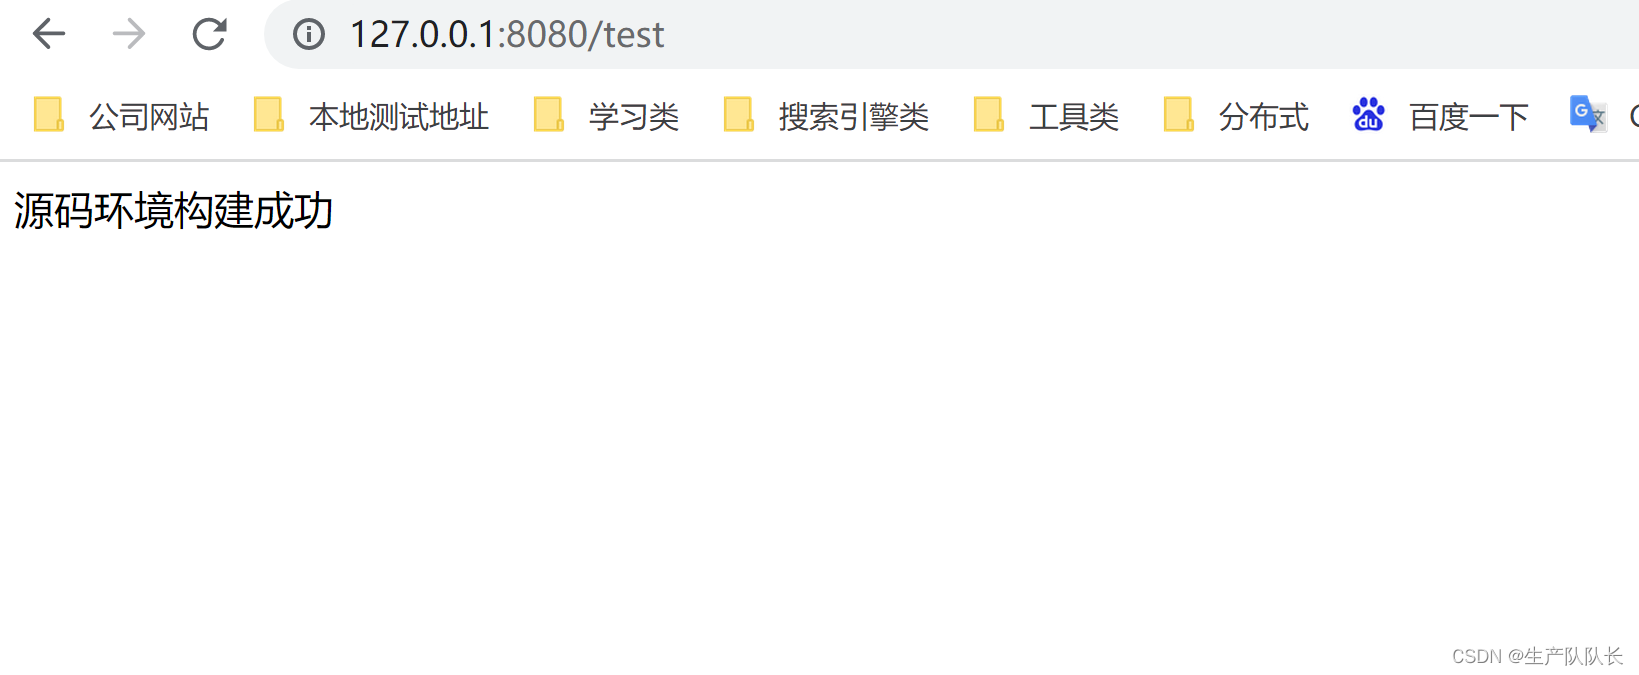
于是,我们再回到IDEA中
启动 spring-boot-mytest 模块
访问controller即可正常访问。
这样,springboot源码就是构建成功了。


 439
439


 被折叠的 条评论
为什么被折叠?
被折叠的 条评论
为什么被折叠?
 到【灌水乐园】发言


