


需要用到的lnmp包和wordpress包
lnmp下载地址:https://pan.baidu.com/s/18n1odkilF4y1ifNRoYAFgg
提取码:lnmp
wordpress下载地址:https://pan.baidu.com/s/1lC96mq9bCEEByBvjSMVx8Q
提取码:lnmp
| 主机名 | ip |
| server | 192.168.10.10 |
一、将下载好的包拖入虚拟机并解压
[root@server ~]# ls
anaconda-ks.cfg  lnmp.zip  wordpress-4.8-zh_CN.zip
[root@server ~]# yum install unzip -y           #下载unzip解压工具
[root@server ~]# unzip lnmp.zip
[root@server ~]# unzip wordpress-4.8-zh_CN.zip
[root@server ~]# ls
anaconda-ks.cfg  lnmp  lnmp.zip  wordpress  wordpress-4.8-zh_CN.zip
二、配置yum源,关闭防火墙
[root@server ~]# systemctl stop firewalld
[root@server ~]# setenforce 0

[root@server ~]# cd /etc/yum.repos.d/
[root@server yum.repos.d]# mkdir /repo
[root@server yum.repos.d]# mv * /repo
[root@server yum.repos.d]# vi local.repo
#本地源
[c7]
baseurl=file:///cdrom
gpgcheck=0
enabled=1

[lnmp]
baseurl=file:///root/lnmp
gpgcheck=0
enabled=1
[root@server yum.repos.d]# yum repolist
已加载插件:fastestmirror
源 'c7' 在配置文件中未指定名字,使用标识代替
源 'lnmp' 在配置文件中未指定名字,使用标识代替
Loading mirror speeds from cached hostfile
c7                                                                                                                                          | 3.6 kB  00:00:00
lnmp                                                                                                                                        | 2.9 kB  00:00:00
lnmp/primary_db                                                                                                                             | 153 kB  00:00:00
源标识                                                                          源名称                                                                        状态
c7                                                                              c7                                                                            4,067
lnmp                                                                            lnmp                                                                            178
repolist: 4,245
三、下载mariadb,nginx,php
[root@server yum.repos.d]# yum install mariadb mariadb-server
[root@server yum.repos.d]# systemctl restart mariadb
[root@server yum.repos.d]# mysql_secure_installation      #初始化数据库

NOTE: RUNNING ALL PARTS OF THIS SCRIPT IS RECOMMENDED FOR ALL MariaDB
      SERVERS IN PRODUCTION USE!  PLEASE READ EACH STEP CAREFULLY!

In order to log into MariaDB to secure it, we'll need the current
password for the root user.  If you've just installed MariaDB, and
you haven't set the root password yet, the password will be blank,
so you should just press enter here.

Enter current password for root (enter for none):    #第一次初始化直接回车
OK, successfully used password, moving on...

Setting the root password ensures that nobody can log into the MariaDB
root user without the proper authorisation.

You already have a root password set, so you can safely answer 'n'.

Change the root password? [Y/n] y
New password:               #数据库密码
Re-enter new password:      #重复
Password updated successfully!
Reloading privilege tables..
 ... Success!


By default, a MariaDB installation has an anonymous user, allowing anyone
to log into MariaDB without having to have a user account created for
them.  This is intended only for testing, and to make the installation
go a bit smoother.  You should remove them before moving into a
production environment.

Remove anonymous users? [Y/n] y
 ... Success!

Normally, root should only be allowed to connect from 'localhost'.  This
ensures that someone cannot guess at the root password from the network.

Disallow root login remotely? [Y/n] y
 ... Success!

By default, MariaDB comes with a database named 'test' that anyone can
access.  This is also intended only for testing, and should be removed
before moving into a production environment.

Remove test database and access to it? [Y/n] y
 - Dropping test database...
 ... Success!
 - Removing privileges on test database...
 ... Success!

Reloading the privilege tables will ensure that all changes made so far
will take effect immediately.

Reload privilege tables now? [Y/n] y
 ... Success!

Cleaning up...

All done!  If you've completed all of the above steps, your MariaDB
installation should now be secure.

Thanks for using MariaDB!
[root@server yum.repos.d]# mysql -u root -p
Enter password:    #数据库密码
Welcome to the MariaDB monitor.  Commands end with ; or \g.
Your MariaDB connection id is 12
Server version: 5.5.64-MariaDB MariaDB Server

Copyright (c) 2000, 2018, Oracle, MariaDB Corporation Ab and others.

Type 'help;' or '\h' for help. Type '\c' to clear the current input statement.

MariaDB [(none)]> create database wordpress;
Query OK, 1 row affected (0.00 sec)

MariaDB [(none)]>exit
Bye
[root@server yum.repos.d]# yum install nginx php php-fpm php-mysql
四、修改nginx的配置文件
[root@server yum.repos.d]# vi /etc/nginx/conf.d/default.conf
server {
listen 80;
server_name localhost;
#charset koi8-r;
#access_log /var/log/nginx/host.access.log main;
location / {
root /www; #修改目录为/www
index index.php index.html index.htm; #添加index.php
}
#error_page 404 /404.html;
# redirect server error pages to the static page /50x.html
#
error_page 500 502 503 504 /50x.html;
location = /50x.html {
root /usr/share/nginx/html;
}
# proxy the PHP scripts to Apache listening on 127.0.0.1:80
#
#location ~ \.php$ {
# proxy_pass http://127.0.0.1;
#}
# pass the PHP scripts to FastCGI server listening on 127.0.0.1:9000
#
#删除下面7行的注释
location ~ \.php$ {
root /www; #修改目录为/www
fastcgi_pass 192.168.10.10:9000; #修改ip为192.168.10.10(自己的ip)
fastcgi_index index.php;
fastcgi_param SCRIPT_FILENAME /scripts$fastcgi_script_name;
include fastcgi_params;
}
# deny access to .htaccess files, if Apache's document root
# concurs with nginx's one
#
#location ~ /\.ht {
# deny all;
#}
}
五、修改fastcgi_params文件
[root@server yum.repos.d]# vi /etc/nginx/fastcgi_params
fastcgi_param QUERY_STRING $query_string;
fastcgi_param REQUEST_METHOD $request_method;
fastcgi_param CONTENT_TYPE $content_type;
fastcgi_param CONTENT_LENGTH $content_length;
fastcgi_param SCRIPT_NAME $fastcgi_script_name;
fastcgi_param SCRIPT_FILENAME $document_root$fastcgi_script_name; #添加这一栏
fastcgi_param REQUEST_URI $request_uri;
fastcgi_param DOCUMENT_URI $document_uri;
fastcgi_param DOCUMENT_ROOT $document_root;
fastcgi_param SERVER_PROTOCOL $server_protocol;
fastcgi_param REQUEST_SCHEME $scheme;
fastcgi_param HTTPS $https if_not_empty;
fastcgi_param GATEWAY_INTERFACE CGI/1.1;
fastcgi_param SERVER_SOFTWARE nginx/$nginx_version;
fastcgi_param REMOTE_ADDR $remote_addr;
fastcgi_param REMOTE_PORT $remote_port;
fastcgi_param SERVER_ADDR $server_addr;
fastcgi_param SERVER_PORT $server_port;
fastcgi_param SERVER_NAME $server_name;
# PHP only, required if PHP was built with --enable-force-cgi-redirect
fastcgi_param REDIRECT_STATUS 200;
六、修改php的配置文件
[root@server yum.repos.d]# vi /etc/php-fpm.d/www.conf
; Start a new pool named 'www'.
[www]
; The address on which to accept FastCGI requests.
; Valid syntaxes are:
; 'ip.add.re.ss:port' - to listen on a TCP socket to a specific address on
; a specific port;
; 'port' - to listen on a TCP socket to all addresses on a
; specific port;
; '/path/to/unix/socket' - to listen on a unix socket.
; Note: This value is mandatory.
listen = 192.168.10.10:9000 #改为自身ip(192.168.10.10)
; Set listen(2) backlog. A value of '-1' means unlimited.
; Default Value: -1
;listen.backlog = -1
; List of ipv4 addresses of FastCGI clients which are allowed to connect.
; Equivalent to the FCGI_WEB_SERVER_ADDRS environment variable in the original
; PHP FCGI (5.2.2+). Makes sense only with a tcp listening socket. Each address
; must be separated by a comma. If this value is left blank, connections will be
; accepted from any ip address.
; Default Value: any
listen.allowed_clients = 192.168.10.10 #改为自身ip(192.168.10.10)
; Set permissions for unix socket, if one is used. In Linux, read/write
; permissions must be set in order to allow connections from a web server. Many
; BSD-derived systems allow connections regardless of permissions.
; Default Values: user and group are set as the running user
; mode is set to 0666
;listen.owner = nobody
;listen.group = nobody
;listen.mode = 0666
; Unix user/group of processes
; Note: The user is mandatory. If the group is not set, the default user's group
; will be used.
; RPM: apache Choosed to be able to access some dir as httpd
user = nginx #改为nginx
; RPM: Keep a group allowed to write in log dir.
group = nginx #改为nginx
; Choose how the process manager will control the number of child processes.
; Possible Values:
七、准备www文件夹,根据提示修改wp-config.php文件
[root@server /]# mkdir /www
[root@server /]# cp -r /root/wordpress/* /www
[root@server /]# chown nginx:nginx /www
[root@server /]# cd /www
[root@server www]# cp wp-config-sample.php wp-config.php
[root@server www]# vi wp-config.php
<?php
/**
 * WordPress基础配置文件。
 *
 * 这个文件被安装程序用于自动生成wp-config.php配置文件,
 * 您可以不使用网站,您需要手动复制这个文件,
 * 并重命名为“wp-config.php”,然后填入相关信息。
 *
 * 本文件包含以下配置选项:
 *
 * * MySQL设置
 * * 密钥
 * * 数据库表名前缀
 * * ABSPATH
 *
 * @link https://codex.wordpress.org/zh-cn:%E7%BC%96%E8%BE%91_wp-config.php
 *
 * @package WordPress
 */

// ** MySQL 设置 - 具体信息来自您正在使用的主机 ** //
/** WordPress数据库的名称 */
define('DB_NAME', 'wordpress');

/** MySQL数据库用户名 */
define('DB_USER', 'root');

/** MySQL数据库密码 */
define('DB_PASSWORD', '123');

/** MySQL主机 */
define('DB_HOST', 'localhost');

/** 创建数据表时默认的文字编码 */
define('DB_CHARSET', 'utf8');

/** 数据库整理类型。如不确定请勿更改 */
define('DB_COLLATE', '');

/**#@+
 * 身份认证密钥与盐。
 *
 * 修改为任意独一无二的字串!
 * 或者直接访问{@link https://api.wordpress.org/secret-key/1.1/salt/
"wp-config.php" [dos] 96L, 2906C
重启服务
[root@server www]# systemctl restart nginx php-fpm mariadb
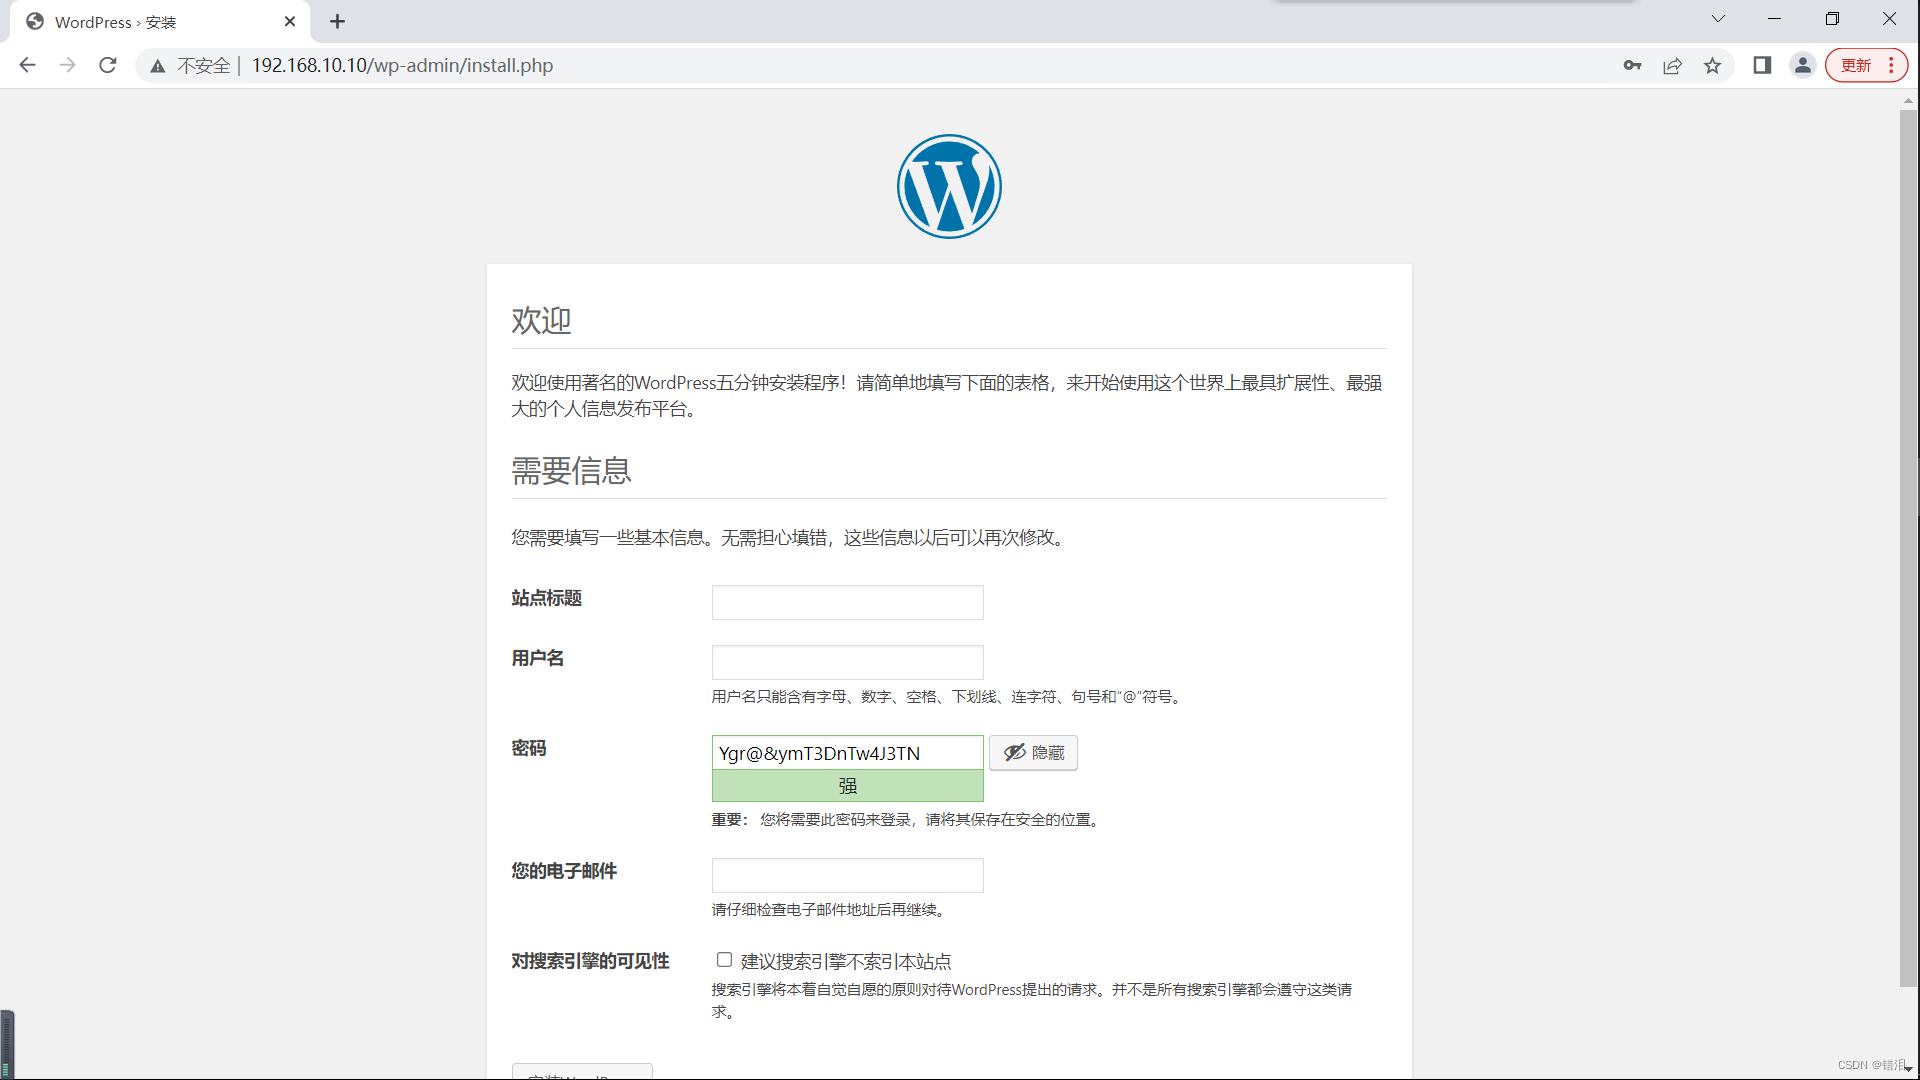
八、进入浏览器验证
输入网址 http://192.168.10.10/wp-admin/install.php


 3702
3702


 被折叠的 条评论
为什么被折叠?
被折叠的 条评论
为什么被折叠?
 到【灌水乐园】发言


