


CUDA+PyTorch安装及卸载
一、版本匹配
1. 查看显卡驱动版本
nvidia-smi
可见显卡驱动版本为551.86,最高支持CUDA版本为12.4

若需更新显卡驱动,可以使用 NVIDIA GeForce Experience 官方程序进行更新,Game Ready驱动和Studio 驱动的区别见官方说明

2. 查看显卡驱动版本和CUDA版本匹配
CUDA版本和显卡驱动版本匹配表官方链接: https://docs.nvidia.com/cuda/cuda-toolkit-release-notes/index.html
从表3可以看到笔者当前显卡驱动版本551.86已支持所有CUDA版本(版本存在更新,以实际为准)

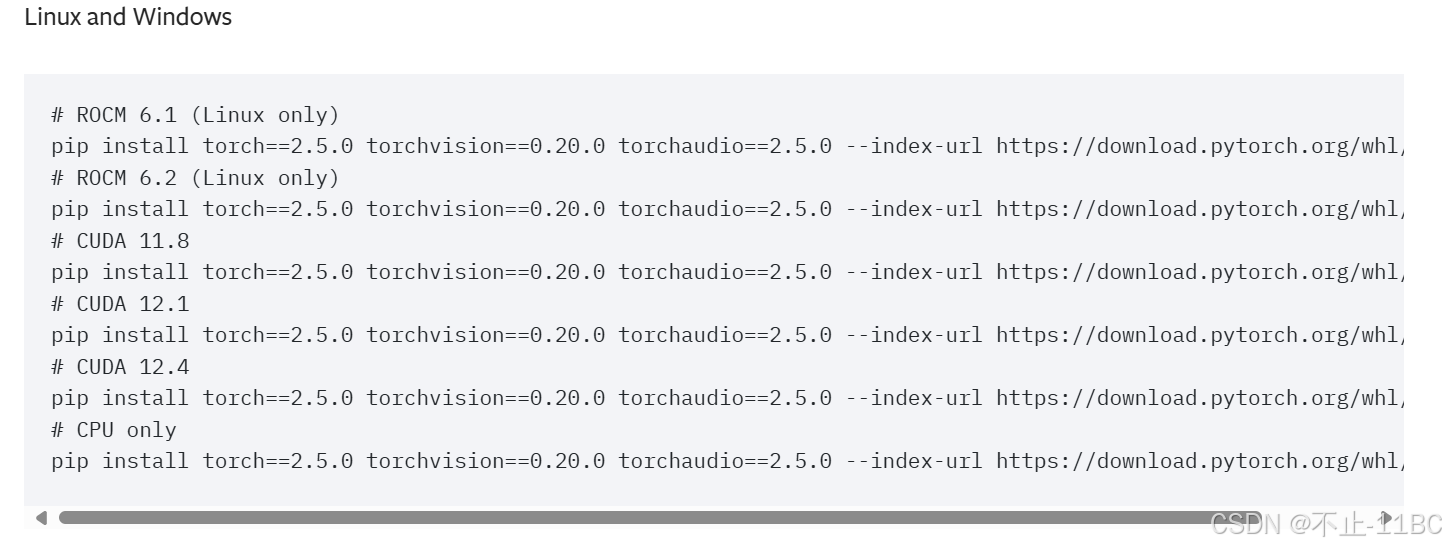
3. 查看PyTorch版本
官方链接: https://pytorch.org/get-started/locally/
根据实际需求选择,只需要显卡驱动满足对应CUDA版本要求即可,这里选择CUDA12.1

二、安装CUDA
1. 下载CUDA
在步骤一中已确定PyTorch安装的计算平台CUDA版本为12.1,即选择安装的CUDA时版本不能低于12.1,当然也可选择更高版本向后兼容
官方下载地址: https://developer.nvidia.com/cuda-downloads?target_os=Windows&target_arch=x86_64&target_version=11
默认为最新版本,安装12.1版本在搜索栏输入12.1搜索即可

可以看到12.1有两个版本,这里选择较新版本【12.1 Update 1】

根据实际需求选择好相应平台安装版本即可,安装方式分为本地安装【exe (local)】和网络安装【exe (network)】两种,选择网络安装即可,下载速度很快

2. 安装CUDA
运行安装程序,弹出的文件选择框为临时文件解压地址,安装完成后会自动删除,默认即可

进入安装界面后选择精简安装即可(缺图)
验证安装结果
打开控制台输入以下命令
nvcc -V
如图即为安装成功

3. 安装PyTorch
根据步骤一选定的安装版本,直接运行官网给出的安装命令即可
pip3 install torch torchvision torchaudio --index-url https://download.pytorch.org/whl/cu121

默认从官方服务器下载安装,若采用清华源安装则在安装时需指定torch、torchvision、torchaudio的版本,三者的版本依赖关系可在官网历史版本中查看
采用清华源安装只需将 --index-url 指定为清华源即可
pip install torch==2.5.0 torchvision==0.20.0 torchaudio==2.5.0 --index-url https://mirrors.tuna.tsinghua.edu.cn/pypi/web/simple
清华pypi镜像使用帮助: https://mirrors.tuna.tsinghua.edu.cn/help/pypi/
验证PyTorch
import torch
x = torch.rand(5, 3)
print(x)
验证CUDA调用
import torch
torch.cuda.is_available()

三、CUDA和PyTorch卸载
1. 卸载CUDA
CUDA卸载只需在 控制面板>程序>卸载程序 中找到CUDA相关的程序点击卸载即可(缺图)
2. 卸载PyTorch
pip uninstall torch torchvision torchaudio


 被折叠的 条评论
为什么被折叠?
被折叠的 条评论
为什么被折叠?
 到【灌水乐园】发言


