


 本文详细阐述了用户如何通过手机提交林业害虫图片,AI进行高精度识别,以及生物基础库的维护与操作流程。涉及界面设计、后端交互与功能实现,包括图片上传、智能识别、列表选择与网络请求等关键点。
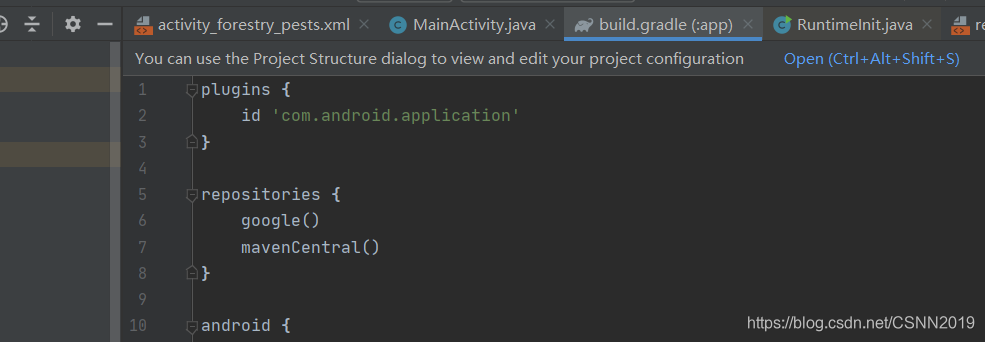
详细设计说明书:
需求概述
用户通过手机拍照或者手动上传等方式提交林业有害生物图像照片,经预览、裁剪等操作处理后上传至服务器进行识别。反馈害虫种类、识别率、个数等信息
基本功能需求
- 手机拍照或者手动上传图片;
- 林业有害生物基础库维护;
- 林业有害生物智能识别反馈。
非功能性需求
识别率达到90%以上,识别性能达到200ms以内
软件结构

更多
中软杯-详细设计说明书
作品展示
中国软件杯作品展示
设计过程
界面设置
主页页面
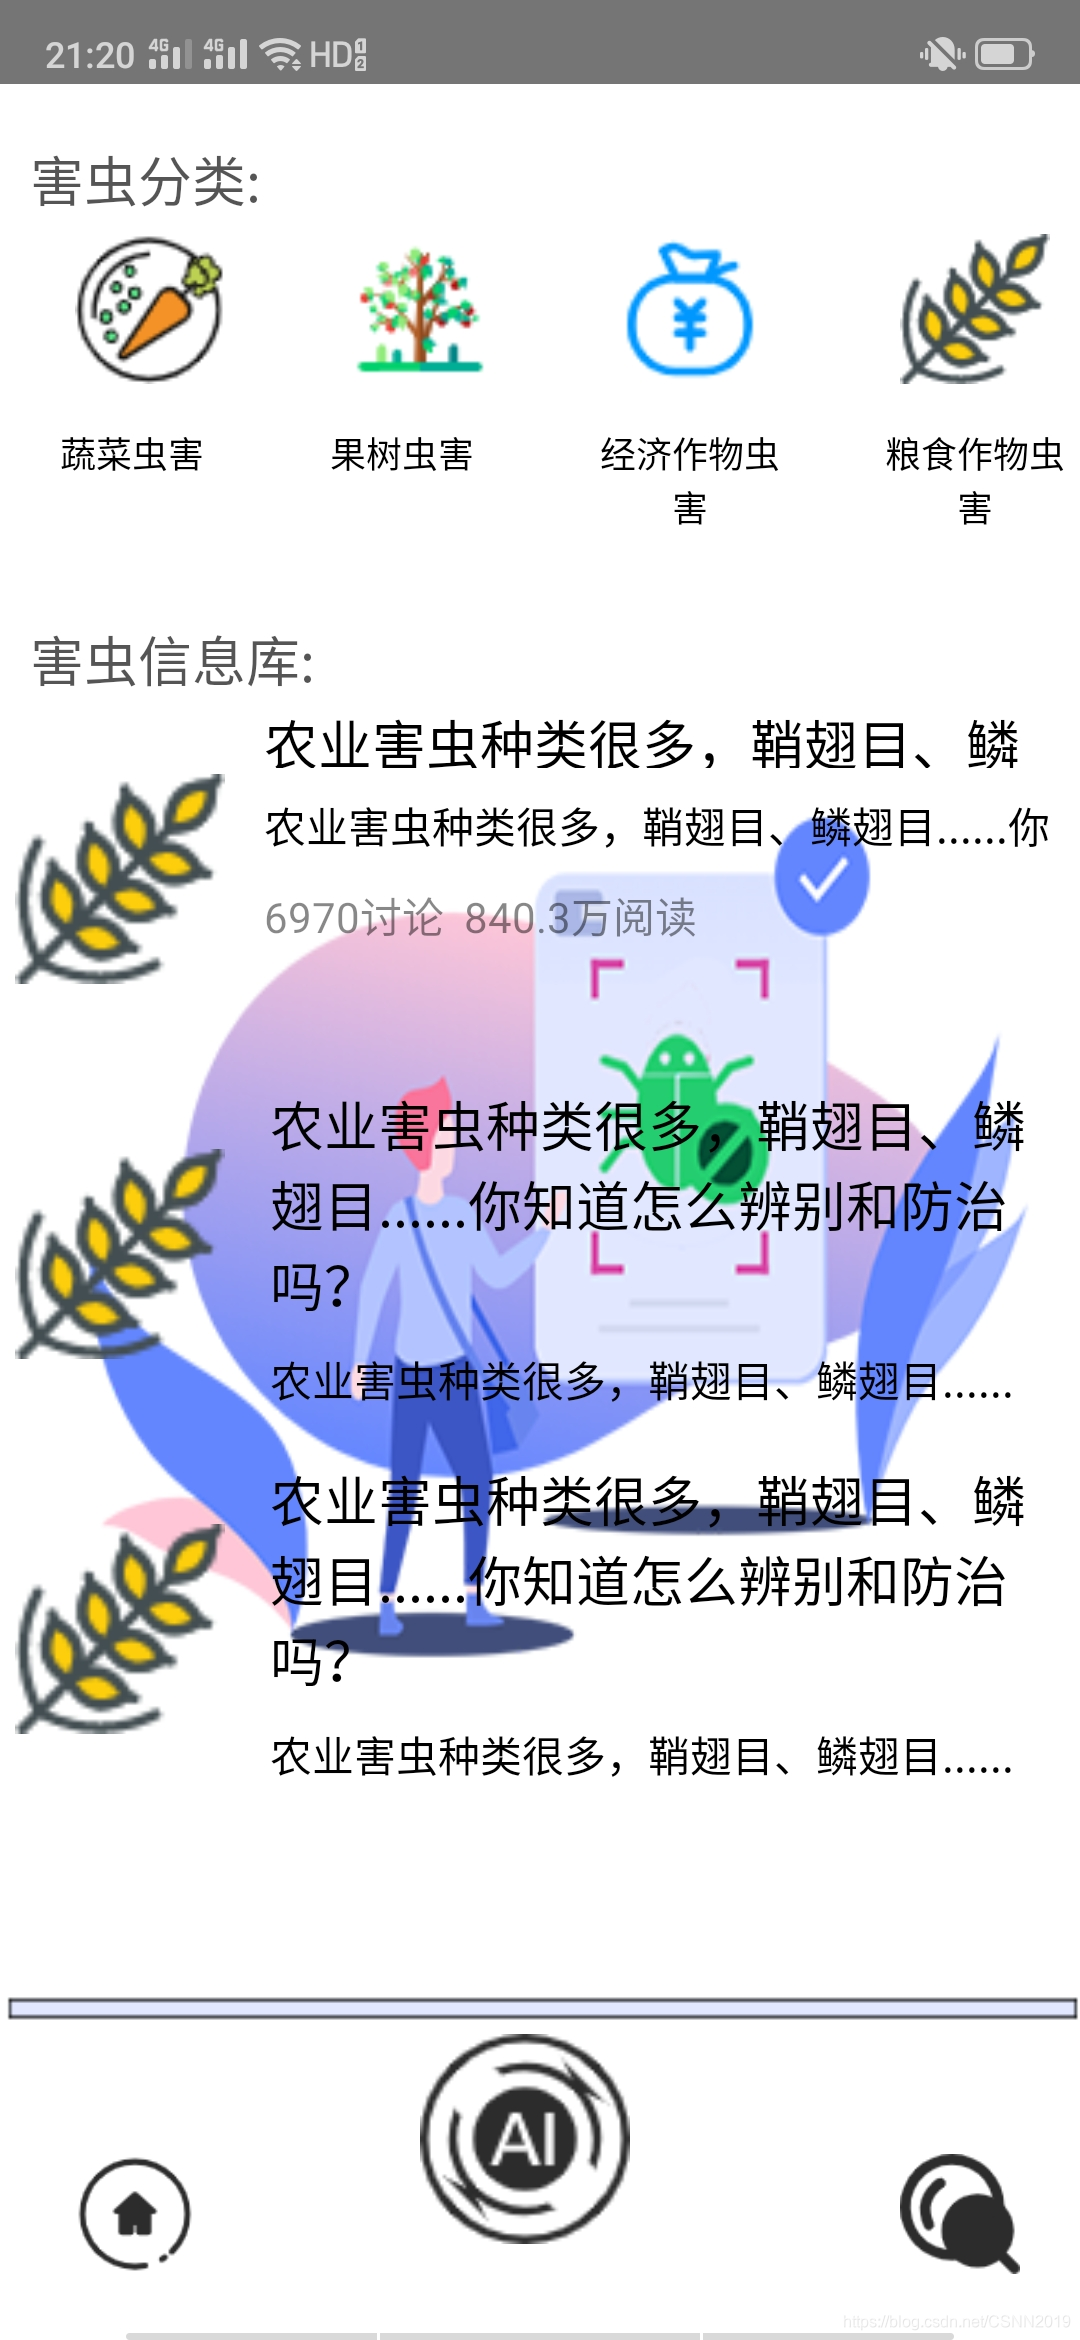
显示点击操作状态:

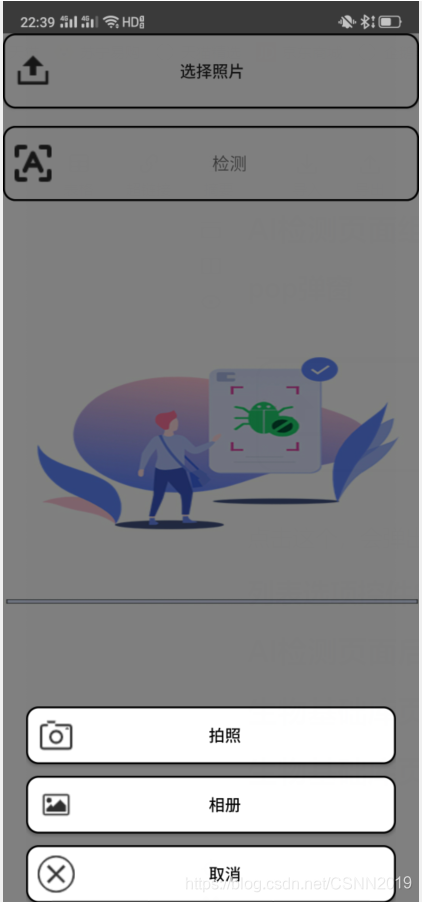
AI检测页面

这个AI按钮点击操作,
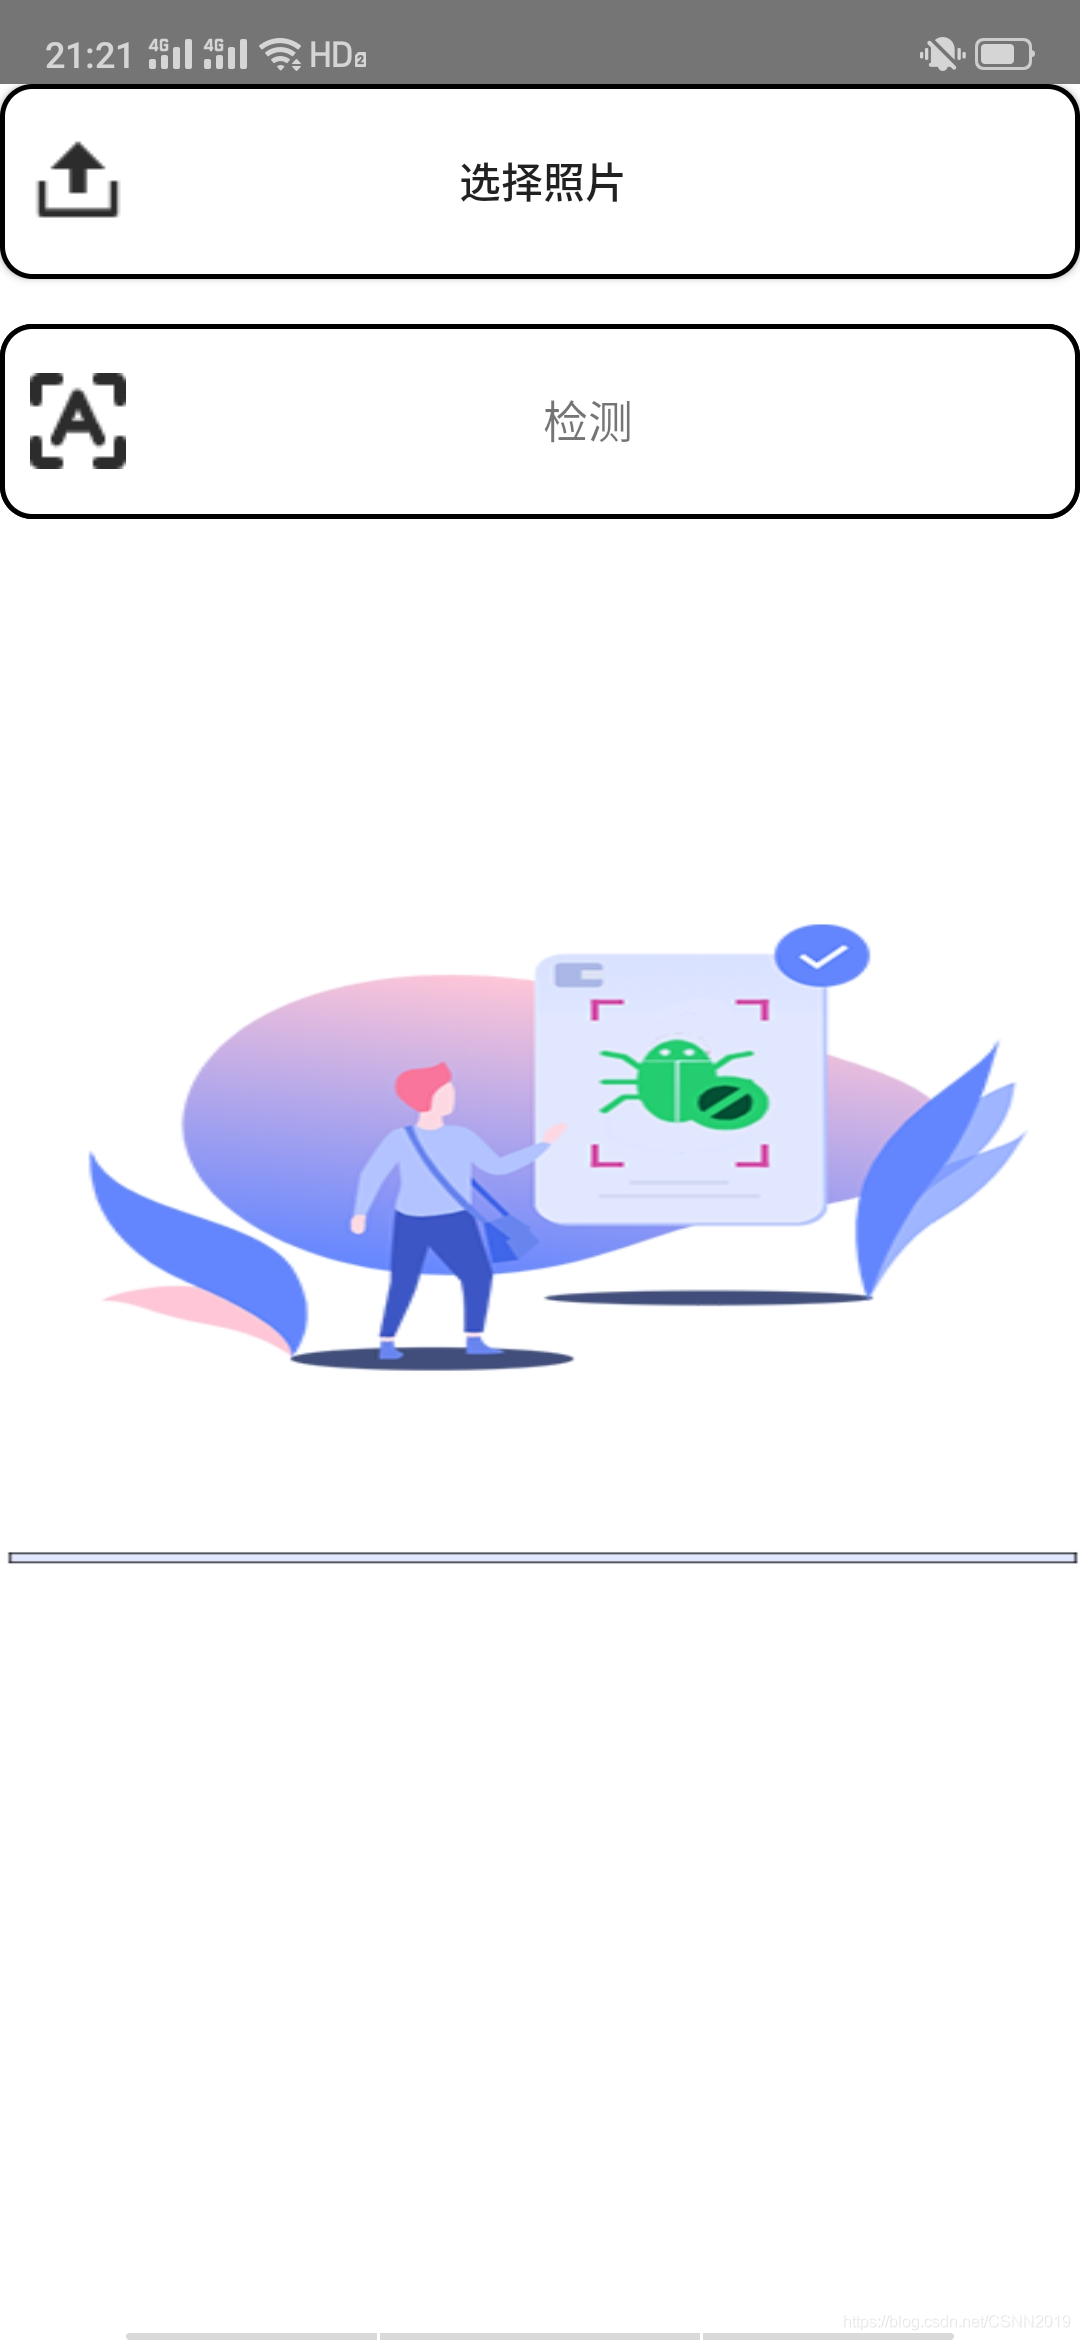 这里的选择图片也就实现了拍照和相册
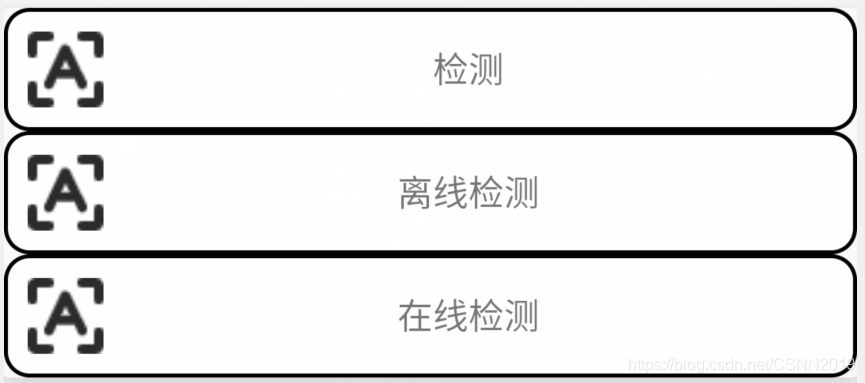
这里的检测按钮也就实现了离线检测和在线检测
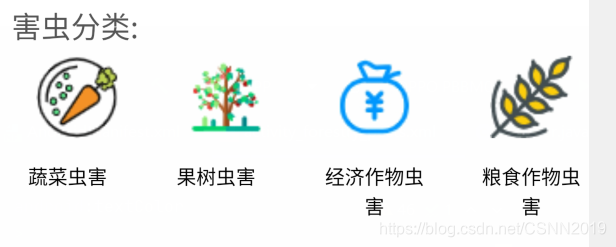
生物基础库页面
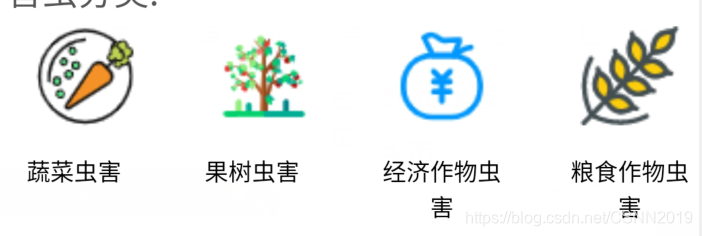
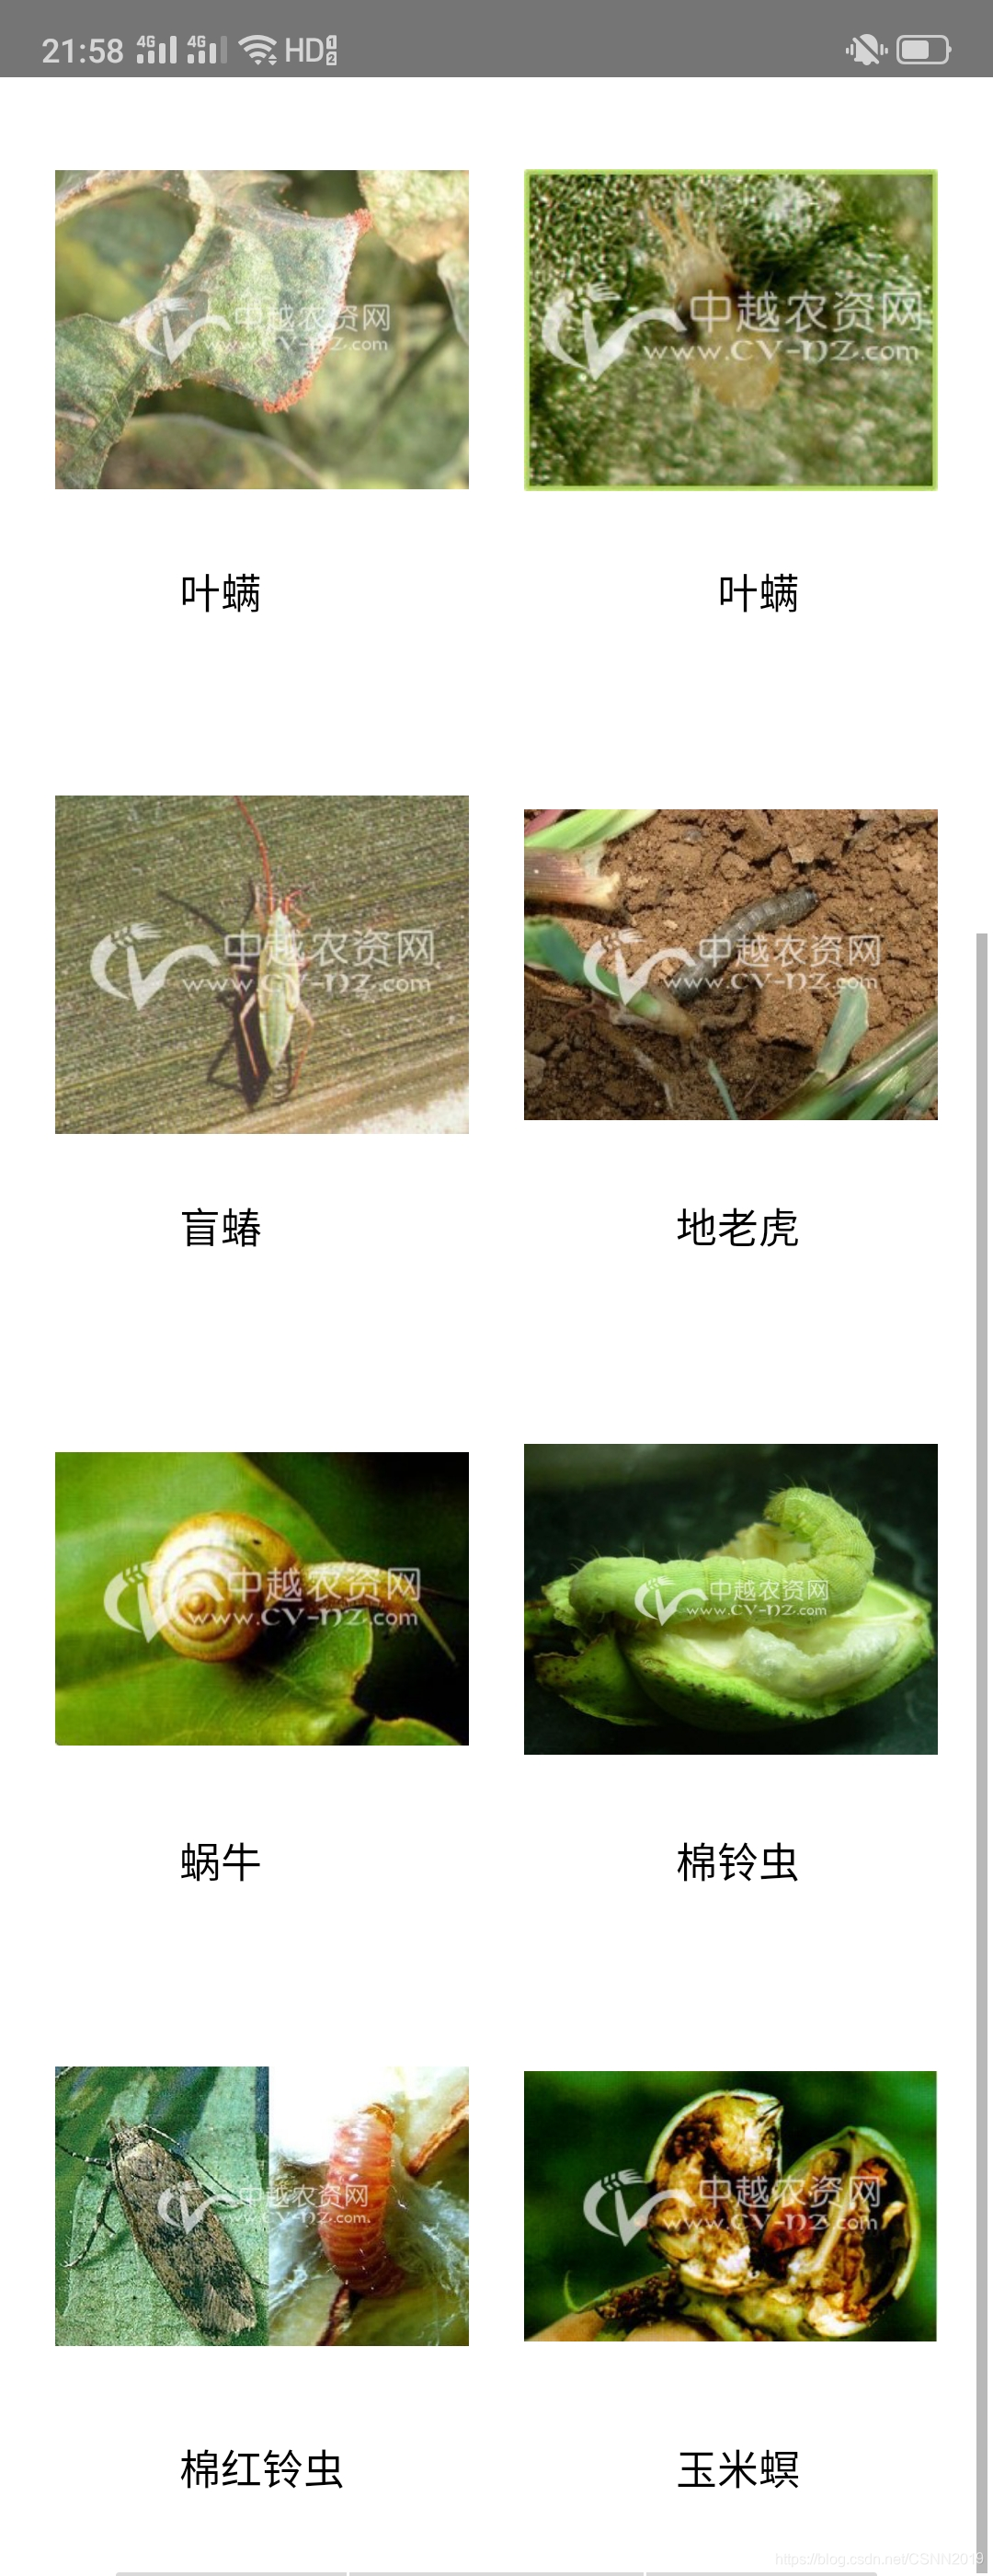
也就是上面这个点击操作,点击之后,会进行向后端接口发送post请求,然后返回网图,提前布置好空的Imageview,然后图片链接经过接口回来之后,直接进行插入即可(也就是说需要联网操作。)

然后点击相应的害虫就会有相应的详情显示,这些图片和文字都是动态初始化的,在后端进行相应修改之后也就进行了更新
这个页面的话,两个TextView和一个ImageView都是动态赋值,所填充的值也就是从后端传来的JSON对象中的标签对应的值。
项目设计代码
主页组件前端摆放心得体会:
布局套娃感想
这三个按钮用一个relativelayout里面包着三个LinearLayout,每个Linearlayout中放一个button,这里为什么要加一个Linearlayout呢,因为在线性布局里面可以加这个属性android:gravity,控制它们的左中右,而左右的话,可以利用线性布局设置外边距来显得不贴边,这样的话,它们的相对位置不会改变的,因为间距并未写死,这里做出来最大的感想就是可以为一个组件可以加一个布局类,然后三个布局类在外面加一个布局类,套娃感想,只要设置属性之后不生效,立刻为它加一个单一的布局类。
  <RelativeLayout
            android:layout_width="match_parent"
            android:layout_height="250dp"
            android:layout_marginTop="600dp"
            >
            <LinearLayout
                android:layout_width="match_parent"
                android:layout_height="match_parent"
                android:gravity="left"
                android:layout_marginTop="50dp"
                android:layout_marginLeft="5dp">
                <Button
                    android:layout_width="40dp"
                    android:layout_height="40dp"
                    android:layout_marginTop="40dp"
                    android:background="@drawable/homepage_press"
                    android:layout_marginLeft="20dp"
                    android:layout_marginBottom="10dp"
                    />
            </LinearLayout>

            <LinearLayout
                android:layout_width="match_parent"
                android:layout_height="match_parent"
                android:gravity="center_vertical"
                android:layout_marginTop="50dp"
                >

                <Button
                    android:layout_width="70dp"
                    android:id="@+id/AI"
                    android:layout_height="70dp"
                    android:background="@drawable/recognition_press"
                    android:layout_gravity="center_horizontal"
                    android:layout_marginLeft="140dp"
                    android:layout_marginBottom="10dp"
                    />


            </LinearLayout>
            <LinearLayout
                android:layout_width="match_parent"
                android:layout_height="match_parent"
                android:layout_marginRight="20dp"
                android:layout_marginTop="50dp"
                android:gravity="right">

                <Button
                    android:layout_width="40dp"
                    android:layout_height="40dp"
                    android:layout_marginTop="40dp"
                    android:background="@drawable/search_press"
                    android:layout_marginBottom="10dp"
                    />

            </LinearLayout>

        </RelativeLayout>
专属线性布局

首先要明白线性布局类,从左往右依次排放或者从上往下,因此在线性布局类里面,只要有关距离的属性都是没用的,只会依次排放,上面这图片摆明就是左边一个Imageview组件,右边一个线性布局,首先把右边这个线性布局类的orientation属性设置成vertical,这样线性布局里面放着三个TextView,一个Imageview和一个线性布局都放在一个线性布局中,orientation属性不用改,这样的话,从左往右就依次排放
<LinearLayout
            android:id="@+id/linearlayout"
            android:layout_width="match_parent"
            android:layout_height="120dp"
            android:layout_marginTop="200dp">

            <ImageView
                android:id="@+id/image1"
                android:layout_width="70dp"
                android:layout_height="120dp"
                android:src="@drawable/food"
                android:layout_margin="5dp"></ImageView>

            <LinearLayout

                android:layout_width="match_parent"
                android:layout_height="120dp"
                android:layout_margin="3dp"
                android:layout_marginLeft="10dp"
                android:orientation="vertical">

                <TextView
                    android:id="@+id/text1"
                    android:layout_width="wrap_content"
                    android:layout_height="20dp"
                    android:layout_margin="5dp"
                    android:text="农业害虫种类很多,鞘翅目、鳞翅目......你知道怎么辨别和防治吗? "
                    android:textColor="@color/dark"
                    android:textSize="18sp" />

                <TextView

                    android:id="@+id/text2"
                    android:layout_width="wrap_content"
                    android:layout_height="20dp"
                    android:layout_margin="5dp"
                    android:text="农业害虫种类很多,鞘翅目、鳞翅目......你知道怎么辨别和防治吗? "
                    android:textColor="@color/dark"
                    android:textSize="14sp" />

                <TextView
                    android:layout_width="wrap_content"
                    android:layout_height="wrap_content"
                    android:layout_margin="5dp"
                    android:textSize="14sp"
                    android:textColor="#77000000"
                    android:text="6970讨论  840.3万阅读"

                    />
            </LinearLayout>
        </LinearLayout>

这里也就是三个线性布局类
方法1
而这里的话,也就很简单了,四个带有orientation属性设置成vertical(垂直)的线性布局放在一个horizontal(水平)的线性布局类中,
方法2
如果要考虑合适间距问题的话(就只能用四个带有orientation属性设置成vertical(垂直)的线性布局放在一个相对布局类里面):为每一个带有orientation属性设置成vertical(垂直)的线性布局加一个带有 android:layout_width="match_parent" android:layout_height="match_parent"的父类线性布局,然后在这个布局可以加gravity属性,marginRight等等属性(如果这里要用margin和gravity的话,那么父布局类就不能使用线性布局,而改用相对布局),因为间距属性针对于线性布局的子控件是无效的,只能在线性布局中统一设置。
主页后端点击操作的心得体会:
跳转AI检测页面
进行按钮监听,这里的按钮监听实现了点击状态和未点击状态。
在布局文件中搞一个selector,然后在页面布局中直接把按钮background换成android:background="@drawable/search_press"这个布局文件名字就行
<?xml version="1.0" encoding="utf-8"?>
<selector xmlns:android="http://schemas.android.com/apk/res/android" >
    <item
        android:state_pressed="false"
        android:drawable="@drawable/search_presss"
        />
    <item
        android:state_pressed="true"
        android:drawable="@drawable/search"
        />
</selector>
跳转生物基础库页面
感觉没什么好说的,也就是四张图片监听,然后利用intent进行activity跳转,如果想实现点迷人操作的话,那么可以试试overridePendingTransition函数
AI检测页面组件前端摆放心得体会:
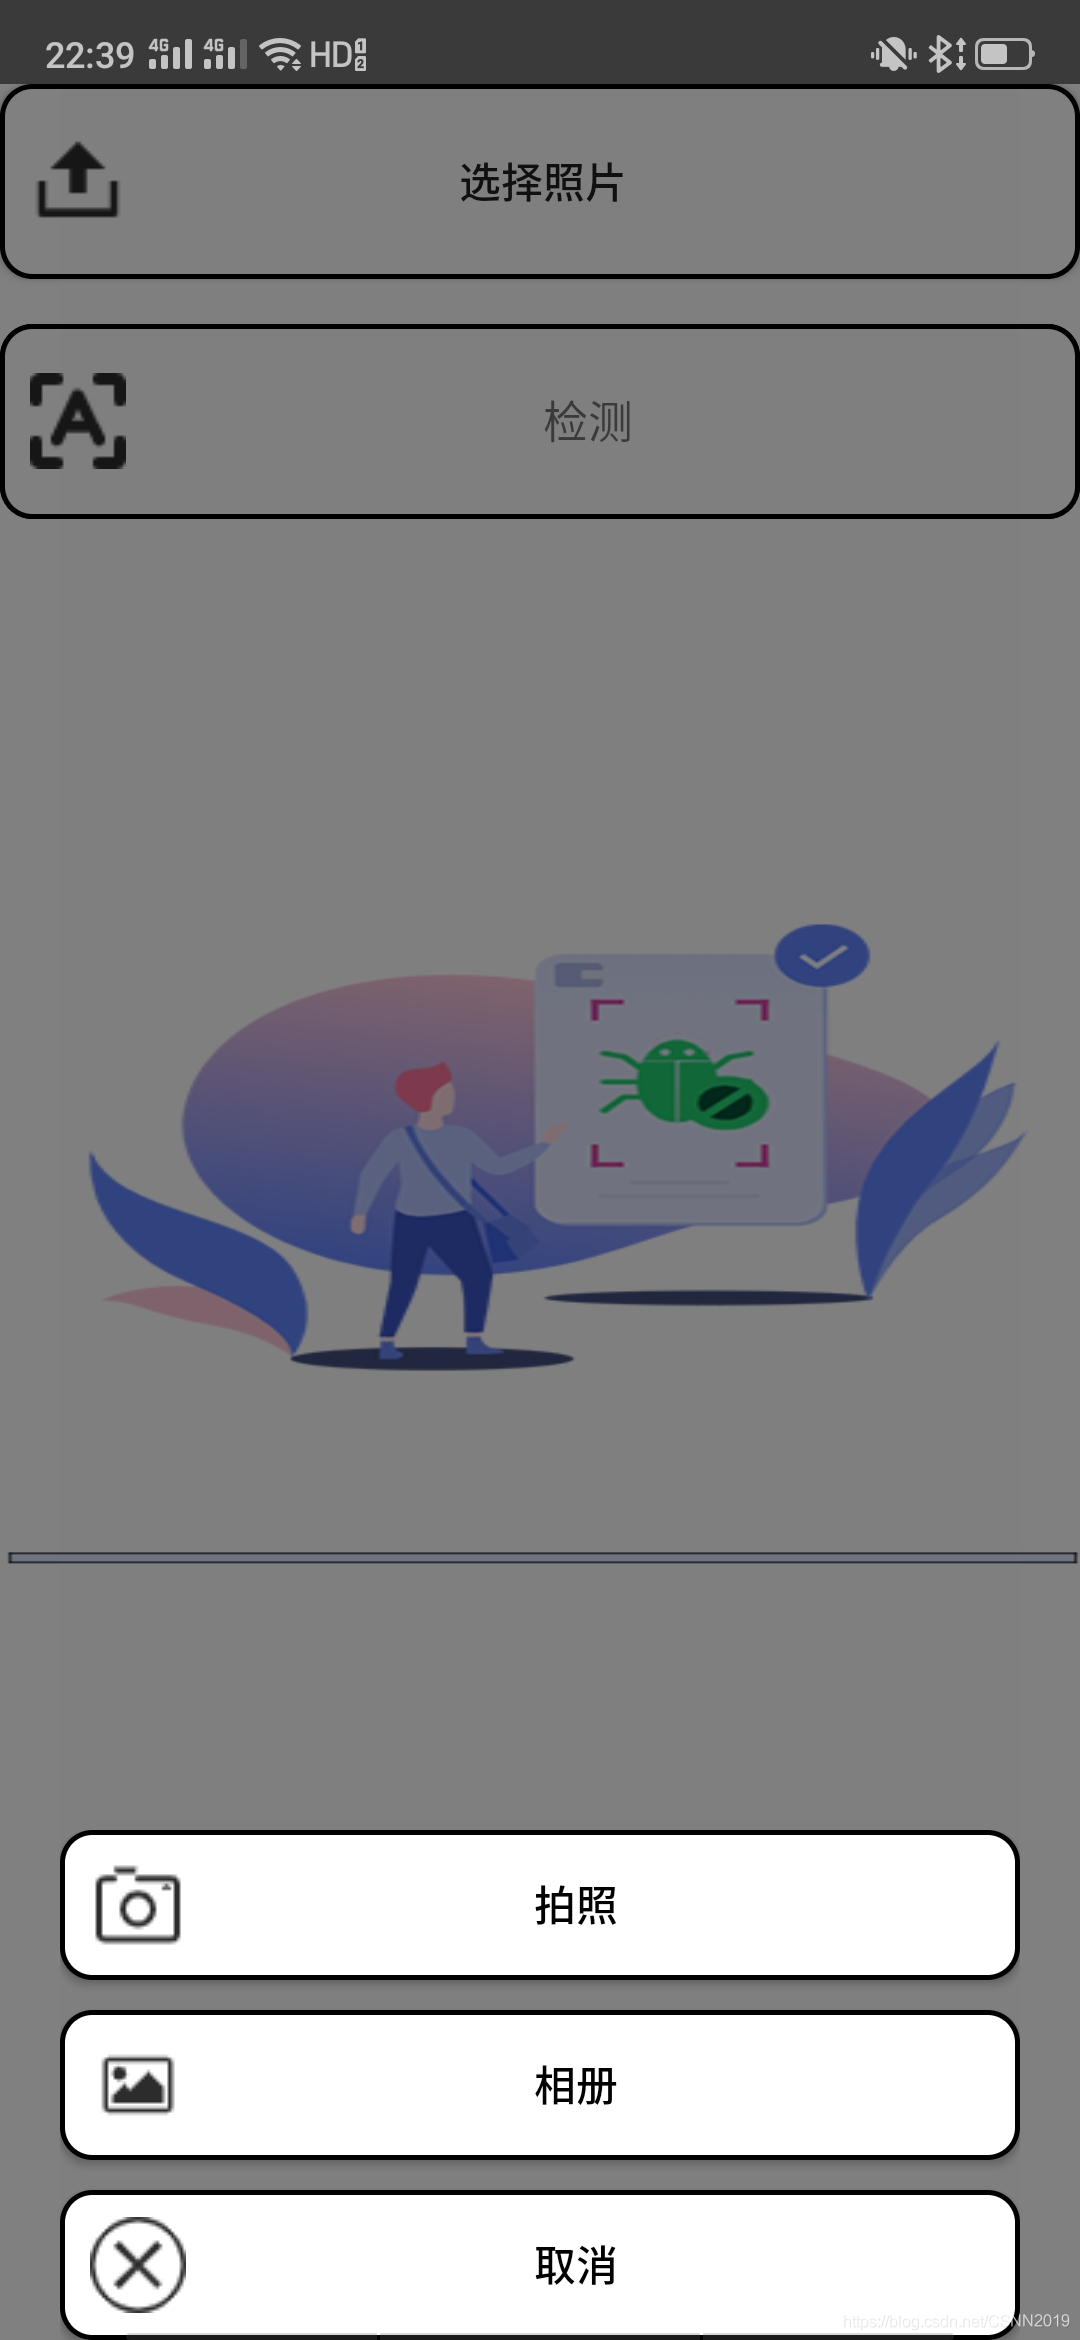
pop弹窗

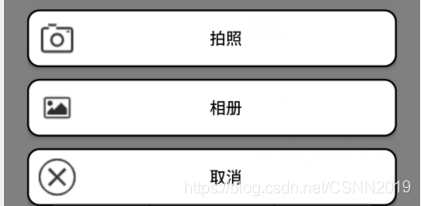
点击这个,当然这个按钮的话就不用说了,有手就行,会弹出如下的xml样式,
这里的话,主要是三个按钮放在一个线性布局中,记得需要把线性布局orientation="vertical",android:layout_alignParentBottom="true",这个的话,也就是贴底操作,至于父类的话,就直接用一个relativelayout把线性布局类包起来就行,至于透明背景操作的话,动态初始化的时候,把背景颜色初始化为01000000,前面两位代表透明度,后面也就是rgb喽
  		ColorDrawable dw = new ColorDrawable(0x01000000);
        popupWindow.setBackgroundDrawable(dw);
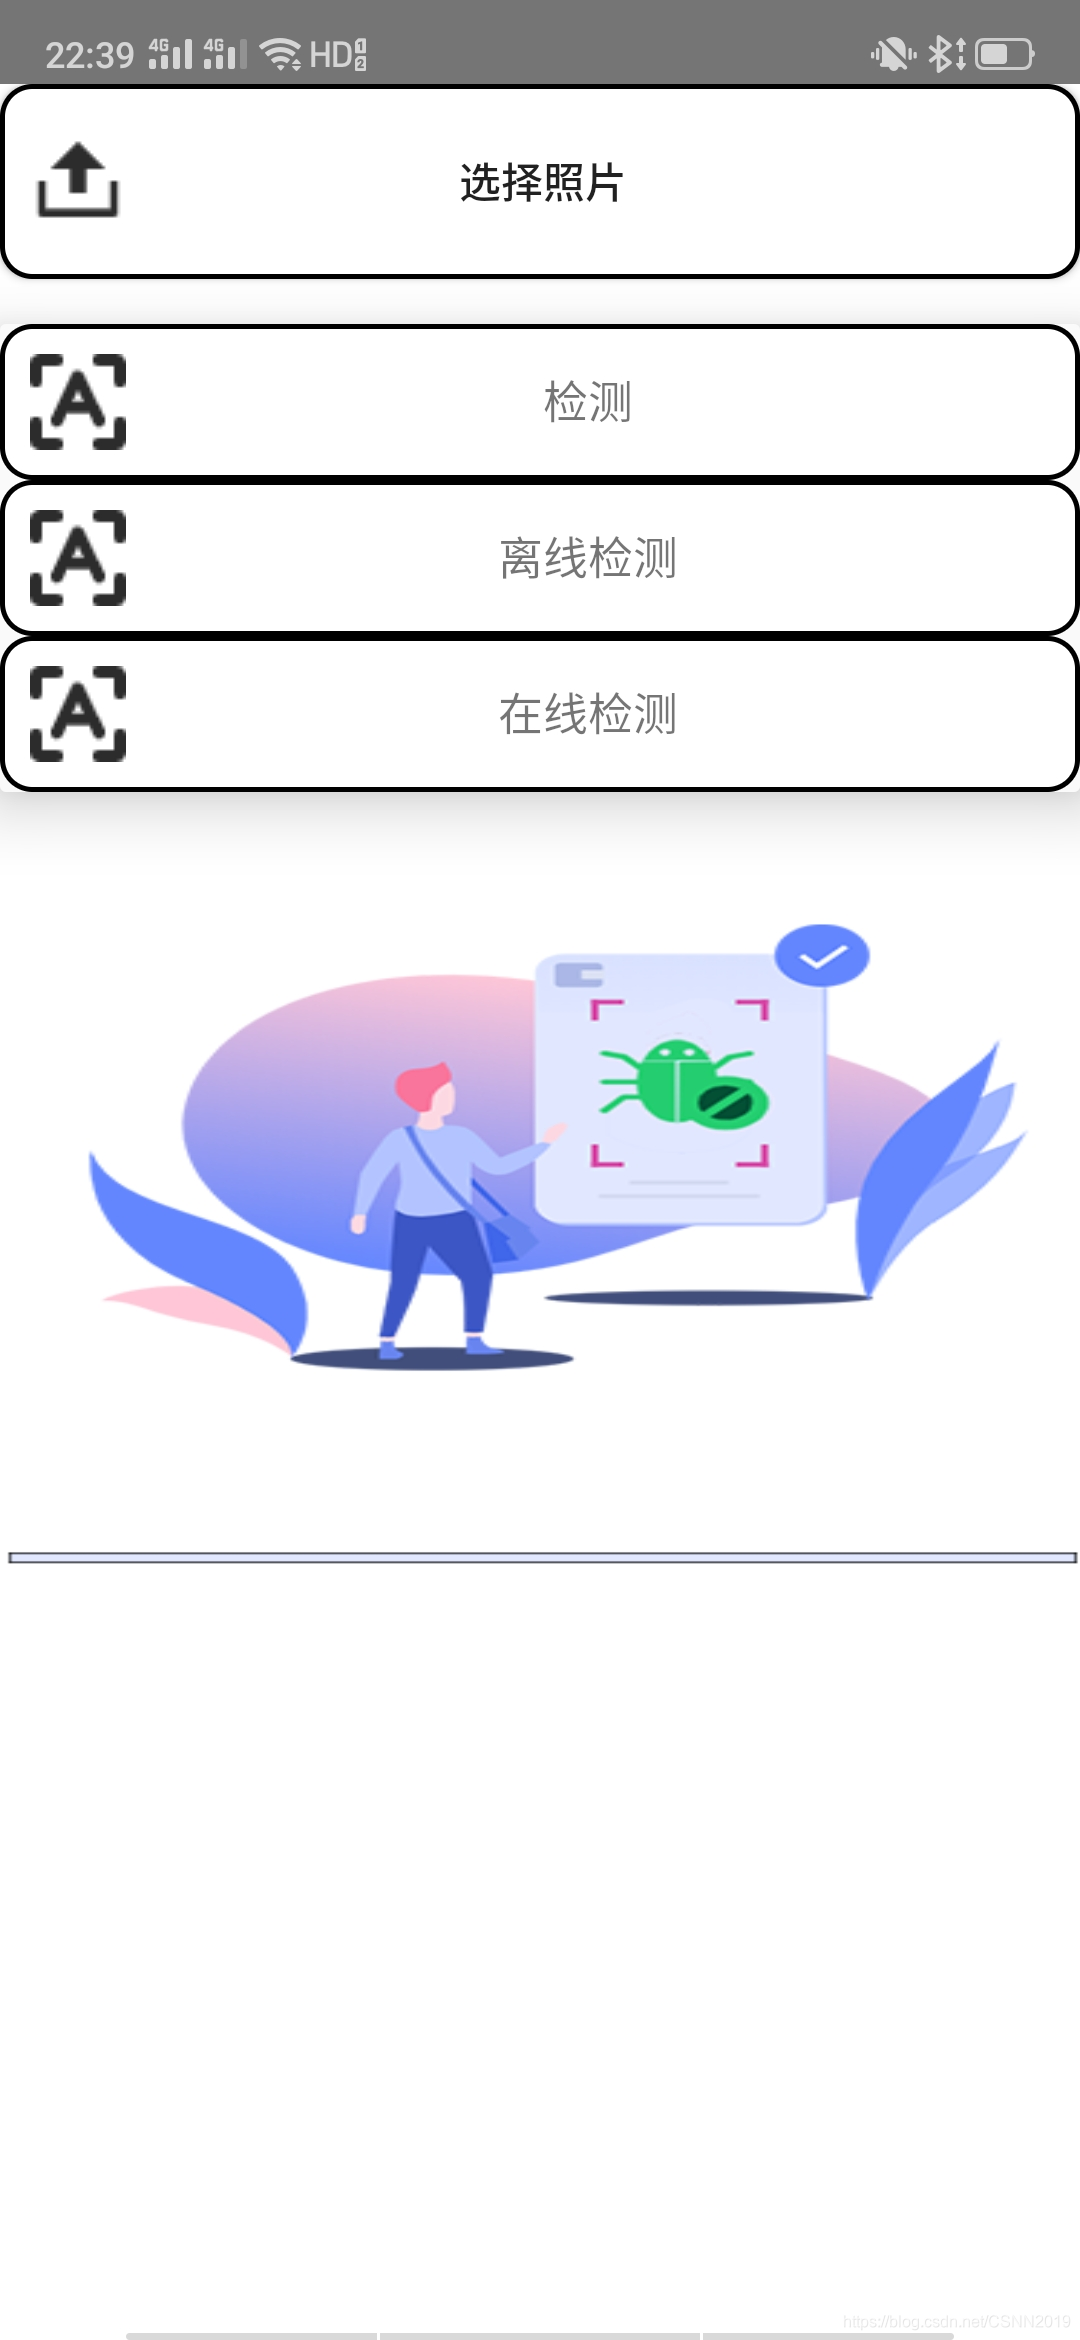
列表选项控件Spinner
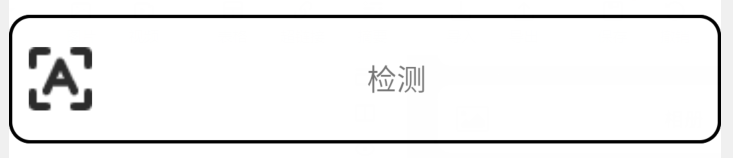
点击一下检测按钮,紧接着就弹出一个Spinner列表,然后直接进行监听
在main.xml里面肯定就直接一个Spinner组件,
<Spinner
        android:id="@+id/spinner"
        android:layout_width="match_parent"
        android:layout_height="65dp"
        android:layout_centerHorizontal="true"
        android:layout_marginTop="80dp"
        android:dropDownWidth="match_parent"
        android:layout_gravity="center"
        android:background="@drawable/check_border"
        android:dropDownHorizontalOffset="50dp"
        android:textAlignment="center"/>
这个是用于android:textAlignment="center"显示按钮的字体是否居中,而这个android:layout_centerHorizontal="true"的话就是下拉列表的居中垂直,但是决定性布局因素还是动态设置的时候布局文件,
    private static final String[] sSpiner={"检测","离线检测","在线检测"};

   		spinner = findViewById(R.id.spinner);

        ArrayAdapter<String> adapter = new ArrayAdapter<String>(this, R.layout.item_spinselect,sSpiner);

        adapter.setDropDownViewResource(R.layout.item_spinselect);

        spinner.setSelection(0);

        spinner.setAdapter(adapter);
创建adapter数组时,第一个参数传this,第二个也就是显示的布局文件,第三个也就是下拉的布局列表值,setDropDownViewResource而这个也就是设置下拉的布局文件样式,setSelection(int pos)可以设置显示的位置,setAdapter设置相应的适配器,然后呢,这里牵扯到了两个布局文件,第一个是显示的布局文件,第二个是下拉列表的布局文件,这两个可以一样,也可以不一样。举例布局文件如下:
<?xml version = "1.0" encoding = "utf-8"?>
<TextView xmlns:android="http://schemas.android.com/apk/res/android"
    android:layout_width="fill_parent"
    android:layout_height="fill_parent"
    android:padding="10dp"
    android:background="@drawable/check_border"
    android:drawableLeft="@drawable/detect"
    android:gravity="center" />
这个android:gravity="center"也就是设置相应的字体居中
AI检测页面后端点击操作的心得体会:
pop弹窗
如何弹出pop弹窗
首选需要找到弹窗:
View popupWindowView = getLayoutInflater().inflate(R.layout.activity_camera, null);
内容,高度,宽度:
  if(Location.BOTTOM.ordinal() == from){
            popupWindow = new PopupWindow(popupWindowView, WindowManager.LayoutParams.FILL_PARENT, WindowManager.LayoutParams.WRAP_CONTENT, true);
        }else{
            popupWindow = new PopupWindow(popupWindowView, WindowManager.LayoutParams.WRAP_CONTENT, WindowManager.LayoutParams.FILL_PARENT, true);
        }
动画效果:
if(Location.BOTTOM.ordinal() == from){
            popupWindow.setAnimationStyle(R.style.AnimationBottomFade);
        }
菜单背景色:
      ColorDrawable dw = new ColorDrawable(0x01000000);
        popupWindow.setBackgroundDrawable(dw);
显示位置:
if(Location.BOTTOM.ordinal() == from){
            popupWindow.showAtLocation(getLayoutInflater().inflate(R.layout.main, null), Gravity.BOTTOM|Gravity.CENTER_HORIZONTAL, 0, 0);
        }
关闭事件:
  popupWindow.setOnDismissListener(new popupDismissListener());

 class popupDismissListener implements PopupWindow.OnDismissListener{
        @Override
        public void onDismiss() {
            backgroundAlpha(1f);
        }

    }
     popupWindowView.setOnTouchListener(new View.OnTouchListener() {
            @Override
            public boolean onTouch(View v, MotionEvent event) {
                if( popupWindow!=null && popupWindow.isShowing()){
                    popupWindow.dismiss();
                    popupWindow=null;
                }
                // 这里如果返回true的话,touch事件将被拦截
                // 拦截后 PopupWindow的onTouchEvent不被调用,这样点击外部区域无法dismiss
                return false;
            }
        });
拍照按钮实现
首先进行按钮监听:
bt_camera = (Button)popupWindowView.findViewById(R.id.bt_camera);
这里的话,需要打开相机需要申请权限,AndroidManifest中需要写入:
<uses-permission android:name="android.permission.CAMERA" />
然后需要动态申请:
  String[] permissions = new String[]{
            Manifest.permission.CAMERA,
            Manifest.permission.WRITE_EXTERNAL_STORAGE,
            Manifest.permission.ACCESS_NETWORK_STATE,
            Manifest.permission.ACCESS_WIFI_STATE,
            Manifest.permission.INTERNET,
            Manifest.permission.MANAGE_EXTERNAL_STORAGE,
    };

 if (ContextCompat.checkSelfPermission(context, Manifest.permission.CAMERA) != PackageManager.PERMISSION_GRANTED) {
                    ActivityCompat.requestPermissions((Activity) context, new String[]{Manifest.permission.CAMERA}, 1);
                } else {
                    openCamera();
                    popupWindow.dismiss();
                }
   Intent intent=new Intent(MediaStore.ACTION_IMAGE_CAPTURE);
        intent.putExtra(MediaStore.EXTRA_OUTPUT, getImageUri());
        startActivityForResult(intent,100);
这里的话,打开相机拍照回来之后,需要把那个popwindow关闭,所以别忘了加一句 popupWindow.dismiss();
相册按钮实现
这里存储权限仍然需要动态申请,如上
<uses-permission android:name="android.permission.WRITE_EXTERNAL_STORAGE" />
动态申请代码一样。
      			Intent i = new Intent(Intent.ACTION_PICK);
                i.setType("image/*");
                startActivityForResult(i, SELECT_IMAGE);
这里的话,打开相册选择回来之后,需要把那个popwindow关闭,所以别忘了加一句 popupWindow.dismiss();
取消按钮实现
一个popupWindow.dismiss();即可
注意(flag设置):
这里的话拍照和相册的处理函数都是同一个onActivityResult,所以的话,需要在这俩函数里面的设置一个flag,然后在处理函数里面进行分别处理,然后进行界面呈现即可。
注意(图片压缩):
进行拍照和选择后,需要把相片进行一定的压缩算法,否则无法放入ImageView 的,网上压缩算法挺多的,我贴一个 :
import android.graphics.Bitmap;
import android.graphics.BitmapFactory;
import android.graphics.Canvas;
import android.graphics.LinearGradient;
import android.graphics.Matrix;
import android.graphics.Paint;
import android.graphics.PixelFormat;
import android.graphics.PorterDuff;
import android.graphics.PorterDuffXfermode;
import android.graphics.Rect;
import android.graphics.RectF;
import android.graphics.Shader;
import android.graphics.drawable.BitmapDrawable;
import android.graphics.drawable.Drawable;

import java.io.ByteArrayInputStream;
import java.io.ByteArrayOutputStream;
import java.io.File;
import java.io.FileNotFoundException;
import java.io.FileOutputStream;
import java.io.IOException;
import java.io.InputStream;

/**
 * Tools for handler picture
 *
 *
 */
public final class ImageTools {

    /**
     * Transfer drawable to bitmap
     *
     * @param drawable
     * @return
     */
    public static Bitmap drawableToBitmap(Drawable drawable) {
        int w = drawable.getIntrinsicWidth();
        int h = drawable.getIntrinsicHeight();

        Bitmap.Config config = drawable.getOpacity() != PixelFormat.OPAQUE ? Bitmap.Config.ARGB_8888
                : Bitmap.Config.RGB_565;
        Bitmap bitmap = Bitmap.createBitmap(w, h, config);
        Canvas canvas = new Canvas(bitmap);
        drawable.setBounds(0, 0, w, h);
        drawable.draw(canvas);
        return bitmap;
    }

    /**
     * Bitmap to drawable
     *
     * @param bitmap
     * @return
     */
    public static Drawable bitmapToDrawable(Bitmap bitmap) {
        return new BitmapDrawable(bitmap);
    }

    /**
     * Input stream to bitmap
     *
     * @param inputStream
     * @return
     * @throws Exception
     */
    public static Bitmap inputStreamToBitmap(InputStream inputStream)
            throws Exception {
        return BitmapFactory.decodeStream(inputStream);
    }

    /**
     * Byte transfer to bitmap
     *
     * @param byteArray
     * @return
     */
    public static Bitmap byteToBitmap(byte[] byteArray) {
        if (byteArray.length != 0) {
            return BitmapFactory
                    .decodeByteArray(byteArray, 0, byteArray.length);
        } else {
            return null;
        }
    }

    /**
     * Byte transfer to drawable
     *
     * @param byteArray
     * @return
     */
    public static Drawable byteToDrawable(byte[] byteArray) {
        ByteArrayInputStream ins = null;
        if (byteArray != null) {
            ins = new ByteArrayInputStream(byteArray);
        }
        return Drawable.createFromStream(ins, null);
    }

    /**
     * Bitmap transfer to bytes
     *
     * @return
     */
    public static byte[] bitmapToBytes(Bitmap bm) {
        byte[] bytes = null;
        if (bm != null) {
            ByteArrayOutputStream baos = new ByteArrayOutputStream();
            bm.compress(Bitmap.CompressFormat.PNG, 100, baos);
            bytes = baos.toByteArray();
        }
        return bytes;
    }

    /**
     * Drawable transfer to bytes
     *
     * @param drawable
     * @return
     */
    public static byte[] drawableToBytes(Drawable drawable) {
        BitmapDrawable bitmapDrawable = (BitmapDrawable) drawable;
        Bitmap bitmap = bitmapDrawable.getBitmap();
        byte[] bytes = bitmapToBytes(bitmap);
        ;
        return bytes;
    }

    /**
     * Base64 to byte[]
     //   */
//  public static byte[] base64ToBytes(String base64) throws IOException {
//      byte[] bytes = Base64.decode(base64);
//      return bytes;
//  }
//
//  /**
//   * Byte[] to base64
//   */
//  public static String bytesTobase64(byte[] bytes) {
//      String base64 = Base64.encode(bytes);
//      return base64;
//  }

    /**
     * Create reflection images
     *
     * @param bitmap
     * @return
     */
    public static Bitmap createReflectionImageWithOrigin(Bitmap bitmap) {
        final int reflectionGap = 4;
        int w = bitmap.getWidth();
        int h = bitmap.getHeight();

        Matrix matrix = new Matrix();
        matrix.preScale(1, -1);

        Bitmap reflectionImage = Bitmap.createBitmap(bitmap, 0, h / 2, w,
                h / 2, matrix, false);

        Bitmap bitmapWithReflection = Bitmap.createBitmap(w, (h + h / 2),
                Bitmap.Config.ARGB_8888);

        Canvas canvas = new Canvas(bitmapWithReflection);
        canvas.drawBitmap(bitmap, 0, 0, null);
        Paint deafalutPaint = new Paint();
        canvas.drawRect(0, h, w, h + reflectionGap, deafalutPaint);

        canvas.drawBitmap(reflectionImage, 0, h + reflectionGap, null);

        Paint paint = new Paint();
        LinearGradient shader = new LinearGradient(0, bitmap.getHeight(), 0,
                bitmapWithReflection.getHeight() + reflectionGap, 0x70ffffff,
                0x00ffffff, Shader.TileMode.CLAMP);
        paint.setShader(shader);
        // Set the Transfer mode to be porter duff and destination in
        paint.setXfermode(new PorterDuffXfermode(PorterDuff.Mode.DST_IN));
        // Draw a rectangle using the paint with our linear gradient
        canvas.drawRect(0, h, w, bitmapWithReflection.getHeight()
                + reflectionGap, paint);

        return bitmapWithReflection;
    }

    /**
     * Get rounded corner images
     *
     * @param bitmap
     * @param roundPx
     *            5 10
     * @return
     */
    public static Bitmap getRoundedCornerBitmap(Bitmap bitmap, float roundPx) {
        int w = bitmap.getWidth();
        int h = bitmap.getHeight();
        Bitmap output = Bitmap.createBitmap(w, h, Bitmap.Config.ARGB_8888);
        Canvas canvas = new Canvas(output);
        final int color = 0xff424242;
        final Paint paint = new Paint();
        final Rect rect = new Rect(0, 0, w, h);
        final RectF rectF = new RectF(rect);
        paint.setAntiAlias(true);
        canvas.drawARGB(0, 0, 0, 0);
        paint.setColor(color);
        canvas.drawRoundRect(rectF, roundPx, roundPx, paint);
        paint.setXfermode(new PorterDuffXfermode(PorterDuff.Mode.SRC_IN));
        canvas.drawBitmap(bitmap, rect, rect, paint);

        return output;
    }

    /**
     * 缩小图片
     *
     * @param bitmap
     * @param width
     * @param height
     * @return
     */
    public static Bitmap zoomBitmap(Bitmap bitmap, double width, double height) {
        int w = bitmap.getWidth();
        int h = bitmap.getHeight();
        Matrix matrix = new Matrix();
        float scaleWidth = ((float) width / w);
        float scaleHeight = ((float) height / h);
        matrix.postScale(scaleWidth, scaleHeight);
        Bitmap newbmp = Bitmap.createBitmap(bitmap, 0, 0, w, h, matrix, true);
        return newbmp;
    }

    /**
     * Resize the drawable
     * @param drawable
     * @param w
     * @param h
     * @return
     */
    public static Drawable zoomDrawable(Drawable drawable, int w, int h) {
        int width = drawable.getIntrinsicWidth();
        int height = drawable.getIntrinsicHeight();
        Bitmap oldbmp = drawableToBitmap(drawable);
        Matrix matrix = new Matrix();
        float sx = ((float) w / width);
        float sy = ((float) h / height);
        matrix.postScale(sx, sy);
        Bitmap newbmp = Bitmap.createBitmap(oldbmp, 0, 0, width, height,
                matrix, true);
        return new BitmapDrawable(newbmp);
    }

    /**
     * Get images from SD card by path and the name of image
     * @param photoName
     * @return
     */
    public static Bitmap getPhotoFromSDCard(String path,String photoName){
        Bitmap photoBitmap = BitmapFactory.decodeFile(path + "/" +photoName +".png");
        if (photoBitmap == null) {
            return null;
        }else {
            return photoBitmap;
        }
    }

    /**
     * Check the SD card
     * @return
     */
    public static boolean checkSDCardAvailable(){
        return android.os.Environment.getExternalStorageState().equals(android.os.Environment.MEDIA_MOUNTED);
    }

    /**
     * Get image from SD card by path and the name of image
     * @return
     */
    public static boolean findPhotoFromSDCard(String path,String photoName){
        boolean flag = false;

        if (checkSDCardAvailable()) {
            File dir = new File(path);
            if (dir.exists()) {
                File folders = new File(path);
                File photoFile[] = folders.listFiles();
                for (int i = 0; i < photoFile.length; i++) {
                    String fileName = photoFile[i].getName().split("\\.")[0];
                    if (fileName.equals(photoName)) {
                        flag = true;
                    }
                }
            }else {
                flag = false;
            }
//          File file = new File(path + "/" + photoName  + ".jpg" );
//          if (file.exists()) {
//              flag = true;
//          }else {
//              flag = false;
//          }

        }else {
            flag = false;
        }
        return flag;
    }


    /**
     * 将图片保存到本地SD卡
     * @param photoBitmap
     * @param photoName
     * @param path
     */
    public static void savePhotoToSDCard(Bitmap photoBitmap, String path, String photoName){
        if (checkSDCardAvailable()) {
            File dir = new File(path);
            if (!dir.exists()){
                dir.mkdirs();
            }

            File photoFile = new File(path , photoName + ".png");
            FileOutputStream fileOutputStream = null;
            try {
                fileOutputStream = new FileOutputStream(photoFile);
                if (photoBitmap != null) {
                    if (photoBitmap.compress(Bitmap.CompressFormat.PNG, 100, fileOutputStream)) {
                        fileOutputStream.flush();
//                      fileOutputStream.close();
                    }
                }
            } catch (FileNotFoundException e) {
                photoFile.delete();
                e.printStackTrace();
            } catch (IOException e) {
                photoFile.delete();
                e.printStackTrace();
            } finally{
                try {
                    fileOutputStream.close();
                } catch (IOException e) {
                    e.printStackTrace();
                }
            }
        }
    }


    /**
     * Delete the image from SD card
     * @param path
     * file:///sdcard/temp.jpg
     */
    public static void deleteAllPhoto(String path){
        if (checkSDCardAvailable()) {
            File folder = new File(path);
            File[] files = folder.listFiles();
            for (int i = 0; i < files.length; i++) {
                files[i].delete();
            }
        }
    }

    //删除上一次截图的临时文件,包括图片路径和文件名称
    public static void deletePhotoAtPathAndName(String path,String fileName){
        if (checkSDCardAvailable()) {
            File folder = new File(path);
            File[] files = folder.listFiles();
            for (int i = 0; i < files.length; i++) {
                System.out.println(files[i].getName());
                if (files[i].getName().equals(fileName)) {
                    files[i].delete();
                }
            }
        }
    }

}
列表选项控件Spinner
在线分析按钮实现
这个在线分析,只需要把图片进行base64之后,然后把base64发送post请求,然后进行后端接收,进行一系列相应的分析,把分析好的图片呈现返回的result也设置为base64,塞进JsonObject中,因为前端发送post请求也接收了一个result,然后进行解码呈现即可
post请求代码
    public void  networkRequest(){
        HttpURLConnection connection=null;
        try {
            URL url = new URL("");
            connection = (HttpURLConnection) url.openConnection();

            connection.setRequestProperty("Content-Type", "application/json; charset=UTF-8");

            connection.setRequestProperty("Accept", "application/json");

            connection.setConnectTimeout(3000);

            connection.setReadTimeout(3000);
            //设置请求方式 GET / POST 一定要大小
            connection.setRequestMethod("POST");
            connection.setDoInput(true);
            connection.setDoOutput(false);
            connection.connect();

            DataOutputStream dos=new DataOutputStream(connection.getOutputStream());

            JSONObject json = new JSONObject();
            json.put("img_bs4",image_base64);

            String jsonstr=json.toString();
            dos.writeBytes(jsonstr);

            int responseCode = connection.getResponseCode();
            if (responseCode != HttpURLConnection.HTTP_OK) {
                throw new IOException("HTTP error code" + responseCode);
            }
            result = getStringByStream(connection.getInputStream());

            if (result == null) {
                Log.d("Fail", "失败了");
            }else{
                Log.d("succuss", "成功了 ");
            }
        } catch (Exception e) {
            e.printStackTrace();
        }

    }
 private String getStringByStream(InputStream inputStream){
        Reader reader;
        try {
            reader=new InputStreamReader(inputStream,"UTF-8");
            char[] rawBuffer=new char[512];
            StringBuffer buffer=new StringBuffer();
            int length;
            while ((length=reader.read(rawBuffer))!=-1){
                buffer.append(rawBuffer,0,length);
            }
            return buffer.toString();
        } catch (UnsupportedEncodingException e) {
            e.printStackTrace();
        } catch (IOException e) {
            e.printStackTrace();
        }
        return null;
    }
注意点,如果返回值是网图的话,那么需要进行一系列的处理链接,因为转义字符的存在
src_link[i].replace("\\","")
前提
这个需要联网操作
离线分析按钮实现
离线分析的话,也就需要提前在linux上面把模型搞好,然后在cpp中进行定位分析,进行相应的结果返回。
生物基础库页面组件前端摆放心得体会:
点击图片进行相应的跳转,
这里的话也就分为四个相对布局,一个相对布局里面有两个线性布局(属性设置为android:orientation="vertical"),然后每一个线性布局里面下面有两个线性布局,分别放ImageView和TextView,为什么要用线性局部套在ImageView和TextView呢,这样可以对布局类设置gravity以及marginLeft值(可以设置左右偏移的话,那么父类的线性布局orientation属性肯定不是horizontal,当 android:orientation=”horizontal” 时, 只有垂直方向的设置才起作用,水平方向的设置不起作用),这也印证了前面的相对布局作为父类为水平布局类而且android:orientation="vertical",代码如下:
  <RelativeLayout
            android:layout_width="match_parent"
            android:layout_height="220dp"
            android:layout_marginTop="40dp">

            <LinearLayout
                android:layout_width="match_parent"
                android:layout_height="210dp"
                android:layout_marginTop="10dp"
                android:orientation="vertical">

                <LinearLayout
                    android:layout_marginLeft="20dp"
                    android:layout_width="match_parent"
                    android:layout_height="150dp"
                    android:gravity="left">
                    <ImageView
                        android:id="@+id/picture1"
                        android:layout_width="150dp"
                        android:layout_height="150dp">
                    </ImageView>
                </LinearLayout>

                <LinearLayout
                    android:layout_width="match_parent"
                    android:layout_height="match_parent"
                    android:gravity="left"
                    android:layout_marginLeft="55dp"
                    >
                    <TextView
                        android:layout_width="wrap_content"
                        android:layout_height="wrap_content"
                        android:layout_margin="10dp"
                        android:textSize="15sp"
                        android:textColor="@color/dark"
                        android:text="梨小实心虫"
                        android:gravity="center_horizontal"
                        />
                </LinearLayout>
            </LinearLayout>

            <LinearLayout
                android:layout_width="match_parent"
                android:layout_height="210dp"
                android:layout_marginTop="10dp"
                android:orientation="vertical">

                <LinearLayout
                    android:layout_marginRight="20dp"
                    android:layout_width="match_parent"
                    android:layout_height="150dp"
                    android:gravity="right">
                    <ImageView
                        android:id="@+id/picture2"
                        android:layout_width="150dp"
                        android:layout_height="150dp">
                    </ImageView>
                </LinearLayout>

                <LinearLayout
                    android:layout_width="match_parent"
                    android:layout_height="match_parent"
                    android:gravity="right"
                    android:layout_marginRight="60dp"
                    >
                    <TextView
                        android:layout_width="wrap_content"
                        android:layout_height="wrap_content"
                        android:layout_margin="10dp"
                        android:textSize="15sp"
                        android:textColor="@color/dark"
                        android:text="梨小实心虫"
                        android:gravity="center_horizontal"
                        />
                </LinearLayout>
            </LinearLayout>

        </RelativeLayout>
这里搞出四份就可以了,如果需要滑动的话,只需要把布局类包进如下代码就行:
<ScrollView android:layout_height="match_parent"
    android:layout_width="match_parent"
    xmlns:android="http://schemas.android.com/apk/res/android"
    >
</ScrollView>
然后点击后,进行详情跳转:

这里就很简单了,直接一个ImageView,外加两个textView,动态赋值即可:
  <RelativeLayout
        android:layout_width="match_parent"
        android:layout_height="match_parent"
        xmlns:tools="http://schemas.android.com/tools"
        >
        <ImageView
            android:id="@+id/spider"
            android:layout_width="match_parent"
            android:layout_height="250dp"
            android:layout_marginTop="10dp"
            android:layout_marginLeft="10dp"
            android:layout_marginRight="10dp"
            >
        </ImageView>
        <TextView
            android:id="@+id/title"
            android:layout_marginLeft="10dp"
            android:layout_marginRight="10dp"
            android:layout_marginTop="275dp"
            android:layout_width="match_parent"
            android:layout_height="60dp"
            android:textSize="25sp"
            >
        </TextView>
        <TextView
            android:id="@+id/texts"
            android:layout_marginTop="320dp"
            android:layout_marginLeft="10dp"
            android:layout_marginRight="10dp"
            android:layout_width="match_parent"
            android:layout_height="match_parent"
            android:textSize="18sp"
            >
        </TextView>
    </RelativeLayout>
还是那句话,如果需要下拉的话,加如下代码即可:
<ScrollView android:layout_height="match_parent"
    android:layout_width="match_parent"
    xmlns:android="http://schemas.android.com/apk/res/android"
    >
</ScrollView>
生物基础库页面后端点击操作的心得体会:
插入网图
加入依赖在build.gardle
repositories {
  google()
  jcenter()
}
dependencies {
  implementation 'com.github.bumptech.glide:glide:4.11.0'
  annotationProcessor 'com.github.bumptech.glide:compiler:4.11.0'
}
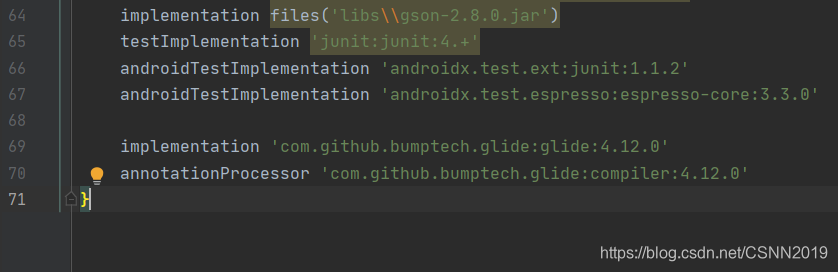
或者maven
<dependency>
  <groupId>com.github.bumptech.glide</groupId>
  <artifactId>glide</artifactId>
  <version>4.12.0</version>
</dependency>
<dependency>
  <groupId>com.github.bumptech.glide</groupId>
  <artifactId>compiler</artifactId>
  <version>4.12.0</version>
  <optional>true</optional>
</dependency>
核心插入代码
Glide.with(this).load("https://www.baidu.com/img/PCtm_d9c8750bed0b3c7d089fa7d55720d6cf.png").into(imgv);
作品展示


 2242
2242

 被折叠的 条评论
为什么被折叠?
被折叠的 条评论
为什么被折叠?
 到【灌水乐园】发言


