


目录
一、Nginx
1.1、Nginx 下载
a)打开官方网站连接:nginx news
Ps:这里以 nginx-1.25.0 为例

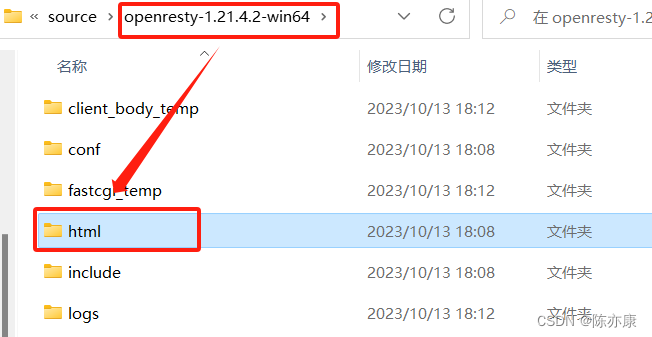
b)解压缩后,进入以下文件路径.

c)打开,输入 nginx.exe,回车即可,如下:

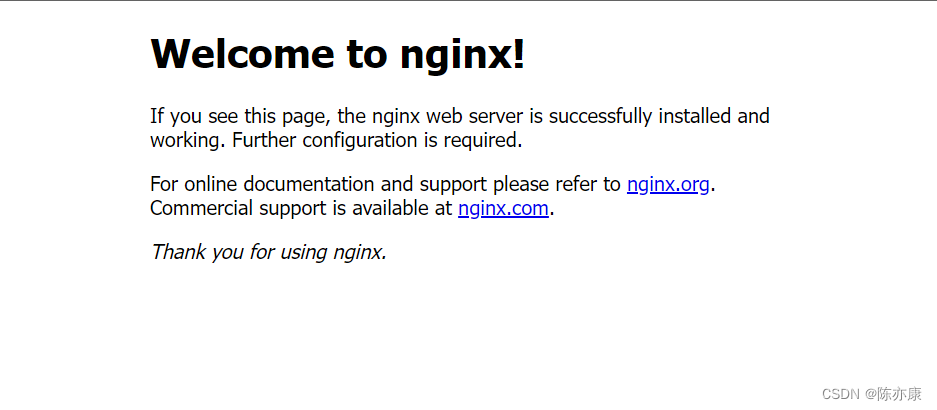
d)打开网页,访问 localhost:80,即可看到 Nginx 页面(OpenResty 就是 Nginx)
1.2、nginx 基础配置的认识
在 nginx-1.24.0\conf\ 路径下有一个 nginx.conf 文件,打开如下:
#user  nobody;
worker_processes  1;

#error_log  logs/error.log;
#error_log  logs/error.log  notice;
#error_log  logs/error.log  info;

#pid        logs/nginx.pid;


events {
    worker_connections  1024;
}


http {
    include       mime.types;
    default_type  application/octet-stream;

    #log_format  main  '$remote_addr - $remote_user [$time_local] "$request" '
    #                  '$status $body_bytes_sent "$http_referer" '
    #                  '"$http_user_agent" "$http_x_forwarded_for"';

    #access_log  logs/access.log  main;

    sendfile        on;
    #tcp_nopush     on;

    #keepalive_timeout  0;
    keepalive_timeout  65;

    #gzip  on;

    server {
        listen       80;
        server_name  localhost;

        #charset koi8-r;

        #access_log  logs/host.access.log  main;

        location / {
            root   html;
            index  index.html index.htm;
        }

        #error_page  404              /404.html;

        # redirect server error pages to the static page /50x.html
        #
        error_page   500 502 503 504  /50x.html;
        location = /50x.html {
            root   html;
        }

        # proxy the PHP scripts to Apache listening on 127.0.0.1:80
        #
        #location ~ \.php$ {
        #    proxy_pass   http://127.0.0.1;
        #}

        # pass the PHP scripts to FastCGI server listening on 127.0.0.1:9000
        #
        #location ~ \.php$ {
        #    root           html;
        #    fastcgi_pass   127.0.0.1:9000;
        #    fastcgi_index  index.php;
        #    fastcgi_param  SCRIPT_FILENAME  /scripts$fastcgi_script_name;
        #    include        fastcgi_params;
        #}

        # deny access to .htaccess files, if Apache's document root
        # concurs with nginx's one
        #
        #location ~ /\.ht {
        #    deny  all;
        #}
    }


    # another virtual host using mix of IP-, name-, and port-based configuration
    #
    #server {
    #    listen       8000;
    #    listen       somename:8080;
    #    server_name  somename  alias  another.alias;

    #    location / {
    #        root   html;
    #        index  index.html index.htm;
    #    }
    #}


    # HTTPS server
    #
    #server {
    #    listen       443 ssl;
    #    server_name  localhost;

    #    ssl_certificate      cert.pem;
    #    ssl_certificate_key  cert.key;

    #    ssl_session_cache    shared:SSL:1m;
    #    ssl_session_timeout  5m;

    #    ssl_ciphers  HIGH:!aNULL:!MD5;
    #    ssl_prefer_server_ciphers  on;

    #    location / {
    #        root   html;
    #        index  index.html index.htm;
    #    }
    #}

}
这里有很多注释,删除掉以后,如下:
worker_processes  1;
events {
    worker_connections  1024;
}
http {
    include       mime.types;
    default_type  application/octet-stream;

    sendfile        on;

    keepalive_timeout  65;

    server {
        listen       80;
        server_name  localhost;

        location / {
            root   html;
            index  index.html index.htm;
        }

        error_page   500 502 503 504  /50x.html;
        location = /50x.html {
            root   html;
        }
    }

}
这里分开来看,如下:
nginx 配置文件主要有三部分组成:
a)第一部分:全局块
全局块:nginx 服务器全局生效的配置命令
worker_processes 1; # 服务器并发处理能力,值越大并发能力越强(受自身配置限制)
b)第二部分:events 块
events:影响 nginx 和用户网络的连接.
events {
    worker_connections  1024; #最大连接数1024个,需灵活配置
}
c)第三部分:http 块
http块:包括文件引入、MIME-TYPE 定义,日志自定义、连接超时等.
http {
    include       mime.types;      # 文件扩展名与文件类型映射表
    default_type  application/octet-stream;  # 访问到未定义的扩展名的时候,就默认为下载该文件

    sendfile        on; # 日志自定义

    keepalive_timeout  65; # 超时时间
http 块中 内嵌的 server 块
和虚拟主机有关系,主要是未来节省硬件成本.
一个 http 块可以包含多个 server 块,而一个 server 块就等于一个虚拟主机.
server 块中又抱哈了 server 块 和 location 块
全局 server 块:
    server {
        listen       80; # 目前监听的端口号
        server_name  localhost; # 主机名称
location 块:
   location / {     #表示默认首页
            root   html;
            index  index.html index.htm;
root html 就是根路径,也就是通过 openresty-1.21.4.2-win64\html\ 路径下,去找页面(默认是 index.html 页面,也就是文章开头展示的页面).
最后是对错误页面的描述
        error_page   500 502 503 504  /50x.html;
        location = /50x.html {
            root   html;
        }
如果请求出现了 500、502、503、504 错误,就会进入到 50x.html 页面中(一般不会用这些默认的错误页,因此可以将这个配置也删除掉)。
1.3、一些常用配置
1.3.1、location 匹配级别
拿 echo 插件来举例:echo 就是会像网页上输出一些东西.
这里需要先在 server 中配置 "default_type text/html" ,否则会走默认的 http 块中的下载,如下:
    server {
        listen       80;
        server_name  localhost;

        default_type  text/html;
        location / {
            echo "hello nginx";
        }
    }
在 openresty-1.21.4.2-win64\ 路径下重新打开一个 cmd 窗口,输入 nginx.exe -s reload 进行重启.

打开浏览器输入 localhost:80 即可访问.
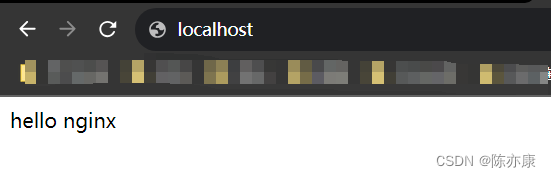
a)location /
/ 就表示匹配以 "/" 开头的所有请求,例如 location/a、location/ajfdioabgua .......

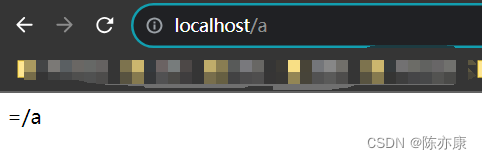
b)location =
= 优先级最高,表示完全匹配,例如 location = /a 就表示只匹配路由 location/a,其他的都不可以.
配置如下:
    server {
        listen       80;
        server_name  localhost;

        default_type  text/html;
        location / {
            echo "hello nginx";
        }

        location = /a {
            echo "=/a";
        }
    }
cmd 窗口,输入 nginx.exe -s reload 进行重启.

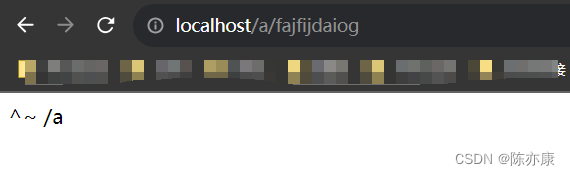
c)location ^~
^~ 优先级比 location / 高,但是匹配规则和 location / 类似. 例如 location ^~ /a 就表示匹配以 /a 开头的所有路由.
例如配置如下:
    server {
        listen       80;
        server_name  localhost;

        default_type  text/html;
        location / {
            echo "hello nginx";
        }

        location = /a {
            echo "=/a";
        }

        location ^~ /a {
            echo "^~ /a";
        }
    }
重启 nginx 服务.
1.3.2、实现反向代理
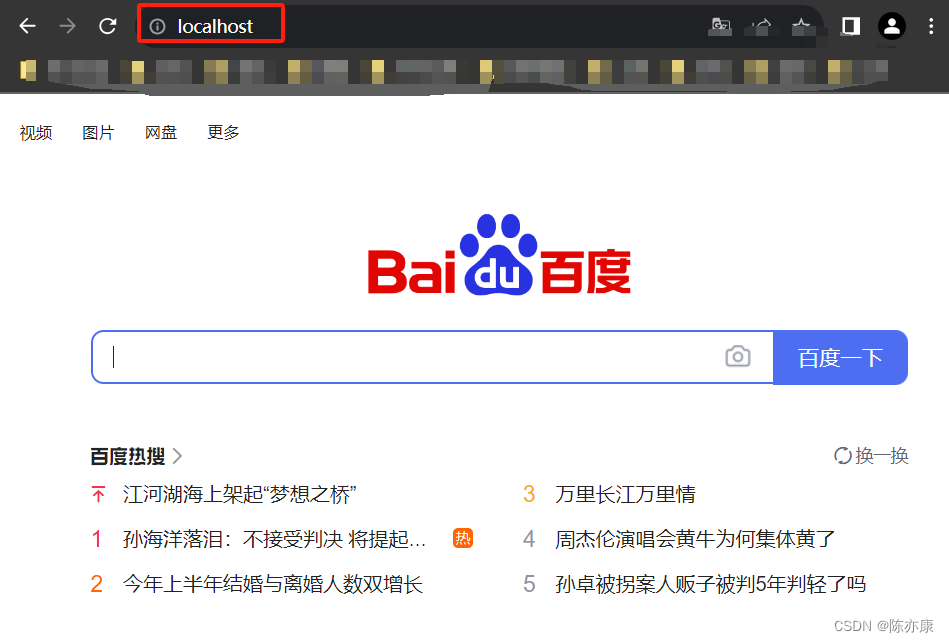
修改 nginx.conf 如下:
    server {
        listen       80;
        server_name  localhost;

        default_type  text/html;
        location / {
            proxy_pass "https://www.baidu.com";
        }
    }
重启 nginx
访问 localhost 即可转到 "https://www.baidu.com".
有一些额外需要注意的如下:
        location /a {
            proxy_pass http://ip;
        }

上述配置会导致你在浏览器中输入以下网址:
localhost/a/xxx  => http://ip/a/xxx
        location /a/ {
            proxy_pass http://ip/;
        }

上述配置会导致你在浏览器中输入以下网址:
localhost/a/xxx  => http://ip/xxx
1.3.3、nginx 配置负载均衡
通过 upstream 来创建一组需要负载均衡服务(默认是轮询策略,如果某个服务器挂了,自动剔除).
    upstream group1 {
        server 192.168.0.12:80;
        server 192.168.0.12:81;
    }
    server {
        listen       80;
        server_name  localhost;

        default_type  text/html;
        location /a {
            proxy_pass "https://group1";
        }
    }
a)weight 权重
另外可以通过 weight 来控制需要负载均衡的权重. 权重越大,访问到的概率越大.
比如将权重都配置为 1,表示两者访问到的概率相同.
    upstream group1 {
        server 192.168.0.12:80 weight=1;
        server 192.168.0.12:81 weight=1;
    }
    server {
        listen       80;
        server_name  localhost;

        default_type  text/html;
        location /a {
            proxy_pass "https://group1";
        }
    }
或者将 80 端口的权重改为 10,让其访问到的概率大一些.
    upstream group1 {
        server 192.168.0.12:80 weight=10;
        server 192.168.0.12:81 weight=1;
    }
    server {
        listen       80;
        server_name  localhost;

        default_type  text/html;
        location /a {
            proxy_pass "https://group1";
        }
    }
b)ip_hash
每个请求按访问 ip 的hash 结果分配,这样子访客固定访问一个后端服务器,可以解决session问题
举个例子:
A用户固定ip,第一次访问到8080 tomcat,那么后面就都是访问到这台机器.
upstream myserver {
    ip_hash;
    server 127.0.0.1:8080;
	server 127.0.0.1:8081;
}
c)fair
根据后端响应时间来分配请求,处理时间短的优先分配.
upstream myserver {
    server 127.0.0.1:8080;
	server 127.0.0.1:8081;
	fair;
}
1.3.4、nginx 引入模块
在 http 块中通过 include 可以引入其他指定的 conf 配置.
也就意味着,你可以创建一个文件夹,在这个文件夹下创建很多配置文件,一并引入. 例如,引入 web 目录下的所有 conf 文件.
http {
    include       mime.types;
    default_type  text/html;
    sendfile        on;
    keepalive_timeout  65;
	# 引入自定义配置文件
	include web/*.conf;
}
web 目录下的 conf 就可以配置反向代理、负载均衡...
upstream demo1 {
    server localhost:10010;
}
server {
	listen 8079;
	location / {
		root D:/webapps/;
		index login.html;
	}

	location /api {
		proxy_pass http://demo1;
		# proxy_set_header HOST $host;  # 不改变源请求头的值
		# proxy_pass_request_body on;  #开启获取请求体
		# proxy_pass_request_headers on;  #开启获取请求头
		# proxy_set_header X-Real-IP $remote_addr;   # 记录真实发出请求的客户端IP
		# proxy_set_header X-Forwarded-For $proxy_add_x_forwarded_for;  #记录代理信息
	}
}


 5448
5448


 被折叠的 条评论
为什么被折叠?
被折叠的 条评论
为什么被折叠?
 到【灌水乐园】发言


