


1、 简单概览
1.1、REST风格
REST(Representational State Transfer),表现形式状态转换,它是一种软件架构风格
在前后端分离的开发模式中,前后端开发人员都需要根据提前定义好的接口文档,来进行前后端功能的开发,而在前后端进行交互的时候,我们需要基于当前主流的REST风格的API接口进行交互
在REST风格的URL中,我们通过四种请求方式,来操作数据的增删改查。
1. GET : 查询
2. POST :新增
3. PUT :修改
4.DELETE :删除
1.2、 统一响应结果
前后端工程在进行交互时,使用统一响应结果 Result
@Data
@NoArgsConstructor
@AllArgsConstructor
public class Result {
    private Integer code;//响应码,1 代表成功; 0 代表失败
    private String msg;  //响应码 描述字符串
    private Object data; //返回的数据

    //增删改 成功响应
    public static Result success(){
        return new Result(1,"success",null);
    }
    //查询 成功响应
    public static Result success(Object data){
        return new Result(1,"success",data);
    }
    //失败响应
    public static Result error(String msg){
        return new Result(0,msg,null);
    }
}
1.3、 开发流程
我们在进行功能开发时,都是根据如下流程进行:
1. 查询页面原型明确需求
2. 阅读接口文档:来完成前后端统一,防止出现不统一造成的问题
3. 思路分析
4. 接口开发:就是开发后台的业务功能,一个业务功能,我们称为一个接口
5. 接口测试:功能开发完毕后,先通过Postman进行接口测试,测试通过后,和前端进行联调测试
6. 前后端联调测试:和前端开发人员开发好的前端工程一起测试
1.4、 三层架构
我们往往会使用三层架构来构建后端代码
1.4.1、 具体分层及其作用
Controller层:接收前端请求,并响应。我们通常在这一层完成前后端交互
Service层:将得到的请求写成抽象方法来交给实现类去实现
ServiceImpl实现类:Service的实现类,来实现Service的抽象方法
Mapper层:与数据库交互。我们通常通过这里将数据库的数据传入实现类来完成方法
Mappers文件:另一种与数据库交互的方式,叫做动态代理。
1.4.2、 Mapper层与Mappers文件的不同
在Mapper层使用Mybatis的注解,主要是来完成一些简单的增删改查功能。如果需要实现复杂的SQL功能,建议使用XML来配置映射语句,也就是将SQL语句写在XML配置文件中。
1.4.3、 一般的操作流程
以下代码就是一个增加员工操作的全部流程:
1.4.3.1
我们通常在阅读需求以后去Controller层接收并响应请求,用到的方法我们先写上
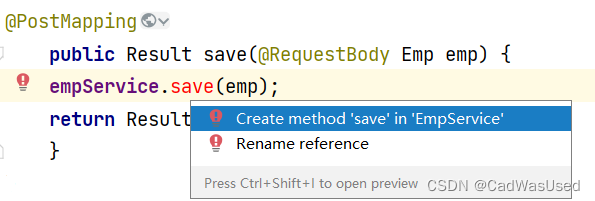
1.4.3.2
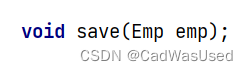
我们用Alt+Enter点击报红的方法,让他去Service层创建抽象方法
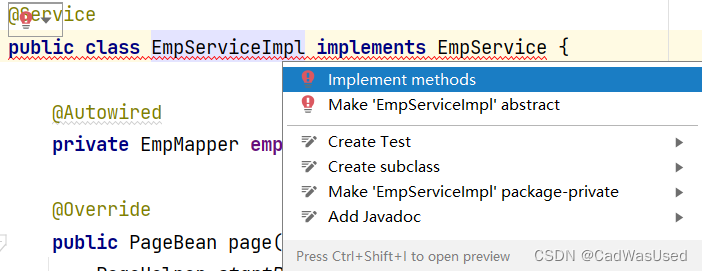
1.4.3.3
这时候ServiceImpl实现类会提示错误,自然也是Alt+Enter点击,自动重写方法。
1.4.3.4
重写的方法我们需要按需求修改,跟第一步一样,用到的方法我们先写上,然后继续交给Idea
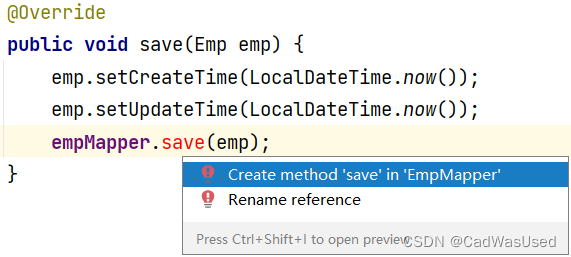
1.4.3.5
最后再去自动生成的Mapper层完成与数据库的交互即可
2、 具体实现
2.1、 新增
Controller:
 //新增
@PostMapping
public Result save(@RequestBody Emp emp){
    empService.save(emp);
    return Result.success();
}
Service:
void save(Emp emp);ServiceImpl:
 @Override
public void save(Emp emp) {
    emp.setCreateTime(LocalDateTime.now());
    emp.setUpdateTime(LocalDateTime.now());
    empMapper.save(emp);
}
Mapper:
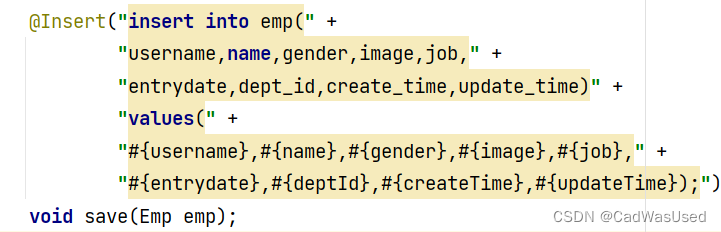
//保存员工信息
@Insert("insert into emp (username, name, gender, image, job, entrydate, dept_id, create_time, update_time) " +
"values (#{username}, #{name}, #{gender}, #{image}, #{job}, #{entrydate}, #{deptId}, #{createTime}, #{updateTime});")
void save(Emp emp);
2.2、 查看(分页查询)
Controller层代码:
@RestController
@RequestMapping("/emps")
public class EmpController {

    @Autowired
    private EmpService empService;

    //条件分页查询
    @GetMapping
    public Result page(@RequestParam(defaultValue = "1") Integer page ,
                       @RequestParam(defaultValue = "10") Integer pageSize,
                       String name, Short gender,
                       @DateTimeFormat(pattern = "yyyy-MM-dd") LocalDate begin,
                       @DateTimeFormat(pattern = "yyyy-MM-dd") LocalDate end){
        PageBean pageBean = empService.page(page, pageSize, name, gender, begin, end);
        return Result.success(pageBean);
    }
}
Service层代码:
public interface EmpService {
    /**
     * 条件分页查询
     * @param page 页码
     * @param pageSize 每页展示记录数
     * @param gender 性别
     * @param begin 范围 - 开始时间
     * @param end 范围 - 结束时间
     * @return
     */
    PageBean page(Integer page, Integer pageSize, String name, Short gender, LocalDate begin, LocalDate end);
}
ServiceImpl代码:
@Service
public class EmpServiceImpl implements EmpService {
    @Autowired
    private EmpMapper empMapper;

    @Override
    public PageBean page(Integer page, Integer pageSize, String name, Short gender, LocalDate begin, LocalDate end) {
        PageHelper.startPage(page, pageSize); // 设置分页参数
        List<Emp> empList = empMapper.list(name,gender,begin,end); // 执行分页查询
        Page<Emp> p = (Page<Emp>) empList;    // 获取分页结果

        PageBean pageBean = new PageBean(p.getTotal(), p.getResult()); //封装PageBean
        return pageBean;
    }
}
Mapper层代码:
@Mapper
public interface EmpMapper {
	public List<Emp> list(String name, Short gender, LocalDate begin, LocalDate end);
}
Mappers:
<?xml version="1.0" encoding="UTF-8" ?>
<!DOCTYPE mapper
        PUBLIC "-//mybatis.org//DTD Mapper 3.0//EN"
        "http://mybatis.org/dtd/mybatis-3-mapper.dtd">
<mapper namespace="com.itheima.mapper.EmpMapper">

    <select id="list" resultType="com.itheima.pojo.Emp">
        select * from emp
        <where>
            <if test="name != null and name != ''">
                name like concat('%',#{name},'%')
            </if>
            <if test="gender != null">
               and gender = #{gender}
            </if>
            <if test="begin != null and end != null">
               and entrydate between #{begin} and #{end}
            </if>
        </where>
        order by update_time desc
    </select>

</mapper>
2.3、 删除(允许批量删除 )
Controller:
@DeleteMapping("/{ids}")
public Result delete(@PathVariable List<Integer> ids){
    empService.delete(ids);
    return Result.success();
}
Service:
void delete(List<Integer> ids);ServiceImpl:
@Override
public void delete(List<Integer> ids) {
	empMapper.delete(ids);
}
Mapper:
void delete(List<Integer> ids);Mappers:
<select id="delete">
    delete from emp where id in
    <foreach collection="ids" item="id" open="(" close=")" separator=",">
    	#{id}
    </foreach>
</select>
2.4、 修改(包含页面回查和修改两部分)
2.4.1、 页面回查
Controller:
//根据id查询
@GetMapping("/{id}")
public Result getById(@PathVariable Integer id){
    Emp emp = empService.getById(id);
    return Result.success(emp);
}
Service:
Emp getById(Integer id);SeviceImpl:
@Override
public Emp getById(Integer id) {
	return empMapper.getById(id);
}
Mapper:
//根据ID查询员工信息
@Select("select * from emp where id = #{id}")
Emp getById(Integer id);
2.4.2、 修改
Controller:
@PutMapping
public Result update(@RequestBody Emp emp){
    empService.update(emp);
    return Result.success();
}
Service:
void update(Emp emp);viceImpl:
@Override
public void update(Emp emp) {
    emp.setUpdateTime(LocalDateTime.now()); //更新修改时间为当前时间
    empMapper.update(emp);
}
Mapper:
void update(Emp emp);Mappers:
<update id="update">
    update emp
    <set>
        <if test="username != null and username != ''">
        	username = #{username},
        </if>
        <if test="password != null and password != ''">
       	 	password = #{password},
        </if>
        <if test="name != null and name != ''">
        	name = #{name},
        </if>
        <if test="gender != null">
        	gender = #{gender},
        </if>
        <if test="image != null and image != ''">
        	image = #{image},
        </if>
        <if test="job != null">
        	job = #{job},
        </if>
        <if test="entrydate != null">
        	entrydate = #{entrydate},
        </if>
        <if test="deptId != null">
        	dept_id = #{deptId},
        </if>
        <if test="updateTime != null">
        	update_time = #{updateTime}
        </if>
    </set>
    where id = #{id}
</update>
2.5、 上传
因为本地上传太实用性太低,我们这里只写如何用"阿里云"来云端上传
2.5.1、 依赖
首先先去Pom文件下载阿里云的依赖
<dependency>
    <groupId>com.aliyun.oss</groupId>
    <artifactId>aliyun-sdk-oss</artifactId>
    <version>3.15.0</version>
</dependency>
2.5.2、 工具类
我们需要创建一个Utils工具类包,来存放AliOssTest文件,文件内容如下
package com.itheima.Utils;

import com.aliyun.oss.OSS;
import com.aliyun.oss.OSSClientBuilder;

import com.itheima.pojo.AliOSSProperties;
import lombok.Data;
import org.springframework.beans.factory.annotation.Autowired;
import org.springframework.stereotype.Component;
import org.springframework.web.multipart.MultipartFile;
import java.io.*;
import java.time.LocalDateTime;
import java.time.format.DateTimeFormatter;

/**
 * 阿里云 OSS 工具类
 */
@Component
@Data
public class AliOSSUtils {

    @Autowired
    private AliOSSProperties aliOSSProperties;

    /**
     * 实现上传图片到OSS
     */
    public String upload(MultipartFile multipartFile) throws IOException {
        //数据设置
        String endpoint = aliOSSProperties.getEndpoint();
        String accessKeyId = aliOSSProperties.getAccessKeyId();
        String accessKeySecret = aliOSSProperties.getAccessKeySecret();
        String bucketName = aliOSSProperties.getBucketName();

        // 获取上传的文件的输入流
        InputStream inputStream = multipartFile.getInputStream();

        // 避免文件覆盖
        String fileName = LocalDateTime.now().format(DateTimeFormatter.ofPattern("yyyy-MM-dd-HH-mm-ss")) + multipartFile.getOriginalFilename();

        //上传文件到 OSS
        OSS ossClient = new OSSClientBuilder().build(endpoint, accessKeyId, accessKeySecret);
        ossClient.putObject(bucketName, fileName, inputStream);

        //文件访问路径
        String url = endpoint.split("//")[0] + "//" + bucketName + "." + endpoint.split("//")[1] + "/" + fileName;
        // 关闭ossClient
        ossClient.shutdown();
        return url;// 把上传到oss的路径返回
    }

}
2.5.3、 实体类
在pojo包下建立AliOSSProperties实体类
package com.itheima.pojo;

import lombok.Data;
import org.springframework.boot.context.properties.ConfigurationProperties;
import org.springframework.stereotype.Component;

@Data
@Component
@ConfigurationProperties(prefix = "aliyun.oss") //指定配置文件
public class AliOSSProperties {
    private String endpoint;
    private String accessKeyId;
    private String accessKeySecret;
    private String bucketName;
}
2.5.4、 准备yml配置文件
我们首先应该把原本的application.properties配置文件里的内容替换为application.yml
1. 大小写敏感
2. 数值前边必须有空格,作为分隔符
3. 使用缩进表示层级关系,缩进时,不允许使用Tab键,只能用空格(idea中会自动将Tab转换为空格)
4. 缩进的空格数目不重要,只要相同层级的元素左侧对齐即可
5. 表示注释,从这个字符一直到行尾,都会被解析器忽略
具体改法如下:
#数据库驱动
spring.datasource.driver-class-name=com.mysql.cj.jdbc.Driver
#链接地址
spring.datasource.url=你的数据
#账号
spring.datasource.username=你的数据
#密码
spring.datasource.password=你的数据
spring:
datasource:
driver-class-name: com.mysql.cj.jdbc.Driver #数据库驱动
url: 你的数据 #链接地址
username: 你的数据 #账号
password: 你的数据 #密码其中阿里云配置如下:
aliyun: #阿里云oss配置
 oss:
  endpoint: 你自己的 #oss外网访问地域节点
  accessKeyId: 你自己的 #ossAccessKeyId
  accessKeySecret: 你自己的 #ossaccessKeySecret
  bucketName: 你自己的 #ossBucket名称


 4万+
4万+


 被折叠的 条评论
为什么被折叠?
被折叠的 条评论
为什么被折叠?
 到【灌水乐园】发言


