


原创作品,允许转载,转载时请务必以超链接形式标明文章 原始出处 、作者信息和本声明。否则将追究法律责任。
Redis作为缓存使用的好处不多说了,懂的人懂的。下面说说windows环境下部署。
这篇Redis作者原话的文章值得看看http://blog.nosqlfan.com/html/3729.html
参考:
http://svenman.blog.51cto.com/6867097/1626914
http://www.cnblogs.com/yun007/p/3705353.html
http://www.hongkevip.com/caozuoxitong/Windows/29057_2.html
http://www.redis.cn/
http://www.redis.io/
1.安装mysql(这个不多说)
介质:http://www.mysql.com/downloads/
创建数据库和表:
create database mytestr;
use mytestr
create table `testr` (`id` int(7) NOT NULL AUTO_INCREMENT, `name` char(8) DEFAULT NULL, PRIMARY KEY (`id`)) ENGINE=InnoDB AUTO_INCREMENT=10 DEFAULT CHARSET=utf8;
INSERT INTO `testr` VALUES (1,'sven'),(2,'jim'),(3,'zhu'),(4,'wang'),(5,'ftd'),(6,'test'),(7,'test01'),(8,'test02'),(9,'test03');
查看结果:
select * from mytestr.testr;给mysql授权:
grant all privileges on *.* to root@localhost identified by '123456';
flush privileges;
2.安装nginx
介质:http://nginx.org/
nginx安装在:E:\Programs\nginx
配置nginx:
备份nginx\conf目录下的nginx.conf
修改配置文件(不相关的就被我删掉了)
    server {
        listen       80;
        server_name  localhost;
        location / {
            root   E:/Programs/nginx/html;
            ##这里的路径的“/”要反过来,和linux下的一样
            index  index.php index.html index.htm;
            ##新增index.php
        }
        error_page   500 502 503 504  /50x.html;
        location = /50x.html {
            root   html;
        }
        location ~ \.php$ {
        #    root           html;
            fastcgi_pass   127.0.0.1:9000;
            fastcgi_index  index.php;
            fastcgi_param  SCRIPT_FILENAME  E:/Programs/nginx/html$fastcgi_script_name;
            ##修改路径,注意斜杠的方向
            include        fastcgi_params;
        }
    }
修改后,启动nginx.exe
查看状态:

log也没报错(log目录:E:\Programs\nginx\logs)
测试:
在E:\Programs\nginx\html下新建index.php文件
<?php
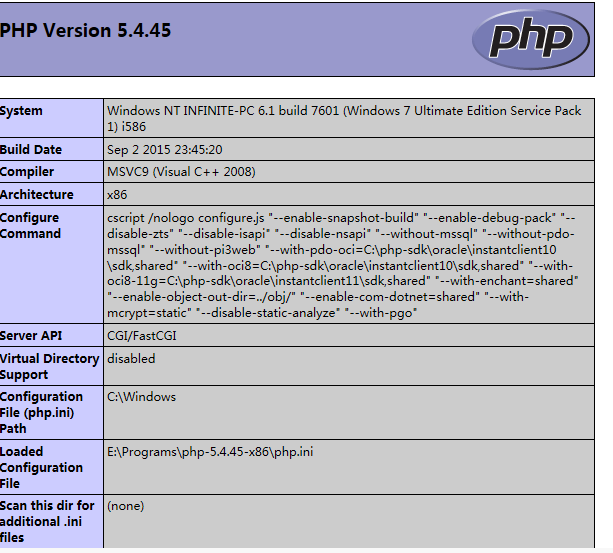
phpinfo();
?>在浏览器中输入:http://localhost/index.php
返回:
3.安装Redis
参考:http://bbs.redis.cn/forum.php?mod=viewthread&tid=715&extra=
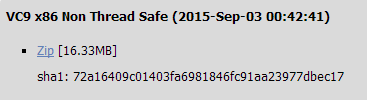
4.安装PHP5.4和Redis扩展
介质:http://windows.php.net/download#php-5.6 (注意,一定要下载Non Thread Safe版本)
解压到E:\Programs\php-5.4.45-x86 (文件重命名,原名太长)
备份php.ini-production,然后将其重命名为php.ini
修改配置文件:

将上图红框内内容去掉“;”并改为
extension_dir = “E:/Programs/php-5.4.45-x86/ext” –注意斜杠方向
以下项目在配置文件中去掉前面的“;”
extension=php_mysql.dll
extension=php_mysqli.dll
cgi.fix_pathinfo=1
添加:(先后顺序别反)
extension=php_igbinary.dll
extension=php_redis.dll
然后下载redis的php5.4扩展文件:https://github.com/phpredis/phpredis/downloads –(phpredis_5.4_vc9_nts.7z,必须nts版本)
解压后放到:E:\Programs\php-5.4.45-x86\ext
启动PHP5.4:命令行CD到php-5.4.45-x86,运行php-cgi.exe -b 127.0.0.1:9000 -c E:/Programs/php-5.4.45-x86/php.ini

测试:修改E:\Programs\nginx\html下index.php 如下内容
<?php
    $redis = new Redis();
    $redis->connect('127.0.0.1',6379);
    $redis->set('test','hello redis');
    echo $redis->get('test');
?>在浏览器中输入:http://localhost/index.php
返回:hello redis
5.缓存测试
修改php文件(PHP文件代码可以自由改动):
<?php
$redis = new Redis();
$redis->connect('127.0.0.1',6379) or die ("could net connect redis server");
$query = "select * from testr";
//为了简单一点,这里就读取了8条数据
for ($key = 1; $key < 9; $key++)
{
if (!$redis->get($key))
{
$connect = mysql_connect('127.0.0.1','root','123456');
mysql_select_db(mytestr);
$result = mysql_query($query);
//如果没有找到$key,就将该查询sql的结果缓存到redis
while ($row = mysql_fetch_assoc($result))
{
$redis->set($row['id'],$row['name']);
}
$myserver = 'mysql';
break;
}
else
{
$myserver = "redis";
$data[$key] = $redis->get($key);
}
}
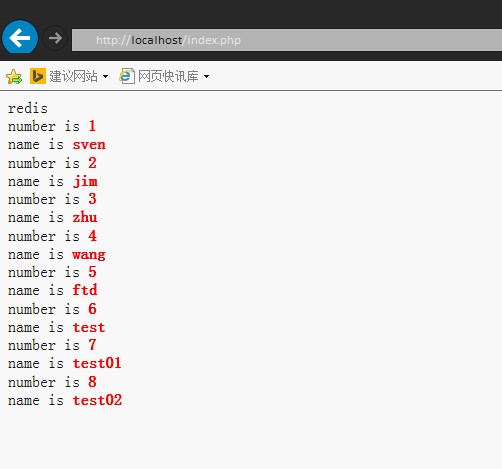
echo $myserver;
echo "<br>";
for ($key = 1; $key < 9; $key++)
{
echo "number is <b><font color=#FF0000>$key</font></b>";
echo "<br>";
echo "name is <b><font color=#FF0000>$data[$key]</font></b>";
echo "<br>";
}
?>在浏览器中输入:http://localhost/index.php
第一次执行,redis中没有对应的KEY
第二次执行:
登录redis端也可以去验证下
至此,已经实现了redis作为mysql的缓存服务器,但是如果更新了mysql,redis中仍然会有对应的KEY,数据就不会更新,需要注意!
原创作品,允许转载,转载时请务必以超链接形式标明文章 原始出处 、作者信息和本声明。否则将追究法律责任。


 1375
1375

 被折叠的 条评论
为什么被折叠?
被折叠的 条评论
为什么被折叠?
 到【灌水乐园】发言


