


文章目录
一、服务器配置
-
安装WebDeploy,需要全部勾选 下载
-
开放8172端口(防火墙和云端本身)
-
需要在服务器管理 — 服务器角色 — 全部勾选Web服务器(IIS)功能
-
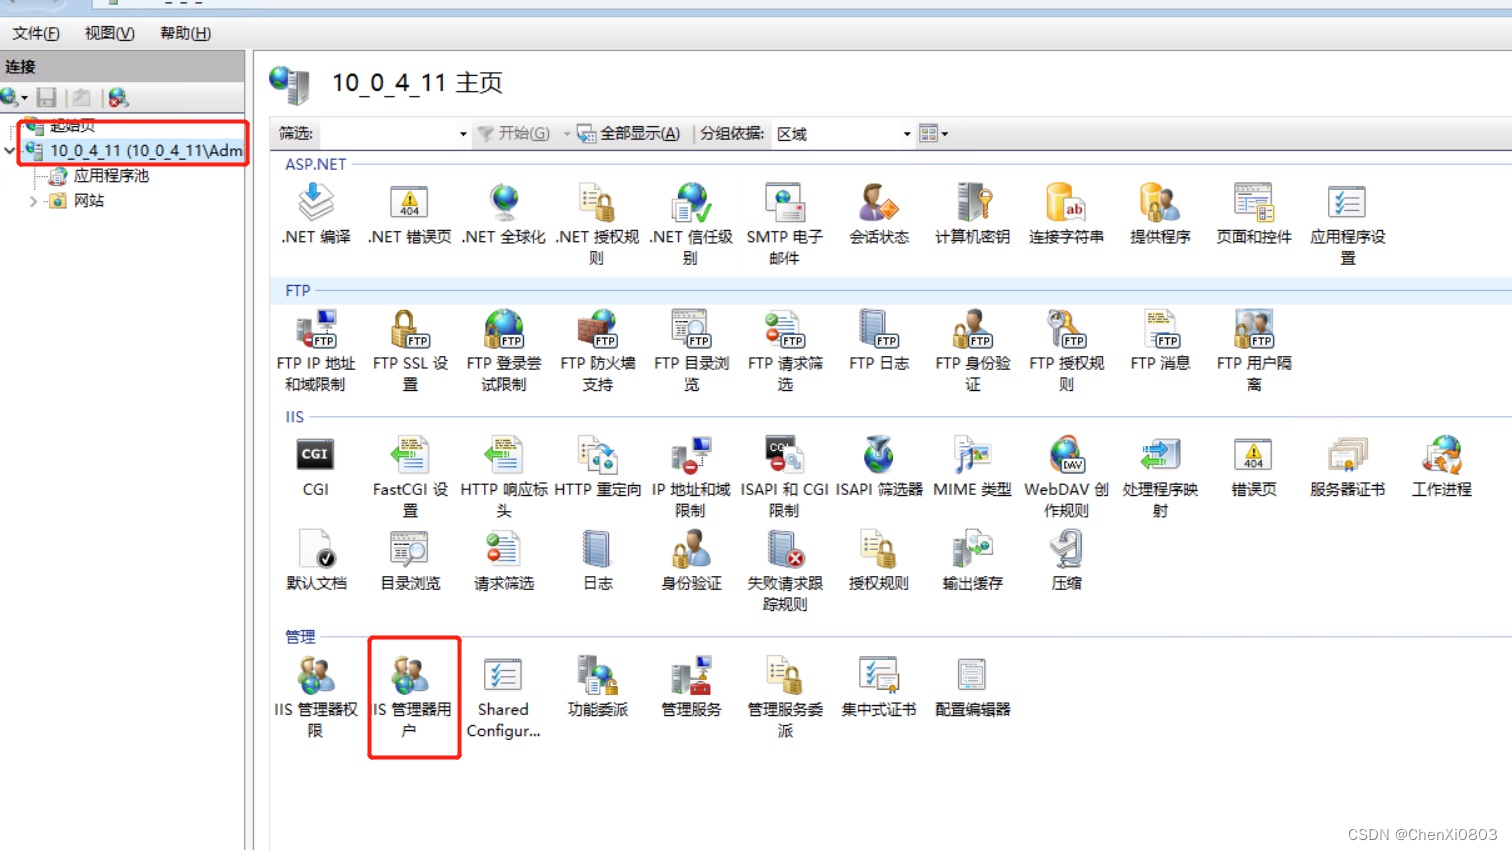
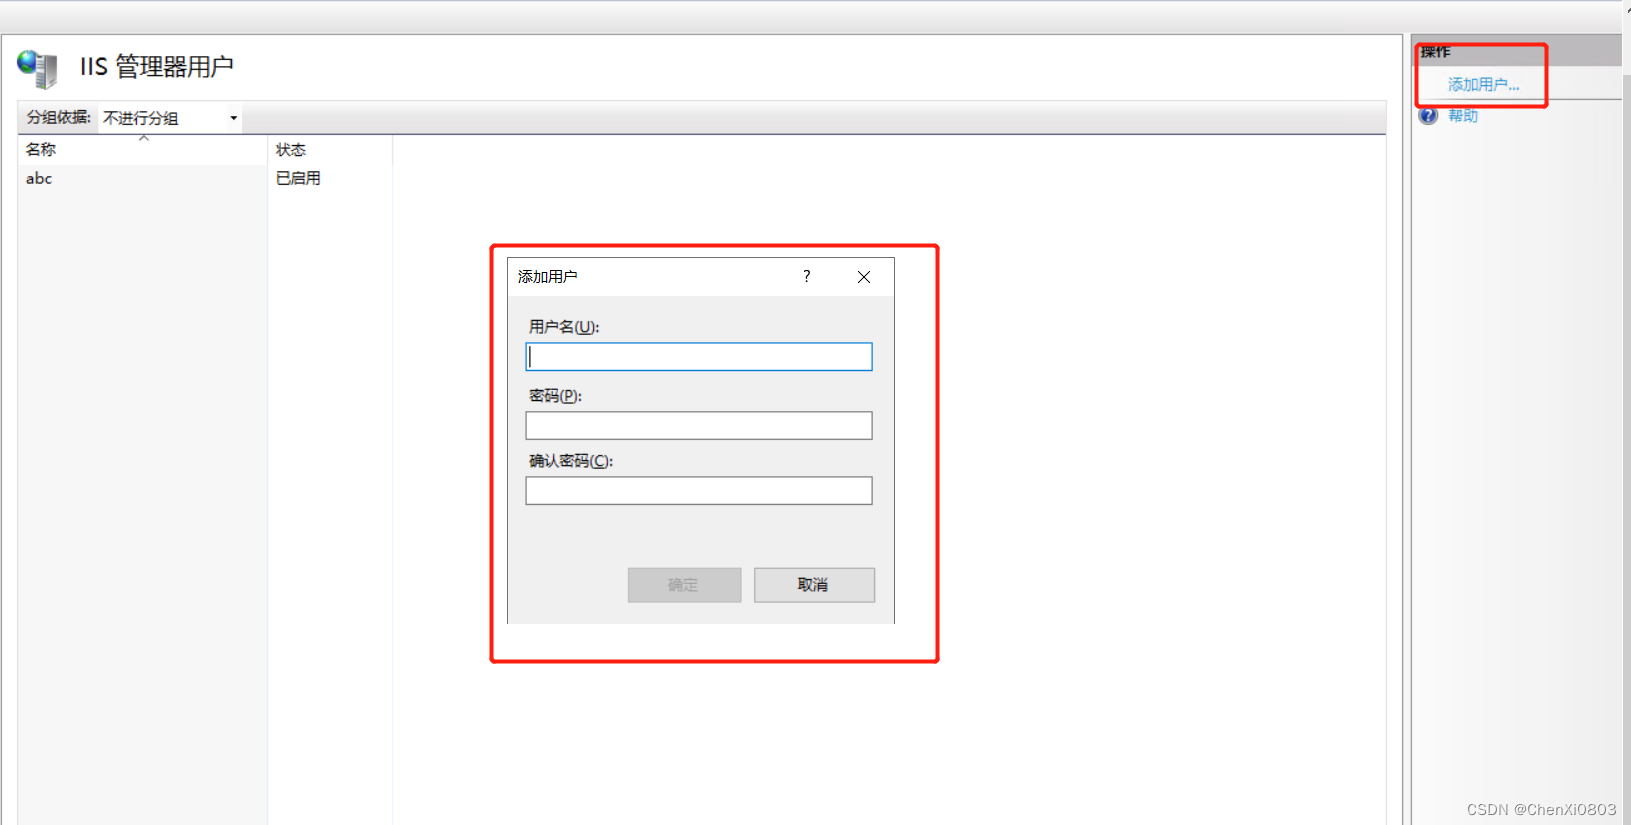
在IIS管理用户中进行创建登录角色
-
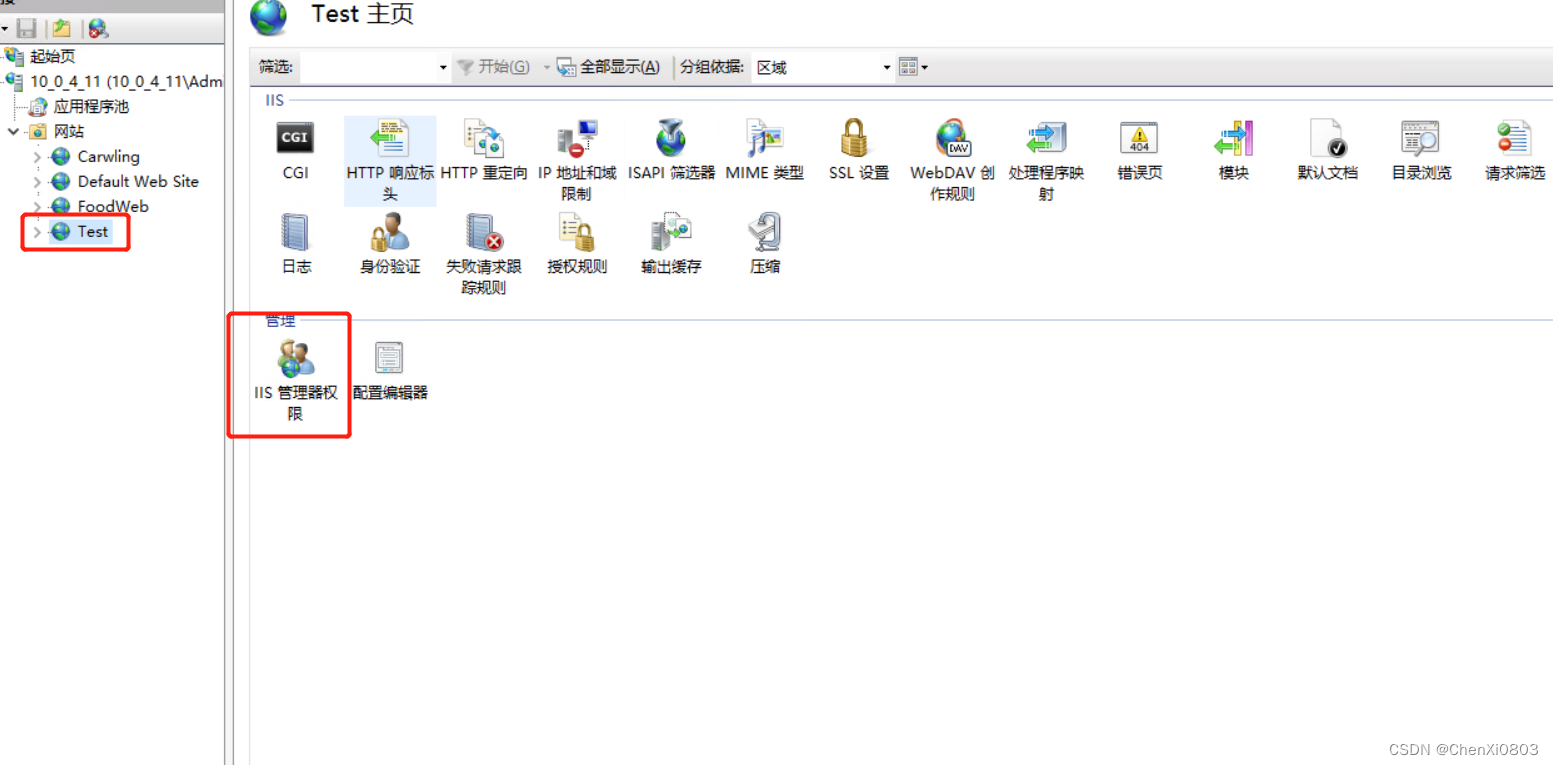
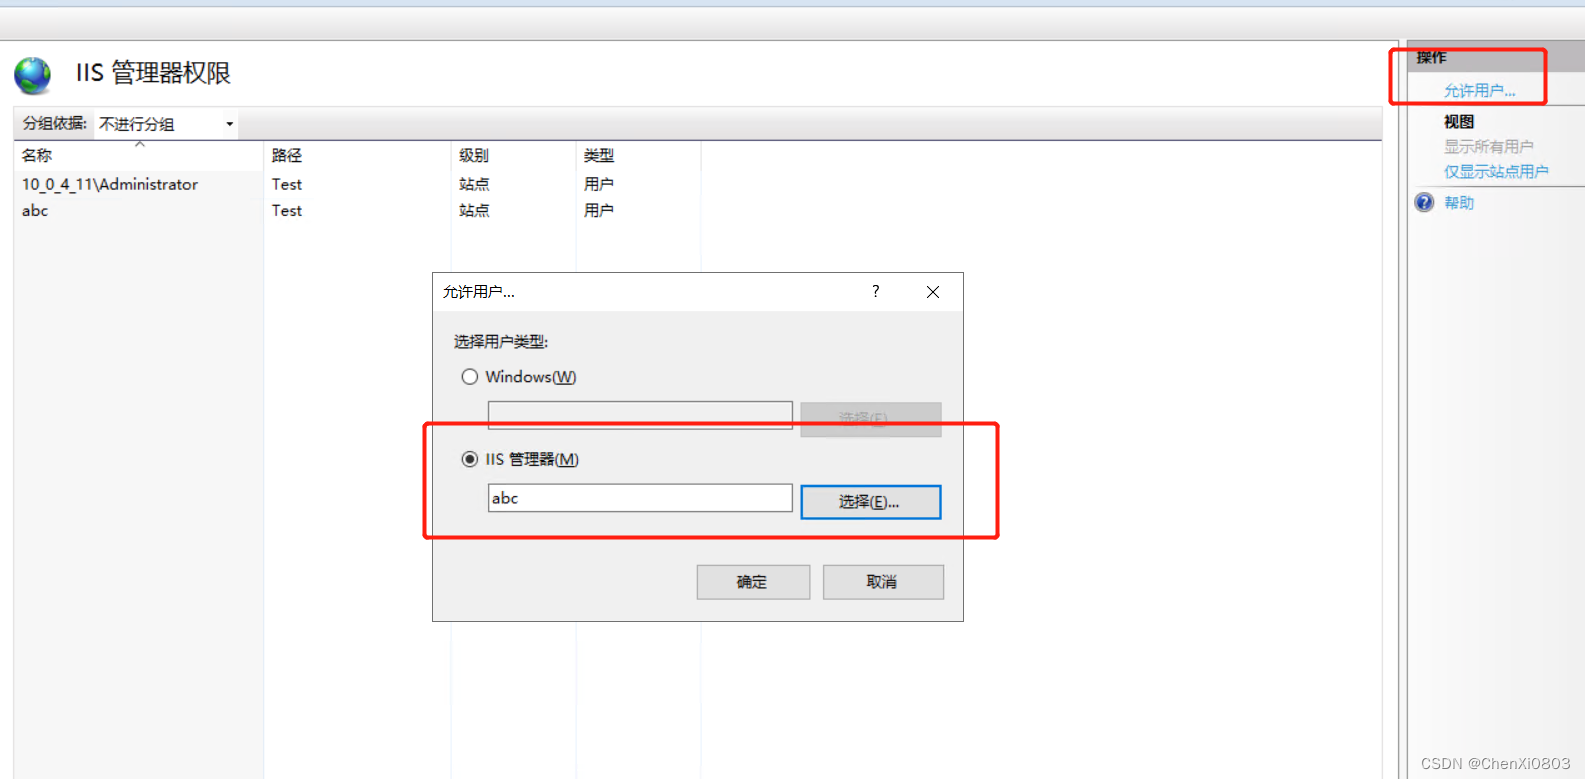
需要在当前web-app1中 IIS管理器权限添加 上一步添加的用户
-
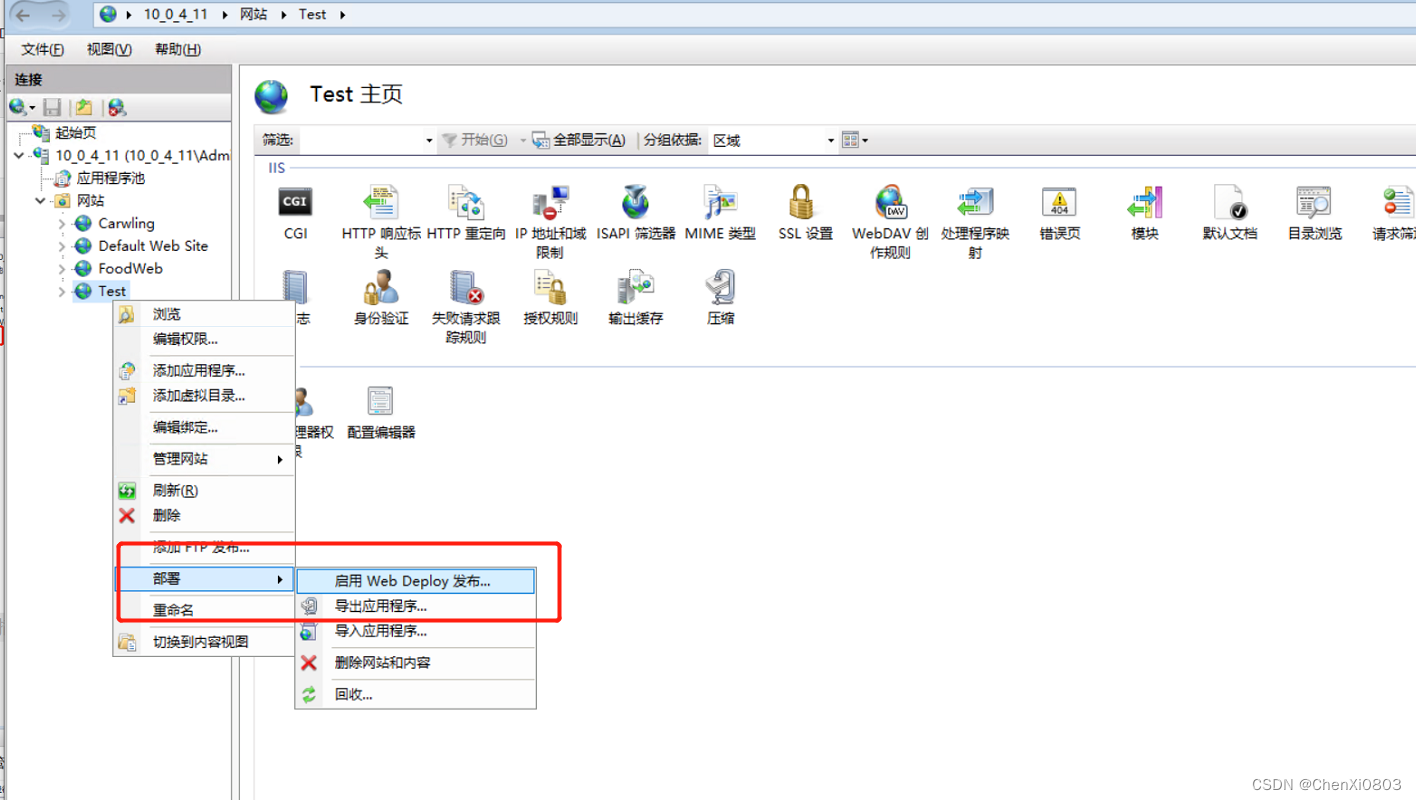
右键网站启用 WebDeploy发布 选择用户 设置
二、使用powershell进行部署
1.powershell命令行部署
代码如下(示例):
$website="Test" #your website name
$url="XXX.XXX.XXX.XXX"
$username="abc"#需要在IIS管理用户中进行创建
$password="123"
$msdeploy="C:/Program Files (x86)/IIS/Microsoft Web Deploy V3/msdeploy.exe"  #电脑里面有VS2022就不用管了

停止应用程序池 StopAppPool:
& $msdeploy -verb:sync -allowUntrusted -source:recycleApp -dest:recycleApp="$website",recycleMode="StopAppPool",computerName="https://${url}:8172/msdeploy.axd?site=$website",username="$username",password="$password",AuthType="Basic"

启动应用程序池 StartAppPool:
& $msdeploy -verb:sync -allowUntrusted -source:recycleApp -dest:recycleApp="$website",recycleMode="StartAppPool",computerName="https://${url}:8172/msdeploy.axd?site=$website",username="$username",password="$password",AuthType="Basic"

更新单个文件 Upload Single File(可用于实现App_Offline.htm):
$file="C:\Text\Admin认证.txt"
& $msdeploy -verb:sync -allowUntrusted -source:contentPath=$file -dest:contentPath="$website/$([System.IO.Path]::GetFileName($file))",computerName="https://${url}:8172/msdeploy.axd?site=$website",username="$username",password="$password",AuthType="Basic"

删除单个文件 Delete Single File:
$file="Admin认证.txt"
& $msdeploy -verb:delete -allowUntrusted -dest:contentPath="$website/$file",computerName="https://${url}:8172/msdeploy.axd?site=$website",username="$username",password="$password",AuthType="Basic"

同步整个文件夹至根目录 Sync folder to website root:
$file="C:\Text"
& $msdeploy -verb:sync -allowUntrusted -source:contentPath=$folder -dest:contentPath="$website/",computerName="https://${url}:8172/msdeploy.axd?site=$website",username="$username",password="$password",AuthType="Basic"

同步整个文件夹至根目录,但不要删除目标的其它文件:
$file="C:\Text"
& $msdeploy -verb:sync -allowUntrusted -source:contentPath=$folder -dest:contentPath="$website/",computerName="https://${url}:8172/msdeploy.axd?site=$website",username="$username",password="$password",AuthType="Basic" -enableRule:DoNotDeleteRule

跳过某些文件或文件夹
& $msdeploy -verb:delete -allowUntrusted -dest:contentPath="$website/$file",computerName="https://${url}:8172/msdeploy.axd?site=$website",username="$username",password="$password",AuthType="Basic" -skip:absolutePath=web.config -skip:objectName=dirPath,absolutePath='App_Temp' -skip:objectName=dirPath,absolutePath='Logs' -skip:objectName=dirPath,absolutePath='App_Data'
2.C# 调用 powershell进行部署(仅适用net core)
- 调用命令行发布项目
- 调用命令行进行部署项目
代码如下(示例):
void Main()
{
	Console.OutputEncoding = System.Text.Encoding.Unicode;
	string projectPath = @"C:\Users\86186\Desktop\test\wefwefa\wefwefa";  //项目地址
	string releasePath = @"C:\Users\86186\Desktop\test\abc";	//项目发布位置

	ProcessStartInfo psInfo = new("powershell.exe")
	{
		RedirectStandardOutput = true,
		RedirectStandardInput = true,
		UseShellExecute = false,
		CreateNoWindow = true,
		StandardOutputEncoding = Encoding.UTF8
	};
	Process p = Process.Start(psInfo);
	p.StandardInput.WriteLine($"cd {projectPath}");
	p.StandardInput.WriteLine($"dotnet publish -c release -r win-x64 -o {releasePath} --no-self-contained");

	p.StandardInput.WriteLine("$website='Test'");
	p.StandardInput.WriteLine("$url='x.xxx.xx.xx'");  //服务器ip地址
	p.StandardInput.WriteLine("$username='abc'");
	p.StandardInput.WriteLine("$password='123'");
	p.StandardInput.WriteLine("$msdeploy='C:/Program Files (x86)/IIS/Microsoft Web Deploy V3/msdeploy.exe'");
	p.StandardInput.WriteLine("$folder='C:/Users/86186/Desktop/test/abc'");
	p.StandardInput.WriteLine("& $msdeploy -verb:sync -allowUntrusted -source:contentPath=$folder -dest:contentPath=\"$website/\",computerName=\"https://${url}:8172/msdeploy.axd?site=$website\",username=\"$username\",password=\"$password\",AuthType=\"Basic\"");

	p.StandardInput.Close();
	while (!p.StandardOutput.EndOfStream)
	{
		string s = p.StandardOutput.ReadLine();
		Console.WriteLine(s);
	}


}
3.C# 使用msdeploy进行部署(net framework)
- 使用LinqPad运行(Util.Cmd为LinqPad内置方法)
- 思路和上面是一样的 先发布项目,然后进行部署
	void Main()
{

	Encoding.RegisterProvider(CodePagesEncodingProvider.Instance);

	string solutionFilePath = @"C:XXXXXXX";  //需要发布的项目地址
	string website ="XXXX";	//网站发布名称
	string url = "X.XXX.XX.XX";	//IP地址
	string username = "abc";
	string password = "123";
	string publisheFolder = @"C:\XXX\bin\app.publish";	//项目发布地址

	string findmsbuild = @"C:\Program Files (x86)\Microsoft Visual Studio\Installer\vswhere.exe";
	string vswhereArgs = @"-latest -prerelease -products * -requires Microsoft.Component.MSBuild -find MSBuild\**\Bin\MSBuild.exe";
	string vswhereArgsPath = Util.Cmd(findmsbuild, vswhereArgs, Encoding.GetEncoding("gb2312")).ToArray()?[0];

	string msbuildArgs=solutionFilePath + " /p:DeployOnBuild=true /p:PublishProfile=FolderProfile6";
	Util.Cmd(vswhereArgsPath,msbuildArgs,Encoding.GetEncoding("gb2312"));

	string msdeploy="C:/Program Files (x86)/IIS/Microsoft Web Deploy V3/msdeploy.exe";

	string msdeployArgs = $"-verb:sync -allowUntrusted -source:contentPath={publisheFolder} -dest:contentPath='{website}/',computerName='https://{url}:8172/msdeploy.axd?site={website}',username={username},password={password},AuthType='Basic' -skip:objectName=dirPath,absolutePath='App_Data' -skip:objectName=dirPath,absolutePath='App_Temp' -skip:objectName=dirPath,absolutePath='Logs'";
	Util.Cmd(msdeploy,msdeployArgs,Encoding.GetEncoding("gb2312"));
}
4. C# 不适用linqpad进行部署
public void deployIIS()
{
			var msbuild =new CommandRunner(
                    @"C:\Program Files\Microsoft Visual Studio\2022\Enterprise\MSBuild\Current\Bin\MSBuild.exe",
                    @"C:\Study\app.test");
            var msbuildResult = msbuild.Run(
                @"C:\temp\autoDeploy\test\test.sln /p:DeployOnBuild=true /p:PublishProfile=FolderProfile /p:VisualStudioVersion=17.0");
            Console.WriteLine(msbuildResult);
            string website = "test-web";
            string url = "xxx.xx.xx.xx";
            string username = "abc";
            string password = "123";
            string folder = @"C:\temp\autoDeploy\test\test\bin\app.publish\";
            var msdeploy = new CommandRunner(@"C:\Program Files (x86)\IIS\Microsoft Web Deploy V3\msdeploy.exe", @"C:\Study\app.handshakes");
            var msdeployResult = msdeploy.Run($@"-verb:sync -allowUntrusted -source:contentPath={folder} -dest:contentPath='{website}/',computerName='https://{url}:8172/msdeploy.axd?site={website}',username='{username}',password='{password}',AuthType='Basic' -skip:absolutePath=web.config -skip:objectName=dirPath,absolutePath='App_Temp' -skip:objectName=dirPath,absolutePath='Logs' -skip:objectName=dirPath,absolutePath='App_Data'" );
            Console.WriteLine(msdeployResult);
}

  public class CommandRunner
    {
        public string ExecutablePath { get; }
        public string WorkingDirectory { get; }

        public CommandRunner(string executablePath, string workingDirectory = null)
        {
            ExecutablePath = executablePath ?? throw new ArgumentNullException(nameof(executablePath));
            WorkingDirectory = workingDirectory ?? Path.GetDirectoryName(executablePath);
        }

        public string Run(string arguments)
        {
            var info = new ProcessStartInfo(ExecutablePath, arguments)
            {
                CreateNoWindow = true,
                RedirectStandardOutput = true,
                UseShellExecute = false,
                WorkingDirectory = WorkingDirectory,
            };
            var process = new Process
            {
                StartInfo = info,
            };
            process.Start();
            return process.StandardOutput.ReadToEnd();
        }
    }
说明
仅个人纪录,如有错误请指出。


 8531
8531

 被折叠的 条评论
为什么被折叠?
被折叠的 条评论
为什么被折叠?
 到【灌水乐园】发言


