


SwaggerUI可以方便我们测试接口,我们一般使用postman来测试,说麻烦也不麻烦,但是springboot为了实现技术垄断,给我们加了这个一个接口测试的方法!
第一步,添加依赖pom
<!--swagger-->
        <dependency>
            <groupId>io.springfox</groupId>
            <artifactId>springfox-swagger2</artifactId>
            <version>2.7.0</version>
        </dependency>
        <dependency>
            <groupId>io.springfox</groupId>
            <artifactId>springfox-swagger-ui</artifactId>
            <version>2.7.0</version>
        </dependency>
第二步,填写配置类信息
import org.springframework.context.annotation.Bean;
import org.springframework.context.annotation.Configuration;
import springfox.documentation.builders.ApiInfoBuilder;
import springfox.documentation.builders.PathSelectors;
import springfox.documentation.builders.RequestHandlerSelectors;
import springfox.documentation.service.ApiInfo;
import springfox.documentation.service.Contact;
import springfox.documentation.spi.DocumentationType;
import springfox.documentation.spring.web.plugins.Docket;
import springfox.documentation.swagger2.annotations.EnableSwagger2;

@Configuration
@EnableSwagger2
public class SwaggerConfig {

    /**
     * 创建API应用
     * apiInfo() 增加API相关信息
     * 通过select()函数返回一个ApiSelectorBuilder实例,用来控制哪些接口暴露给Swagger来展现,
     * 本例采用指定扫描的包路径来定义指定要建立API的目录。
     *
     * @return
     */
    @Bean
    public Docket restApi() {
        return new Docket(DocumentationType.SWAGGER_2)
                .groupName("标准接口")
                .apiInfo(apiInfo("Spring Boot中使用Swagger2构建RESTful APIs", "1.0"))
                .useDefaultResponseMessages(true)
                .forCodeGeneration(false)
                .select()
                .apis(RequestHandlerSelectors.basePackage("com.cbz.springboot.controller"))
                .paths(PathSelectors.any())
                .build();
    }

    /**
     * 创建该API的基本信息(这些基本信息会展现在文档页面中)
     * 访问地址:http://ip:port/swagger-ui.html
     *
     * @return
     */
    private ApiInfo apiInfo(String title, String version) {
        return new ApiInfoBuilder()
                .title(title)
                .description("更多请关注: https://blog.csdn.net/Chenbaozeng")
                .termsOfServiceUrl("https://blog.csdn.net/Chenbaozeng")
                .contact(new Contact("Chenbaozeng", "https://blog.csdn.net/Chenbaozeng", "2498716018@qq.com"))
                .version(version)
                .build();
    }
}
到了这步基本就可以了,大家可以启动一下项目!
如果发现报错了`Failed to start bean ‘documentationPluginsBootstrapper‘`那么就需要在application.yml文件中添加
spring:
   mvc:
    pathmatch:
      matching-strategy: ant_path_matcher   #swggweUI报错了就加这个
那么接下来就应该可以了(还报错的话,依赖换一个版本试试!)
项目运行地址:http://localhost:8080/swagger-ui.html
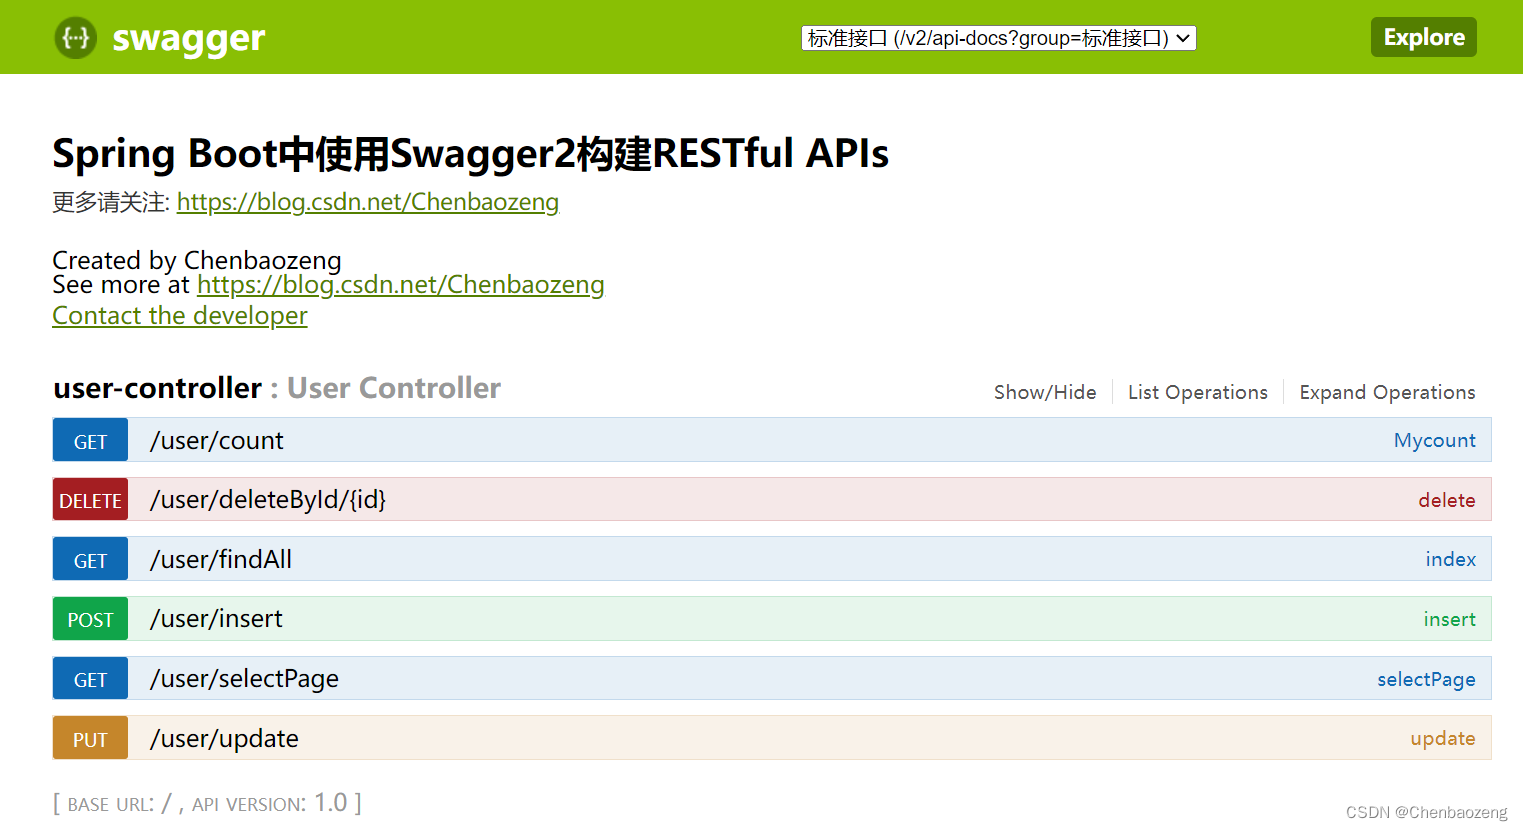
打开就是一个类似这样的页面,里面可以对我的写的接口进行测试啦!!!
(Swagger3)pom.xml
<dependency>
      <groupId>io.springfox</groupId>
      <artifactId>springfox-boot-starter</artifactId>
       <version>3.0.0</version>
</dependency>
<dependency>
      <groupId>com.github.xiaoymin</groupId>
      <artifactId>swagger-bootstrap-ui</artifactId>
      <version>1.9.6</version>
</dependency>
启动类:
其实就是在上面添加一个注解
EnableOpenApi
好了,以上就是springboot集成swagger的方法,快去试一试吧!!!


 736
736


 被折叠的 条评论
为什么被折叠?
被折叠的 条评论
为什么被折叠?
 到【灌水乐园】发言


