


| 🚀 ShardingSphere 🚀 |
🌲 算法刷题专栏 | 面试必备算法 | 面试高频算法 🍀
🌲 越难的东西,越要努力坚持,因为它具有很高的价值,算法就是这样✨
🌲 作者简介:硕风和炜,CSDN-Java领域优质创作者🏆,保研|国家奖学金|高中学习JAVA|大学完善JAVA开发技术栈|面试刷题|面经八股文|经验分享|好用的网站工具分享💎💎💎
🌲 恭喜你发现一枚宝藏博主,赶快收入囊中吧🌻
🌲 人生如棋,我愿为卒,行动虽慢,可谁曾见我后退一步?🎯🎯
| 🚀 ShardingSphere 🚀 |


🍀 一.Sharding-JDBC分布式事务详解
🥦 1.1 本地事务 & 事务四大特性
数据库事务需要满足 ACID(原子性、一致性、隔离性、持久性)四个特性:
- 原子性(Atomicity)指事务作为整体来执行,要么全部执行,要么全不执行;
- 一致性(Consistency)指事务应确保数据从一个一致的状态转变为另一个一致的状态;
- 隔离性(Isolation)指多个事务并发执行时,一个事务的执行不应影响其他事务的执行;
- 持久性(Durability)指已提交的事务修改数据会被持久保存。
在单一数据节点中,事务仅限于对单一数据库资源的访问控制,称之为本地事务。 几乎所有的成熟的关系型数据库都提供了对本地事务的原生支持。 但是在基于微服务的分布式应用环境下,越来越多的应用场景要求对多个服务的访问及其相对应的多个数据库资源能纳入到同一个事务当中,分布式事务应运而生。
关系型数据库虽然对本地事务提供了完美的 ACID 原生支持。 但在分布式的场景下,它却成为系统性能的桎梏。 如何让数据库在分布式场景下满足 ACID 的特性或找寻相应的替代方案,是分布式事务的重点工作。
🥦 1.2 分布式事务
ShardingSphere 对外提供 begin/commit/rollback 传统事务接口,通过 LOCAL,XA,BASE 三种模式提供了分布式事务的能力。
- LOCAL 事务:LOCAL 模式基于 ShardingSphere 代理的数据库 begin/commit/rolllback 的接口实现, 对于一条逻辑 SQL,ShardingSphere 通过 begin 指令在每个被代理的数据库开启事务,并执行实际 SQL,并执行 commit/rollback。 由于每个数据节点各自管理自己的事务,它们之间没有协调以及通信的能力,也并不互相知晓其他数据节点事务的成功与否。 在性能方面无任何损耗,但在强一致性以及最终一致性方面不能够保证。
- XA 事务:采用的是 X/OPEN 组织所定义的 DTP 模型 所抽象的 AP(应用程序), TM(事务管理器)和 RM(资源管理器) 概念来保证分布式事务的强一致性。 其中 TM 与 RM 间采用 XA 的协议进行双向通信,通过两阶段提交实现。 与传统的本地事务相比,XA 事务增加了准备阶段,数据库除了被动接受提交指令外,还可以反向通知调用方事务是否可以被提交。 TM 可以收集所有分支事务的准备结果,并于最后进行原子提交,以保证事务的强一致性。
- 柔性事务:如果将实现了 ACID 的事务要素的事务称为刚性事务的话,那么基于 BASE 事务要素的事务则称为柔性事务。 BASE 是基本可用、柔性状态和最终一致性这三个要素的缩写。
- 基本可用(Basically Available)保证分布式事务参与方不一定同时在线;
- 柔性状态(Soft state)则允许系统状态更新有一定的延时,这个延时对客户来说不一定能够察觉;
- 最终一致性(Eventually consistent)通常是通过消息传递的方式保证系统的最终一致性。
在 ACID 事务中对隔离性的要求很高,在事务执行过程中,必须将所有的资源锁定。 柔性事务的理念则是通过业务逻辑将互斥锁操作从资源层面上移至业务层面。 通过放宽对强一致性要求,来换取系统吞吐量的提升。
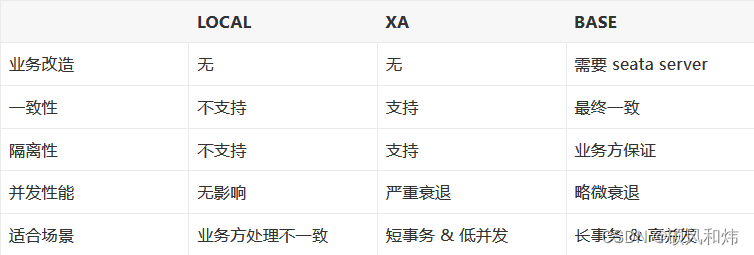
🥦 1.3 LOCAL vs XA vs BASE
基于 ACID 的强一致性事务和基于 BASE 的最终一致性事务都不是银弹,只有在最适合的场景中才能发挥它们的最大长处。 Apache ShardingSphere 集成了 SEATA 作为柔性事务的使用方案。 可通过下表详细对比它们之间的区别,以帮助开发者进行技术选型。
🍀 二.Sharding-JDBC分布式事务实战
🥦 2.1 数据环境准备
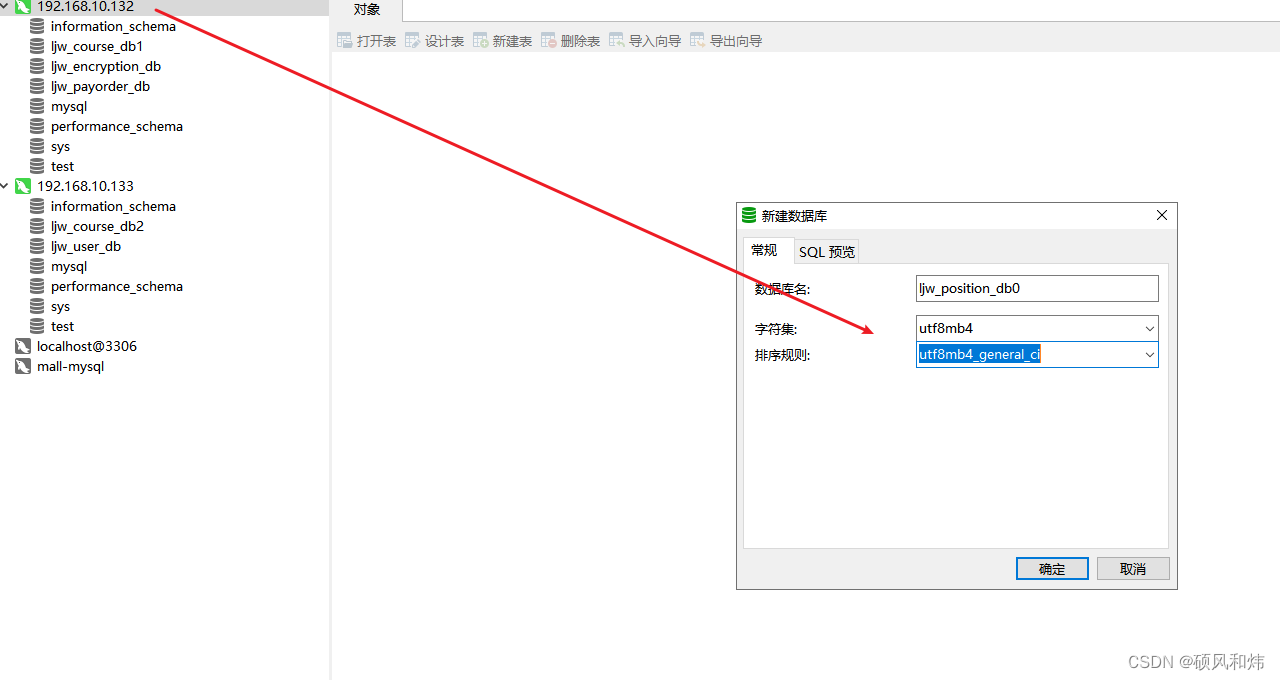
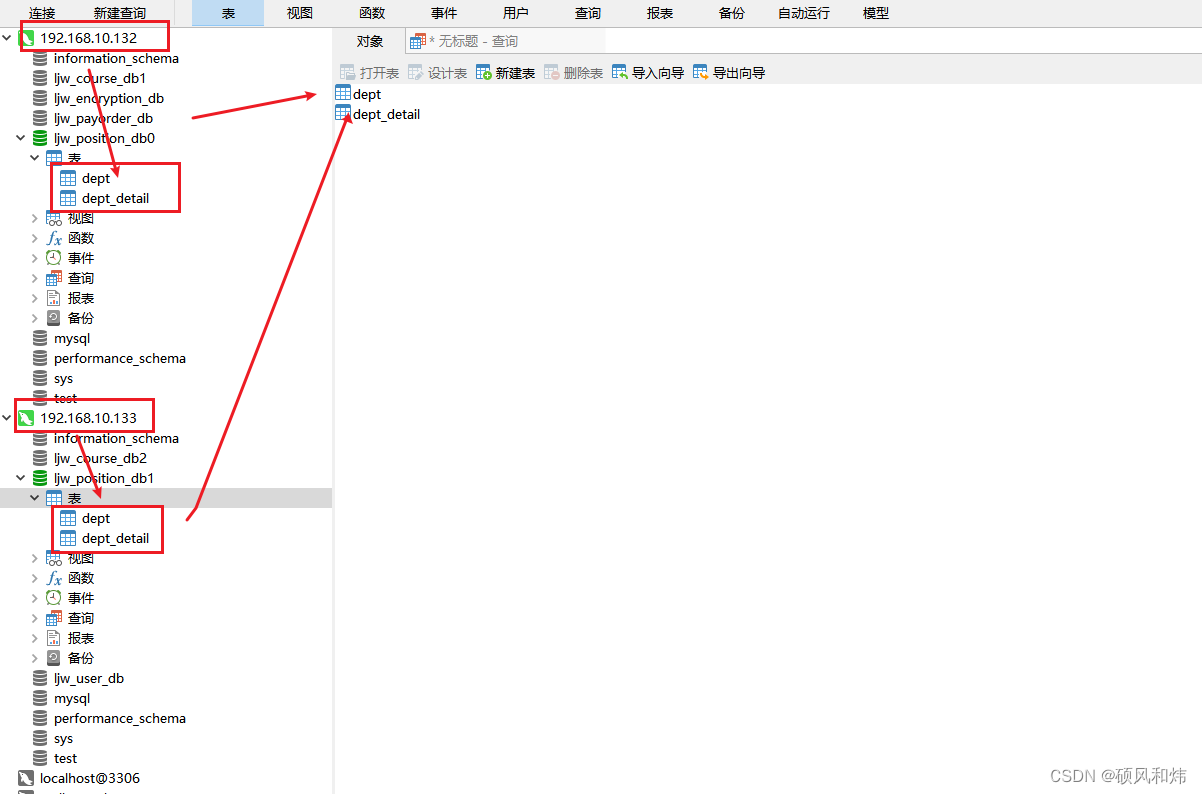
在192.168.10.132服务器上创建ljw_position_db0数据库,然后在数据库中创建dept职位表和dept_detail职位描述表 ;
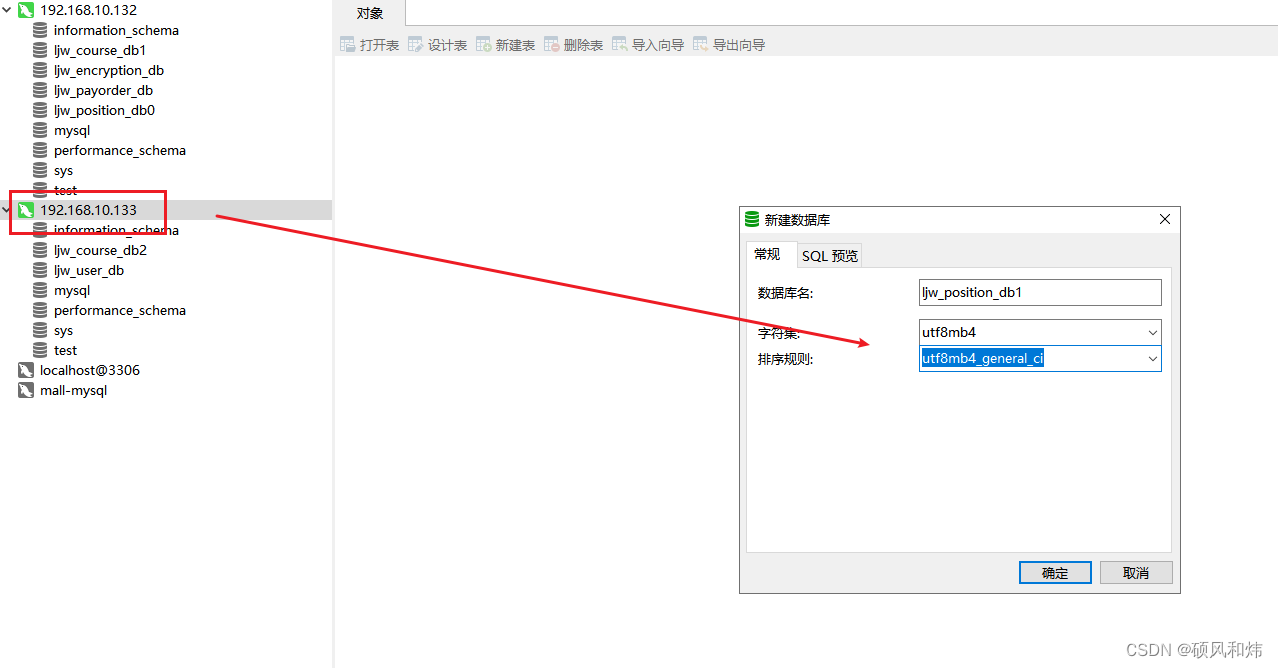
在192.168.10.133服务器上创建ljw_position_db1数据库,然后在数据库中创建dept职位表和dept_detail职位描述表 。
-- 职位表
CREATE TABLE `dept` (
  `Id` bigint(11) NOT NULL AUTO_INCREMENT,
  `name` varchar(256) DEFAULT NULL,
  `salary` varchar(50) DEFAULT NULL,
  `city` varchar(256) DEFAULT NULL,
  PRIMARY KEY (`Id`)
) ENGINE=InnoDB DEFAULT CHARSET=utf8mb4;

-- 职位描述表
CREATE TABLE `dept_detail` (
  `Id` bigint(11) NOT NULL AUTO_INCREMENT,
  `pid` bigint(11) NOT NULL DEFAULT '0',
  `description` text,
  PRIMARY KEY (`Id`)
) ENGINE=InnoDB DEFAULT CHARSET=utf8mb4;
🥦 2.2 创建SpringBoot程序 - 导入依赖
引入依赖 (注意: 在这里使用ShardingSphere4.1版本为案例进行分布式事务的实战)
    <parent>
        <groupId>org.springframework.boot</groupId>
        <artifactId>spring-boot-starter-parent</artifactId>
        <version>2.2.5.RELEASE</version>
        <relativePath/> <!-- lookup parent from repository -->
    </parent>

    <properties>
        <java.version>1.8</java.version>
    </properties>

    <dependencies>
        <dependency>
            <groupId>org.springframework.boot</groupId>
            <artifactId>spring-boot-starter-test</artifactId>
        </dependency>

        <dependency>
            <groupId>org.springframework.boot</groupId>
            <artifactId>spring-boot-starter</artifactId>
        </dependency>

        <dependency>
            <groupId>org.springframework.boot</groupId>
            <artifactId>spring-boot-starter-web</artifactId>
        </dependency>

        <dependency>
            <groupId>mysql</groupId>
            <artifactId>mysql-connector-java</artifactId>
            <scope>runtime</scope>
        </dependency>

        <dependency>
            <groupId>org.projectlombok</groupId>
            <artifactId>lombok</artifactId>
            <optional>true</optional>
        </dependency>

        <dependency>
            <groupId>org.mybatis.spring.boot</groupId>
            <artifactId>mybatis-spring-boot-starter</artifactId>
            <version>2.1.3</version>
        </dependency>

        <dependency>
            <groupId>com.baomidou</groupId>
            <artifactId>mybatis-plus-boot-starter</artifactId>
            <version>3.4.1</version>
        </dependency>

        <dependency>
            <groupId>com.baomidou</groupId>
            <artifactId>mybatis-plus-generator</artifactId>
            <version>3.4.1</version>
        </dependency>

        <dependency>
            <groupId>org.apache.shardingsphere</groupId>
            <artifactId>sharding-jdbc-spring-boot-starter</artifactId>
            <version>4.1.0</version>
        </dependency>

        <dependency>
            <groupId>org.apache.shardingsphere</groupId>
            <artifactId>sharding-core-common</artifactId>
            <version>4.1.0</version>
        </dependency>

        <dependency>
            <groupId>org.apache.commons</groupId>
            <artifactId>commons-lang3</artifactId>
            <version>3.10</version>
        </dependency>

        <dependency>
            <groupId>cn.hutool</groupId>
            <artifactId>hutool-all</artifactId>
            <version>5.5.8</version>
        </dependency>

        <dependency>
            <groupId>com.github.xiaoymin</groupId>
            <artifactId>knife4j-spring-boot-starter</artifactId>
            <version>2.0.5</version>
        </dependency>

        <dependency>
            <groupId>com.google.guava</groupId>
            <artifactId>guava</artifactId>
            <version>20.0</version>
            <scope>compile</scope>
        </dependency>


        <!-- XA模式-->
        <dependency>
            <groupId>org.apache.shardingsphere</groupId>
            <artifactId>sharding-transaction-xa-core</artifactId>
            <version>4.1.0</version>
        </dependency>

    </dependencies>

    <build>
        <plugins>
            <plugin>
                <groupId>org.springframework.boot</groupId>
                <artifactId>spring-boot-maven-plugin</artifactId>
            </plugin>
        </plugins>
    </build>
🥦 2.3 创建SpringBoot程序 - 实体类
与数据库表中对应的实体类
@TableName("dept")
@Data
@ToString
public class Dept{

    @TableId(type = IdType.AUTO)
    private Long id;

    private String name;

    private String salary;

    private String city;
}
@TableName("dept_detail")
@Data
@ToString
public class DeptDetail {

    @TableId(type = IdType.AUTO)
    private Long id;

    private Long pid;

    private String description;

}
🥦 2.4 创建SpringBoot程序 - 数据库Mapper接口 & 主启动类
编写对应的数据库持久层UserMapper接口
@Repository
public interface DeptMapper extends BaseMapper<Dept> {

}

@Repository
public interface DeptDetailMapper extends BaseMapper<DeptDetail> {

}
@Repository注解的类需要交给我们的Spring容器进行管理,因此需要我们在主启动类加上扫描接口的注解。
@SpringBootApplication
@MapperScan("com.ljw.mapper")
public class ShardingSphereApplication {

    public static void main(String[] args) {
        SpringApplication.run(ShardingSphereApplication.class, args);
    }
}
🥦 2.5 创建SpringBoot程序 - 数据加密配置文件
配置读写分离相关配置的信息
# 应用名称
spring.application.name=sharding-jdbc-transaction

# 打印SQl
spring.shardingsphere.props.sql-show=true

# 端口
server.port=8888


# 配置数据源
spring.shardingsphere.datasource.names=db0,db1

# 数据源1
spring.shardingsphere.datasource.db0.type=com.zaxxer.hikari.HikariDataSource
spring.shardingsphere.datasource.db0.driver-class-name=com.mysql.jdbc.Driver
spring.shardingsphere.datasource.db0.jdbc-url=jdbc:mysql://192.168.10.132:3306/ljw_position_db0?useUnicode=true&characterEncoding=utf-8&useSSL=false
spring.shardingsphere.datasource.db0.username=root
spring.shardingsphere.datasource.db0.password=root

# 数据源2
spring.shardingsphere.datasource.db1.type=com.zaxxer.hikari.HikariDataSource
spring.shardingsphere.datasource.db1.driver-class-name=com.mysql.jdbc.Driver
spring.shardingsphere.datasource.db1.jdbc-url=jdbc:mysql://192.168.10.133:3306/ljw_position_db1?useUnicode=true&characterEncoding=utf-8&useSSL=false
spring.shardingsphere.datasource.db1.username=root
spring.shardingsphere.datasource.db1.password=root

# 分库策略
spring.shardingsphere.sharding.tables.position.database-strategy.inline.sharding-column=id
spring.shardingsphere.sharding.tables.position.database-strategy.inline.algorithm-expression=db$->{id % 2}

spring.shardingsphere.sharding.tables.position_detail.database-strategy.inline.sharding-column=pid
spring.shardingsphere.sharding.tables.position_detail.database-strategy.inline.algorithm-expression=db$->{pid % 2}

# 分布式主键生成
spring.shardingsphere.sharding.tables.position.key-generator.column=id
spring.shardingsphere.sharding.tables.position.key-generator.type=SNOWFLAKE

spring.shardingsphere.sharding.tables.position_detail.key-generator.column=id
spring.shardingsphere.sharding.tables.position_detail.key-generator.type=SNOWFLAKE
🍀 三.Sharding-JDBC分布式事务实战测试
🥦 3.1 编写测试接口 - 不做任何事务处理
@RestController
@RequestMapping("/dept")
public class DeptController {

    @Autowired
    private DeptMapper deptMapper;

    @Autowired
    private DeptDetailMapper deptDetailMapper;

    @RequestMapping("/save")
    public String saveDept(){
        for(int i=0;i<6;i++){
            Dept dept = new Dept();
            dept.setName("Java高级开发工程师" + i);
            dept.setSalary("40K");
            dept.setCity("北京");
            deptMapper.insert(dept);
            // 注意 : 模拟出现 BUG -> 然后去数据库中验证数据是否插入!
            if(i == 4){
                throw new RuntimeException("模拟出现 BUG -> 然后去数据库中验证数据是否插入!");
            }
            DeptDetail deptDetail = new DeptDetail();
            deptDetail.setPid(dept.getId());
            deptDetail.setDescription("这是Java高级开发工程师具体的职位描述" + i);
            deptDetailMapper.insert(deptDetail);
        }
        return "Save Successfully!";
    }
}
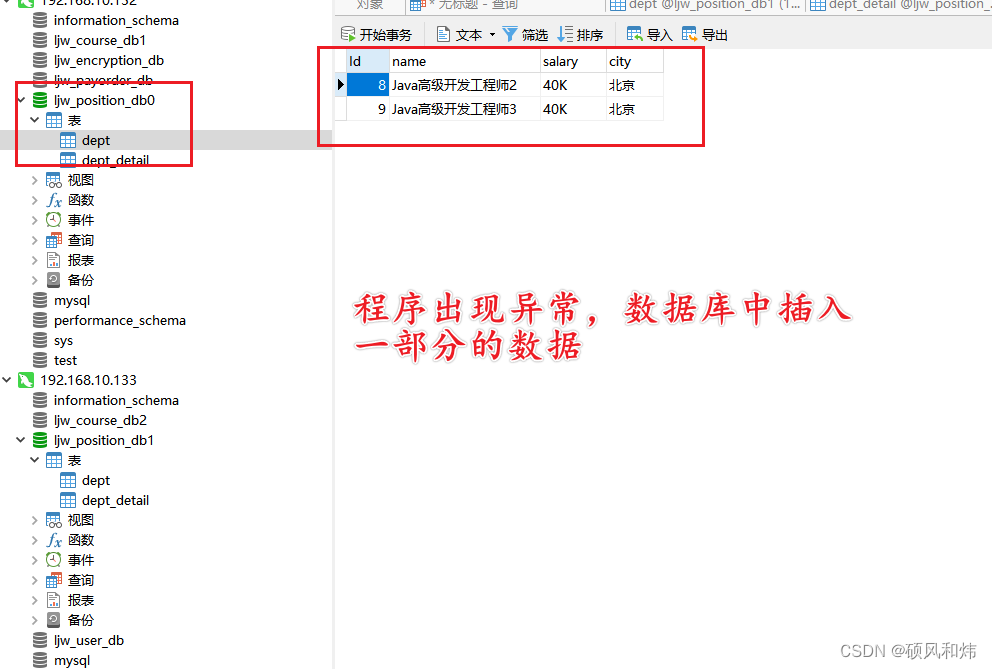
启动项目打开浏览器,访问接口http://localhost:8888/dept/save,到数据库中验证数据!
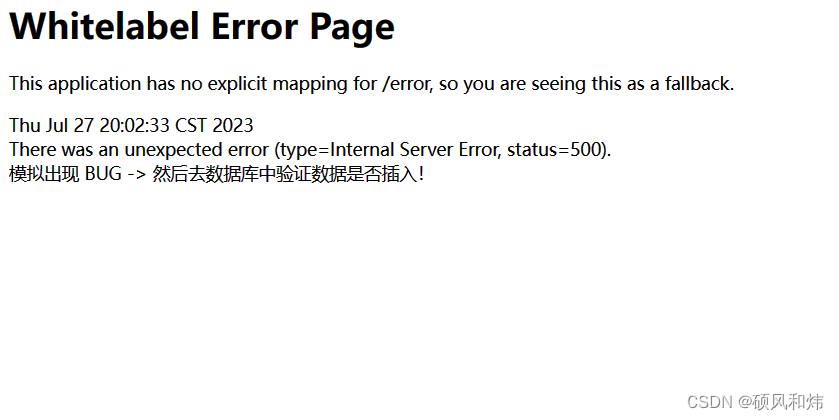
程序出现异常,检查数据库, 发现数据库的数据插入了,但是数据是不完整。
🥦 3.2 编写测试接口 - 添加本地事务处理注解
主启动类添加@EnableTransactionManagement注解,开启声明式事务
@EnableTransactionManagement
@SpringBootApplication
@MapperScan("com.ljw.mapper")
public class ShardingSphereApplication {

    public static void main(String[] args) {
        SpringApplication.run(ShardingSphereApplication.class, args);
    }
}
方法上添加@Transactional注解
@RestController
@RequestMapping("/dept")
public class DeptController {

    @Autowired
    private DeptMapper deptMapper;

    @Autowired
    private DeptDetailMapper deptDetailMapper;

	@Transactional
    @RequestMapping("/save")
    public String saveDept(){
        for(int i=0;i<6;i++){
            Dept dept = new Dept();
            dept.setName("Java高级开发工程师" + i);
            dept.setSalary("40K");
            dept.setCity("北京");
            deptMapper.insert(dept);
            // 注意 : 模拟出现 BUG -> 然后去数据库中验证数据是否插入!
            if(i == 4){
                throw new RuntimeException("模拟出现 BUG -> 然后去数据库中验证数据是否插入!");
            }
            DeptDetail deptDetail = new DeptDetail();
            deptDetail.setPid(dept.getId());
            deptDetail.setDescription("这是Java高级开发工程师具体的职位描述" + i);
            deptDetailMapper.insert(deptDetail);
        }
        return "Save Successfully!";
    }
}
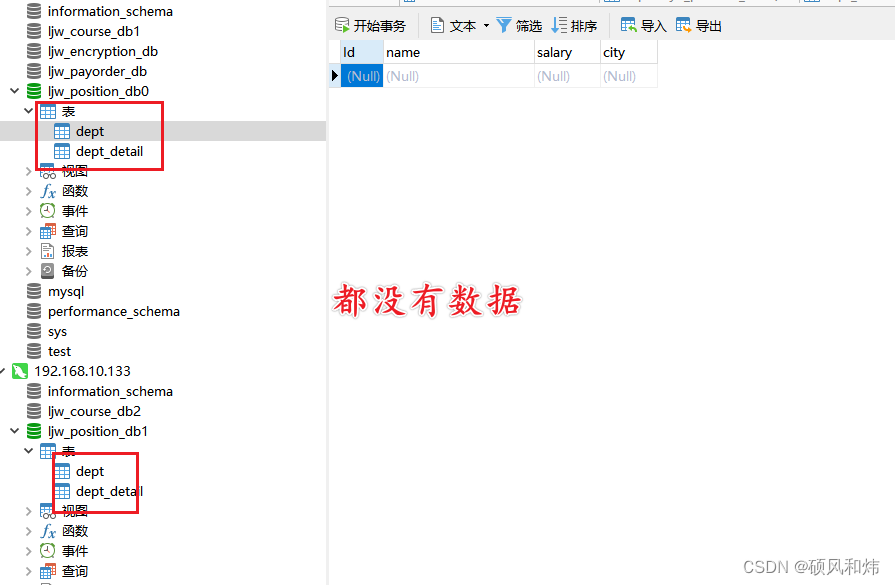
启动项目打开浏览器,访问接口http://localhost:8888/dept/save,到数据库中验证数据(项目启动之前要把数据库中原来的数据删除!)!

程序出现错误,检查数据库, 发现数据库中没有任何数据,说明数据发生了回滚的操作。
问题来了:
问题1: 为什么会出现回滚操作呢?此时是分布式环境呀? 难道@Transactional注解可以解决分布式事务吗?(@Transactional不能解决分布式事务)
-
Sharding-JDBC中的本地事务在以下两种情况是完全支持的:
- 支持非跨库事务,比如仅分表、在单库中操作;
- 支持因逻辑异常导致的跨库事务(这点非常重要),比如上述的操作,跨两个库插入数据,中间存在逻辑的错误哦!
-
本地事务不支持的情况:
-
不支持因网络、硬件异常导致的跨库事务;例如:同一事务中,跨两个库更新,更新完毕后、未提交之前,第一个库宕机,则只有第二个库数据提交。
对于因网络、硬件异常导致的跨库事务无法支持很好理解,在分布式事务中无论是两阶段还是三阶段提交都是直接或者间接满足以下两个条件:
1.有一个事务协调者 2.事务日志记录
本地事务并未满足上述条件,自然是无法支持
-
问题2:为什么逻辑异常导致的跨库事务能够支持?
- Sharding-JDBC中的一条SQL会经过改写,拆分成不同数据源的SQL,比如一条select语句,会按照其中分片键拆分成对应数据源的SQL,然后在不同数据源中的执行,最终会提交或者回滚。
🥦 3.3 编写测试接口 - 添加分布式事务XA
导入sharding-transaction-xa-core依赖
<!--XA模式-->
<dependency>
    <groupId>org.apache.shardingsphere</groupId>
    <artifactId>sharding-transaction-xa-core</artifactId>
    <version>4.1.0</version>
</dependency>
方法上添加@ShardingTransactionType(TransactionType.XA)注解
@RestController
@RequestMapping("/dept")
public class DeptController {

    @Autowired
    private DeptMapper deptMapper;

    @Autowired
    private DeptDetailMapper deptDetailMapper;

	@Transactional
	@ShardingTransactionType(TransactionType.XA)
    @RequestMapping("/save")
    public String saveDept(){
        for(int i=0;i<6;i++){
            Dept dept = new Dept();
            dept.setName("Java高级开发工程师" + i);
            dept.setSalary("40K");
            dept.setCity("北京");
            deptMapper.insert(dept);
            // 注意 : 模拟出现 BUG -> 然后去数据库中验证数据是否插入!
            if(i == 4){
                throw new RuntimeException("模拟出现 BUG -> 然后去数据库中验证数据是否插入!");
            }
            DeptDetail deptDetail = new DeptDetail();
            deptDetail.setPid(dept.getId());
            deptDetail.setDescription("这是Java高级开发工程师具体的职位描述" + i);
            deptDetailMapper.insert(deptDetail);
        }
        return "Save Successfully!";
    }
}
启动项目打开浏览器,访问接口http://localhost:8888/dept/save,到数据库中验证数据!(项目启动之前记得清除数据!)

程序出现错误,检查数据库, 发现数据库中没有任何数据,说明数据发生了回滚的操作。
🍀 四.总结
本篇文章主要讲解了Sharding-JDBC分布式事务详解与实战,实操过程非常重要,大家一定要动手亲自实践一下,必须掌握。下节预告,ShardingProxy实战,大家敬请期待呦!!!。
💬 五.共勉
| 最后,我想和大家分享一句一直激励我的座右铭,希望可以与大家共勉! |


 2464
2464


 被折叠的 条评论
为什么被折叠?
被折叠的 条评论
为什么被折叠?
 到【灌水乐园】发言


