


当我们的项目已经跑起来后,我们首先需要的是完成用户注册的功能实现。这里我们进行设计。
一、前端服务(Website)的搭建
1、新建一个SpringBoot的服务
进行依赖的添加和设计
   <dependencies>
        <!--开发中功能的依赖-->
        <dependency>
            <groupId>org.springframework.boot</groupId>
            <artifactId>spring-boot-starter-web</artifactId>
        </dependency>
        <dependency>
            <groupId>org.springframework.boot</groupId>
            <artifactId>spring-boot-starter-freemarker</artifactId>
        </dependency>
        <!-- <dependency>
             <groupId>org.springframework.boot</groupId>
             <artifactId>spring-boot-devtools</artifactId>
         </dependency>-->
        <dependency>
            <groupId>commons-io</groupId>
            <artifactId>commons-io</artifactId>
            <version>2.4</version>
        </dependency>
        <dependency>
            <groupId>commons-fileupload</groupId>
            <artifactId>commons-fileupload</artifactId>
            <version>1.3.2</version>
        </dependency>
        <dependency>
            <groupId>com.alibaba.boot</groupId>
            <artifactId>dubbo-spring-boot-starter</artifactId>
        </dependency>
        <!--api依赖-->
        <dependency>
            <groupId>com.javah5.parent</groupId>
            <artifactId>trip-common</artifactId>
        </dependency>
        <dependency>
            <groupId>com.javah5.parent</groupId>
            <artifactId>trip-member-api</artifactId>
        </dependency>
    </dependencies>
##2、application.properties的设计
server.port=8888
#服务名
spring.application.name=website-client-consumer
dubbo.application.name=website-client-consumer
#注册中心
dubbo.registry.address=zookeeper://127.0.0.1:2181
#协议
dubbo.server=true
dubbo.protocol.name=dubbo
dubbo.protocol.port=20881
#是否启动检查
dubbo.consumer.check=false
#freemarker数字格式化
spring.freemarker.settings.number_format=0.##
#dubbo超时时间
dubbo.consumer.timeout=20000

file.path=e:/img/upload
spring.resources.static-locations=classpath:/META-INF/resources/,classpath:/resources/,classpath:/static/,classpath:/public/,file:${file.path}
3、Website启动类的设计
@SpringBootApplication
public class Website {
    public static void main(String[] args) {
        SpringApplication.run(Website.class,args);
    }
}
4、设计控制器,进行验证服务器是否联通
@Controller
public class LoginController {
    //@Autowired :模块间的调用
    @Reference //不同服务间的调用
    private IUserInfoService userInfoService;
    @RequestMapping("/hello")
    @ResponseBody
    public String hell(Long id) {
        System.out.println(userInfoService.get(id));
        return "ok";
    }
}
测试服务器远程调用成功后,进行下一步的开发;
二、单点登录的设计
1、验证手机号码唯一的程序设计
在LoginController中新设计一个请求URL;
  @RequestMapping("/checkPhone")//验证手机的唯一
    @ResponseBody
    public boolean checkPhone(String phone) {
        return !userInfoService.checkPhone(phone);
    }
再进行Service的接口设计
    /**
     *检查手机号码是否存在
     * @param phone
     * @return  true手机号码已经存在  false手机号码可以注册
     */
    boolean checkPhone(String phone);
Service的实现类设计
   @Override
    public boolean checkPhone(String phone) {
        return userInfoMapper.selectByPhone(phone)>0;
    }
Mapper接口的设计
int selectByPhone(String phone);
再到Sql的设计
  <select id="selectByPhone" resultType="int">
        select count(id) from userinfo where phone=#{phone}
    </select>
2、登录注册的验证设计
1、在控制器中设计一个url接口的设计
  @RequestMapping("/userRegist")
    @ResponseBody
    public AjaxResult userRegist(String phone, String nickname, String password, String rpassword, String verifyCode) {
        userInfoService.userRegist(phone, nickname, password, rpassword, verifyCode);
        return new AjaxResult();
    }
Dubbo的统一的异常处理方案
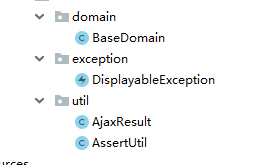
在common的公共包中进行设计自定义的异常类和返回测试类还有断言工具类
AjaxResult的设计
@Getter
@Setter
public class AjaxResult {
    //是success 的功能拓展, 暂时没用
    private int code;       //返回参数码

    private String msg;     //返回信息

    private Object data;    //返回数据

    private boolean success = true;    //返回状态

    public AjaxResult() {

    }

    //错误带信息 带状态码
    public AjaxResult(String msg) {
        this.success = false;
        this.msg = msg;
    }

    //自定义返回状态与信息
    public AjaxResult(String msg, int code) {
        this.success = false;
        this.msg = msg;
        this.code = code;
    }

    public AjaxResult(boolean success, String msg) {
        this.success = success;
        this.msg = msg;
    }

    public AjaxResult addData(Object data) {
        this.data = data;
        return this;
    }
}
断言工具类AssertUtil的设计
/**
 * 断言工具类,一些判断操作
 */
public class AssertUtil {
    /**
     * 判断传入的value值是否有值
     * @param value
     * @param msg
     */
    public static void hasLength(String value,String msg){
        if(value==null||"".equals(value.trim())){
            throw new DisplayableException(msg);
        }
    }

    public static void isEquals(String v1,String v2,String msg){
        if(v1==null||v2==null){
            throw new DisplayableException("传入的判断参数不能为空");
        }
        if(!v1.equals(v2)){
            throw new DisplayableException(msg);
        }
    }

}
自定义的异常类的设计
/**
 * 自定义异常,异常信息给用户看
 */
public class DisplayableException extends RuntimeException {
    public DisplayableException(String message) {
        super(message);
    }
}
再在Website的服务中设计一个公共的统一异常处理类

/**
 * controller类的增强标签
 * 在访问请求映射方法之前之后对这些方法进行功能增强
 * 之前: 对请求参数处理
 * 之后:对请求方法处理之后一些操作
 *         请求方法处理过程中,出现异常了统一操作
 *
 *         @ControllerAdvice :  AOP的应用  日志的处理,事务的处理,统一异常的处理,时间的处理
 */
@ControllerAdvice
public class CommonExceptionHandler {
    //异常处理器,参数表示:当请求映射方法执行过程中抛出该异常时候,执行该方法
    @ExceptionHandler(DisplayableException.class)
    public void displayExp(Exception e, HttpServletResponse resp) throws IOException {
        e.printStackTrace();
        resp.setContentType("text/json;charset=utf-8");
        resp.getWriter().write(JSON.toJSONString(new AjaxResult(e.getMessage())));
    }

    @ExceptionHandler(RuntimeException.class)
    public void runTimeExp(Exception e, HttpServletResponse resp) throws IOException {
        e.printStackTrace();
        resp.setContentType("text/json;charset=utf-8");
        resp.getWriter().write(JSON.toJSONString(new AjaxResult("系统出现未知异常,请联系客服。")));
    }
}
静态页面放于Website的resources中

分别启动member服务,再启动website服务进行校验验证
验证通过,OK
今天完成了手机注册验证的设计,下一步设计短信验证登入信息。
2019-11-12


 836
836


 被折叠的 条评论
为什么被折叠?
被折叠的 条评论
为什么被折叠?
 到【灌水乐园】发言


