


Nodejs博客开发笔记(持续更新)
本博客采用 node 原生制作
接口设计
| 描述 | 接口 | 方法 | url参数 | 备注 |
|---|---|---|---|---|
| 获取博客列表 | /api/blog/list | get | author 作者,keyword 搜索关键字 | 参数为空的话,则不进行查询过滤 |
| 获取一篇博客的内容 | /api/blog/detail | get | id | |
| 新增一篇博客 | /api/blog/new | post | post中有新增的信息 | |
| 更新一篇博客 | /api/blog/update | post | id | postData中有更新的内容 |
| 删除一篇博客 | /api/blog/del | post | id | |
| 登录 | /api/user/login | post | postData中有用户名和密码 |
基本目录结构
|-- bin
|-- www.js --- 服务启动文件
|-- src
|-- controller
|-- blog.js --- 数据文件
|-- model
|-- resModel.js --- 模型文件
|-- router
|-- blog.js --- 存放 blog 目录下的路由
|-- user.js --- 存放 user 目录下的路由
|-- app.js --- 处理路由的文件
|-- package.json --- 包管理文件
博客搭建过程
【梦初】
把服务跑起来
www.js
const http = require("http");
const serverHandle = require("../app");
const port = 3000;
const server = http.createServer(serverHandle);

server.listen(port, () => {
  console.log(`服务启动成功 --- ${port}`);
});
serverHandle 是分离出去的回调函数
【梦入】
把 serverHandle 导出去
app.js
const serverHandle = (req, res) => {
  // 设置返回格式 JSON
  res.setHeader("Content-Type", "application/json");
  res.end("Hello Blog!")
};

module.exports = serverHandle;
现在
127.0.0.1:3000就能正常启动了
【梦时】
我需要写路由,怎么办呢?于是乎我便把 blog 和 user 两个目录下的路由分别写到不同的 js 文件中,然后导出供
app.js文件进行路由处理
blog.js
const handleBlogRouter = (req, res) => {
  const method = req.method; // GET POST
  const url = req.url;
  // 获取路由地址
  const path = url.split("?")[0];

  // 获取博客列表
  if (method == "GET" && path == "/api/blog/list") {
    return {
      msg: "这是获取博客列表的接口",
    };
  }

  // 获取博客详情
  if (method == "GET" && path == "/api/blog/detail") {
    return {
      msg: "这是获取博客详情的接口",
    };
  }

  // 新建一篇博客
  if (method == "POST" && path == "/api/blog/new") {
    return {
      msg: "这是新建博客的接口",
    };
  }

  // 更新一篇博客
  if (method == "POST" && path == "/api/blog/update") {
    return {
      msg: "这是更新博客的接口",
    };
  }
};

module.exports = handleBlogRouter;
user.js
const handleUserRouter = (req, res) => {
  const method = req.method; // GET POST
  const url = req.url;
  // 获取路由地址
  const path = url.split("?")[0];

  // 登录
  if (method == "POST" && path == "/api/user/login") {
    return {
      msg: "这是用户登录的接口",
    };
  }
};

module.exports = handleUserRouter;
【梦境】
但是写好路由之后怎么使用它呢?这就需要通过
app.js来处理路由了,我们通常会在处理路由时,先给它设置 JSON 的返回格式,然后处理时需要以字符串的形式响应给前端,具体如下
app.js
// 导入 blog 路由文件
const handleBlogRouter = require("./src/router/blog");
// 导入 user 路由文件
const handleUserRouter = require("./src/router/user");

const serverHandle = (req, res) => {
  // 设置返回格式 JSON
  res.setHeader("Content-Type", "application/json");

  // 处理 blog 路由
  const blogData = handleBlogRouter(req, res);
  if (blogData) {
    // 把 JSON 类型的数据先转换为字符串,再响应给前端
    res.end(JSON.stringify(blogData));
    // 最后需要返回
    return;
  }

  // 处理 user 路由
  const userData = handleUserRouter(req, res);
  if (userData) {
    // 把 JSON 类型的数据先转换为字符串,再响应给前端
    res.end(JSON.stringify(userData));
    // 最后需要返回
    return;
  }

  // 未命中路由,返回 404
  res.writeHead(404, { "Content-Type": "text/plain" });
  res.write("404 Not Found\n");
  res.end();
};

module.exports = serverHandle;
现在我们已经可以通过
http://127.0.0.1:3000/api/blog/list来正常的访问了
【梦遇】
虽然已经可以正常的访问了,但是我们可以发现,
blog.jsuser.js中是有重复的代码的,这就需要通过路由设计来优化代码了
在 app.js 中处理它们重复的代码
const url = req.url;
req.path = url.split("?")[0];
app.js
// 导入 blog 路由文件
const handleBlogRouter = require("./src/router/blog");
// 导入 user 路由文件
const handleUserRouter = require("./src/router/user");

const serverHandle = (req, res) => {
  // 设置返回格式 JSON
  res.setHeader("Content-Type", "application/json");

  const url = req.url;
  req.path = url.split("?")[0];
  // 处理 blog 路由
  const blogData = handleBlogRouter(req, res);
  if (blogData) {
    // 把 JSON 类型的数据先转换为字符串,再响应给前端
    res.end(JSON.stringify(blogData));
    // 最后需要返回
    return;
  }

  // 处理 user 路由
  const userData = handleUserRouter(req, res);
  if (userData) {
    // 把 JSON 类型的数据先转换为字符串,再响应给前端
    res.end(JSON.stringify(userData));
    // 最后需要返回
    return;
  }

  // 未命中路由,返回 404
  res.writeHead(404, { "Content-Type": "text/plain" });
  res.write("404 Not Found\n");
  res.end();
};

module.exports = serverHandle;
在
blog.jsuser.js文件中就得写成req.path了
blog.js
const handleBlogRouter = (req, res) => {
  // 获取博客列表
  if (req.method == "GET" && req.path == "/api/blog/list") {
    return {
      msg: "这是获取博客列表的接口",
    };
  }

  // 获取博客详情
  if (req.method == "GET" && req.path == "/api/blog/detail") {
    return {
      msg: "这是获取博客详情的接口",
    };
  }

  // 新建一篇博客
  if (req.method == "POST" && req.path == "/api/blog/new") {
    return {
      msg: "这是新建博客的接口",
    };
  }

  // 更新一篇博客
  if (req.method == "POST" && req.path == "/api/blog/update") {
    return {
      msg: "这是更新博客的接口",
    };
  }
};

module.exports = handleBlogRouter;
user.js
const handleUserRouter = (req, res) => {
  // 登录
  if (req.method == "POST" && req.path == "/api/user/login") {
    return {
      msg: "这是用户登录的接口",
    };
  }
};

module.exports = handleUserRouter;
【梦醒】
现在虽然能返回一些内容了,但是我们需要返回一些动态的数据,数据是由
router/blog.js文件中的路由返回的,同样的道理,把数据单独做成一个文件
在
controller目录下新建一个blog.js文件
controller/blog.js
const getList = (author, keyword) => {
  // 先返回假数据(格式是正确的)
  return [
    {
      id: 1,
      title: "标题A",
      content: "内容A",
      createTime: 1601305438637,
      author: "张三",
    },
    {
      id: 1,
      title: "标题B",
      content: "内容B",
      createTime: 1601305527630,
      author: "李四",
    },
  ];
};

module.exports = {
  getList,
};
这时我们就可以在
router/blog.js文件中去使用这个数据文件中的数据了
// 导入 getList 数据文件
const { getList } = require("../controller/blog");
想要获取到用户提交的数据,需要解析 query,获取到 query 对象
首先引入 querystring,然后再使用 querystring.parse 对url进行解析
// 引入querystring
const querystring = require("querystring");
// 解析 query
req.query = querystring.parse(url.split("?")[1]);
app.js
// 导入 blog 路由文件
const handleBlogRouter = require("./src/router/blog");
// 导入 user 路由文件
const handleUserRouter = require("./src/router/user");

// 引入querystring
const querystring = require("querystring");

const serverHandle = (req, res) => {
  // 设置返回格式 JSON
  res.setHeader("Content-Type", "application/json");

  const url = req.url;
  req.path = url.split("?")[0];

  // 解析 query
  req.query = querystring.parse(url.split("?")[1]);

  // 处理 blog 路由
  const blogData = handleBlogRouter(req, res);
  if (blogData) {
    // 把 JSON 类型的数据先转换为字符串,再响应给前端
    res.end(JSON.stringify(blogData));
    // 最后需要返回
    return;
  }

  // 处理 user 路由
  const userData = handleUserRouter(req, res);
  if (userData) {
    // 把 JSON 类型的数据先转换为字符串,再响应给前端
    res.end(JSON.stringify(userData));
    // 最后需要返回
    return;
  }

  // 未命中路由,返回 404
  res.writeHead(404, { "Content-Type": "text/plain" });
  res.write("404 Not Found\n");
  res.end();
};

module.exports = serverHandle;
现在我们可以在
router/blog.js文件中调用 getList 函数,来获取到需要返回的数据了
// 获取 query 中的 anthor ,如果没有则为空字符串
const author = req.query.author || "";
// 获取 query 中的 keyword ,如果没有则为空字符串
const keyword = req.query.keyword || "";
// 调用 getList 函数
const listData = getList(author, keyword);
但是又想到我们不能直接把这个数据直接返回给前端,我们需要返回给前端的只是需要一些 code 啊,message 、data 之类的东西
所以需要创建模型文件,把需要返回的数据用类来封装一下
resModel.js
class BaseModel {
  constructor(data, message) {
    if (typeof data === "string") {
      this.message = data;
      data = null;
      message = null;
    }
    if (data) {
      this.data = data;
    }
    if (message) {
      this.message = message;
    }
  }
}

class SuccessModel extends BaseModel {
  constructor(data, message) {
    super(data, message);
    this.errno = 0;
  }
}

class ErrorModel extends BaseModel {
  constructor(data, message) {
    super(data, message);
    this.errno = -1;
  }
}

module.exports = {
  SuccessModel,
  ErrorModel,
};
在
router/blog.js文件中导入数据模型
// 导入数据模型
const { SuccessModel, ErrorModel } = require("../model/resModel");
返回一个 SuccessModel 对象
// 返回一个 SuccessModel 对象
return new SuccessModel(listData);
意思就是说在 SuccessModel 中只传入一个 data 数据,当执行 SuccessModel 类时,会把 listData 的值赋给 this.data 类本身,并且 SuccessModel 自带 error为0
当我在浏览器输入
http://127.0.0.1:3000/api/blog/list的时候,页面会返回以下内容
{
    "data":[
        {
            "id":1,
            "title":"标题A",
            "content":"内容A",
            "createTime":1601305438637,
            "author":"张三"
        },
        {
            "id":1,
            "title":"标题B",
            "content":"内容B",
            "createTime":1601305527630,
            "author":"李四"
        }
    ],
    "errno":0
}
【梦结】
来总结一下
代码是怎么运行的?
-
第一层 – www.js
- 开启服务
-
第二层 – app.js
- 设置返回格式 JSON
- 解析 query
- 处理 blog 路由
- 处理 user 路由
- 未命中路由,返回 404
-
第三层 – router/blog.js
- 路由文件
-
第四层 – controller/blog.js
- 最关心数据的一层
- 用来存放数据
处理 POST 请求
在
app.js文件中处理post data
app.js
// 用于处理 post data
const getPostData = (req) => {
  const promise = new Promise((resolve, rejects) => {
    // 如果当前的请求方法不是 POST,则返回空
    if (req.method !== "POST") {
      resolve({});
      return;
    }
    // 如果当前的请求头的 content-type 不为 application/json,则返回空
    if (req.headers["content-type"] !== "application/json") {
      resolve({});
      return;
    }
    let postData = "";
    // 接收前端请求的数据
    req.on("data", (chunk) => {
      // 将传进来的数据转换为字符串
      postData += chunk.toString();
    });
    req.on("end", () => {
      // 如果 postData 为空,则返回空
      if (!postData) {
        resolve({});
        return;
      }
      // 如果 postData 存在,则返回这个JSON格式的对象
      resolve(JSON.parse(postData));
    });
  });
  return promise;
};
然后需要使用这个
getPostData函数
// 处理 post data
getPostData(req).then((postData) => {
    // 把 postData 的数据放到 req.body 中
    req.body = postData;
});
然后需要处理各种路由,就需要把处理路由的全部代码放到处理 post data 之中
// 处理 post data
getPostData(req).then((postData) => {
    req.body = postData;

    // 处理 blog 路由
    const blogData = handleBlogRouter(req, res);
    if (blogData) {
        // 把 JSON 类型的数据先转换为字符串,再响应给前端
        res.end(JSON.stringify(blogData));
        // 最后需要返回
        return;
    }

    // 处理 user 路由
    const userData = handleUserRouter(req, res);
    if (userData) {
        // 把 JSON 类型的数据先转换为字符串,再响应给前端
        res.end(JSON.stringify(userData));
        // 最后需要返回
        return;
    }

    // 未命中路由,返回 404
    res.writeHead(404, { "Content-Type": "text/plain" });
    res.write("404 Not Found\n");
    res.end();
});
然后在
controller/blog.js中写新建博客需要返回的数据
const newBlog = (blogData = {}) => {
  // blogData = {}  如果blogData没有值的话,默认为空
  // blogData 是一个博客对象,包含 title content 属性
  console.log("newBlog blogData...", blogData);
  return {
    id: 3, // 表示新建博客,插入到数据表里面的 id
  };
};
记得把 newBlog 导出去
然后就可以在
router/blog.js文件中返回数据给前端
// 新建一篇博客
if (req.method == "POST" && req.path == "/api/blog/new") {
    // 通过 app.js 文件中定义的 req.body 来获取到前端请求的数据
    const data = newBlog(req.body);
    return new SuccessModel(data);
}
然后可以通过 postman 发送
http://127.0.0.1:3000/api/blog/new这个,选择 POST请求,然后在 Body 里面的 raw 中随便发送一个JSON格式的数据,类型格式选择JSON(application/json)
返回结果如下:
{
    "data": {
        "id": 3
    },
    "errno": 0
}
后台输出的 blogData 的结果为
newBlog blogData... { title: '测试标题123', content: '测试内容123' }
说明成功
新增删除博客路由,同理
先
controller/blog.js文件中设置一个删除路由需要返回的数据
const delBlog = (id) => {
  // id 就是要删除博客的 id
  return true;
};
记得把 delBlog 导出去
然后由
router.blog.js文件在路由中返回数据给app.js,进行数据处理,然后再返回给前端
// 删除一篇博客
if (req.method == "POST" && req.path == "/api/blog/del") {
    const result = delBlog(id);
    if (result) {
        return new SuccessModel();
    } else {
        return new ErrorModel("删除博客失败");
    }
}
postman 请求
http://127.0.0.1:3000/api/blog/del?id=1的结果如下:
{
    "errno": 0
}
新增登录接口
在
controller/user.js文件中添加如下代码
const loginCheck = (username, passsword) => {
  if (username == "zhangsan" && passsword == "123") {
    return true;
  }
  return false;
};

module.exports = {
  loginCheck,
};
router/user.js文件内容如下:
// 导入数据文件
const { loginCheck } = require("../controller/user");
// 导入数据模型
const { SuccessModel, ErrorModel } = require("../model/resModel");

const handleUserRouter = (req, res) => {
  // 登录
  if (req.method == "POST" && req.path == "/api/user/login") {
    const { username, password } = req.body;
    const result = loginCheck(username, password);
    if (result) {
      return new SuccessModel();
    } else {
      return new ErrorModel("登录失败");
    }
  }
};

module.exports = handleUserRouter;
postman 访问
http://127.0.0.1:3000/api/user/login结果如下
如果成功
{
    "errno": 0
}
如果失败
{
    "message": "登录失败",
    "errno": -1
}
node连接mysql
新建 myblog 数据库
在数据库中新建两个表 users 、 blogs
users表字段如下
| id | username | password | realname | state | |
|---|---|---|---|---|---|
| 类型 | int | varchar | varchar | varchar | int |
| 长度 | 11 | 20 | 20 | 10 | 10 |
| 不是null | yes | yes | yes | yes | yes |
| 主键 | yes | ||||
| 注释 | 状态为1说明此数据存在,0代表此数据已被删除 |
blogs表字段如下
| id | title | content | createtime | author | state | |
|---|---|---|---|---|---|---|
| 类型 | int | varchar | longtext | bigint | varchar | int |
| 长度 | 11 | 50 | 20 | 20 | 10 | |
| 不是null | yes | yes | yes | yes | yes | |
| 主键 | yes | |||||
| 注释 | 状态为1说明此数据存在,0代表此数据已被删除 |
首先,在 package.json 文件中配置 scripts
{
  "name": "blog-1",
  "version": "1.0.0",
  "description": "",
  "main": "bin/www.js",
  "scripts": {
    "test": "echo \"Error: no test specified\" && exit 1",
    "dev": "cross-env NODE_ENV=dev node ./bin/www.js",
    "prd": "cross-env NODE_ENV=production node ./bin/www.js"
  },
  "keywords": [],
  "author": "",
  "license": "ISC",
  "devDependencies": {
    "cross-env": "^7.0.2"
  },
  "dependencies": {
    "mysql": "^2.18.1"
  }
}
此操作需要安装 cross-env,
npm install cross-env --save-dev
然后,在src目录下新建 conf 目录,在 conf 目录下新建
db.js文件
const env = process.env.NODE_ENV; // 环境参数

// 配置
let MYSQL_CONF;

// 通过 npm run dev 会使用下面这个配置
if (env === "dev") {
  MYSQL_CONF = {
    host: "localhost",
    user: "root",
    password: "root",
    port: "3306",
    database: "myblog",
  };
}

// 通过 npm run production 会使用下面这个配置
if (env === "production") {
  MYSQL_CONF = {
    host: "localhost",
    user: "root",
    password: "root",
    port: "3306",
    database: "myblog",
  };
}

// 通过 node .\bin\www.js 启动服务会使用下面这个数据库配置
MYSQL_CONF = {
  host: "localhost",
  user: "root",
  password: "root",
  port: "3306",
  database: "myblog",
};

module.exports = {
  MYSQL_CONF,
};
这是配置数据库的一些参数
然后在 src 目录下新建 db 目录,在 db 目录下新建
mysql.js文件
const mysql = require("mysql");
const { MYSQL_CONF } = require("../conf/db");

// 创建连接对象
const con = mysql.createConnection(MYSQL_CONF);

// 开始连接
con.connect();

// 统一执行 sql 的函数
function exec(sql) {
  const promise = new Promise((resolve, reject) => {
    con.query(sql, (err, result) => {
      if (err) {
        reject(err);
        return;
      }
      resolve(result);
    });
  });
  return promise;
}

module.exports = {
  exec,
};
用来封装一个统一执行 sql 的函数
修改
controller/blog.js文件中的getList函数,获取数据库中的数据
// 导入统一执行 sql 的函数的文件
const { exec } = require("../db/mysql");

const getList = (author, keyword) => {
  let sql = `select id,title,content,createtime,author from blogs where 1=1 `;
  if (author) {
    sql += `and author='${author}' `;
  }
  if (keyword) {
    sql += `and title like '%${keyword}%' `;
  }
  sql += `order by createtime desc;`;

  // 返回 promise
  return exec(sql);
};
会返回一个从数据库中查到的结果,不过需要通过 Promise 对象来获取
然后需要在
router/blog.js文件中返回一个 SuccessModel 对象的结果就需要修改对应的博客列表路由
// 获取博客列表
if (req.method == "GET" && req.path == "/api/blog/list") {
    // 获取 query 中的 anthor ,如果没有则为空字符串
    const author = req.query.author || "";
    // 获取 query 中的 keyword ,如果没有则为空字符串
    const keyword = req.query.keyword || "";

    const result = getList(author, keyword);
    // 返回 promise
    // listData 为从数据库查到的对应的数据
    return result.then((listData) => {
    	return new SuccessModel(listData);
    });
}
返回的这个结果还是Promise对象,所以继续通过 then 方法来接收这个路由返回的 SuccessModel 数据结果
app.js
// 处理 blog 路由
const blogResult = handleBlogRouter(req, res);
if (blogResult) {
    // blogData 为SuccessModule对象返回的结果
    blogResult.then((blogData) => {
        // console.log("blogData:", blogData);
        // 把 JSON 类型的数据先转换为字符串,再响应给前端
        res.end(JSON.stringify(blogData));
    });
    // 最后需要返回
    return;
}
最后通过
npm run dev命令启动服务,访问http://127.0.0.1:3000/api/blog/list?author=zhangsan&keyword=A结果如下
{
    "data":[
        {
            "id":1,
            "title":"标题A",
            "content":"内容A",
            "createtime":1601528638003,
            "author":"zhangsan"
        }
    ],
    "errno":0
}
查询到的此数据就是我数据库中的数据,到此,node 连接 mysql 成功。
cookie 登录
需要在
app.js文件中解析 cookie
// 解析 cookie
req.cookie = {};
const cookieStr = req.headers.cookie || "";
cookieStr.split(";").forEach((item) => {
    if (!item) {
        return;
    }
    const arr = item.split("=");
    const key = arr[0].trim();
    const val = arr[1].trim();
    req.cookie[key] = val;
});
把 cookie 转换成一个对象格式的数据
trim() 是去除多余的空格
登录验证测试
router/user.js
// 登录验证的测试
if (method == "GET" && req.path == "/api/user/login-test") {
    if (req.cookie.username) {
        return Promise.resolve(
            new SuccessModel({
                username: req.cookie.username,
            })
        );
    }
    return Promise.resolve(new ErrorModel("尚未登录"));
}
登录
controller/user.js
// 导入统一执行 sql 的函数的文件
const { exec } = require("../db/mysql");

const login = (username, password) => {
  let sql = `select username,realname,state from users where state=1 and username='${username}' and password='${password}'`;
  return exec(sql).then((rows) => {
    return rows[0] || {};
  });
};

module.exports = {
  login,
};
router/user.js
// 登录
if (method == "GET" && req.path == "/api/user/login") {
    // const { username, password } = req.body;
    const { username, password } = req.query;
    const result = login(username, password);
    return result.then((data) => {
        if (data.username) {
            // 操作 cookie
            res.setHeader("Set-Cookie", `username=${data.username}; path=/;`);
            return new SuccessModel();
        }
        return new ErrorModel("登录失败");
    });
}
username=${data.username}; 登录的用户名
path=/; 让 cookie 在所有的路由中都生效
最后,别忘了在
app.js文件中处理 user 路由
// 处理 user 路由
const userResult = handleUserRouter(req, res);
if (userResult) {
    userResult.then((userData) => {
        // 把 JSON 类型的数据先转换为字符串,再响应给前端
        res.end(JSON.stringify(userData));
    });
    // 最后需要返回
    return;
}
在浏览器输入
http://127.0.0.1:3000/api/user/login?username=lisi&password=456即可在添加一条 cookie,username=lisi
虽然现在是后端设置的 cookie,但是前端也能修改 cookie 的值,并不安全,所以需要用后端来做一些限制条件才行
在 setHeader 中加上
httpOnly即可
router/user.js
// 操作 cookie
res.setHeader(
    "Set-Cookie",
    `username=${
    data.username
    }; path=/; httpOnly;`
);
获取 cookie 的过期时间
router/user.js
// 获取 cookie 的过期时间
const getCookieExpires = () => {
  // 获取当前时间(中国标准时间)
  const d = new Date();
  d.setTime(d.getTime() + 24 * 60 * 60 * 1000);
  console.log("d.toGMTString() is ", d.toGMTString());
  return d.toGMTString();
};
参数说明:
getTime() 获取当前时间戳
setTime() 用时间戳设置时间
toGMTString() 设置成 GMT 格式的时间
然后给 cookie 设置一个过期时间
在 setHeader 中加上
expires=${getCookieExpires()};即可
router/user.js
// 操作 cookie
res.setHeader(
    "Set-Cookie",
    `username=${
    data.username
    }; path=/; httpOnly; expires=${getCookieExpires()};`
);
getCookieExpires() 就是调用的那个获取 cookie 过期时间的函数
session 登录
既然已经有了 cookie 登录了,那为什么还要使用 session 登录呢,那是因为 cookie 登录存在着许多问题,会暴露许多用户的信息,很危险
那么如何解决呢?cookie 中存储 userid,server端对应 username
解决方案就是使用 session,即 server 端存储用户信息
首先需要 定义一个存储 session 的数据
app.js
// session 数据
const SESSION_DATA = {};
然后需要解析 session
app.js
// 解析 session
let needSetCookie = false;
let userId = req.cookie.userid;
if (userId) {
    if (!SESSION_DATA[userId]) {
        SESSION_DATA[userId] = {};
    }
} else {
    needSetCookie = true;
    userId = `${Date.now()}_${Math.random()}`;
    SESSION_DATA[userId] = {};
}
req.session = SESSION_DATA[userId];
needSetCookie 是否需要设置 cookie,当 cookie 中不存在 userid 时,则需要设置 cookie
这个 session 只是把 userid 存储在 cookie 中,并且这个 userid 是实时变化的
我们在 处理 blog 路由和处理 user 路由中判断 如果需要设置 cookie 怎么办
app.js
if (needSetCookie) {
    // 操作 cookie
    res.setHeader(
        "Set-Cookie",
        `userid=${userId}; path=/; httpOnly; expires=${getCookieExpires()};`
    );
}
上面代码中提到了需要调用 getCookieExpires(),则需要获取 cookie 的过期时间
app.js
// 获取 cookie 的过期时间
const getCookieExpires = () => {
  const d = new Date();
  d.setTime(d.getTime() + 24 * 60 * 60 * 1000);
  console.log("d.toGMTString() is ", d.toGMTString());
  return d.toGMTString();
};
写好之后需要在
router/user.js文件中设置登录,操作 session
// 登录
if (method == "GET" && req.path == "/api/user/login") {
    // const { username, password } = req.body;
    const { username, password } = req.query;
    const result = login(username, password);
    return result.then((data) => {
        if (data.username) {
            // 操作 session
            req.session.username = data.username;
            req.session.realname = data.realname;

            console.log("req.session is ", req.session);

            return new SuccessModel();
        }
        return new ErrorModel("登录失败");
    });
}
在浏览器中输入
http://127.0.0.1:3000/api/user/login?username=zhangsan&password=123,后台输出如下
req.session is { username: 'zhangsan', realname: '张三' }
登录验证测试
// 登录验证的测试
if (method == "GET" && req.path == "/api/user/login-test") {
    if (req.session.username) {
        return Promise.resolve(
            new SuccessModel({
                session: req.session,
            })
        );
    }
    return Promise.resolve(new ErrorModel("尚未登录"));
}
在浏览器中输入
http://127.0.0.1:3000/api/user/login-test,页面显示如下
{
    "data":{
        "session":{
            "username":"zhangsan",
            "realname":"张三"
        }
    },
    "errno":0
}
redis 存储 session 数据
redis 内容可以自行了解,这里只提供如何使用
启动 redis
redis-server.exe redis.windows.conf
首先,在
db.js文件中配置 redis
let REDIS_CONF;
REDIS_CONF = {
    port: 6379,
    host: "127.0.0.1",
};
整体代码
db.js
const env = process.env.NODE_ENV; // 环境参数

// 配置
let MYSQL_CONF;
let REDIS_CONF;

// 通过 npm run dev 会使用下面这个配置
if (env === "dev") {
  MYSQL_CONF = {
    host: "localhost",
    user: "root",
    password: "root",
    port: "3306",
    database: "myblog",
  };

  REDIS_CONF = {
    port: 6379,
    host: "127.0.0.1",
  };
}

// 通过 npm run production 会使用下面这个配置
if (env === "production") {
  MYSQL_CONF = {
    host: "localhost",
    user: "root",
    password: "root",
    port: "3306",
    database: "myblog",
  };

  REDIS_CONF = {
    port: 6379,
    host: "127.0.0.1",
  };
}

// 通过 node .\bin\www.js 启动服务会使用下面这个数据库配置
MYSQL_CONF = {
  host: "localhost",
  user: "root",
  password: "root",
  port: "3306",
  database: "myblog",
};

REDIS_CONF = {
  port: 6379,
  host: "127.0.0.1",
};

module.exports = {
  MYSQL_CONF,
  REDIS_CONF,
};
然后需要在 db 文件夹下新建
redis.js文件,其中用 Promise 封装了设置 redis 的键值对的方法和通过键获取对应的值的方法
const redis = require("redis");
const { REDIS_CONF } = require("../conf/db");

// 创建客户端
const redisClient = redis.createClient(REDIS_CONF.port, REDIS_CONF.post);
redisClient.on("error", (err) => {
  console.error(err);
  return;
});

function set(key, val) {
  if (typeof val === "object") {
    val = JSON.stringify(val);
  }
  // redis.print  返回设置的状态
  redisClient.set(key, val, redis.print);
}

function get(key) {
  const promise = new Promise((resolve, reject) => {
    redisClient.get(key, (err, val) => {
      if (err) {
        reject(err);
        return;
      }
      if (val == null) {
        resolve(val);
        return;
      }

      try {
        resolve(JSON.parse(val));
      } catch (error) {
        resolve(val);
      }
    });
  });
  return promise;
}

module.exports = {
  set,
  get,
};
封装好 set 和 get 之后,就要使用 redis 来存储 session 了
则需要修改
app.js文件
// 导入 blog 路由文件
const handleBlogRouter = require("./src/router/blog");
// 导入 user 路由文件
const handleUserRouter = require("./src/router/user");
// 导入 get set 获取和设置 session
const { get, set } = require("./src/db/redis");
// 引入querystring
const querystring = require("querystring");

// session 数据
// const SESSION_DATA = {};

// 获取 cookie 的过期时间
const getCookieExpires = () => {
  const d = new Date();
  d.setTime(d.getTime() + 24 * 60 * 60 * 1000);
  console.log("d.toGMTString() is ", d.toGMTString());
  return d.toGMTString();
};

// 用于处理 post data
const getPostData = (req) => {
  const promise = new Promise((resolve, reject) => {
    // 如果当前的请求方法不是 POST,则返回空
    if (req.method !== "POST") {
      resolve({});
      return;
    }
    // 如果当前的请求头的 content-type 不为 application/json,则返回空
    if (req.headers["content-type"] !== "application/json") {
      resolve({});
      return;
    }
    let postData = "";
    // 接收前端请求的数据
    req.on("data", (chunk) => {
      // 将传进来的数据转换为字符串
      postData += chunk.toString();
    });
    req.on("end", () => {
      // 如果 postData 为空,则返回空
      if (!postData) {
        resolve({});
        return;
      }
      // 如果 postData 存在,则返回这个JSON格式的对象
      resolve(JSON.parse(postData));
    });
  });
  return promise;
};

const serverHandle = (req, res) => {
  // 设置返回格式 JSON
  res.setHeader("Content-Type", "application/json");

  // 获取 path
  const url = req.url;
  req.path = url.split("?")[0];

  // 解析 query
  req.query = querystring.parse(url.split("?")[1]);

  // 解析 cookie
  req.cookie = {};
  const cookieStr = req.headers.cookie || "";
  cookieStr.split(";").forEach((item) => {
    if (!item) {
      return;
    }
    const arr = item.split("=");
    const key = arr[0].trim();
    const val = arr[1].trim();
    req.cookie[key] = val;
    // console.log(key, val);
  });

  // 解析 session (使用 redis)
  let needSetCookie = false;
  let userId = req.cookie.userid;
  if (!userId) {
    needSetCookie = true;
    userId = `${Date.now()}_${Math.random()}`;
    set(userId, {});
  }
  // 获取 session
  req.sessionId = userId;
  get(req.sessionId)
    .then((sessionData) => {
      if (sessionData === null) {
        // 初始化 redis 中的 session 值
        set(req.sessionId, {});
        // 设置 session
        req.session = {};
      } else {
        // 设置 session
        req.session = sessionData;
      }
      console.log("req.session ", req.session);

      // 处理 post data
      return getPostData(req);
    })
    .then((postData) => {
      req.body = postData;

      // 处理 blog 路由
      const blogResult = handleBlogRouter(req, res);
      if (blogResult) {
        // blogData 为SuccessModule对象返回的结果
        blogResult.then((blogData) => {
          if (needSetCookie) {
            // 操作 cookie
            res.setHeader(
              "Set-Cookie",
              `userid=${userId}; path=/; httpOnly; expires=${getCookieExpires()};`
            );
          }
          // console.log("blogData:", blogData);
          // 把 JSON 类型的数据先转换为字符串,再响应给前端
          res.end(JSON.stringify(blogData));
        });
        // 最后需要返回
        return;
      }

      // 处理 user 路由
      const userResult = handleUserRouter(req, res);
      if (userResult) {
        userResult.then((userData) => {
          if (needSetCookie) {
            // 操作 cookie
            res.setHeader(
              "Set-Cookie",
              `userid=${userId}; path=/; httpOnly; expires=${getCookieExpires()};`
            );
          }
          // 把 JSON 类型的数据先转换为字符串,再响应给前端
          res.end(JSON.stringify(userData));
        });
        // 最后需要返回
        return;
      }

      // 未命中路由,返回 404
      res.writeHead(404, { "Content-Type": "text/plain" });
      res.write("404 Not Found\n");
      res.end();
    });
};

module.exports = serverHandle;
文件修改了 获取 session 部分代码
然后需要在登录时把 username 和 realname 添加到 session中,然后再把 session 添加到 redis 中
router/user.js
// 导入数据文件
const { login } = require("../controller/user");
const { set } = require("../db/redis");
// 导入数据模型
const { SuccessModel, ErrorModel } = require("../model/resModel");

const handleUserRouter = (req, res) => {
  const method = req.method; // GET POST
  // 登录
  if (method == "POST" && req.path == "/api/user/login") {
    const { username, password } = req.body;
    // const { username, password } = req.query;
    const result = login(username, password);
    return result.then((data) => {
      // console.log(data); // RowDataPacket { username: 'zhangsan', realname: '张三', state: 1 }
      if (data.username) {
        // 操作 session
        req.session.username = data.username;
        req.session.realname = data.realname;
        // 同步到 redis
        set(req.sessionId, req.session);

        console.log("req.session is ", req.session);

        return new SuccessModel();
      }
      return new ErrorModel("登录失败");
    });
  }
};

module.exports = handleUserRouter;
上面代码把 session 同步到了 redis 中
修改
controller/blog.js文件
// 导入统一执行 sql 的函数的文件
const { exec } = require("../db/mysql");

const getList = (author, keyword) => {
  let sql = `select id,title,content,createtime,author,state from blogs where state=1 `;
  if (author) {
    sql += `and author='${author}' `;
  }
  if (keyword) {
    sql += `and title like '%${keyword}%' `;
  }
  sql += `order by createtime desc;`;

  // 返回 promise
  return exec(sql);
};

const getDetail = (id) => {
  const sql = `select id,title,content,createtime,author,state from blogs where state=1 and id='${id}'`;
  return exec(sql).then((rows) => {
    return rows[0];
  });
};

const newBlog = (blogData = {}) => {
  // blogData = {}  如果blogData没有值的话,默认为空
  // blogData 是一个博客对象,包含 title content author 属性
  const title = blogData.title;
  const content = blogData.content;
  const author = blogData.author;
  const createTime = Date.now();

  const sql = `
    insert into blogs(title, content, createtime, author)
    value ('${title}', '${content}', ${createTime}, '${author}');
  `;

  return exec(sql).then((insertData) => {
    // console.log("insertData is ", insertData);
    return {
      id: insertData.insertId,
    };
  });
};

const updateBlog = (id, blogData = {}) => {
  // id 就是要更新博客的 id
  // blogData 是一个博客对象

  const title = blogData.title;
  const content = blogData.content;

  const sql = `
    update blogs set title='${title}', content='${content}' where state=1 and id=${id}
  `;

  return exec(sql).then((updateData) => {
    // console.log("updateData is ", updateData);
    if (updateData.affectedRows > 0) {
      return true;
    }
    return false;
  });
};

const delBlog = (id, author) => {
  // id 就是要删除博客的 id
  const sql = `
    update blogs set state=0 where state=1 and id=${id} and author='${author}'
  `;

  return exec(sql).then((delData) => {
    // console.log("delData is ", delData);
    if (delData.affectedRows > 0) {
      return true;
    }
    return false;
  });
};

module.exports = {
  getList,
  getDetail,
  newBlog,
  updateBlog,
  delBlog,
};
来查询 mysql 中的真实数据来动态加载数据
再修改
router/blog.js文件
// 导入 getList 数据文件
const {
  getList,
  getDetail,
  newBlog,
  updateBlog,
  delBlog,
} = require("../controller/blog");
// 导入数据模型
const { SuccessModel, ErrorModel } = require("../model/resModel");

// 统一的登录验证函数(登录拦截)
const loginCheck = (req) => {
  if (!req.session.username) {
    return Promise.resolve(new ErrorModel("尚未登录"));
  }
};

const handleBlogRouter = (req, res) => {
  const method = req.method;
  const id = req.body.id;
  const loginCheckResult = loginCheck(req);
  // 获取博客列表
  if (method == "GET" && req.path == "/api/blog/list") {
    // 获取 query 中的 anthor ,如果没有则为空字符串
    const author = req.query.author || "";
    // 获取 query 中的 keyword ,如果没有则为空字符串
    const keyword = req.query.keyword || "";

    const result = getList(author, keyword);
    // 返回 promise
    // listData 为从数据库查到的对应的数据
    return result.then((listData) => {
      return new SuccessModel(listData);
    });
  }

  // 获取博客详情
  if (method == "GET" && req.path == "/api/blog/detail") {
    // 获取 query 中的 id ,如果没有则为空字符串
    const id = req.query.id || "";
    // console.log(id);
    const result = getDetail(id);
    // 返回一个 SuccessModel 对象
    return result.then((data) => {
      return new SuccessModel(data);
    });
  }

  // 新建一篇博客
  if (method == "POST" && req.path == "/api/blog/new") {
    if (loginCheckResult) {
      // 未登录
      return loginCheck;
    }

    req.body.author = req.session.username;
    // 通过 app.js 文件中定义的 req.body 来获取到前端请求的数据
    const result = newBlog(req.body);
    return result.then((data) => {
      return new SuccessModel(data);
    });
  }

  // 更新一篇博客
  if (method == "POST" && req.path == "/api/blog/update") {
    if (loginCheckResult) {
      // 未登录
      return loginCheck;
    }

    const result = updateBlog(id, req.body);
    return result.then((val) => {
      if (val) {
        return new SuccessModel();
      } else {
        return new ErrorModel("更新博客失败");
      }
    });
  }

  // 删除一篇博客
  if (method == "POST" && req.path == "/api/blog/del") {
    if (loginCheckResult) {
      // 未登录
      return loginCheck;
    }

    const author = req.session.username;
    const result = delBlog(id, author);
    return result.then((val) => {
      if (val) {
        return new SuccessModel();
      } else {
        return new ErrorModel("删除博客失败");
      }
    });
  }
};

module.exports = handleBlogRouter;
使用 promise 来返回成功或失败的数据
使用 postman 访问 post
http://127.0.0.1:3000/api/user/login输入用户名和密码,结果返回errno:0,说明成功后端可以看到由
app.js文件输出的结果
req.session { username: 'zhangsan', realname: '张三' }
说明已经把 username 和 realname 存到了 session 中,并且把 session 存到了 redis 中了
前端联调
前端文件需要安装
npm i http-server -g来全局安装http启动服务,然后输入命令http-server -p 8001来启动 8001 端口
需要配置 nginx
我的是配置
D:\Nginx\nginx-1.19.2\conf\nginx.conf文件
#user  nobody;

# CPU开启双核
worker_processes  2;

#error_log  logs/error.log;
#error_log  logs/error.log  notice;
#error_log  logs/error.log  info;

#pid        logs/nginx.pid;


events {
    worker_connections  1024;
}


http {
    include       mime.types;
    default_type  application/octet-stream;

    #log_format  main  '$remote_addr - $remote_user [$time_local] "$request" '
    #                  '$status $body_bytes_sent "$http_referer" '
    #                  '"$http_user_agent" "$http_x_forwarded_for"';

    #access_log  logs/access.log  main;

    sendfile        on;
    #tcp_nopush     on;

    #keepalive_timeout  0;
    keepalive_timeout  65;

    #gzip  on;

    include       server/*.conf;

    server {
        listen       8080;
        server_name  localhost;

        #charset koi8-r;

        #access_log  logs/host.access.log  main;

        #location / {
        #    root   html;
        #    index  index.html index.htm;
        #}

		# 访问前端页面时 nginx 会代理 8001 端口
		location / {
			proxy_pass http://localhost:8001;
		}

		# 访问后端路由时 nginx 会代理 8000 端口
		location /api/ {
			proxy_pass http://localhost:8000;
			proxy_set_header Host $host;
		}

        #error_page  404              /404.html;

        # redirect server error pages to the static page /50x.html
        #
        error_page   500 502 503 504  /50x.html;
        location = /50x.html {
            root   html;
        }

        # proxy the PHP scripts to Apache listening on 127.0.0.1:80
        #
        #location ~ \.php$ {
        #    proxy_pass   http://127.0.0.1;
        #}

        # pass the PHP scripts to FastCGI server listening on 127.0.0.1:9000
        #
        #location ~ \.php$ {
        #    root           html;
        #    fastcgi_pass   127.0.0.1:9000;
        #    fastcgi_index  index.php;
        #    fastcgi_param  SCRIPT_FILENAME  /scripts$fastcgi_script_name;
        #    include        fastcgi_params;
        #}

        # deny access to .htaccess files, if Apache's document root
        # concurs with nginx's one
        #
        #location ~ /\.ht {
        #    deny  all;
        #}
    }
}
也可以看图理解

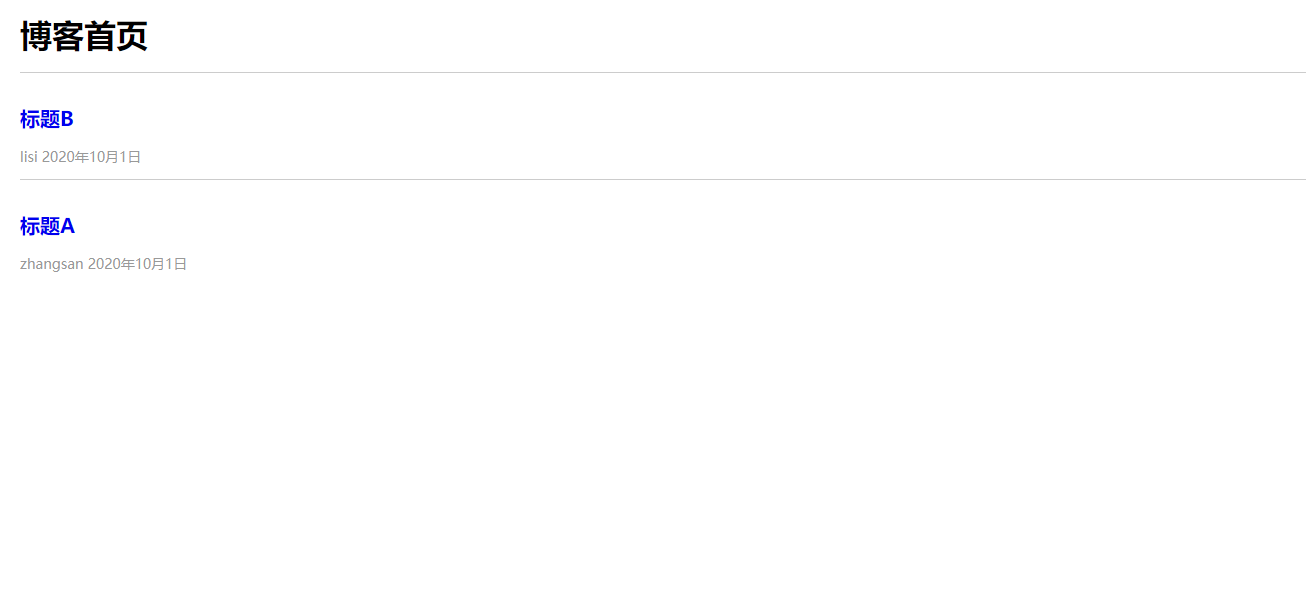
这时 nginx 已经代理的两端的服务,把前后端的服务全部开启,然后
浏览器输入
http://127.0.0.1:8080/index.html即可,首页效果如下
查看文章只能查看自己的,而不能查看别人的,所以需要加个判断
router/blog.js
// 获取博客列表
if (method == "GET" && req.path == "/api/blog/list") {
    // 获取 query 中的 anthor ,如果没有则为空字符串
    let author = req.query.author || "";
    // 获取 query 中的 keyword ,如果没有则为空字符串
    const keyword = req.query.keyword || "";

    if (req.query.isadmin) {
        // 管理员界面
        if (loginCheckResult) {
            // 未登录
            return loginCheckResult;
        }
        // 强制查询自己的博客
        author = req.session.username;
    }

    const result = getList(author, keyword);
    // 返回 promise
    // listData 为从数据库查到的对应的数据
    return result.then((listData) => {
        return new SuccessModel(listData);
    });
}
这样就可以只查看当前登录用户的博客了,如果没有登录则就是查看全部博客
添加日志
首先在 blog-1 目录下新建
logs目录,然后在这个文件夹中新建三个空日志文件在 src 目录下新建
utils目录,在这个目录下在新建log.js文件
log.js
const fs = require("fs");
const path = require("path");

// 写日志
function writeLog(writeStream, log) {
  writeStream.write(log + "\n");
}

// 生成 write stream
function createWriteStream(fileName) {
  const fullFileName = path.join(__dirname, "../", "../", "logs", fileName);
  const writeStream = fs.createWriteStream(fullFileName, {
    flags: "a",
  });
  return writeStream;
}

// 写访问日志
const accessWriteStream = createWriteStream("access.log");

function access(log) {
  writeLog(accessWriteStream, log);
}

module.exports = {
  access,
};
这个就是通过文件流来写日志存储到文件中
在
app.js文件中引入处理日志的文件
// 引入处理日志的文件
const { access } = require("./src/utils/log");
然后再在
serverHandle函数中记录 access log
// 记录 access log
access(
    `${req.method} -- ${req.url} -- ${
    req.headers["user-agent"]
    } -- ${Date.now()}`
);
日志存储结果如下:
access.log
GET -- /api/blog/list -- Mozilla/5.0 (Windows NT 10.0; Win64; x64) AppleWebKit/537.36 (KHTML, like Gecko) Chrome/85.0.4183.121 Safari/537.36 Edg/85.0.564.68 -- 1602127808640
GET -- /api/blog/detail?id=3 -- Mozilla/5.0 (Windows NT 10.0; Win64; x64) AppleWebKit/537.36 (KHTML, like Gecko) Chrome/85.0.4183.121 Safari/537.36 Edg/85.0.564.68 -- 1602127827129


 1390
1390

 被折叠的 条评论
为什么被折叠?
被折叠的 条评论
为什么被折叠?
 到【灌水乐园】发言


