


 本文档展示了如何使用网易的Duilib框架重新设计一个类似百度网盘的登录界面,包括窗口大小、背景颜色、按钮布局等,并通过XML语法进行描述。同时,提供了C++代码示例,说明如何绑定登录按钮事件,获取输入框内容并进行验证。最终实现了一个包含账号密码登录和二维码登录功能的界面。
使用的网易版本的duilib:
https://github.com/netease-im/NIM_Duilib_Framework
重写demo中basic.xml页面的布局,熟悉布局语法,类似于html语言,这里模仿百度网盘的UI:
<?xml version="1.0" encoding="UTF-8"?>
<Window size="662,442" caption="0,0,0,35">
<VBox>

  <VBox bkcolor="bk_wnd_darkcolor">
    <HBox width="stretch" height="35" bkcolor="">
      <Control />
      <Button class="btn_wnd_min" name="minbtn" margin="4,6,0,0"/>
      <Box width="21" margin="4,6,0,0">
        <Button class="btn_wnd_max" name="maxbtn"/>
        <Button class="btn_wnd_restore" name="restorebtn" visible="false"/>
      </Box>
      <Button class="btn_wnd_close" name="closebtn" margin="4,6,8,0"/>
	</HBox>

	<HBox width="stretch" height = "60">
		<Control />
		<Label bkimage = "logo.png"/>
		<Control />
    </HBox>

	<HBox width="stretch" bkcolor="white">
		<Control width="70"/>

		<VBox valign="center" halign="center">
			<Control height = "40"/>
			<Label name="tooltip" text="扫一扫登录"/>
			<Control height = "20"/>
			<Label name="tooltip" text="使用百度APP扫码登录" normaltextcolor="blue"/>
			<Control height = "20"/>
			<Label bkimage = "QrCode.png" />
			<Control height = "20"/>
			<Button text ="刷新二维码" name = "refresh_code" height = "30" width = "100" bordercolor="blue" bordersize="1" normaltextcolor="blue"/>
		 </VBox>
		 <Control width = "30"/>
		 <VBox valign="center" halign="center">
			<Control height = "40"/>
			<HBox width="stretch" bkcolor="white">
				<Label  text="账号密码登录"/>
				<Control width = "30"/>
				<Label  text="短信快捷登录>" normaltextcolor="blue" />
			</HBox>
			<RichEdit name="name" multiline="false" bordersize="1" bordercolor="blue" height = "30" width = "220"autohscroll="true"/>
			<Control height = "10"/>
			<RichEdit name="password" multiline="false" bordersize="1" bordercolor="blue" height = "30" width = "220" autohscroll="true" password="true"/>
			<Control height = "10"/>
			<HBox width="stretch" bkcolor="white">
				<CheckBox />
				<Label  text="记住密码" />
				<Control width = "10"/>
				<CheckBox />
				<Label  text="自动登录" />
			</HBox>
			<Button text ="登录" name = "login" height = "30" width = "220" bkcolor="blue" normaltextcolor="white"/>
			<Control height = "10"/>
			<Label  text="注册账号" normaltextcolor="blue"/>
			<Control />
		 </VBox>

		 <Control width="50"/>
	</HBox>
  </VBox>

</VBox>

</Window>
通过实现GetSkinFile接口告诉render去渲染basic.xml页面:
std::wstring BasicForm::GetSkinFile()
{
	return L"basic.xml";
}
在之前xml中定义的登录button名字为login,代码中通过名字找到对象,然后绑定按钮事件:
void BasicForm::InitWindow()
{
	this->SetShadowAttached(true);
	/* Show settings menu */
	ui::Button* msg = dynamic_cast<ui::Button*>(FindControl(L"login"));
	msg->AttachClick([this](ui::EventArgs* args) {
		ui::RichEdit* edit_name = dynamic_cast<ui::RichEdit*>(FindControl(L"name"));
		ui::RichEdit* edit_password = dynamic_cast<ui::RichEdit*>(FindControl(L"password"));
		auto str_name = edit_name->GetText();
		auto str_pass = edit_password->GetText();
		if (str_name == str_pass)
		{
			MessageBoxA(0, "ok", "", 0);
		}
		return true;
		});
}
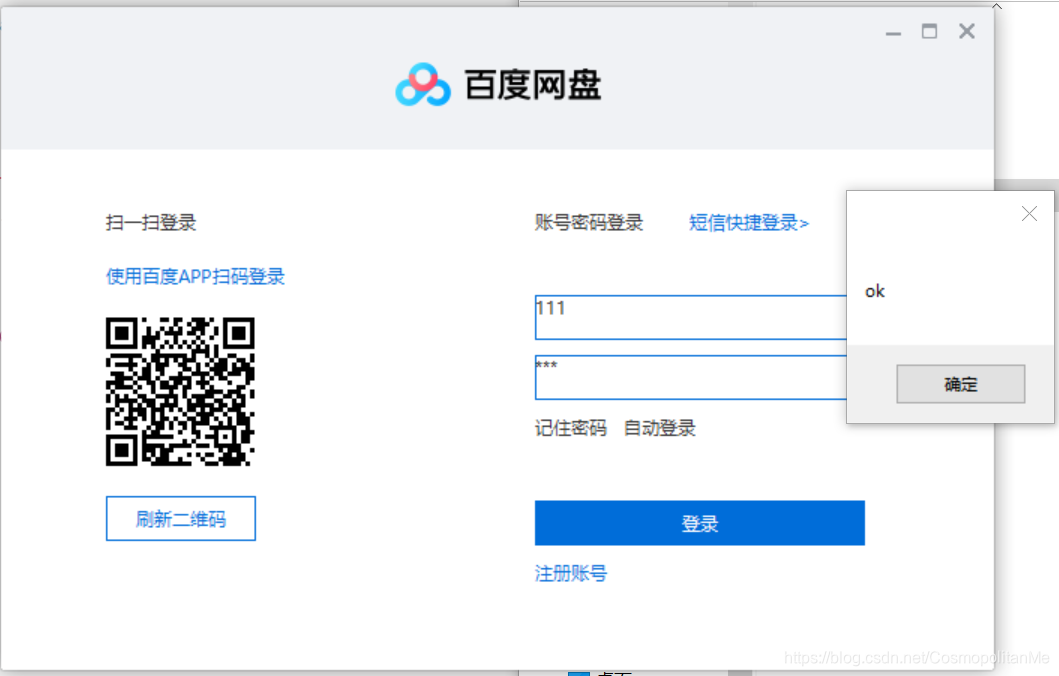
最后实现的效果:


 被折叠的 条评论
为什么被折叠?
被折叠的 条评论
为什么被折叠?
 到【灌水乐园】发言


