


Nginx进阶
https配置
生成私钥,生成证书签署请求并获得证书,然后在nginx.conf中配置
server {
  listen       443 ssl;
  server_name  www.idfsoft.com;
  ssl_certificate      /etc/nginx/ssl/nginx.crt;
  ssl_certificate_key  /etc/nginx/ssl/nginx.key;
  ssl_session_cache    shared:SSL:1m;
  ssl_session_timeout  5m;
  ssl_ciphers  HIGH:!aNULL:!MD5;
  ssl_prefer_server_ciphers  on;
  location / {
    root   html;
    index  index.html index.htm;
  }
}
获取证书有方式有两种,其一是openssl实现私有CA签发证书,其二是免费SSL证书申请。在个人实验环境中二者选其一即可,但在企业的生产环境中必须要购买证书进行部署。
openssl实现私有CA签发证书
#创建私有CA存放位置
[root@localhost ~]# mkdir -p /etc/pki/CA
[root@localhost ~]# cd /etc/pki/CA
[root@localhost CA]# mkdir private
#服务端生成密钥
[root@localhost CA]# (umask 077;openssl genrsa -out private/cakey.pem 2048)
Generating RSA private key, 2048 bit long modulus (2 primes)
....+++++
.........................+++++
e is 65537 (0x010001)
#提取公钥
[root@localhost CA]# openssl rsa -in private/cakey.pem -pubout
writing RSA key
-----BEGIN PUBLIC KEY-----
MIIBIjANBgkqhkiG9w0BAQEFAAOCAQ8AMIIBCgKCAQEA1R3BrFLzEFub1t8k2CPd
EZcUoXvmSJVGNf99LgISs+zzY7Jl0s97bcNLaB91h/riPNHq9Z/hyeqfTbSVNKeO
s4Z6RuM7m/Bpm1cSt53FOgrz41GBs/DT9V0CzJABCiWjJziQOIn93JElTNOttDKD
AOMwo88u+b1kG/GcSfkLpNn871X/5YKp1YRXMmE8TLfvpp6hXmvojai2MpxIGCcJ
DC/oDtKOKtsPGUAW6xB7ZpIcQsw+n3JMhiCgKsYeGZ1ZKHM9LFTB7s02Xe0pQwhZ
fzQ3N1nR9fpC6eiU3DkV1h4V+2mUD36Omgqz9H3+DrPn+xAfGSVBtxrmBFvxJMAV
+wIDAQAB
-----END PUBLIC KEY-----
#生成自签署证书,请记住这里填写的信息,后面生成的证书签署请求文件填写的信息要与这里完全一致
[root@localhost CA]# openssl req -new -x509 -key private/cakey.pem -out cacert.pem -days 365
You are about to be asked to enter information that will be incorporated
into your certificate request.
What you are about to enter is what is called a Distinguished Name or a DN.
There are quite a few fields but you can leave some blank
For some fields there will be a default value,
If you enter '.', the field will be left blank.
-----
Country Name (2 letter code) [XX]:CN
State or Province Name (full name) []:HB
Locality Name (eg, city) [Default City]:WH
Organization Name (eg, company) [Default Company Ltd]:www.yf.com
Organizational Unit Name (eg, section) []:www.yf.com
Common Name (eg, your name or your server's hostname) []:www.yf.com
Email Address []:1@2.com
[root@localhost CA]# ls
cacert.pem  private
[root@localhost CA]# mkdir certs newcerts crl
[root@localhost CA]# touch index.txt && echo 01 > serial
[root@localhost CA]# ls
cacert.pem  certs  crl  index.txt  newcerts  private  serial
[root@localhost CA]# cd /usr/local/nginx/conf/
[root@localhost conf]# mkdir ssl
[root@localhost conf]# cd ssl/
#客户端生成密钥
[root@localhost ssl]# (umask 077;openssl genrsa -out nginx.key 2048)
Generating RSA private key, 2048 bit long modulus (2 primes)
.....+++++
..............................+++++
e is 65537 (0x010001)
#客户端生成证书签署请求文件,这里填写的信息要与前面的完全一致,不然无法签署成功
[root@localhost ssl]# openssl req -new -key nginx.key -days 365 -out nginx.csr
Ignoring -days; not generating a certificate
You are about to be asked to enter information that will be incorporated
into your certificate request.
What you are about to enter is what is called a Distinguished Name or a DN.
There are quite a few fields but you can leave some blank
For some fields there will be a default value,
If you enter '.', the field will be left blank.
-----
Country Name (2 letter code) [XX]:CN
State or Province Name (full name) []:HB
Locality Name (eg, city) [Default City]:WH
Organization Name (eg, company) [Default Company Ltd]:www.yf.com
Organizational Unit Name (eg, section) []:www.yf.com
Common Name (eg, your name or your server's hostname) []:www.yf.com
Email Address []:1@2.com

Please enter the following 'extra' attributes
to be sent with your certificate request
A challenge password []:
An optional company name []:
[root@localhost ssl]# ls
nginx.csr  nginx.key
#CA签署客户端的证书
[root@localhost ssl]# openssl ca -in nginx.csr -out nginx.crt -days 365
Using configuration from /etc/pki/tls/openssl.cnf
Check that the request matches the signature
Signature ok
Certificate Details:
        Serial Number: 1 (0x1)
        Validity
            Not Before: Oct 13 12:38:41 2022 GMT
            Not After : Oct 13 12:38:41 2023 GMT
        Subject:
            countryName               = CN
            stateOrProvinceName       = HB
            organizationName          = www.yf.com
            organizationalUnitName    = www.yf.com
            commonName                = www.yf.com
            emailAddress              = 1@2.com
        X509v3 extensions:
            X509v3 Basic Constraints:
                CA:FALSE
            Netscape Comment:
                OpenSSL Generated Certificate
            X509v3 Subject Key Identifier:
                04:7E:A7:7C:55:34:E8:B8:52:D0:C5:CE:FA:C4:14:E2:A5:96:08:A2
            X509v3 Authority Key Identifier:
                keyid:76:81:2D:69:5B:17:F6:52:4C:C4:91:7C:BC:FD:90:21:01:C0:49:F7

Certificate is to be certified until Oct 13 12:38:41 2023 GMT (365 days)
Sign the certificate? [y/n]:y


1 out of 1 certificate requests certified, commit? [y/n]y
Write out database with 1 new entries
Data Base Updated
[root@localhost ssl]# ls
nginx.crt  nginx.csr  nginx.key
#csr是证书签署请求文件,已完成了它的使命,后续不再用到
[root@localhost ssl]# rm -f nginx.csr
[root@localhost ssl]# ls
nginx.crt  nginx.key
免费https证书申请
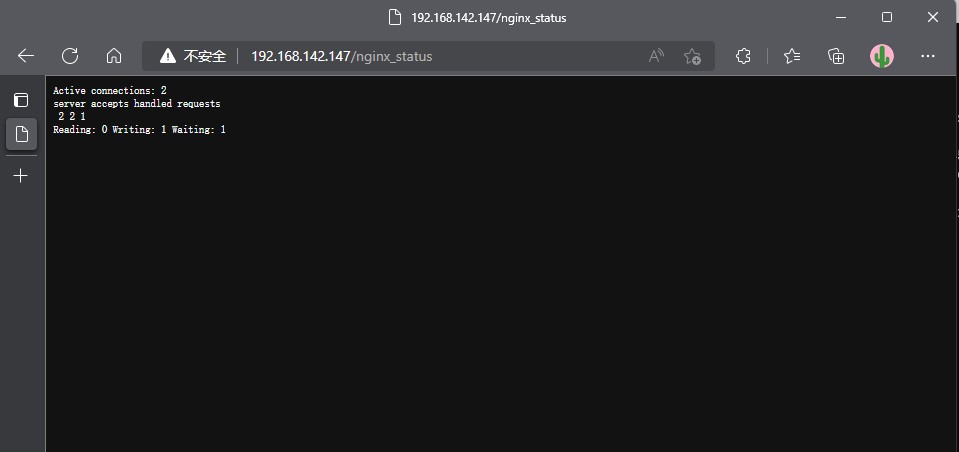
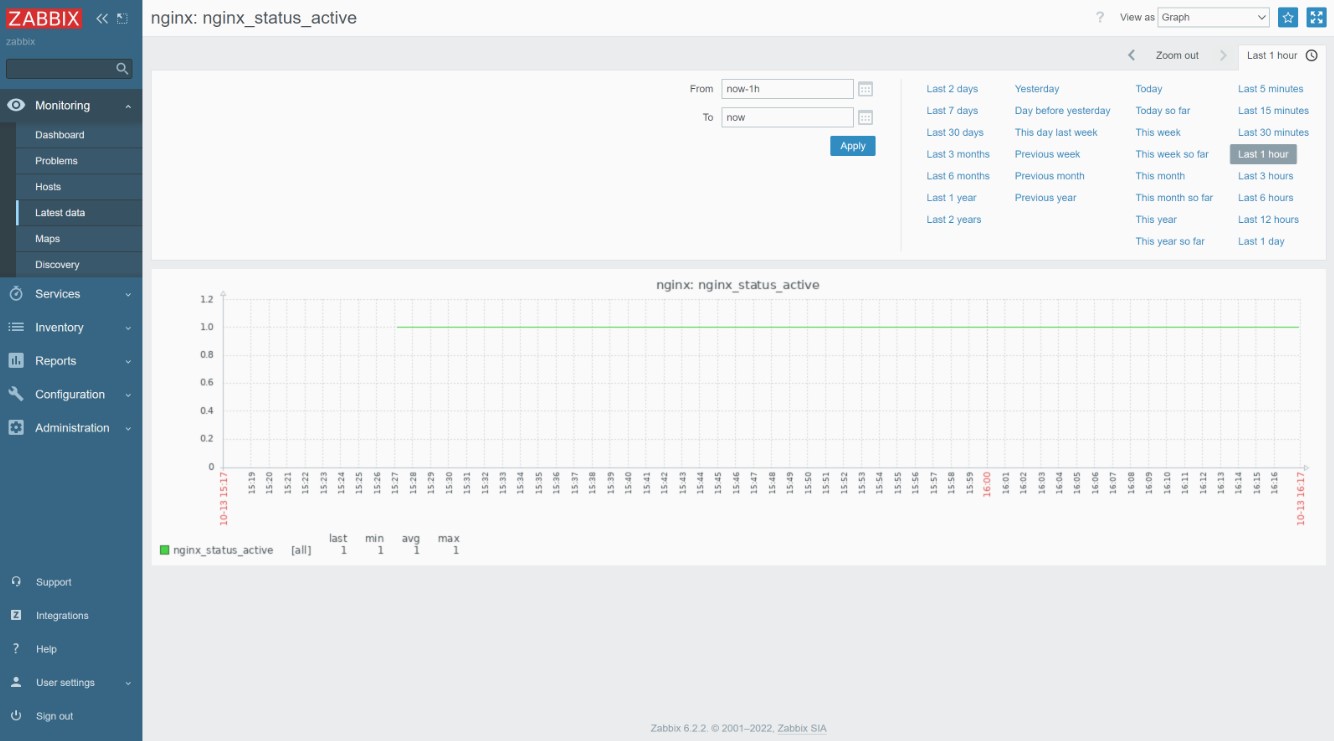
zabbix监控nginx状态界面
状态页面信息详解:
| 状态码 | 表示的意义 |
|---|---|
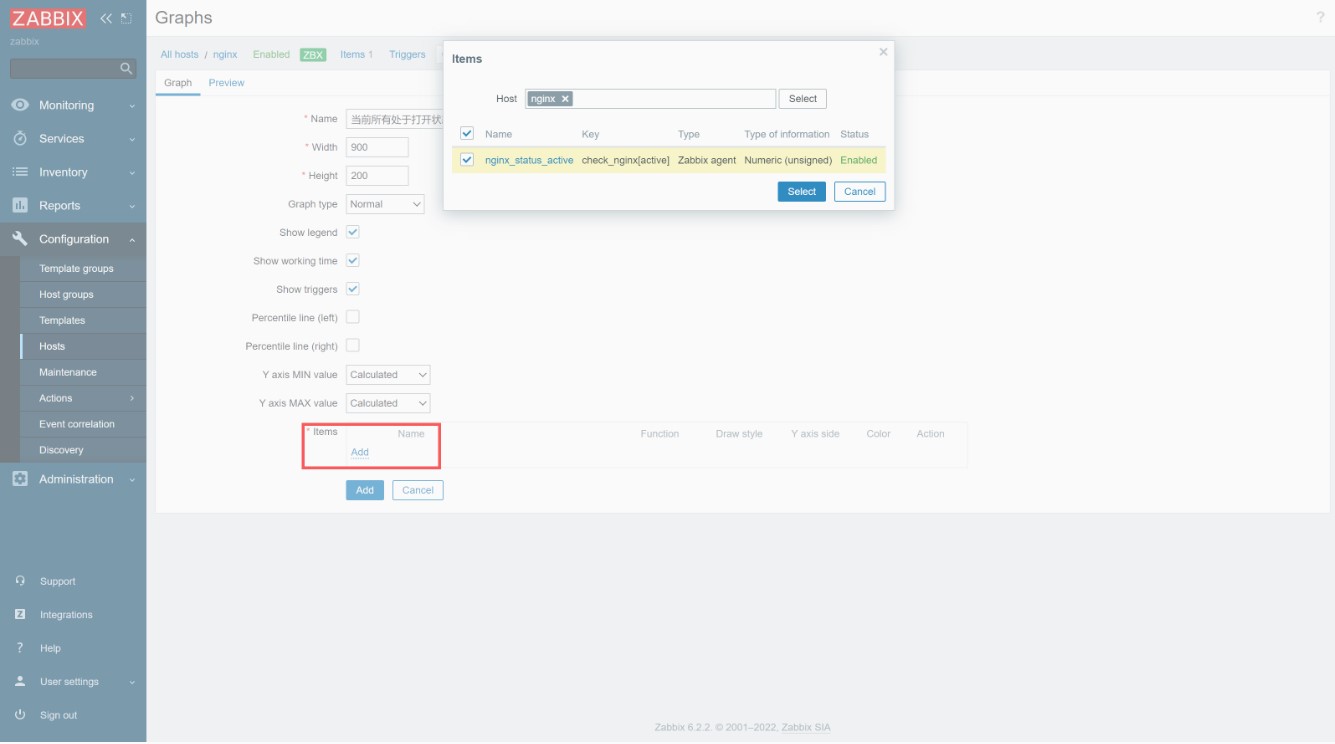
| Active connections 2 | 当前所有处于打开状态的连接数 |
| accepts | 总共处理了多少个连接 |
| handled | 成功创建多少握手 |
| requests | 总共处理了多少个请求 |
| Reading | nginx读取到客户端的Header信息数,表示正处于接收请求状态的连接数 |
| Writing | nginx返回给客户端的Header信息数,表示请求已经接收完成, 且正处于处理请求或发送响应的过程中的连接数 |
| Waiting | 开启keep-alive的情况下,这个值等于active - (reading + writing), 意思就是Nginx已处理完正在等候下一次请求指令的驻留连接 |
环境说明:
| 系统 | 主机名 | IP | |
|---|---|---|---|
| centos8 | nginx | 192.168.142.147 | nginx zabbix-agentd |
| centos8 | zabbix | 192.168.111.143 | LAMP zabbix-server zabbix-agentd |
开启状态界面
//修改配置文件
[root@nginx ~]# vim /usr/local/nginx/conf/nginx.conf
        location /nginx_status {
            stub_status on;			//开启status
        }
[root@nginx ~]# systemctl restart nginx
修改配置文件
//修改zabbix配置文件
[root@nginx ~]# vim /usr/local/etc/zabbix_agentd.conf
Server=192.168.111.143 //服务端ip
ServerActive=192.168.111.143 //服务端ip
Hostname=test //监控主机名
//编写脚本
[root@nginx ~]# mkdir /scripts
[root@nginx ~]# cd /scripts/
[root@nginx scripts]# vim check_nginx.sh
#Script to fetch nginx statuses for monitoring systems
HOST="127.0.0.1"
PORT="80"
function ping {
/sbin/pidof nginx | wc -l
}
function active {
/usr/bin/curl "http://$HOST:$PORT/nginx_status/" 2>/dev/null| grep 'Active' | awk '{print $NF}'
}
function reading {
/usr/bin/curl "http://$HOST:$PORT/nginx_status/" 2>/dev/null| grep 'Reading' | awk '{print $2}'
}
function writing {
/usr/bin/curl "http://$HOST:$PORT/nginx_status/" 2>/dev/null| grep 'Writing' | awk '{print $4}'
}
function waiting {
/usr/bin/curl "http://$HOST:$PORT/nginx_status/" 2>/dev/null| grep 'Waiting' | awk '{print $6}'
}
function accepts {
/usr/bin/curl "http://$HOST:$PORT/nginx_status/" 2>/dev/null| awk NR==3 | awk '{print $1}'
}
function handled {
/usr/bin/curl "http://$HOST:$PORT/nginx_status/" 2>/dev/null| awk NR==3 | awk '{print $2}'
}
function requests {
/usr/bin/curl "http://$HOST:$PORT/nginx_status/" 2>/dev/null| awk NR==3 | awk '{print $3}'
}
$1
[root@nginx scripts]# chmod +x check_nginx.sh
[root@nginx scripts]# ll
total 4
-rwxr-xr-x 1 root root 968 Oct 13 15:17 check_nginx.sh
//开启自定义监控
[root@nginx ~]# vim /usr/local/etc/zabbix_agentd.conf
UnsafeUserParameters=1 //添加
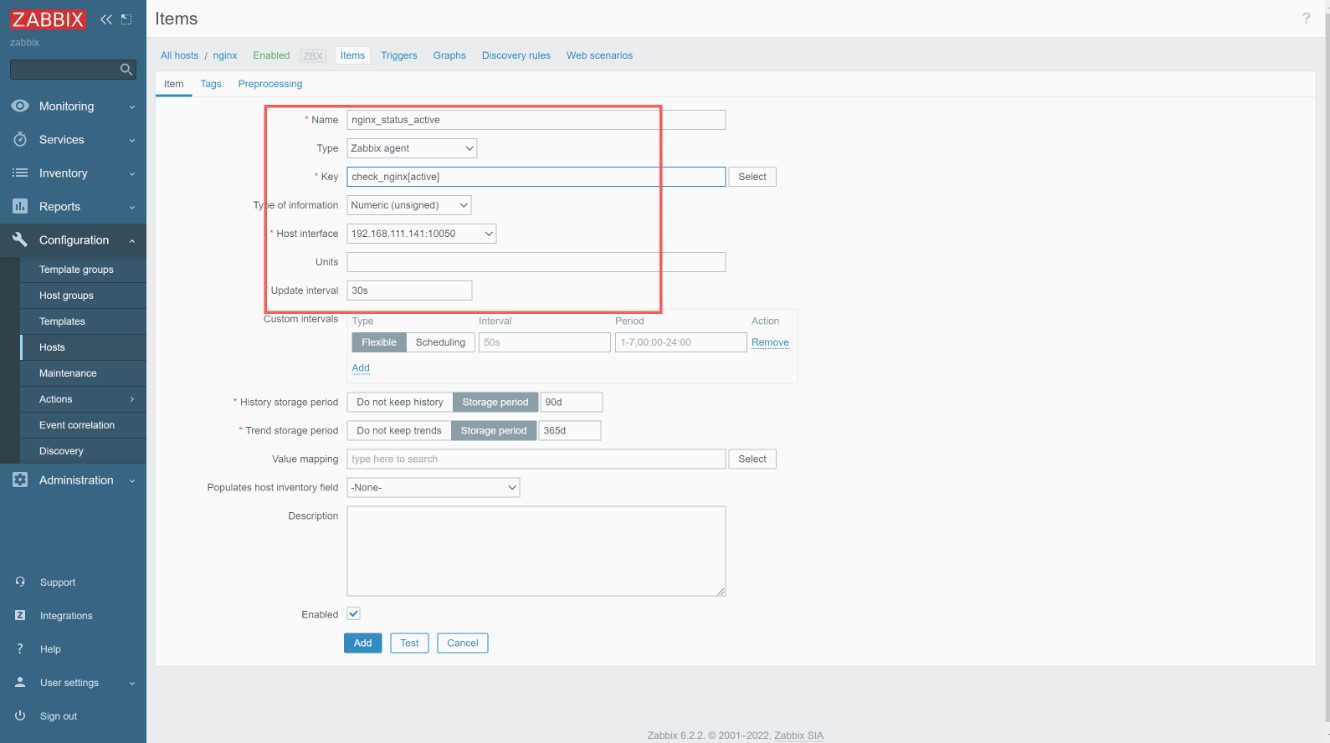
UserParameter=check_nginx[*],/bin/bash /scripts/check_nginx.sh $1 //添加
//重启服务
[root@nginx ~]# pkill zabbix
[root@nginx ~]# zabbix_agentd
[root@nginx ~]# ss -anlt
State Recv-Q Send-Q Local Address:Port Peer Address:Port Process
LISTEN 0 128 0.0.0.0:80 0.0.0.0:*
LISTEN 0 128 0.0.0.0:22 0.0.0.0:*
LISTEN 0 128 0.0.0.0:443 0.0.0.0:*
LISTEN 0 128 0.0.0.0:10050 0.0.0.0:*
LISTEN 0 128 [::]:22 [::]:*
//服务端进行测试
[root@zabbix ~]# zabbix_get -s 192.168.142.152 -k check_nginx[active] //修改中括号内想要查看的状态名称即可
1
[root@zabbix ~]# zabbix_get -s 192.168.142.152 -k check_nginx[accepts]
4
[root@zabbix ~]# zabbix_get -s 192.168.142.152 -k check_nginx[handled]
5
web界面配置
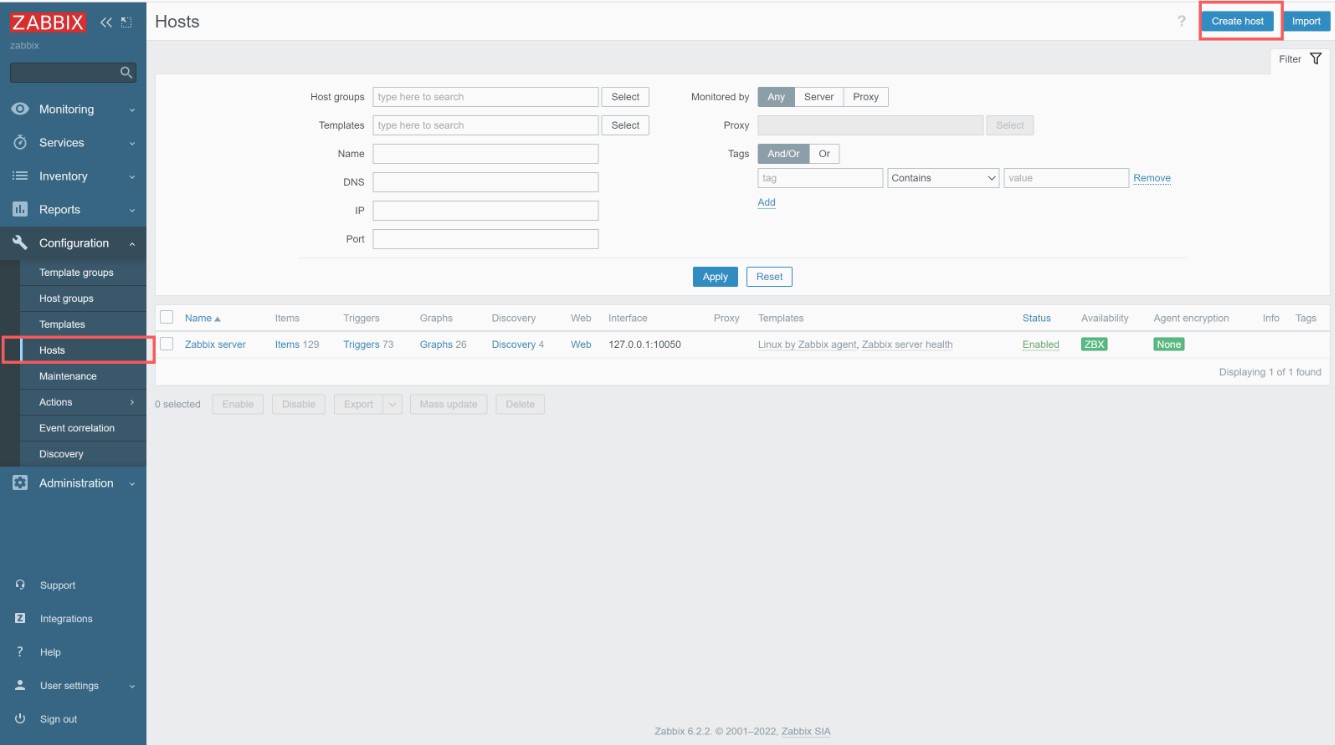
创建监控主机
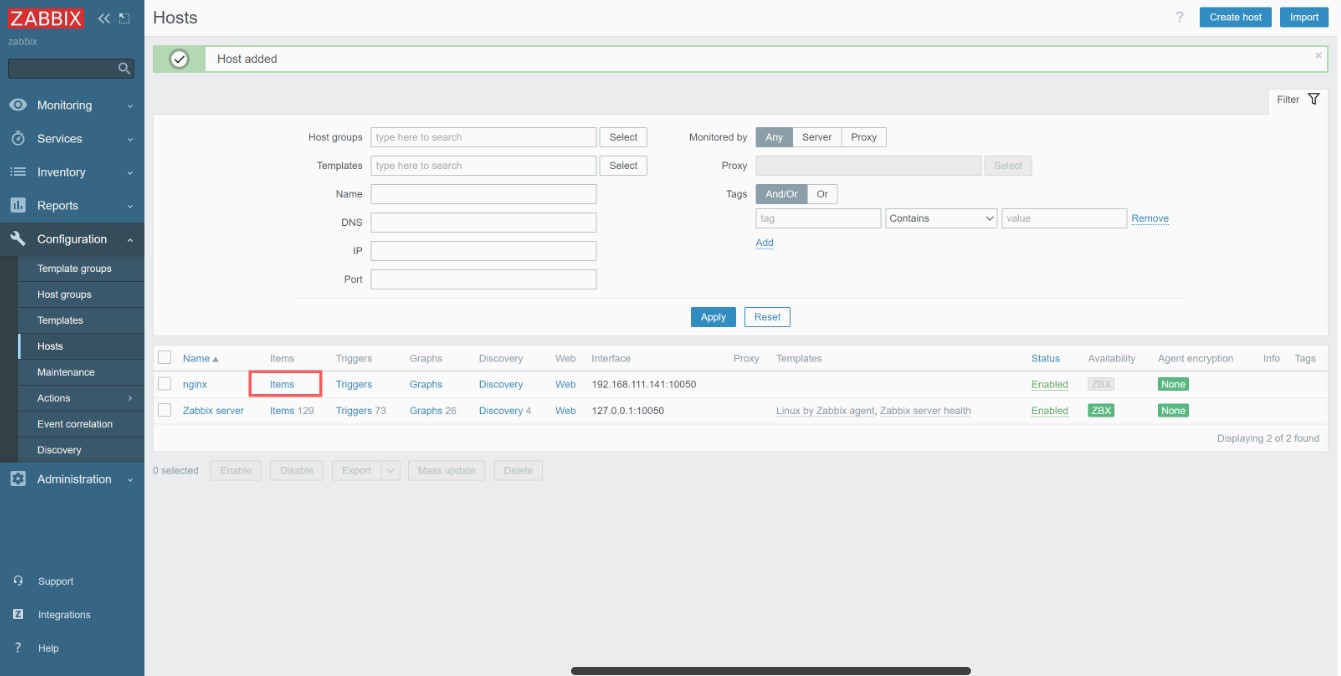
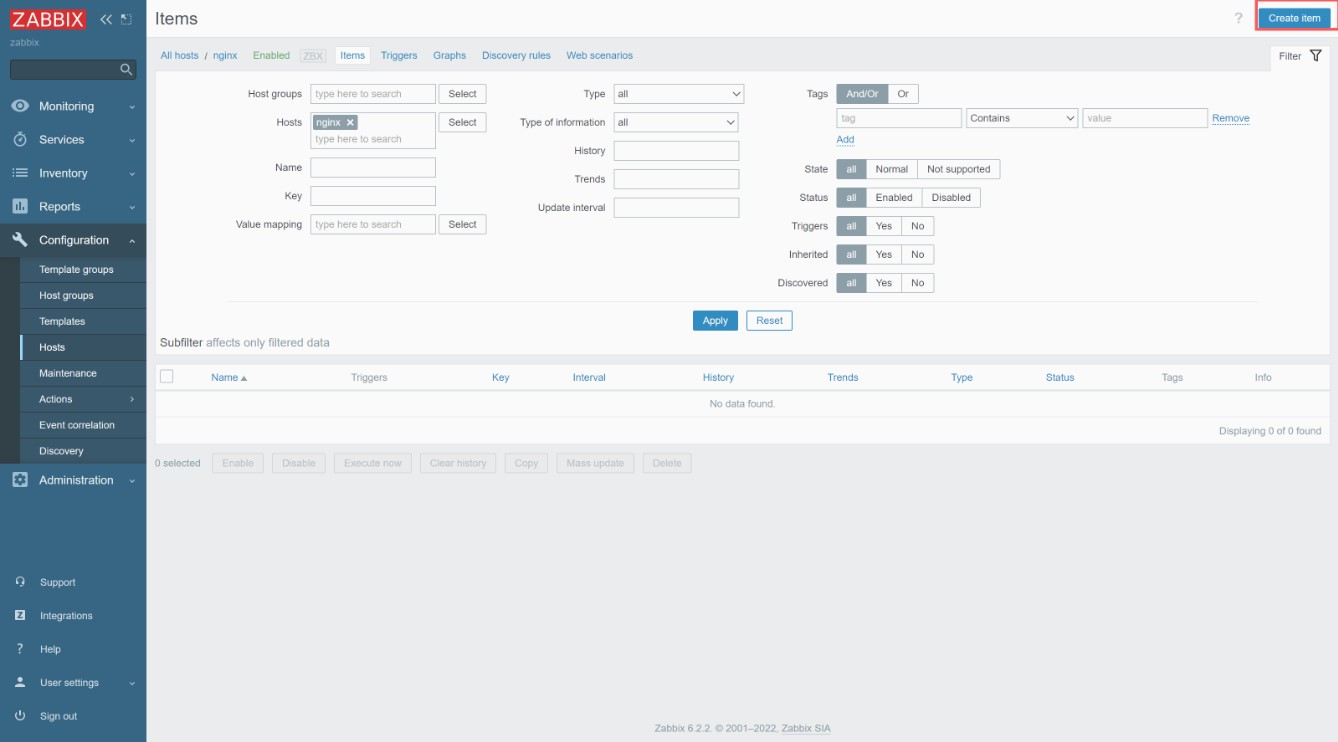
配置监控项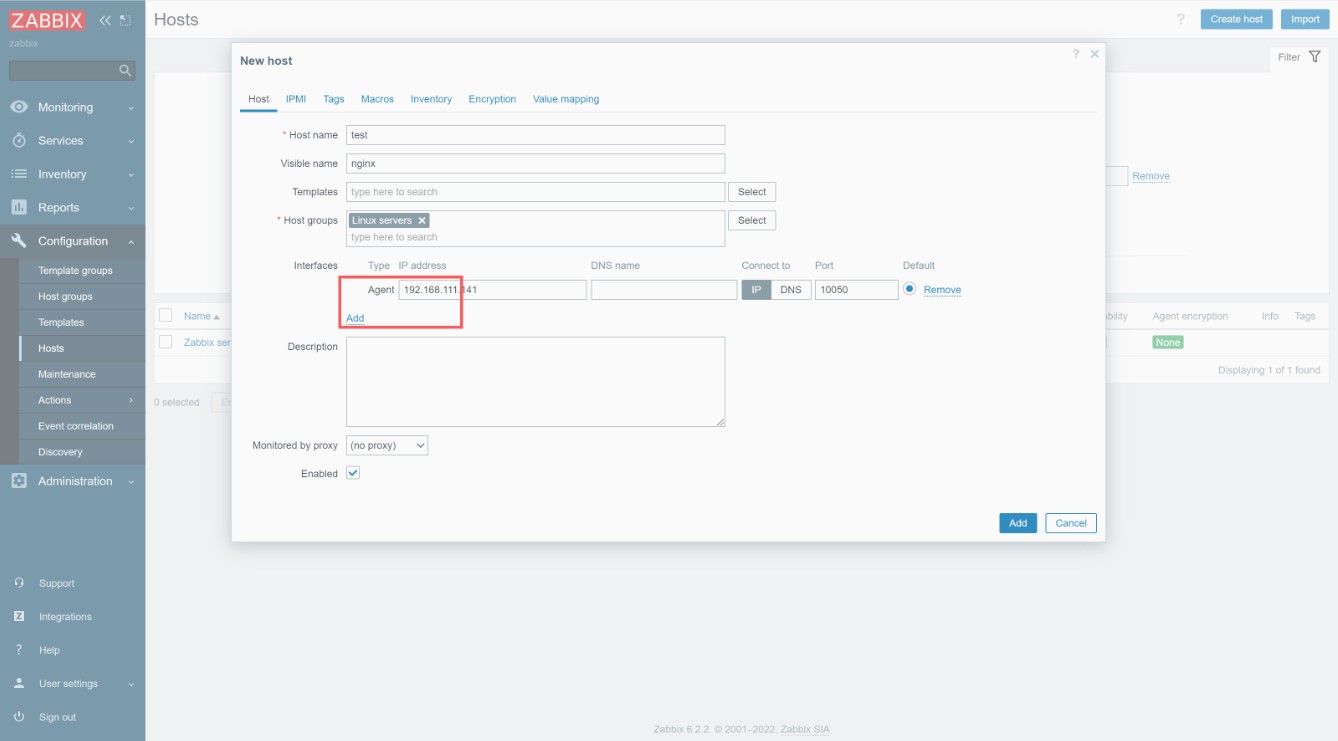


 173
173


 被折叠的 条评论
为什么被折叠?
被折叠的 条评论
为什么被折叠?
 到【灌水乐园】发言


