


目录
1. 项目中加入 SpringSecurity
1.1 加入 SpringSecurity 环境
2.1.1 依赖
<!-- SpringSecurity 对 Web 应用进行权限管理 -->
        <dependency>
            <groupId>org.springframework.security</groupId>
            <artifactId>spring-security-web</artifactId>
        </dependency>
        <!-- SpringSecurity 配置 -->
        <dependency>
            <groupId>org.springframework.security</groupId>
            <artifactId>spring-security-config</artifactId>
        </dependency>
        <!-- SpringSecurity 标签库 -->
        <dependency>
            <groupId>org.springframework.security</groupId>
            <artifactId>spring-security-taglibs</artifactId>
        </dependency>
在原有的 SSM 整合环境基础上加入 SpringSecurity 的依赖。
1.1.2 在 web.xml 中配置 DelegatingFilterProxy
<!-- SpringSecurity 的 Filter -->
            <filter>
              <filter-name>springSecurityFilterChain</filter-name>
              <filter-class>org.springframework.web.filter.DelegatingFilterProxy</filter-class>
            </filter>
            <filter-mapping>
              <filter-name>springSecurityFilterChain</filter-name>
              <url-pattern>/*</url-pattern>
            </filter-mapping>
1.1.3 创建基于注解的配置类

package com.atguigu.crowd.mvc.config;


import com.atguigu.crowd.constant.CrowdConstant;
import org.springframework.beans.factory.annotation.Autowired;
import org.springframework.context.annotation.Configuration;
import org.springframework.security.access.AccessDeniedException;
import org.springframework.security.config.annotation.authentication.builders.AuthenticationManagerBuilder;
import org.springframework.security.config.annotation.method.configuration.EnableGlobalMethodSecurity;
import org.springframework.security.config.annotation.web.builders.HttpSecurity;
import org.springframework.security.config.annotation.web.configuration.EnableWebSecurity;
import org.springframework.security.config.annotation.web.configuration.WebSecurityConfigurerAdapter;
import org.springframework.security.core.userdetails.UserDetailsService;
import org.springframework.security.crypto.bcrypt.BCryptPasswordEncoder;
import org.springframework.security.web.access.AccessDeniedHandler;

import javax.servlet.ServletException;
import javax.servlet.http.HttpServletRequest;
import javax.servlet.http.HttpServletResponse;
import java.io.IOException;

// 表示当前类是一个配置类
@Configuration

// 启用web环境下权限控制功能
@EnableWebSecurity

// 启用全局方法权限控制功能,并且设置prePostEnabled = true.保住@PreAuthority、@PostAuthority、@PreFilter、@PostFilter生效
@EnableGlobalMethodSecurity(prePostEnabled = true)
public class WebAppSecurityConfig extends WebSecurityConfigurerAdapter {

    @Autowired
    private UserDetailsService userDetailsService;

    /*
    在这里声明,无法在XxxService中装配
    @Bean
    public BCryptPasswordEncoder getPasswordEncoder(){
        return new BCryptPasswordEncoder();
    }*/

    @Autowired
    private BCryptPasswordEncoder passwordEncoder;

    @Override
    protected void configure(AuthenticationManagerBuilder builder) throws Exception {
        // 与 SpringSecurity 环境下用户登录相关

        /*// 临时使用内存版登录的模式测试代码
        builder.inMemoryAuthentication().withUser("tom").password("123123").roles("ADMIN");*/

        // 正式功能中使用基于数据库的认证
        builder
                .userDetailsService(userDetailsService)
                .passwordEncoder(passwordEncoder);

    }

    @Override
    protected void configure(HttpSecurity security) throws Exception {
        // 与 SpringSecurity 环境下请求授权相关
        security
                .authorizeRequests()    // 对请求进行授权
                .antMatchers("/admin/to/login/page.html")   // 针对登录页进行设置
                .permitAll()    // 无条件访问
                .antMatchers("/bootstrap/**")   // 针对静态资源进行设置,无条件访问
                .permitAll()
                .antMatchers("/crowd/**")// 针对静态资源进行设置,无条件访问
                .permitAll()
                .antMatchers("/css/**")// 针对静态资源进行设置,无条件访问
                .permitAll()
                .antMatchers("/fonts/**")// 针对静态资源进行设置,无条件访问
                .permitAll()
                .antMatchers("/img/**")// 针对静态资源进行设置,无条件访问
                .permitAll()
                .antMatchers("/jquery/**")// 针对静态资源进行设置,无条件访问
                .permitAll()
                .antMatchers("/layer/**")// 针对静态资源进行设置,无条件访问
                .permitAll()
                .antMatchers("/script/**")// 针对静态资源进行设置,无条件访问
                .permitAll()
                .antMatchers("/ztree/**")// 针对静态资源进行设置,无条件访问
                .permitAll()
                .antMatchers("/admin/get/page.html")    // 针对分页显示Admin数据设定访问控制
//                .hasRole("经理")  // 要求具备经理角色
                .access("hasRole('经理') OR hasAuthority('user:get')")    // 要求具备"经理"角色和“user:get”权限之一
                .anyRequest()   // 其他任意请求
                .authenticated()    // 认证后访问
                .and()
                .exceptionHandling()
                .accessDeniedHandler(new AccessDeniedHandler() {

                    @Override
                    public void handle(HttpServletRequest request, HttpServletResponse response,
                                       AccessDeniedException accessDeniedException) throws IOException, ServletException {
                        request.setAttribute("exception", new Exception(CrowdConstant.MESSAGE_ACCESS_DENIED));
                        request.getRequestDispatcher("/WEB-INF/system-error.jsp").forward(request, response);
                    }
                })
                .and()
                .csrf() // 防跨站请求伪造功能
                .disable()  // 禁用
                .formLogin()    // 开启表单登录的功能
                .loginPage("/admin/to/login/page.html") // 指定登录页面
                .loginProcessingUrl("/security/do/login.html")  // 指定出来登录请求的地址
                .defaultSuccessUrl("/admin/to/main/page.html")  // 指定登录成功后前往的地址
                .usernameParameter("loginAcct") // 账号的请求参数名称
                .passwordParameter("userPswd")  // 密码的请求参数名称
                .and()
                .logout()   // 开启退出登录功能
                .logoutUrl("/seucrity/do/logout.html")  // 指定退出登录地址
                .logoutSuccessUrl("/admin/to/login/page.html")   // 指定退出成功以后前往的地址
        ;

    }
}
1.1.4 谁来把 WebAppSecurityConfig 扫描到 IOC 里?
如果是 Spring 的 IOC 容器扫描:

如果是 SpringMVC 的 IOC 容器扫描:

结论:为了让 SpringSecurity 能够针对浏览器请求进行权限控制,需要让SpringMVC 来扫描 WebAppSecurityConfig 类。
衍生问题:DelegatingFilterProxy 初始化时需要到 IOC 容器查找一个 bean,这个 bean 所在的 IOC 容器要看是谁扫描了 WebAppSecurityConfig。
如果是 Spring 扫描了 WebAppSecurityConfig,那么 Filter 需要的 bean 就在Spring 的 IOC 容器。
如果是 SpringMVC 扫描了 WebAppSecurityConfig,那么 Filter 需要的 bean
就在 SpringMVC 的 IOC 容器。
1.2 提出找不到 bean 的问题

2.3 分析问题
2.3.1 明确三大组件启动顺序
首先:ContextLoaderListener 初始化,创建 Spring 的 IOC 容器
其次:DelegatingFilterProxy 初始化,查找 IOC 容器、查找 bean
最后:DispatcherServlet 初始化,创建 SpringMVC 的 IOC 容器
2.3.2 DelegatingFilterProxy 查找 IOC 容器然后查找 bean 的工作机制

2.4 解决方案一:把两个 IOC 容器合二为一
不使用 ContextLoaderListener,让 DispatcherServlet 加载所有 Spring 配置文件。
DelegatingFilterProxy 在初始化时查找 IOC 容器,找不到,放弃。
第一次请求时再次查找。
找到 SpringMVC 的 IOC 容器。
从这个 IOC 容器中找到所需要的 bean。
遗憾:会破坏现有程序的结构。原本是 ContextLoaderListener 和 DispatcherServlet两个组件创建两个 IOC 容器,现在改成只有一个。
2.5 解决方案二:改源码
2.5.1 初始化时直接跳过查找 IOC 容器的环节


public void doFilter(ServletRequest request, ServletResponse response, FilterChain filterChain) throws ServletException, IOException {
        Filter delegateToUse = this.delegate;
        if (delegateToUse == null) {
            Object var5 = this.delegateMonitor;
            synchronized(this.delegateMonitor) {
                delegateToUse = this.delegate;
                if (delegateToUse == null) {

                    // 把原来的查找IOC容器的代码注释掉
                    // WebApplicationContext wac = this.findWebApplicationContext();

                    // 按我们自己的需要重新编写
                    // 1.获取ServletContext对象
                    ServletContext sc = this.getServletContext();

                    // 2.拼接SpringMVC将IOC容器存入ServletContext域的时候使用的属性名
                    String servletName = "springDispatcherServlet";

                    String attrName = FrameworkServlet.SERVLET_CONTEXT_PREFIX + servletName;

                    // 3.根据attrName从ServletContext域中获取IOC容器对象
                    WebApplicationContext wac = (WebApplicationContext) sc.getAttribute(attrName);

                    if (wac == null) {
                        throw new IllegalStateException("No WebApplicationContext found: no ContextLoaderListener or DispatcherServlet registered?");
                    }

                    delegateToUse = this.initDelegate(wac);
                }

                this.delegate = delegateToUse;
            }
        }

        this.invokeDelegate(delegateToUse, request, response, filterChain);
    }
2.5.2 第一次请求的时候直接找 SpringMVC 的 IOC 容器
2.6 意外收获
发现了 SpringSecurity 的工作原理:在初始化时或第一次请求时准备好过滤器链。具体任务由具体过滤器来完成。
org.springframework.security.web.context.request.async.WebAsyncManagerIntegrationFilter
org.springframework.security.web.context.SecurityContextPersistenceFilter
org.springframework.security.web.header.HeaderWriterFilter
org.springframework.security.web.csrf.CsrfFilter
org.springframework.security.web.authentication.logout.LogoutFilter
org.springframework.security.web.authentication.UsernamePasswordAuthenticationFilter
org.springframework.security.web.authentication.ui.DefaultLoginPageGeneratingFilter
org.springframework.security.web.authentication.www.BasicAuthenticationFilter
org.springframework.security.web.savedrequest.RequestCacheAwareFilter
org.springframework.security.web.servletapi.SecurityContextHolderAwareRequestFilter
org.springframework.security.web.authentication.AnonymousAuthenticationFilter
org.springframework.security.web.session.SessionManagementFilter
org.springframework.security.web.access.ExceptionTranslationFilter
org.springframework.security.web.access.intercept.FilterSecurityInterceptor
2.7 目标 1:放行登录页和静态资源
2.7.1 思路
在 SpringSecurity 的配置类 WebAppSecurityConfig 中重写 configure(HttpSecuritysecurity)方法并设置。
2.7.2 代码
2.8 目标 2:提交登录表单做内存认证
2.8.1 思路

 @Override
    protected void configure(HttpSecurity security) throws Exception {
        // 与 SpringSecurity 环境下请求授权相关
        security
                .authorizeRequests()    // 对请求进行授权
                .antMatchers("/admin/to/login/page.html")   // 针对登录页进行设置
                .permitAll()    // 无条件访问
                .antMatchers("/bootstrap/**")   // 针对静态资源进行设置,无条件访问
                .permitAll()
                .antMatchers("/crowd/**")// 针对静态资源进行设置,无条件访问
                .permitAll()
                .antMatchers("/css/**")// 针对静态资源进行设置,无条件访问
                .permitAll()
                .antMatchers("/fonts/**")// 针对静态资源进行设置,无条件访问
                .permitAll()
                .antMatchers("/img/**")// 针对静态资源进行设置,无条件访问
                .permitAll()
                .antMatchers("/jquery/**")// 针对静态资源进行设置,无条件访问
                .permitAll()
                .antMatchers("/layer/**")// 针对静态资源进行设置,无条件访问
                .permitAll()
                .antMatchers("/script/**")// 针对静态资源进行设置,无条件访问
                .permitAll()
                .antMatchers("/ztree/**")// 针对静态资源进行设置,无条件访问
                .permitAll()

                .anyRequest()   // 其他任意请求
                .authenticated();   // 认证后访问
                }
2.8.2 操作 1:设置表单

2.8.3 操作 2:SpringSecurity 配置
@Override
    protected void configure(AuthenticationManagerBuilder builder) throws Exception {
        // 与 SpringSecurity 环境下用户登录相关

        // 临时使用内存版登录的模式测试代码
        builder.inMemoryAuthentication().withUser("tom").password("123123").roles("ADMIN");
        }
@Override
    protected void configure(HttpSecurity security) throws Exception {
    .anyRequest()   // 其他任意请求
                .authenticated()    // 认证后访问
                .and()
                .csrf() // 防跨站请求伪造功能
                .disable()  // 禁用
                .formLogin()    // 开启表单登录的功能
                .loginPage("/admin/to/login/page.html") // 指定登录页面
                .loginProcessingUrl("/security/do/login.html")  // 指定出来登录请求的地址
                .defaultSuccessUrl("/admin/to/main/page.html")  // 指定登录成功后前往的地址
                .usernameParameter("loginAcct") // 账号的请求参数名称
                .passwordParameter("userPswd")  // 密码的请求参数名称
                .and();

    }
2.8.4 操作 3:取消以前的自定义登录拦截器

<!--<!– 注册拦截器: 使用SpringSecurity后当前登录自定义的登录拦截器不再使用了–>
<mvc:interceptors>
<mvc:interceptor>
<!– mvc:mapping配置要拦截的资源 –>
<!– /*对应一层路径, 比如:/aaa –>
<!– /**对应多层路径,比如:/aaa/bbb 或/aaa/bbb/ccc 或/aaa/bbb/ccc/ddd –>
<mvc:mapping path="/**"/>
<!– vc:exclude-mapping配置不拦截的资源 –>
<mvc:exclude-mapping path="/admin/to/login/page.html"/>
<mvc:exclude-mapping path="/admin/do/login.html"/>
<mvc:exclude-mapping path="/admin/do/logout.html"/>
<!– 配置拦截器 –>
<bean class="com.atguigu.crowd.mvc.interceptor.LoginInterceptor"/>
</mvc:interceptor>
</mvc:interceptors>-->
2.9 目标 3:退出登录
@Override
    protected void configure(AuthenticationManagerBuilder builder) throws Exception {
.usernameParameter("loginAcct") // 账号的请求参数名称
                .passwordParameter("userPswd")  // 密码的请求参数名称
                .and()
                .logout()   // 开启退出登录功能
                .logoutUrl("/seucrity/do/logout.html")  // 指定退出登录地址
                .logoutSuccessUrl("/admin/to/login/page.html")   // 指定退出成功以后前往的地址
        ;
        }
2.10目标 4:把内存登录改成数据库登录
2.10.1思路

2.10.2操作 1:根据 adminId 查询已分配的角色

@Service
public class RoleServiceImpl implements RoleService {

    @Autowired
    private RoleMapper roleMapper;


@Override
    public List<Role> getAssignedRole(Integer adminId) {

        return roleMapper.selectAssignedRole(adminId);
    }
SQL语句如下:


<select id="selectAssignedRole" resultMap="BaseResultMap">
		select id,name from t_role where id in (select  role_id from inner_admin_role where admin_id=#{adminId})
	</select>
2.10.3操作 2:根据 adminId 查询已分配权限

@Service
public class AuthServiceImpl implements AuthService {

    @Autowired
    private AuthMapper authMapper;
    @Override
    public List<String> getAssignedAuthNameByAdminId(Integer adminId) {


        return authMapper.selectAssignedAuthNameByAdminId(adminId);
    }
    }
SQL语句如下:


<select id="selectAssignedAuthNameByAdminId" resultType="string">
    SELECT DISTINCT t_auth.name
    FROM t_auth
    LEFT JOIN inner_role_auth ON t_auth.id=inner_role_auth.auth_id
    LEFT JOIN inner_admin_role ON inner_admin_role.role_id=inner_role_auth.role_id
    WHERE inner_admin_role.admin_id=#{adminId} and t_auth.name != "" and t_auth.name is
    not null
  </select>
2.10.4操作 3:创建 SecurityAdmin 类

package com.atguigu.crowd.mvc.config;

import com.atguigu.crowd.entity.Admin;
import org.springframework.security.core.GrantedAuthority;
import org.springframework.security.core.userdetails.User;

import java.util.List;

/**
 * 考虑到User对象中仅仅包含账号和密码,为了能够获取到原始的Admin对象,专门创建这个类对User类进行扩展
 */
public class SecurityAdmin extends User {

    public static final long serialVersionUID = 1L;

    // 原始的Admin对象,包含Admin对象的全部属性
    private Admin originalAdmin;

    public SecurityAdmin(
            // 传入原始的Admin对象
            Admin originalAmin,

            // 创建角色、权限信息的集合
            List<GrantedAuthority> authorities){

        // 调用父类构造器
        super(originalAmin.getLoginAcct(), originalAmin.getUserPswd(), authorities);

        // 给本类的this.originalAdmin赋值
        this.originalAdmin = originalAmin;

        // 将原始Admin对象中的密码擦除
        this.originalAdmin.setUserPswd(null);
    }

    // 对外提供的获取原始Admin对象的getXxx()方法
    public Admin getOriginalAdmin() {
        return originalAdmin;
    }
}
2.10.5操作 4:根据账号查询 Admin

@Service
public class AdminServiceImpl implements AdminService {

    @Autowired
    private AdminMapper adminMapper;
@Override
    public Admin getAdminByLoginAcct(String username) {

        AdminExample example = new AdminExample();

        AdminExample.Criteria criteria = example.createCriteria();

        criteria.andLoginAcctEqualTo(username);

        List<Admin> list = adminMapper.selectByExample(example);

        Admin admin = list.get(0);

        return admin;
    }
    }
2.10.6操作 5;创建 UserDetailsService 实现类

package com.atguigu.crowd.mvc.config;

import java.util.ArrayList;
import java.util.List;

import org.springframework.beans.factory.annotation.Autowired;
import org.springframework.security.core.GrantedAuthority;
import org.springframework.security.core.authority.SimpleGrantedAuthority;
import org.springframework.security.core.userdetails.UserDetails;
import org.springframework.security.core.userdetails.UserDetailsService;
import org.springframework.security.core.userdetails.UsernameNotFoundException;
import org.springframework.stereotype.Component;

import com.atguigu.crowd.entity.Admin;
import com.atguigu.crowd.entity.Role;
import com.atguigu.crowd.service.api.api.AdminService;
import com.atguigu.crowd.service.api.api.AuthService;
import com.atguigu.crowd.service.api.api.RoleService;

@Component
public class CrowdUserDetailsService implements UserDetailsService {

    @Autowired
    private AdminService adminService;

    @Autowired
    private RoleService roleService;

    @Autowired
    private AuthService authService;

    @Override
    public UserDetails loadUserByUsername(String username) throws UsernameNotFoundException {

        // 1.根据账号名称查询Admin对象
        Admin admin = adminService.getAdminByLoginAcct(username);

        // 2.获取adminId
        Integer adminId = admin.getId();

        // 3.根据adminId查询角色信息
        List<Role> assignedRoleList = roleService.getAssignedRole(adminId);

        // 4.根据adminId查询权限信息
        List<String> authNameList = authService.getAssignedAuthNameByAdminId(adminId);

        // 5.创建集合对象用来存储GrantedAuthority
        List<GrantedAuthority> authorities = new ArrayList<>();

        // 6.遍历assignedRoleList存入角色信息
        for (Role role : assignedRoleList) {

            // 注意:不要忘了加前缀!
            String roleName = "ROLE_" + role.getName();

            SimpleGrantedAuthority simpleGrantedAuthority = new SimpleGrantedAuthority(roleName);

            authorities.add(simpleGrantedAuthority);
        }

        // 7.遍历authNameList存入权限信息
        for (String authName : authNameList) {

            SimpleGrantedAuthority simpleGrantedAuthority = new SimpleGrantedAuthority(authName);

            authorities.add(simpleGrantedAuthority);
        }

        // 8.封装SecurityAdmin对象
        SecurityAdmin securityAdmin = new SecurityAdmin(admin, authorities);

        return securityAdmin;
    }

}
2.10.7操作 6:在配置类中使用 UserDetailsService

// 表示当前类是一个配置类
@Configuration

// 启用web环境下权限控制功能
@EnableWebSecurity

// 启用全局方法权限控制功能,并且设置prePostEnabled = true.保住@PreAuthority、@PostAuthority、@PreFilter、@PostFilter生效
@EnableGlobalMethodSecurity(prePostEnabled = true)
public class WebAppSecurityConfig extends WebSecurityConfigurerAdapter {

    @Autowired
    private UserDetailsService userDetailsService;


    @Override
    protected void configure(AuthenticationManagerBuilder builder) throws Exception {
        // 与 SpringSecurity 环境下用户登录相关

        /*// 临时使用内存版登录的模式测试代码
        builder.inMemoryAuthentication().withUser("tom").password("123123").roles("ADMIN");*/

        // 正式功能中使用基于数据库的认证
        builder
                .userDetailsService(userDetailsService)


    }
2.11目标 5:密码加密
2.11.1修改 t_admin 表结构
修改的原因:以前使用 JDK 自带的 MessageDigest 进行加密操作,生成的密文长度为 32。现在使用带盐值的加密方式,生成的密文长度超过这个数值,所以要修改。
ALTER TABLE `project_crowd`.`t_admin` CHANGE `user_pswd` `user_pswd` CHAR(100) CHARSET
utf8 COLLATE utf8_general_ci NOT NULL;
2.11.2准备 BCryptPasswordEncoder 对象
注 意 : 如 果 在SpringSecurity的 配 置 类 中 用 @Bean注 解 将BCryptPasswordEncoder 对象存入 IOC 容器,那么 Service 组件将获取不到。


<!-- 配置BCryptPasswordEncoder的bean-->
    <bean id="passwordEncoder" class="org.springframework.security.crypto.bcrypt.BCryptPasswordEncoder"/>
然后在有需要的地方@Autowired 注解装配即可
2.11.3使用 BCryptPasswordEncoder 对象
/*
    在这里声明,无法在XxxService中装配
    @Bean
    public BCryptPasswordEncoder getPasswordEncoder(){
        return new BCryptPasswordEncoder();
    }*/

    @Autowired
    private BCryptPasswordEncoder passwordEncoder;

@Override
    protected void configure(AuthenticationManagerBuilder builder) throws Exception {
        // 与 SpringSecurity 环境下用户登录相关

        /*// 临时使用内存版登录的模式测试代码
        builder.inMemoryAuthentication().withUser("tom").password("123123").roles("ADMIN");*/

        // 正式功能中使用基于数据库的认证
        builder
                .userDetailsService(userDetailsService)
                .passwordEncoder(passwordEncoder);

    }
2.11.4使用 BCryptPasswordEncoder 在保存 Admin 时加密

@Service
public class AdminServiceImpl implements AdminService {

    @Autowired
    private AdminMapper adminMapper;

    private Logger logger = LoggerFactory.getLogger(AdminServiceImpl.class);

    @Autowired
    private BCryptPasswordEncoder passwordEncoder;

    @Override
    public void saveAdmin(Admin admin) {

        // 1.密码加密
        String userPswd = admin.getUserPswd();
//        userPswd = CrowdUtil.md5(userPswd);
        userPswd = passwordEncoder.encode(userPswd);
        admin.setUserPswd(userPswd);

        // 2.生成创建时间
        Date date = new Date();
        SimpleDateFormat format = new SimpleDateFormat("yyyy-MM-dd HH:mm:ss");
        String createTime = format.format(date);
        admin.setCreateTime(createTime);

        // 3.执行保存
        try {
            adminMapper.insert(admin);
        } catch (Exception e) {
            e.printStackTrace();

            logger.info("异常全类名" + e.getClass().getName());

            if (e instanceof DuplicateKeyException){
                throw new  LoginAcctAlreadyInUseException(CrowdConstant.MESSAGE_LOGIN_ACCT_ALREADY_IN_USE);
            }
        }
    }
    }
2.12目标 6:在页面上显示用户昵称

2.12.1导入标签库

<%@taglib uri="http://www.springframework.org/security/tags" prefix="security"%>
2.12.2通过标签获取已登录用户信息

<security:authentication property="Principal.originalAdmin.userName"/>
分析过程:
<p>显示出来才发现,principal 原来是我们自己封装的 SecurityAdmin 对象</p>
<p>SpringSecurity 处理完登录操作之后把登录成功的 User 对象以 principal 属性名存入了
UsernamePasswordAuthenticationToken 对象</p>
Principal:<security:authentication property="principal.class.name"/><br/>访问SecurityAdmin对象的属性:
<security:authentication property="principal.originalAdmin.loginAcct"/><br/>访问SecurityAdmin对象的属性:<security:authentication property="principal.originalAdmin.userPswd"/><br/>访问SecurityAdmin对象属
性:<security:authentication property="principal.originalAdmin.userName"/><br/>访问SecurityAdmin对象的属性:<security:authentication
property="principal.originalAdmin.email"/><br/>访问SecurityAdmin对象的属性:<security:authentication
property="principal.originalAdmin.createTime"/><br/>
2.13目标 7:密码的擦除
本身 SpringSecurity 是会自动把 User 对象中的密码部分擦除。
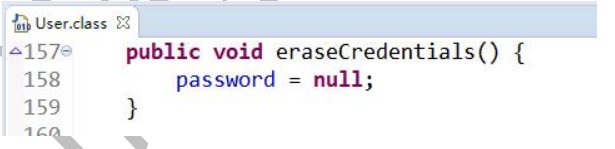
但是我们创建 SecurityAdmin 对象扩展了 User 对象,User 对象中的密码被擦除了,但是原始 Admin 对象中的密码没有擦除。如果要把原始的 Admin 对象中的密码也擦除需要修改 SecurityAdmin 类代码:

擦除密码是在不影响登录认证的情况下,避免密码泄露,增加系统安全性。
2.14目标 8:权限控制
2.14.1设置测试数据
运行时计算权限需要的数据:
用户:adminOperator
角色:经理
权限:无
角色:经理操作者
权限:user:save
最终组装后:ROLE_经理,ROLE_经理操作者,user:save
用户:roleOperator
角色:部长
权限:无
角色:部长操作者
权限:role:delete
最终组装后:ROLE_部长,ROLE_部长操作者,role:delete,user:get
测试时进行操作的数据:
admin01
admin02
……
role01
role02
……
2.14.2测试 1
要求:访问 Admin 分页功能时具备“经理”角色
“加锁”的代码:
@Override
    protected void configure(HttpSecurity security) throws Exception {
security
		.antMatchers("/admin/get/page.html")    // 针对分页显示Admin数据设定访问控制
		.hasRole("经理")  // 要求具备经理角色
效果:
adminOperator 能够访问
roleOperator 不能访问

这个结果为什么没有经过异常映射机制?

所以要在 SpringSecurity 的配置类中进行配置

 .and()
                .exceptionHandling()
                .accessDeniedHandler(new AccessDeniedHandler() {

                    @Override
                    public void handle(HttpServletRequest request, HttpServletResponse response,
                                       AccessDeniedException accessDeniedException) throws IOException, ServletException {
                        request.setAttribute("exception", new Exception(CrowdConstant.MESSAGE_ACCESS_DENIED));
                        request.getRequestDispatcher("/WEB-INF/system-error.jsp").forward(request, response);
                    }
                })
2.14.3测试 2
要求:访问 Role 的分页功能时具备“部长”角色
“加锁”的代码:

//@Controller
@RestController
public class RoleHandler {

    @Autowired
    private RoleService roleService;

  @PreAuthorize("hasRole('部长')")
    @RequestMapping("/role/get/page/info.json")
    public ResultEntity<PageInfo<Role>> getPageInfo(
            @RequestParam(value = "pageNum", defaultValue = "1") Integer pageNum,
            @RequestParam(value = "pageSize", defaultValue = "5") Integer pageSize,
            @RequestParam(value = "keyword", defaultValue = "") String keyword
    ){

        // 调用Service方法获取分页数据
        PageInfo<Role> pageInfo = roleService.getPageInfo(pageNum, pageSize, keyword);;

        // 封装到ResultEntity对象中返回(如果上面的操作抛出异常,交给异常映射机制处理)
        return ResultEntity.successWithData(pageInfo);

}
    }
要“加锁”的代码生效:需要在配置类上加注解

// 表示当前类是一个配置类
@Configuration

// 启用web环境下权限控制功能
@EnableWebSecurity

// 启用全局方法权限控制功能,并且设置prePostEnabled = true.保住@PreAuthority、@PostAuthority、@PreFilter、@PostFilter生效
@EnableGlobalMethodSecurity(prePostEnabled = true)
public class WebAppSecurityConfig extends WebSecurityConfigurerAdapter {
效果:
adminOperator 不能访问
roleOperator 能够访问
补充:完善基于注解的异常映射

//@ControllerAdvice表示当前类是一个基于注解异常处理器类
@ControllerAdvice
public class CrowdExceptionResolver {
@ExceptionHandler(value = Exception.class)
    public ModelAndView resolveException(
            Exception exception,
            HttpServletRequest request,
            HttpServletResponse response
    ) throws IOException {
        String viewName = "system-error";
        return commonResolve(viewName, exception, request, response);
    }
    }
发现:基于注解的异常映射和基于 XML 的异常映射如果映射同一个异常类型,那么基于注解的方案优先。
2.14.4测试 3
要求:访问 Admin 保存功能时具备 user:save 权限
“加锁”的代码:

@PreAuthorize(“hasAuthority(‘user:save’)”)
@RequestMapping("/admin/save.html")
public String save(Admin admin){
    adminService.saveAdmin(admin);

    return "redirect:/admin/get/page.html?pageNum="+Integer.MAX_VALUE;
}
效果:
adminOperator 能够访问
roleOperator 不能访问
2.14.5测试 4
要求:访问 Admin 分页功能时具备“经理”角色或“user:get”权限二者之一
“加锁”的代码:
@Override
    protected void configure(HttpSecurity security) throws Exception {
        // 与 SpringSecurity 环境下请求授权相关
                        .antMatchers("/admin/get/page.html")    // 针对分页显示Admin数据设定访问控制
//                .hasRole("经理")  // 要求具备经理角色
                .access("hasRole('经理') OR hasAuthority('user:get')")    // 要求具备"经理"角色和“user:get”权限之一
                }
效果:
adminOperator 能够访问
roleOperator 能够访问
PS:附带看一下其他注解(了解)
@PostAuthorize:先执行方法然后根据方法返回值判断是否具备权限。
例如:查询一个 Admin 对象,在@PostAuthorize 注解中和当前登录的 Admin 对象进行比较,如果不一致,则判断为不能访问。实现“只能查自己”效果。
@PostAuthorize(“returnObject.data.loginAcct == principal.username”)
使用 returnObject 获取到方法返回值,使用 principal 获取到当前登录用户的主体对象
通过故意写错表达式,然后从异常信息中发现表达式访问的是下面这个类的属性:
org.springframework.security.access.expression.method.MethodSecurityExpressionRoot
@PreFilter:在方法执行前对传入的参数进行过滤。只能对集合类型的数据进行过滤。
@PostFilter:在方法执行后对方法返回值进行过滤。只能对集合类型的数据进行过滤。
2.15目标 9:页面元素的权限控制
2.15.1要求
页面上的局部元素,根据访问控制规则进行控制。
2.15.2标签库

<%@ page contentType="text/html;charset=UTF-8" language="java"
         pageEncoding="UTF-8"%>
<%@taglib uri="http://www.springframework.org/security/tags" prefix="security"%>
<!DOCTYPE html>
<html lang="zh-CN">
<%@include file="/WEB-INF/include-head.jsp" %>
<body>
<%@include file="/WEB-INF/include-nav.jsp"%>
<div class="container-fluid">
    <div class="row">
        <%@include file="/WEB-INF/include-sidebar.jsp"%>
        <div class="col-sm-9 col-sm-offset-3 col-md-10 col-md-offset-2 main">
            <h1 class="page-header">控制面板</h1>

            <%----%>
            Credentials:<security:authentication property="credentials"/><br/>
            <p>显示出来才发现,principal原来是我们自己封装的SecurityAdmin对象</p>
            <p>SpringSecurity处理完登录操作之后把登录成功的User对象以principal属性名存入了UsernamePasswordAuthenticationToken对象</p>
            Principal:<security:authentication property="Principal.class.name"/><br/>
            访问SecurityAdmin对象的属性:<security:authentication property="Principal.originalAdmin.loginAcct"/><br/>
            访问SecurityAdmin对象的属性:<security:authentication property="Principal.originalAdmin.userPswd"/><br/>
            访问SecurityAdmin对象的属性:<security:authentication property="Principal.originalAdmin.userName"/><br/>
            访问SecurityAdmin对象的属性:<security:authentication property="Principal.originalAdmin.email"/><br/>
            访问SecurityAdmin对象的属性:<security:authentication property="Principal.originalAdmin.createTime"/><br/>
            <div class="row placeholders">
                <security:authorize access="hasRole('经理')">
                <div class="col-xs-6 col-sm-3 placeholder">
                    <img data-src="holder.js/200x200/auto/sky" class="img-responsive" alt="Generic placeholder thumbnail">
                    <h4>Label</h4>
                    <span class="text-muted">Something else</span>
                </div>
                </security:authorize>
                <security:authorize access="hasAuthority('role:delete')">
                <div class="col-xs-6 col-sm-3 placeholder">
                    <img data-src="holder.js/200x200/auto/vine" class="img-responsive" alt="Generic placeholder thumbnail">
                    <h4>Label</h4>
                    <span class="text-muted">Something else</span>
                </div>
                </security:authorize>
                <div class="col-xs-6 col-sm-3 placeholder">
                    <img data-src="holder.js/200x200/auto/sky" class="img-responsive" alt="Generic placeholder thumbnail">
                    <h4>Label</h4>
                    <span class="text-muted">Something else</span>
                </div>
                <div class="col-xs-6 col-sm-3 placeholder">
                    <img data-src="holder.js/200x200/auto/vine" class="img-responsive" alt="Generic placeholder thumbnail">
                    <h4>Label</h4>
                    <span class="text-muted">Something else</span>
                </div>
            </div>
        </div>
    </div>
</div>

</body>
</html>
access 属性可以传入权限控制相关的表达式。
No visible WebSecurityExpressionHandler instance could be found
原因:AbstractAuthorizeTag 类默认是查找“根级别”的 IOC 容器。而根级别的
IOC 容器中没有扫描 SpringSecurity 的配置类,所以没有相关的 bean。
解决办法:修改 AbstractAuthorizeTag 类的源码。

 private SecurityExpressionHandler<FilterInvocation> getExpressionHandler() throws IOException {
       // ApplicationContext appContext = SecurityWebApplicationContextUtils.findRequiredWebApplicationContext(this.getServletContext());

       // 1.获取ServletContext对象
        ServletContext servletContext = getServletContext();

        // 2.拼接SpringMVC在ServletContext域中的属性名
        String attrName = FrameworkServlet.SERVLET_CONTEXT_PREFIX + "springDispatcherServlet";

        // 3.从域中获取IOC容器对象
        ApplicationContext appContext = (ApplicationContext) servletContext.getAttribute(attrName);


        Map<String, SecurityExpressionHandler> handlers = appContext.getBeansOfType(SecurityExpressionHandler.class);
        Iterator var3 = handlers.values().iterator();

        SecurityExpressionHandler h;
        do {
            if (!var3.hasNext()) {
                throw new IOException("No visible WebSecurityExpressionHandler instance could be found in the application context. There must be at least one in order to support expressions in JSP 'authorize' tags.");
            }

            h = (SecurityExpressionHandler)var3.next();
        } while(!FilterInvocation.class.equals(GenericTypeResolver.resolveTypeArgument(h.getClass(), SecurityExpressionHandler.class)));

        return h;
    }
//
// Source code recreated from a .class file by IntelliJ IDEA
// (powered by Fernflower decompiler)
//

package org.springframework.security.taglibs.authz;

import java.io.IOException;
import java.util.Iterator;
import java.util.Map;
import javax.servlet.FilterChain;
import javax.servlet.ServletContext;
import javax.servlet.ServletException;
import javax.servlet.ServletRequest;
import javax.servlet.ServletResponse;
import javax.servlet.http.HttpServletRequest;
import org.springframework.context.ApplicationContext;
import org.springframework.core.GenericTypeResolver;
import org.springframework.expression.EvaluationContext;
import org.springframework.expression.Expression;
import org.springframework.expression.ParseException;
import org.springframework.security.access.expression.ExpressionUtils;
import org.springframework.security.access.expression.SecurityExpressionHandler;
import org.springframework.security.core.Authentication;
import org.springframework.security.core.context.SecurityContextHolder;
import org.springframework.security.web.FilterInvocation;
import org.springframework.security.web.WebAttributes;
import org.springframework.security.web.access.WebInvocationPrivilegeEvaluator;
import org.springframework.security.web.context.support.SecurityWebApplicationContextUtils;
import org.springframework.util.StringUtils;
import org.springframework.web.servlet.FrameworkServlet;

public abstract class AbstractAuthorizeTag {
    private String access;
    private String url;
    private String method = "GET";

    public AbstractAuthorizeTag() {
    }

    protected abstract ServletRequest getRequest();

    protected abstract ServletResponse getResponse();

    protected abstract ServletContext getServletContext();

    public boolean authorize() throws IOException {
        boolean isAuthorized;
        if (StringUtils.hasText(this.getAccess())) {
            isAuthorized = this.authorizeUsingAccessExpression();
        } else if (StringUtils.hasText(this.getUrl())) {
            isAuthorized = this.authorizeUsingUrlCheck();
        } else {
            isAuthorized = false;
        }

        return isAuthorized;
    }

    public boolean authorizeUsingAccessExpression() throws IOException {
        if (SecurityContextHolder.getContext().getAuthentication() == null) {
            return false;
        } else {
            SecurityExpressionHandler handler = this.getExpressionHandler();

            Expression accessExpression;
            try {
                accessExpression = handler.getExpressionParser().parseExpression(this.getAccess());
            } catch (ParseException var5) {
                IOException ioException = new IOException();
                ioException.initCause(var5);
                throw ioException;
            }

            return ExpressionUtils.evaluateAsBoolean(accessExpression, this.createExpressionEvaluationContext(handler));
        }
    }

    protected EvaluationContext createExpressionEvaluationContext(SecurityExpressionHandler<FilterInvocation> handler) {
        FilterInvocation f = new FilterInvocation(this.getRequest(), this.getResponse(), new FilterChain() {
            public void doFilter(ServletRequest request, ServletResponse response) throws IOException, ServletException {
                throw new UnsupportedOperationException();
            }
        });
        return handler.createEvaluationContext(SecurityContextHolder.getContext().getAuthentication(), f);
    }

    public boolean authorizeUsingUrlCheck() throws IOException {
        String contextPath = ((HttpServletRequest)this.getRequest()).getContextPath();
        Authentication currentUser = SecurityContextHolder.getContext().getAuthentication();
        return this.getPrivilegeEvaluator().isAllowed(contextPath, this.getUrl(), this.getMethod(), currentUser);
    }

    public String getAccess() {
        return this.access;
    }

    public void setAccess(String access) {
        this.access = access;
    }

    public String getUrl() {
        return this.url;
    }

    public void setUrl(String url) {
        this.url = url;
    }

    public String getMethod() {
        return this.method;
    }

    public void setMethod(String method) {
        this.method = method != null ? method.toUpperCase() : null;
    }

    private SecurityExpressionHandler<FilterInvocation> getExpressionHandler() throws IOException {
       // ApplicationContext appContext = SecurityWebApplicationContextUtils.findRequiredWebApplicationContext(this.getServletContext());

       // 1.获取ServletContext对象
        ServletContext servletContext = getServletContext();

        // 2.拼接SpringMVC在ServletContext域中的属性名
        String attrName = FrameworkServlet.SERVLET_CONTEXT_PREFIX + "springDispatcherServlet";

        // 3.从域中获取IOC容器对象
        ApplicationContext appContext = (ApplicationContext) servletContext.getAttribute(attrName);


        Map<String, SecurityExpressionHandler> handlers = appContext.getBeansOfType(SecurityExpressionHandler.class);
        Iterator var3 = handlers.values().iterator();

        SecurityExpressionHandler h;
        do {
            if (!var3.hasNext()) {
                throw new IOException("No visible WebSecurityExpressionHandler instance could be found in the application context. There must be at least one in order to support expressions in JSP 'authorize' tags.");
            }

            h = (SecurityExpressionHandler)var3.next();
        } while(!FilterInvocation.class.equals(GenericTypeResolver.resolveTypeArgument(h.getClass(), SecurityExpressionHandler.class)));

        return h;
    }

    private WebInvocationPrivilegeEvaluator getPrivilegeEvaluator() throws IOException {
        WebInvocationPrivilegeEvaluator privEvaluatorFromRequest = (WebInvocationPrivilegeEvaluator)this.getRequest().getAttribute(WebAttributes.WEB_INVOCATION_PRIVILEGE_EVALUATOR_ATTRIBUTE);
        if (privEvaluatorFromRequest != null) {
            return privEvaluatorFromRequest;
        } else {
            ApplicationContext ctx = SecurityWebApplicationContextUtils.findRequiredWebApplicationContext(this.getServletContext());
            Map<String, WebInvocationPrivilegeEvaluator> wipes = ctx.getBeansOfType(WebInvocationPrivilegeEvaluator.class);
            if (wipes.size() == 0) {
                throw new IOException("No visible WebInvocationPrivilegeEvaluator instance could be found in the application context. There must be at least one in order to support the use of URL access checks in 'authorize' tags.");
            } else {
                return (WebInvocationPrivilegeEvaluator)wipes.values().toArray()[0];
            }
        }
    }
}


 800
800


 被折叠的 条评论
为什么被折叠?
被折叠的 条评论
为什么被折叠?
 到【灌水乐园】发言


