


1.安装MySql
更新列表
sudo apt-get update
安装MySQL
sudo apt-get install mysql-server
2.Mysql安全配置
sudo mysql_secure_installation
会输出以下内容
Securing the MySQL server deployment.

Connecting to MySQL using a blank password.

VALIDATE PASSWORD COMPONENT can be used to test passwords
and improve security. It checks the strength of password
and allows the users to set only those passwords which are
secure enough. Would you like to setup VALIDATE PASSWORD component?

Press y|Y for Yes, any other key for No:
意为询问是否使用密码验证组件。输入 “Y” 并按下回车键。
There are three levels of password validation policy:

LOW    Length >= 8
MEDIUM Length >= 8, numeric, mixed case, and special characters
STRONG Length >= 8, numeric, mixed case, special characters and dictionary                  file

Please enter 0 = LOW, 1 = MEDIUM and 2 = STRONG:
设置密码验证策略的级别。他提供了 3 个级别:
LOW: 密码长度至少 8 位
MEDIUM: 密码长度至少 8 位, 由数字、混合大小写的字母和特殊字符组成
STRONG: 密码长度至少 8 位, 由数字、混合大小写的字母、特殊字符和字典文件组成
请选择适合你的密码级别。我选择 0。
Please set the password for root here.

New password:

Re-enter new password:
在这里,输入两次密码
Estimated strength of the password: 25
Do you wish to continue with the password provided?(Press y|Y for Yes, any other key for No) : Y
如果你对密码强度满意,输入 Y 和回车键后继续
By default, a MySQL installation has an anonymous user,
allowing anyone to log into MySQL without having to have
a user account created for them. This is intended only for
testing, and to make the installation go a bit smoother.
You should remove them before moving into a production
environment.

Remove anonymous users? (Press y|Y for Yes, any other key for No) : Y
Success.


Normally, root should only be allowed to connect from
'localhost'. This ensures that someone cannot guess at
the root password from the network.

Disallow root login remotely? (Press y|Y for Yes, any other key for No) : Y
Success.

By default, MySQL comes with a database named 'test' that
anyone can access. This is also intended only for testing,
and should be removed before moving into a production
environment.


Remove test database and access to it? (Press y|Y for Yes, any other key for No) : Y
 - Dropping test database...
Success.

 - Removing privileges on test database...
Success.

Reloading the privilege tables will ensure that all changes
made so far will take effect immediately.

Reload privilege tables now? (Press y|Y for Yes, any other key for No) : Y
Success.

All done!
在这里,上面所有问题都输入 Y 。然后完成整个配置过程。
3.启动MySQL
sudo service mysql start
重启和关闭服务的命令:
#重启:
sudo  service mysql restart

#关闭:
sudo service mysql stop
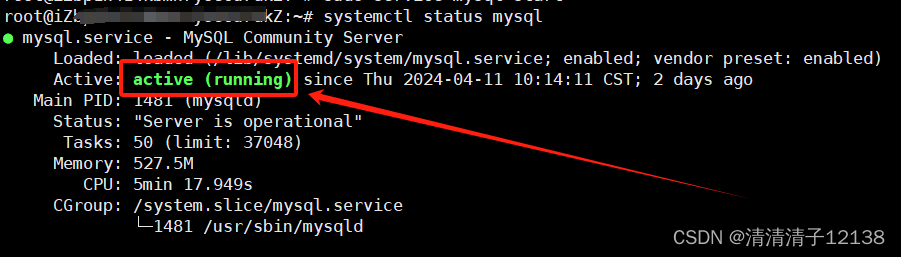
4.查看MySQL状态
systemctl status mysql
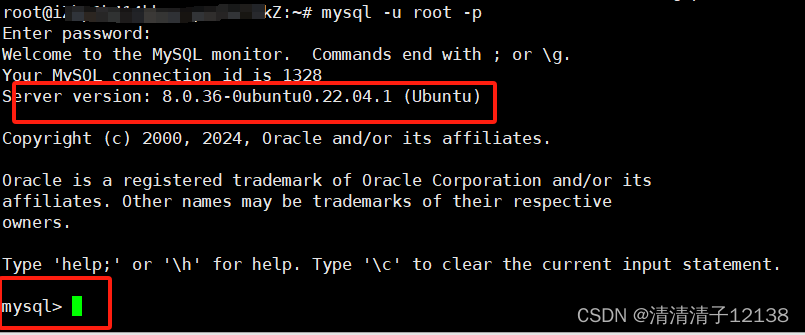
5.登录MySQL
mysql -u root -p
输入密码进入mysql
6.修改MySQL密码
ALTER USER 'root'@'%' identified with mysql_native_password BY '你的密码';
修改之后要刷新权限
flush privileges;
7.开启远程连接
把访问权限从root改成%,代表所有用户均可访问
update user set host='%' where user='root';
记得刷新权限
flush privileges;
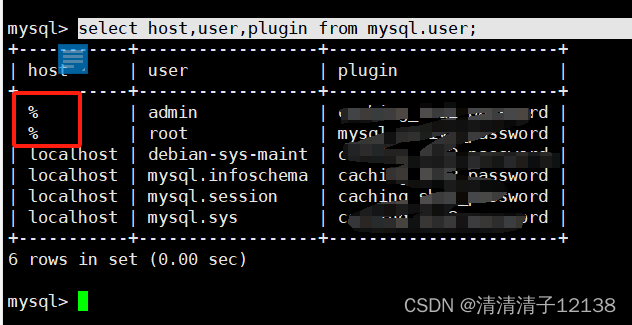
可以查看MySQL用户和权限表:
select host,user,plugin from mysql.user;
%代表对应的用户有远程访问权限
8.服务器开放3306端口(如有)

9.测试连接
此时,使用navicat进行远程连接,发现仍然连接失败
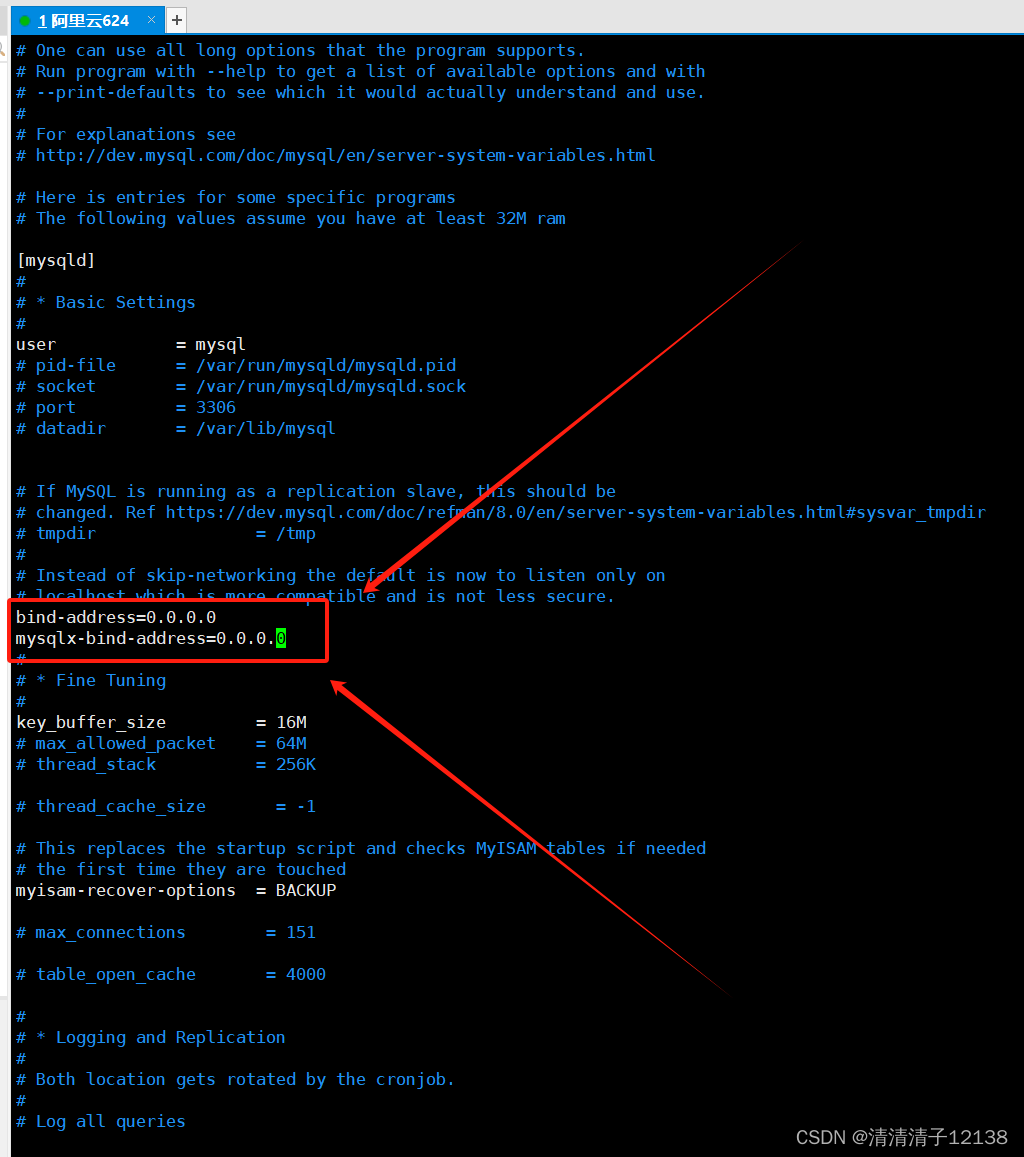
10.修改配置文件解决无法远程连接问题
sudo vi /etc/mysql/mysql.conf.d/mysqld.cnf
把文件中对应如下位置的两行ip地址改为0.0.0.0,或者直接注释掉
11.重启mysql
sudo service mysql restart
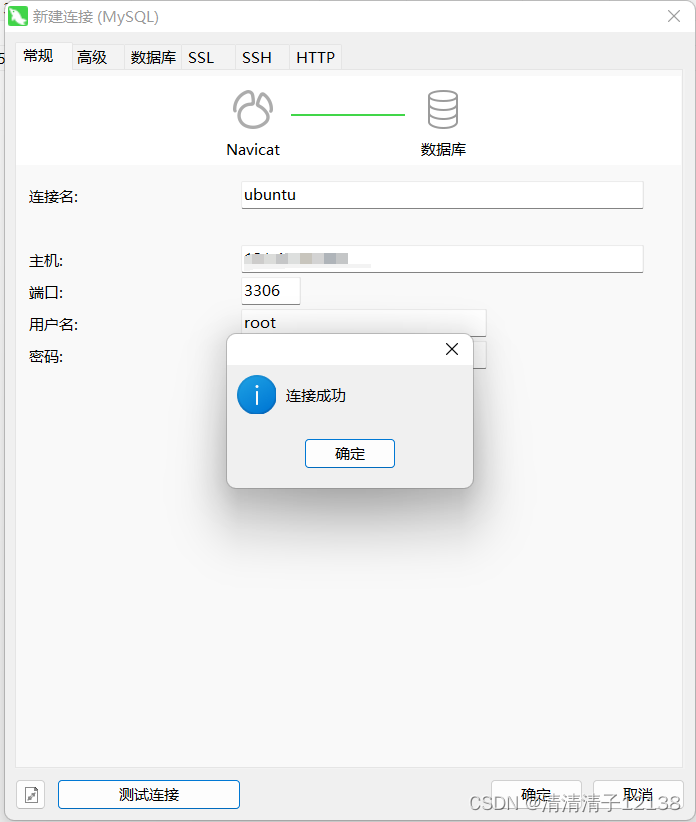
12.再次Navicat测试连接
成功


 524
524


 被折叠的 条评论
为什么被折叠?
被折叠的 条评论
为什么被折叠?
 到【灌水乐园】发言


