


前两天接手微信小程序时,领导让把原有小程序的底部导航栏大换样,改成自定义形式。查阅文档后发现可以以下步骤更加清晰明了:
1.首先在app.json里配置"tabBar"属性为公共属性"custom": true,其他可以不变。
"tabBar": {
"custom": true,
"color": "#84899E",
"selectedColor": "#000000",
"borderStyle": "white",
"list": [
{
"text": "首页",
"pagePath": "pages/index/index",
"iconPath": "/images/navBarImg/home.png",
"selectedIconPath": "/images/navBarImg/home_active.png"
},
{
"text": "商城",
"pagePath": "pages/mall/mall",
"iconPath": "/images/navBarImg/shop.png",
"selectedIconPath": "/images/navBarImg/shop_active.png"
},
{
"text": "购物车",
"pagePath": "pages/cart/cart",
"iconPath": "/images/navBarImg/cart.png",
"selectedIconPath": "/images/navBarImg/cart_active.png"
},
{
"text": "我的",
"pagePath": "pages/mine/mine",
"iconPath": "/images/navBarImg/my.png",
"selectedIconPath": "/images/navBarImg/my_active.png"
}
]
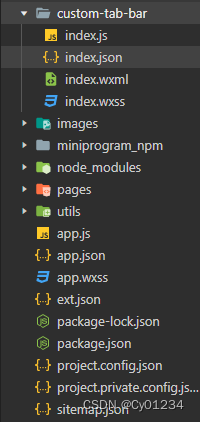
},2.在pages同级目录下新建custom-tab-bar文件夹,文件夹内的文件命名为index.js、index.json、index.wxss、index.wxml。
3.在index.js、index.json、index.wxss、index.wxml内分别写下以下代码
index.js
//index.js
Component({
  data: {
    selected: 0,
    list: [
      {
        text: "首页",
        pagePath: "/pages/index/index",
        iconPath: "/images/navBarImg/home.png",
        selectedIconPath: "/images/navBarImg/home_active.png"
      },
      {
        text: "商城",
        pagePath: "/pages/mall/mall",
        iconPath: "/images/navBarImg/shop.png",
        selectedIconPath: "/images/navBarImg/shop_active.png"
      },
      {
        text: "购物车",
        pagePath: "/pages/cart/cart",
        iconPath: "/images/navBarImg/cart.png",
        selectedIconPath: "/images/navBarImg/cart_active.png"
      },
      {
        text: "我的",
        pagePath: "/pages/mine/mine",
        iconPath: "/images/navBarImg/my.png",
        selectedIconPath: "/images/navBarImg/my_active.png"
      }
  ]
  },
  attached() {
  },
  methods: {
    switchTab(e) {
      // console.log(e)
      const data = e.currentTarget.dataset
      const url = data.path
      wx.switchTab({url})
      this.setData({
        selected: data.index,
      })
    }
  }
})
index.json
{
  "component": true,
  "usingComponents": {}
}
index.wxml 可以修改view来自定义样式
<!--custom-tab-bar/index.wxml-->
<view class="tab-bar">
  <view class="tab-bar-border"></view>
  <view wx:for="{{list}}" wx:key="index" class="tab-bar-item" data-path="{{item.pagePath}}" data-index="{{index}}" bindtap="switchTab">
   <view class="item-img">
    <image src="{{selected === index ? item.selectedIconPath : item.iconPath}}"></image>
   </view>
    <view class="word">{{item.text}}</view>
  </view>
</view>
index.wxss 修改对应类名的view修改样式成功
/* custom-tab-bar/index.wxss */
.tab-bar {
  position: fixed;
  bottom: 0;
  left: 0;
  right: 0;
  height: 48px;
  background: white;
  display: flex;
  padding-bottom: env(safe-area-inset-bottom);
}

.tab-bar-border {
  background-color: rgba(0, 0, 0, 0.33);
  position: absolute;
  left: 0;
  top: 0;
  width: 100%;
  height: 1px;
  transform: scaleY(0.5);
}

.tab-bar-item {
  flex: 1;
  text-align: center;
  display: flex;
  justify-content: center;
  align-items: center;
  flex-direction: column;
  background: #edeceb;
}

.item-img{
  width: 25px;
  height: 25px;
  border: 1px solid #f6f5f5;
  box-shadow: 0 -5px 10px 0 #f6f5f5;
  background: #f1f1f0;
  border-radius: 50%;
  display: flex;
  justify-content: center;
  align-items: center;
}
.item-img image {
  width: 15px;
  height: 15px;
}

.word{
  font-size: 10px;
  color: #0f0f0e;
}
4.最关键一步,在你选择为底部导航栏的tabbar页面的js文件中添加以下代码,首页的selected = 0 商城为1 购物车为2 我的为3
  onShow: function () {
    if (typeof this.getTabBar === 'function' &&
    this.getTabBar()) {
    this.getTabBar().setData({
      selected: 0
    })
  }
  },
好了,展示修改后的自定义导航栏。最后附加个问题:使用自定义底部导航栏的tabbar页面可能要在wxss内 page加内边距padding-bottom值 不然有些内容可能显示不全。

附加微信小程序官方链接:https://developers.weixin.qq.com/miniprogram/dev/framework/ability/custom-tabbar.html


 434
434


 被折叠的 条评论
为什么被折叠?
被折叠的 条评论
为什么被折叠?
 到【灌水乐园】发言


