


Jump into your Java Enterprise project right away!
https://lp.jetbrains.com/intellij-idea-jakartaee/
Create Java Enterprise project
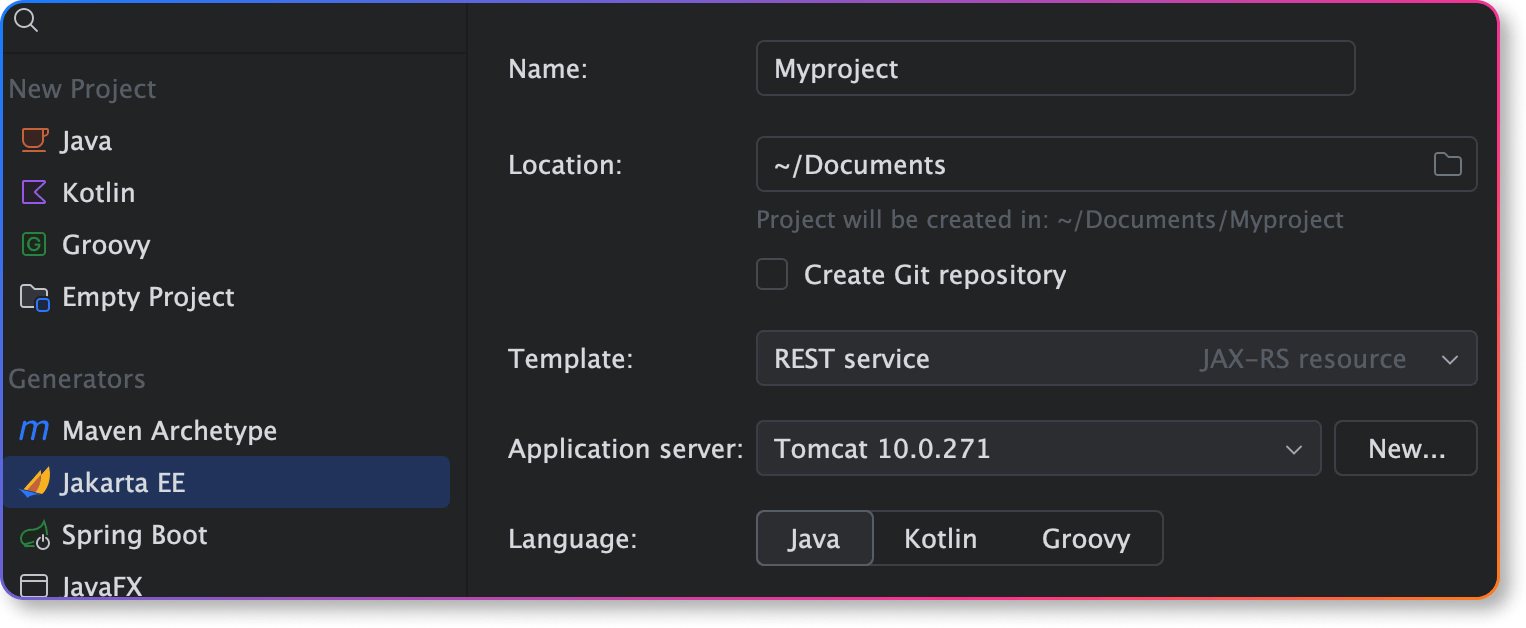
Create Jakarta EE based projects in a dedicated wizard. All the core information is conveniently grouped on the first screen, while the second screen features framework-specific settings — the project creation process is more straightforward.
在专用向导中创建基于 Jakarta EE 的项目。所有核心信息都便捷地集中在第一屏,而第二屏则包含框架特定的设置——项目创建过程更加直观明了。
Automatic migration from Java EE to Jakarta EE
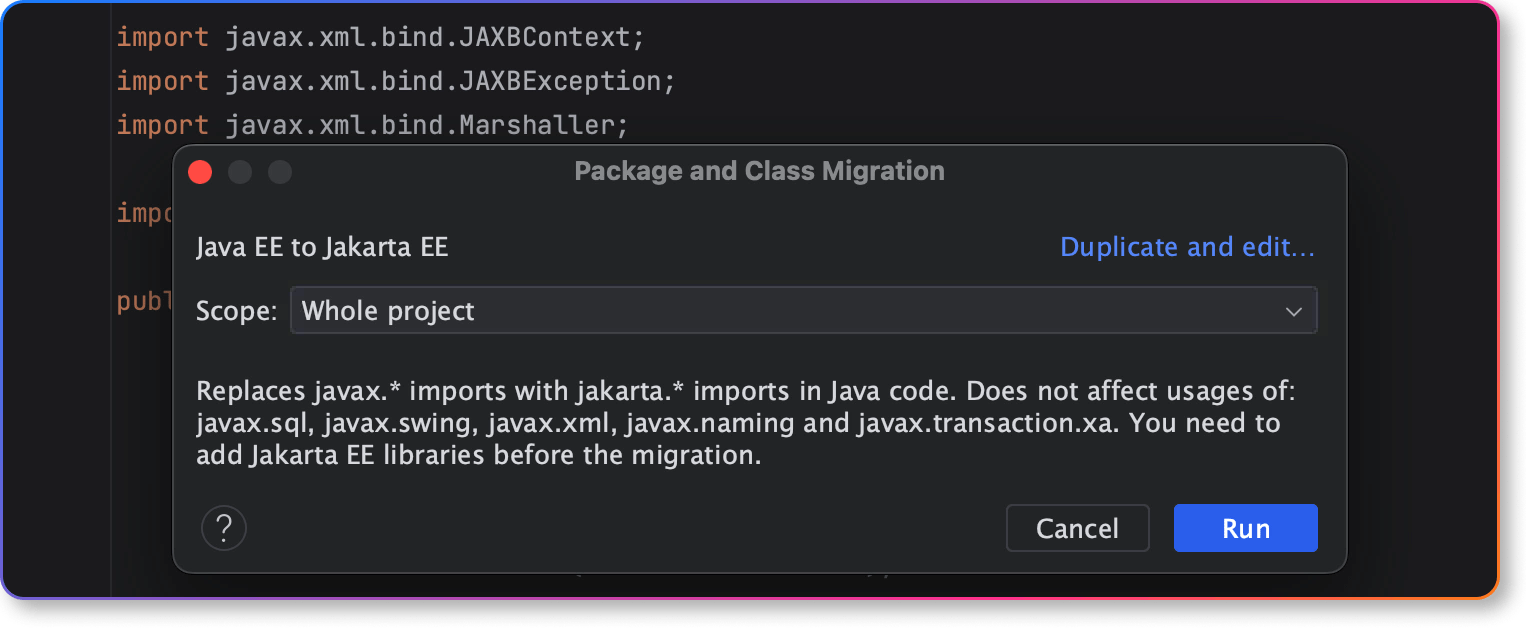
The Migrate... refactoring helps you quickly and painlessly migrate a project or module from Java EE to Jakarta EE. You can review all the discovered usages of Java EE imports on Refactoring Preview tab and finalize the process.
“迁移...”重构功能可帮助您快速轻松地将项目或模块从Java EE迁移到Jakarta EE。您可以在“重构预览”选项卡上查看所有检测到的Java EE导入用法,并完成迁移过程。
Java and Kotlin support for Jakarta EE CDI
The IDE reports injection points in bean classes that have ambiguous dependencies and incorrect injection points for fields, methods, and parameters annotated with @Inject that violate the CDI specification.
IDE报告了存在模糊依赖关系的Bean类中的注入点,以及对于使用@Inject注解的字段、方法和参数违反CDI规范的不正确注入点。
IDEA 提供的视频连接
https://img.youtube.com/vi/AJxBg90HM4s/maxresdefault.jpg
Your first Jakarta EE application
https://www.jetbrains.com/help/idea/creating-and-running-your-first-jakarta-ee-application.html
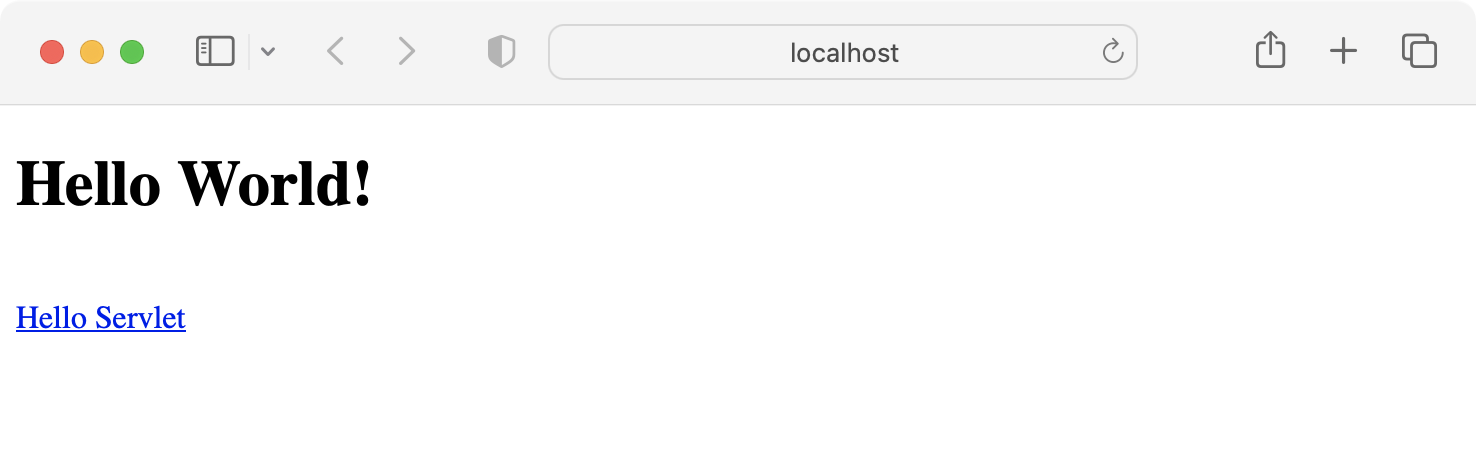
This tutorial describes how to create a simple Jakarta Enterprise Edition (EE) web application in IntelliJ IDEA. The application will include a single JSP page that shows Hello, World! and a link to a Java servlet that also shows Hello, World!.
You will create a new Jakarta EE project using the web application template, tell IntelliJ IDEA where your application server is located, then use a run configuration to build the artifact, start the server, and deploy the artifact to it.
您将使用Web应用程序模板创建一个新的Jakarta EE项目,告诉IntelliJ IDEA您的应用服务器所在位置,然后使用运行配置来构建构件、启动服务器并将该构件部署到服务器上。
| IntelliJ IDEA Ultimate | Java Enterprise / Jakarta Enterprise development is not supported in the free IntelliJ IDEA Community Edition. For more information, refer to IntelliJ IDEA Ultimate vs IntelliJ IDEA Community Edition |
| Relevant plugins | By default, the following necessary plugins are bundled and enabled in IntelliJ IDEA Ultimate. If something does not work, make sure that the following plugins are enabled:
|
| Java SE Development Kit (JDK) version 1.8 or later | You can get the JDK directly from IntelliJ IDEA as described in Java Development Kit (JDK) or download and install it manually, for example: Oracle JDK or OpenJDK. 可以采用 https://blog.csdn.net/D1237890/article/details/151363196 Eclipse Temurin JDK |
| Tomcat | The Tomcat application server version 7 or later.
|
| Web browser | You will need a web browser to view your web application. |
Create a new Jakarta EE project
IntelliJ IDEA includes a dedicated wizard for creating Jakarta Enterprise projects based on various Jakarta EE implementations. In this tutorial, we will create a simple web application.
-
In the main menu, go to File | New | Project.
-
In the New Project dialog, select Jakarta EE.
-
Enter a name for your project:
JakartaEEHelloWorld. -
Select the Web application template, Maven as a build tool, and use Oracle OpenJDK 17 as the project SDK. Don't select or add an application server, we will do it later.
Click Next to continue.

5. In the Version field, select Jakarta EE 11 because that's what Tomcat 11 used in this tutorial is compatible with.
For Tomcat 9, select Java EE 8. For Tomcat 10, select Jakarta EE 9.1.
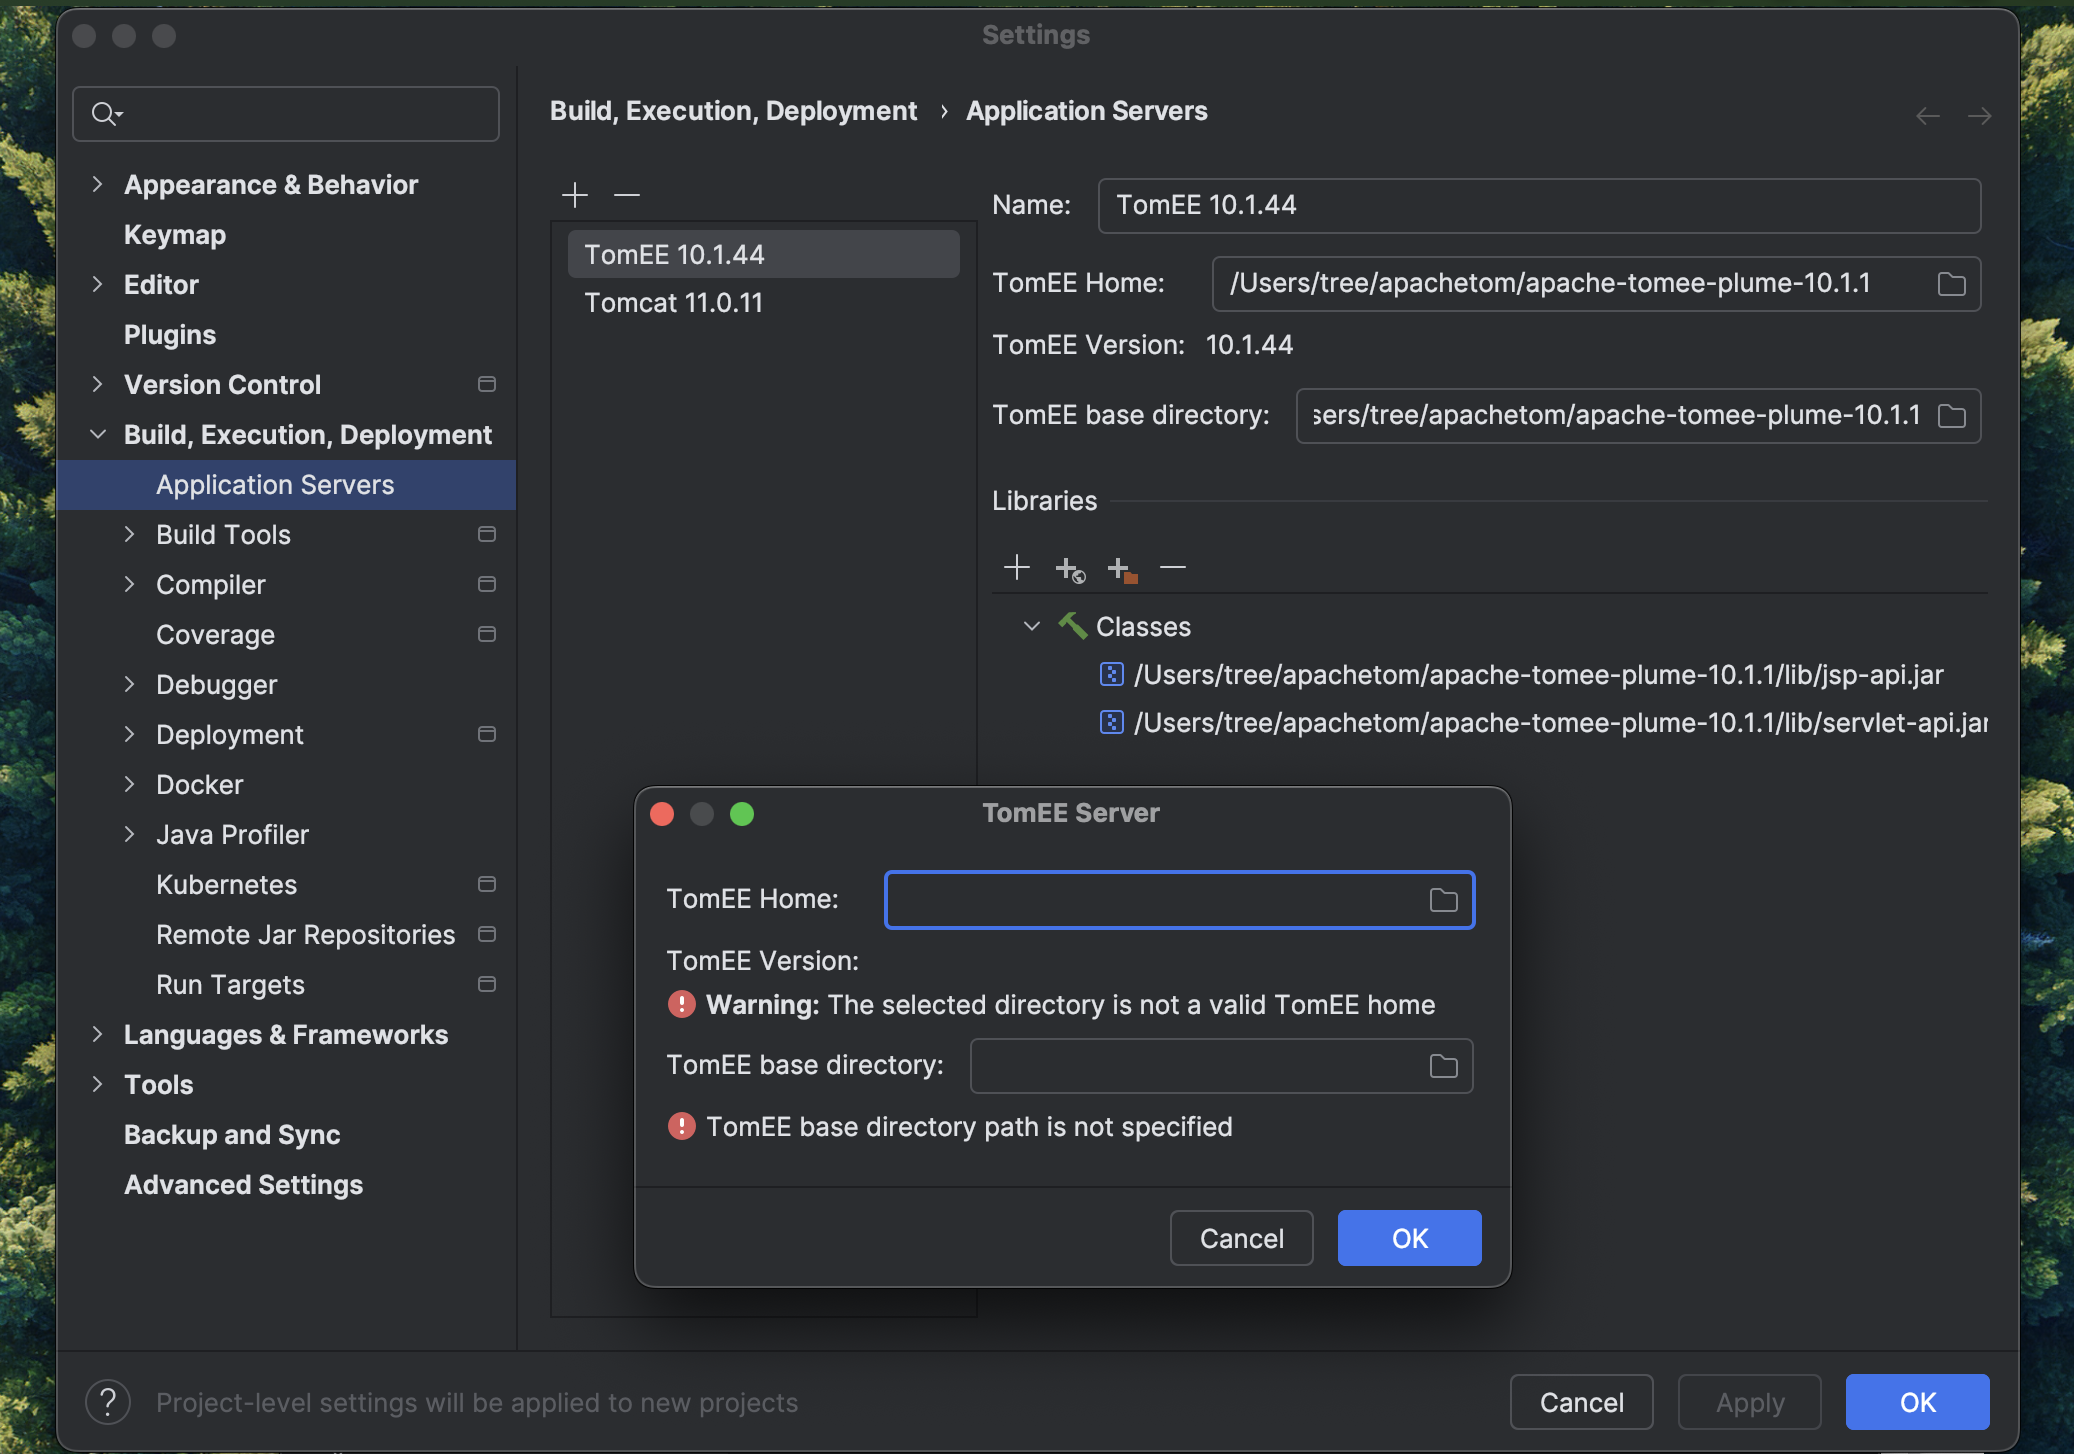
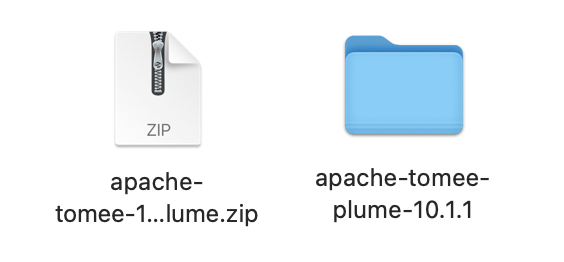
下载,解压;之后在 setting -> application servers 中选择对应的目录即可。
In the Dependencies list, you can see that the web application template includes only the Servlet framework under Specifications.
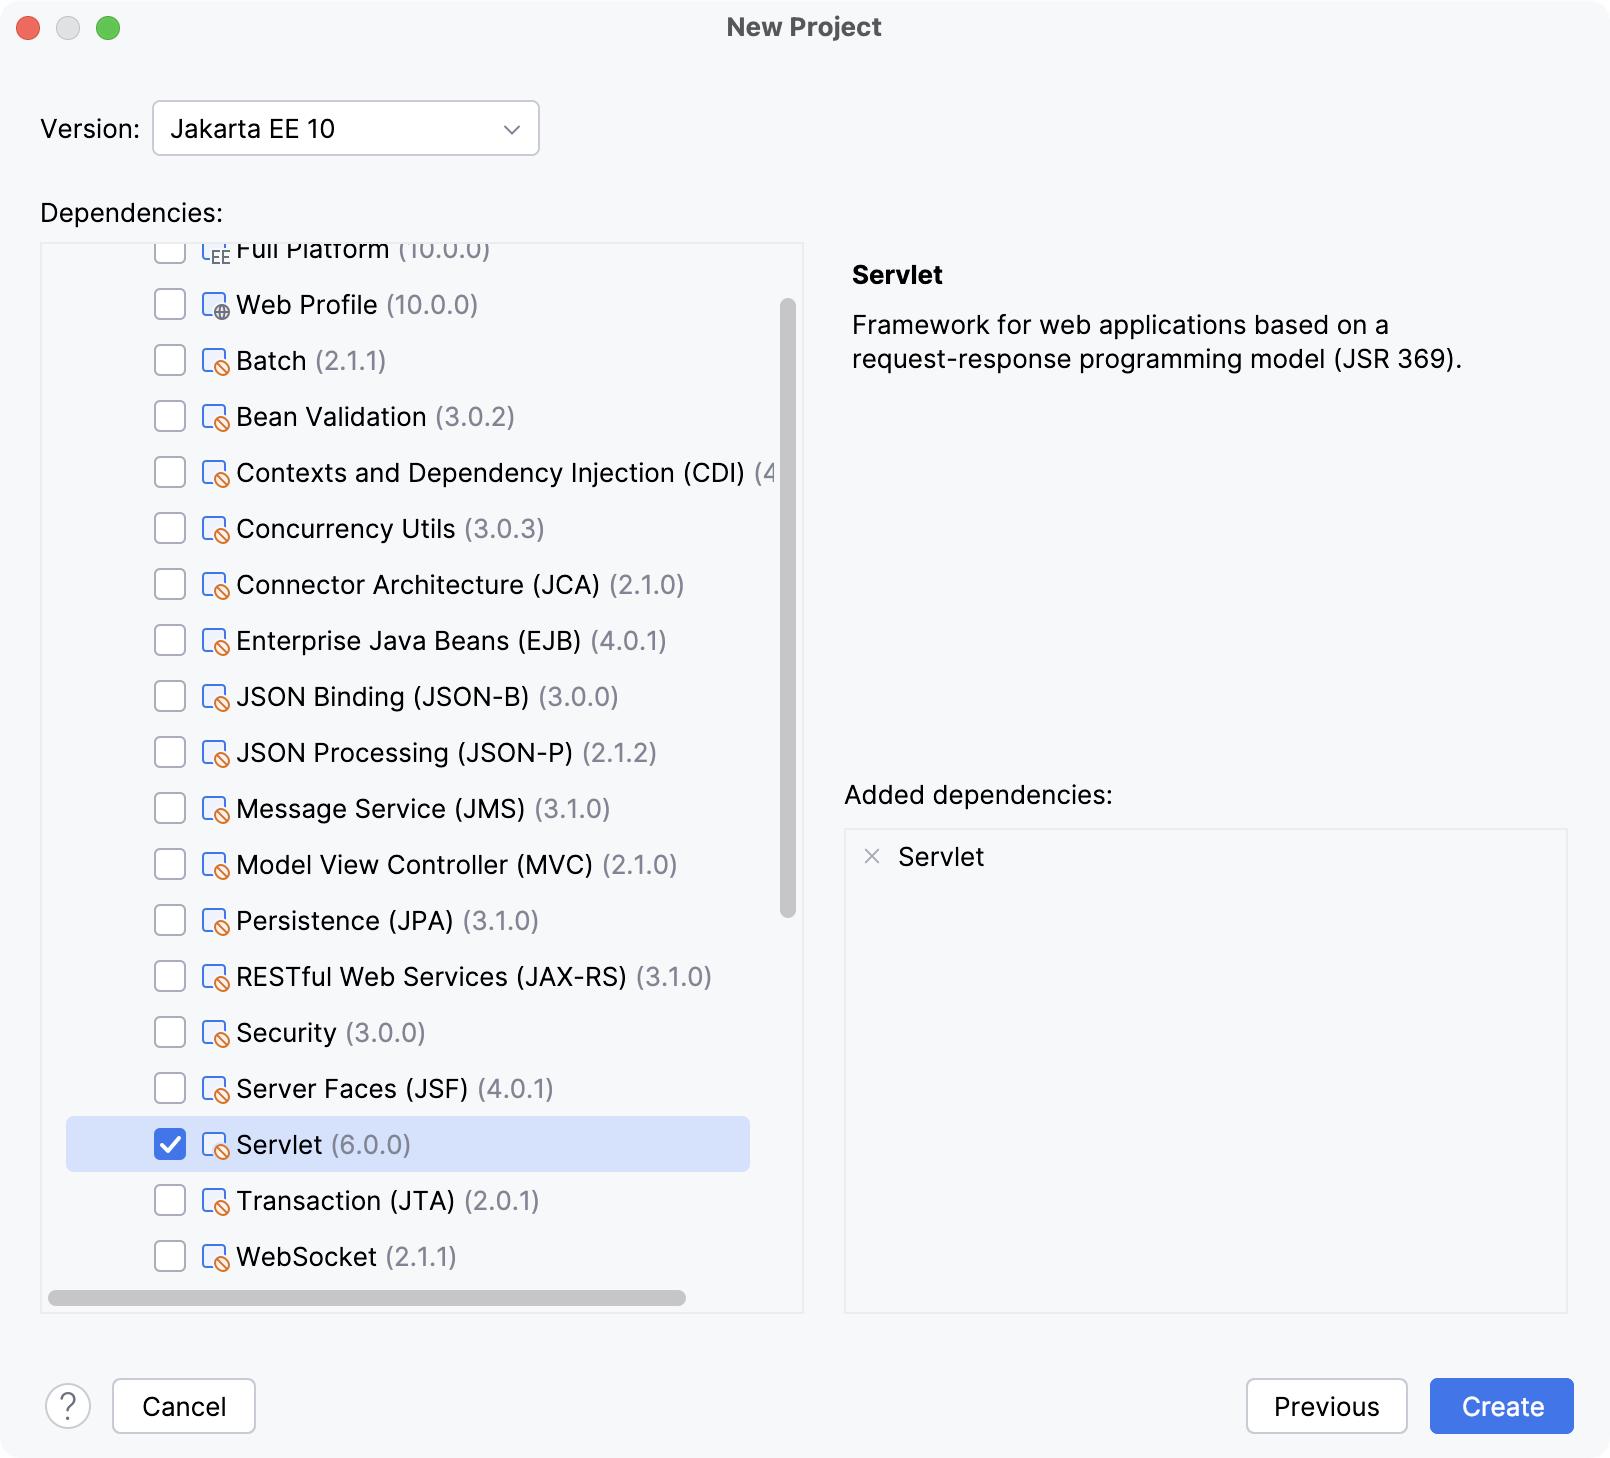
6. Click Create.
Explore the default project structure
IntelliJ IDEA creates a project with some boilerplate code that you can build and deploy successfully.
-
pom.xml is the Project Object Model with Maven configuration information, including dependencies and plugins necessary for building the project.
pom.xml{...}
-
index.jsp is the starting page of your application that opens when you access the root directory URL. It renders
Hello World!and a link to/hello-servlet.src/main/webapp/index.jsp{...}
-
The
HelloServletclass extendsHttpServletand is annotated with@WebServlet. It processes requests to/hello-servlet: a GET request returns HTML code that rendersHello World!.src/main/java/com/example/JakartaEEHelloWorld/HelloServlet.java{...}
Use the Project tool window to browse and open files in your project or press ⌘Cmd⇧Shift0O and type the name of the file.
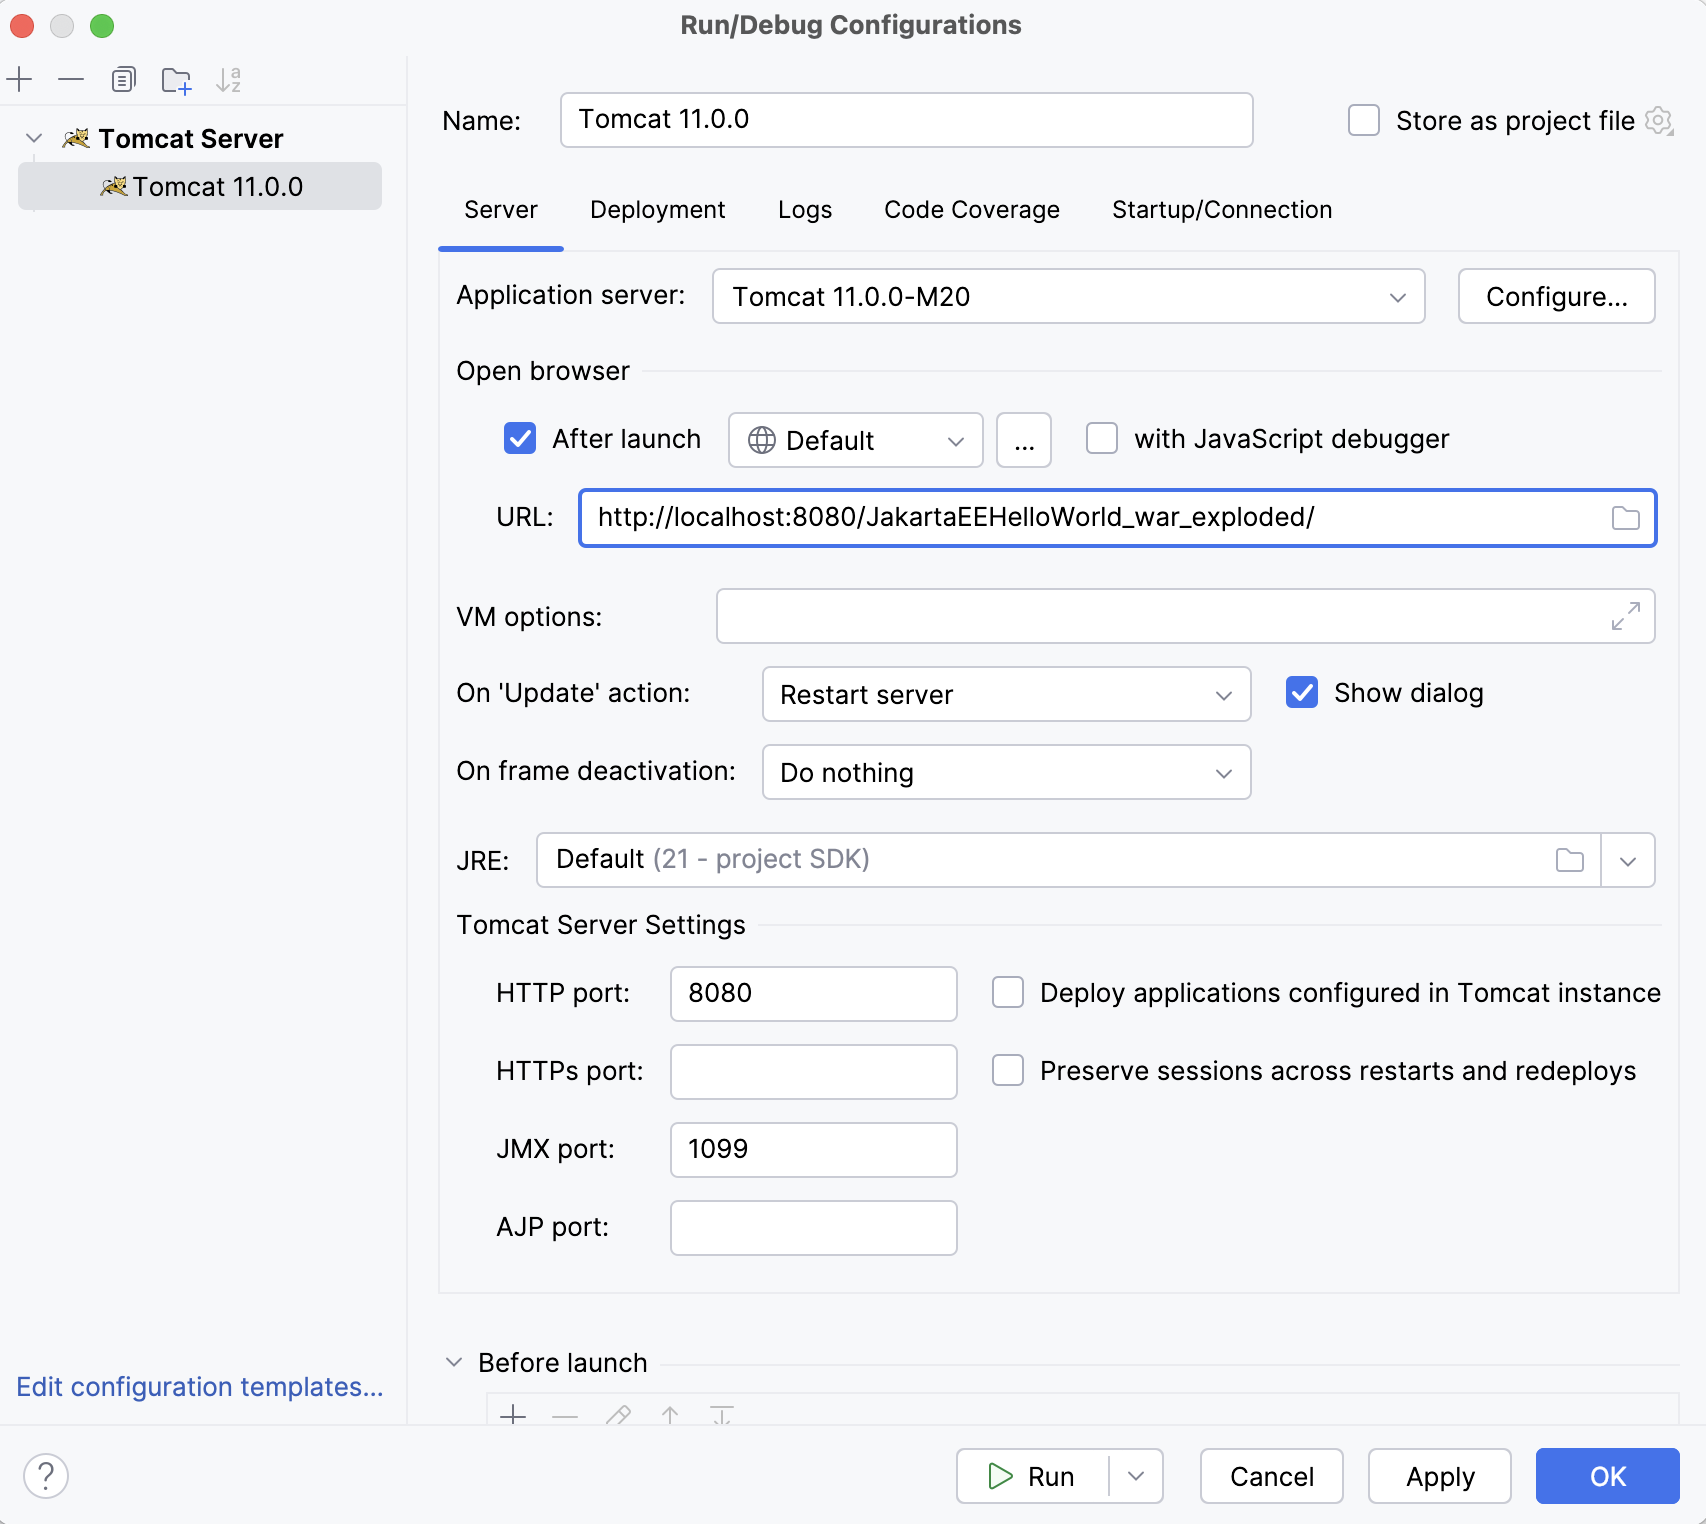
Create a run configuration
IntelliJ IDEA needs a run configuration to build the artifacts and deploy them to your application server.
-
In the main menu, go to Run | Edit Configurations.
-
In the Run/Debug Configurations dialog, click +, expand the Tomcat Server node, and select Local.
-
Fix any warnings that appear at the bottom of the run configuration settings dialog.
-

Most likely, you will need to fix the following:
-
On the Deployment tab, add the artifact that you want to deploy:
JakartaEEHelloWorld:war exploded
-
-
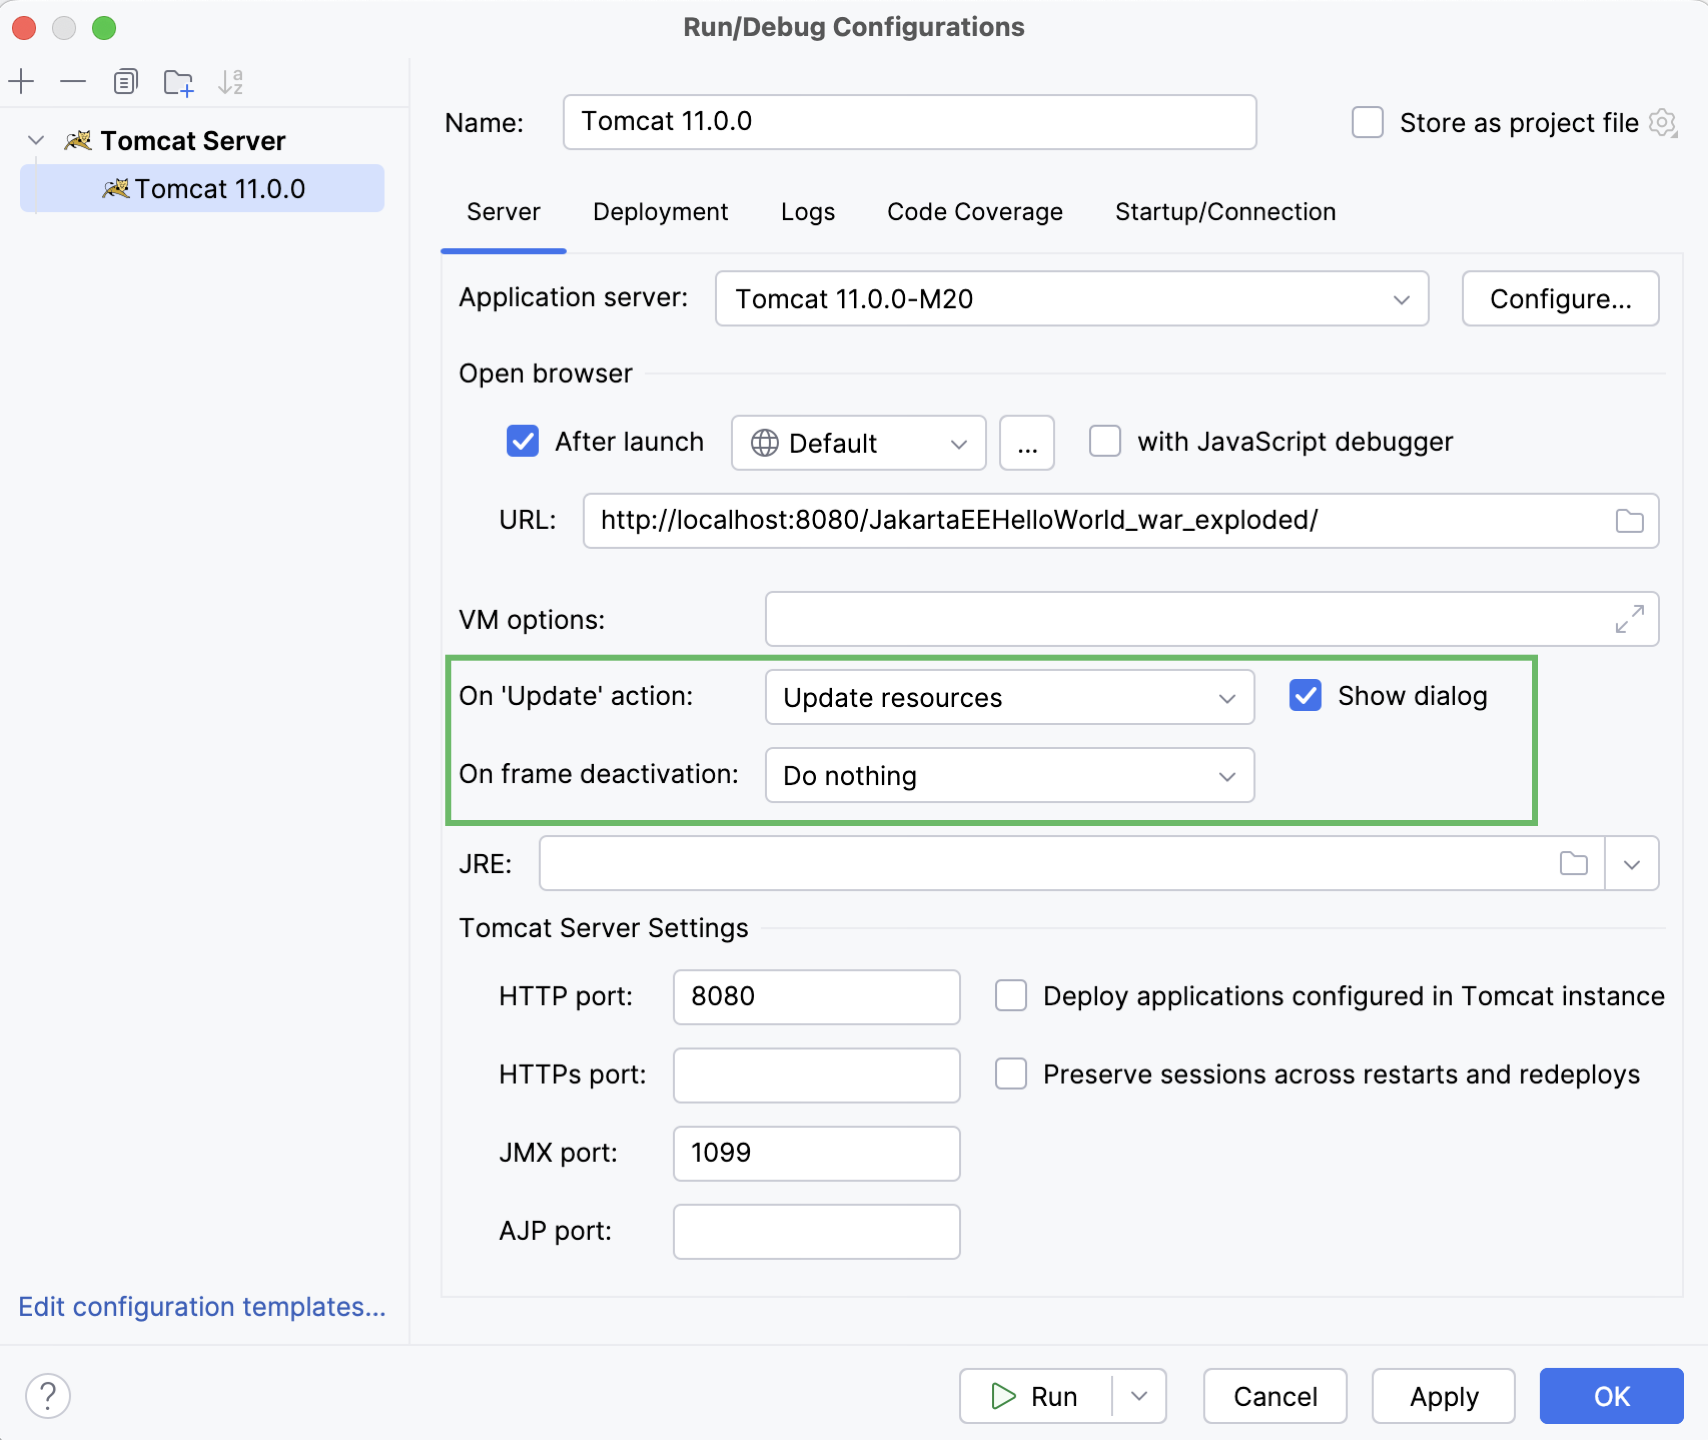
On the Server tab, set the URL to point to the root resource:
-
Click OK to save the run configuration.
-
To run the configuration, press ⌃Ctrl⌥Option0R and select the created application server configuration.
Alternatively, if you have your run configuration selected in the main toolbar at the top, you can click
 in the main toolbar or press ⌃Ctrl0R to run it.
This run configuration builds the artifacts, then starts the Tomcat server, and deploys the artifacts to the server. You should see the corresponding output in the Services tool window.
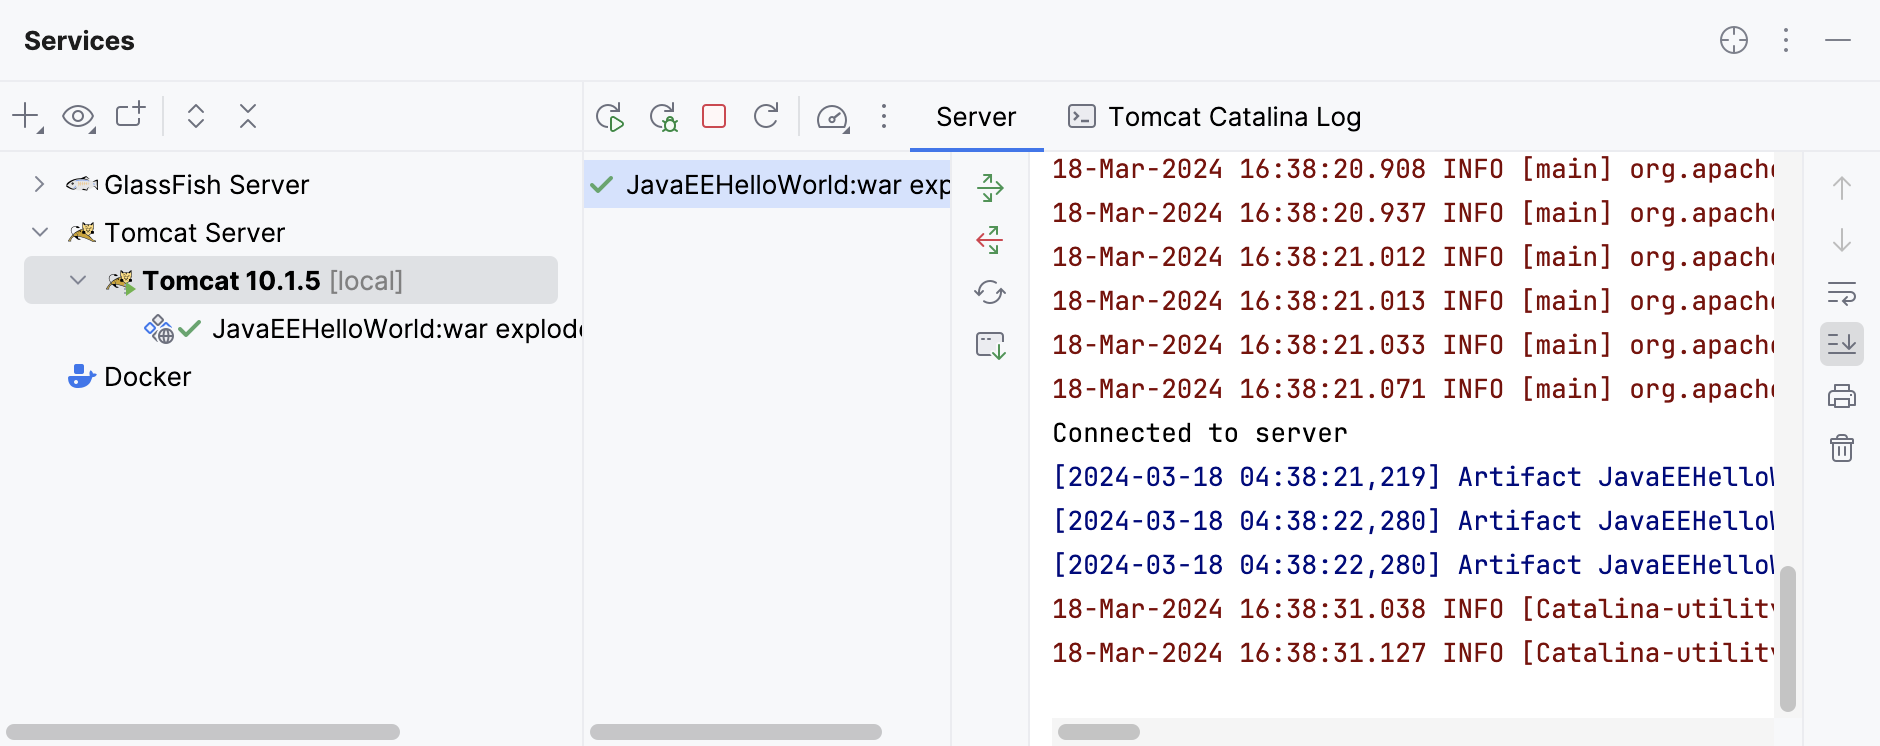
Once this is done, IntelliJ IDEA opens the specified URL in your web browser.
If not, try opening the URL yourself: http://localhost:8080/JakartaEEHelloWorld_war_exploded/
Modify the application
Whenever you change the source code of the application, you can restart the run configuration to see the changes. But this is not always necessary, especially when you can't restart the server. Most of the changes are minor and don't require rebuilding the artifacts, restarting the server, and so on. Let's change the JSP page of the application.
-
Open index.jsp and change the greeting from
Hello WorldtoA better greeting. -
In the Services tool window, click

or press ⌘CmdF10.
-
In the Update dialog, select Update resources because the JSP page is a static resource. Click OK.
-
Refresh the application URL in your web browser to see the new string:
A better greeting.
You can configure the default update action in the run configuration settings: go to Run | Edit Configurations in the main menu. Change the On 'Update' action option under the Server tab of the Tomcat run configuration settings.
<?xml version="1.0" encoding="UTF-8"?>
                <project xmlns="http://maven.apache.org/POM/4.0.0"

xmlns:xsi="http://www.w3.org/2001/XMLSchema-instance"
                         xsi:schemaLocation="http://maven.apache.org/POM/4.0.0 http://maven.apache.org/xsd/maven-4.0.0.xsd">
                    <modelVersion>4.0.0</modelVersion>

                    <groupId>com.example</groupId>
                    <artifactId>RestTomcatHelloWorld</artifactId>
                    <version>1.0-SNAPSHOT</version>
                    <name>RestTomcatHelloWorld</name>
                    <packaging>war</packaging>

                    <properties>
                        <maven.compiler.target>1.8</maven.compiler.target>
                        <maven.compiler.source>1.8</maven.compiler.source>
                        <junit.version>5.6.2</junit.version>
                    </properties>

                    <dependencies>
                        <dependency>
                            <groupId>javax.ws.rs</groupId>
                            <artifactId>javax.ws.rs-api</artifactId>
                            <version>2.1.1</version>
                            <scope>provided</scope>
                        </dependency>
                        <dependency>
                            <groupId>org.glassfish.jersey.containers</groupId>
                            <artifactId>jersey-container-servlet</artifactId>
                            <version>2.31</version>
                        </dependency>
                        <dependency>
                            <groupId>org.glassfish.jersey.media</groupId>
                            <artifactId>jersey-media-json-jackson</artifactId>
                            <version>2.31</version>
                        </dependency>
                        <dependency>
                            <groupId>org.glassfish.jersey.inject</groupId>
                            <artifactId>jersey-hk2</artifactId>
                            <version>2.31</version>
                        </dependency>
                        <dependency>
                            <groupId>org.glassfish.jersey.core</groupId>
                            <artifactId>jersey-client</artifactId>
                            <version>2.31</version>
                        </dependency>
                        <dependency>
                            <groupId>org.junit.jupiter</groupId>
                            <artifactId>junit-jupiter-api</artifactId>
                            <version>${junit.version}</version>
                            <scope>test</scope>
                        </dependency>
                        <dependency>
                            <groupId>org.junit.jupiter</groupId>
                            <artifactId>junit-jupiter-engine</artifactId>
                            <version>${junit.version}</version>
                            <scope>test</scope>
                        </dependency>
                    </dependencies>

                    <build>
                        <plugins>
                            <plugin>
                                <groupId>org.apache.maven.plugins</groupId>
                                <artifactId>maven-war-plugin</artifactId>
                                <version>3.3.0</version>
                            </plugin>
                        </plugins>
                    </build>
                </project>
参 考
https://lp.jetbrains.com/intellij-idea-jakartaee/
https://www.jetbrains.com/help/idea/creating-and-running-your-first-jakarta-ee-application.html


 被折叠的 条评论
为什么被折叠?
被折叠的 条评论
为什么被折叠?
 到【灌水乐园】发言


