


1、UI布局:
(1)添加图片位的div:
<div class="add_remove_file"></div>
(2)文件显示的模板布局(重点):
<!-- 模板放在add_remove_file外面 -->
		    <div class="img_notfirst_div templatel div_display">
		    	<div class="img_group" id="">
		    	    <div class="div_icon_left">
			             <img src="resources/images/teaching-icon-left.png" class="img_icon_left">
		            </div>
		            <div class="div_file_icon">
		            	<img alt="" class="img_pre_type" src= 'resources/images/pic-word.png'>
                         <a class="icon-img-remove" title="删除文件">
                         <i class="hide_clip">移除</i>
                         </a>
		            </div>
                   <div class="div_icon_right">
			            <img src="resources/images/teaching-icon-right.png" class="img_icon_right">
		           </div>
		        </div>
		        <div class="fileimg_txt" id="">飞啊飞啊飞飞到那里去laallalal</div>
           </div>
由于画面上需要移动图片,在img_group层,id中保存了文件的大小,在img中保存了需要显示的图片的路径,在fileimg_txt层的id中保存了图片的src,加上这些数据在后期都需要传递给后台接口或者加以显示,所以有必要将他们保存在页面的相应布局中,其实没有这些要求,这种将需要获取的数据放入页面div中的做法也是很有必要的,非常稳定且不容易出错(起码不会因为某个原因而丢失或者未获取到)。
另外这里我将图片(左移图片、文件显示图片、右移图片)放在一层div中,文件的名称放在另一个div中,两层div等宽,文件名称居中。
2、支持的文件类型:
项目中图片和文件上传至文件服务器,走的是两个不同的接口。所以文件类型分为图片和文件,以文件为例说明:
判断文件的类型:
判断文件的类型有两个方面的目的:(1)不支持的文件类型,在调用上传文件服务器接口之前进行判断;(2)支持的文件类型根据类型采用不同的图片进行显示。
<input type="file" id="file_ns_upload" name="upload" οnchange="nsUploadFile2(this);" style="display:none;">function nsUploadFile2(obj) {
var $this = $(obj);
fileName = $this.val().substr($this.val().lastIndexOf("\\") + 1);
var fileLength = $this.val().substring($this.val().lastIndexOf("\\") + 1,
$this.val().lastIndexOf("."));
if (fileLength.length > maxLength) {
openMsg("文件名不能大于" + maxLength);
return;
}
// 文件未选择的场合
if (fileName == '') {
return;
}
picPostfix = fileName.substring(fileName.lastIndexOf(".") + 1).toLowerCase();
if(isPic(picPostfix)){
uploadPic(obj);
}else if(isFileTypeSupport(picPostfix)){
uploadFile(obj);
}else{
openMsg("不支持的文件类型!");
return;
}
}点击获取文件,因为用了自定义的按钮,则需要将input隐藏,点击自定义的按钮让input的click事件触发,然后用上述函数去处理选择的文件。其中用到了substr和substring两个方法,注意区别。主要要说明的是(1)获取到了文件的后缀名并进行小写转换(2)在调用接口之前判断了是否为支持的文件类型。函数的具体内容如下:
/*判断是否是支持的文件类型*/
function isFileTypeSupport(filePostFix){
	var allowExtention = ".txt,.pdf,.ppt,.pptx,.xls,.xlsx,.doc,.docx,.mp4,.ogg,.webm"; // 允许上传文件的后缀名
	// 判断上传文件格式是否符合要求
	if (allowExtention.indexOf(filePostFix) <= -1) {
		return false;
	}else{
		return true;
	}
}
var $item = $('.img_notfirst_div.templatel').clone();
				if(picPostfix=="txt"){
					$('.img_pre_type', $item).attr('src', 'resources/images/pic-txt.png');
				 }else if(picPostfix=="pdf"){
					 $('.img_pre_type', $item).attr('src', 'resources/images/pic-pdf.png');
				 }else if(picPostfix=="ppt"||picPostfix=="pptx"){
					 $('.img_pre_type', $item).attr('src', 'resources/images/pic-ppt.png');
				 }else if(picPostfix=="xls"||picPostfix=="xlsx"){
					 $('.img_pre_type', $item).attr('src', 'resources/images/pic-excel.png');
				 }else if(picPostfix=="doc"||picPostfix=="docx"){
					 $('.img_pre_type', $item).attr('src', 'resources/images/pic-word.png');
				 }else if(picPostfix=="mp4"||picPostfix=="ogg"||picPostfix=="webm"){
					 $('.img_pre_type', $item).attr('src', 'resources/images/pic-video.png');
				 }
				$('.fileimg_txt',$item).text(fileName);
				$('.fileimg_txt',$item).attr("id",data.url);
				$('.img_group',$item).attr("id",data.fileSize);
				 $('.icon-img-remove',$item).on('click',function(){
					 $item.remove();
				 })
				 $(".div_file_icon, .img_icon_left, .img_icon_right", $item).mouseover(function(){
					   $('.icon-img-remove',$item).show();
						$(".img_icon_left, .img_icon_right", $item).show();
					});
					$(".div_file_icon, .img_icon_left, .img_icon_right", $item).mouseout(function(){
						$('.icon-img-remove',$item).hide();
						$(".img_icon_left, .img_icon_right", $item).hide();
					});
					$(" .img_icon_left", $item).on('click', function() {
						tpFileAdjustPre($item);
					});
					$(" .img_icon_right", $item).on('click', function() {
						tpFileAdjustNext($item);
					});
				$item.removeClass('templatel').appendTo('.add_remove_file').show();
4、左右移动事件:
由于文件上传只是新建一条信息的一部分,但是文件上传后又是可以删除移动的,将文件的各个信息保存在页面中,到最后点击保存按钮时获取存在的各个文件的信息是最简单也是最不容易出错的做法。左右移动则包含了相同两个文件div中文件信息的转移。以左移为例,具体函数如下:
/*前移*/
function tpFileAdjustPre(selected){
	$prev = selected.prev();
	if($prev.length>0){
		var curSrc = selected.find('.img_group .div_file_icon .img_pre_type').attr('src');
		var curId = selected.find('.fileimg_txt').attr('id');
		var curName = selected.find('.fileimg_txt').html();
		var curFilesize = selected.find('.img_group').attr('id');
		var preSrc = $prev.find('.img_group .div_file_icon .img_pre_type').attr('src');
		var preId = $prev.find('.fileimg_txt').attr('id');
		var preName = $prev.find('.fileimg_txt').html();
		var preFilesize = $prev.find('.img_group').attr('id');
		$prev.find('.img_group .div_file_icon .img_pre_type').attr('src',curSrc);
		$prev.find('.fileimg_txt').attr('id',curId);
		$prev.find('.fileimg_txt').text(curName);
		$prev.find('.img_group').attr('id',curFilesize);
		selected.find('.img_group .div_file_icon .img_pre_type').attr('src',preSrc);
		selected.find('.fileimg_txt').attr('id',preId);
		selected.find('.fileimg_txt').text(preName);
		selected.find('.img_group').attr('id',preFilesize);
	}else{
		openMsg("你都第一了,不能再前进了!");
	}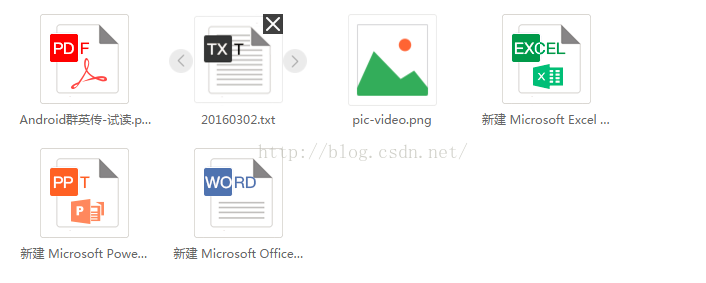
}5、效果如下:
但是,至此还有一个问题,就是上传时因为没有load,所以当大文件未完全上传时,仍然可以点击上传其他文件,而得到的结果就是之前的大文件没有上传,出现了两个相同的后来上传的文件。
6、添加遮罩在上传大文件时阻止用户做其他操作。(先这样保证功能的正确性吧)
在ajax请求之前,调用showloading,请求成功之后调用hideloading。
<!-- loading遮罩层 -->
<div class="loading loading_back">
</div>
<div class="loading loading_page">
	<img alt="" src="resources/images/loading.gif">
</div>.loading_back {
position: absolute;
opacity: 0.4;
width: 100%;
height: 100%;
background: #fff;
z-index: 999999998;
}
.loading_page{
position: absolute;
padding: 8px;
overflow: hidden;
top: 45%;
left: 45%;
z-index: 999999999;
}
.loading{
display: none;
}//显隐loading'条方法
function showLoading(){
$(".loading_back").css({ "width": $(document).width(), "height": $(document).height() });
$('.loading').show();
}
function hideLoading(){
$('.loading').hide();
}效果如下:
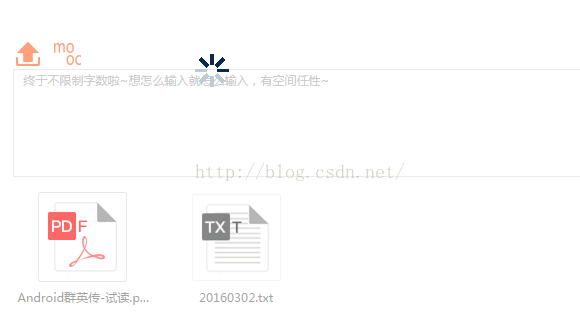
虽然效果上不太好,但是功能上没有大问题了。


 613
613

 被折叠的 条评论
为什么被折叠?
被折叠的 条评论
为什么被折叠?
 到【灌水乐园】发言


