


Azkaban 任务调度
官网地址:https://azkaban.github.io/
概述
Azkaban是由Linkedin公司推出的一个批量工作流任务调度器,主要用于在一个工作流内以一个特定的顺序运行一组工作和流程,它的配置是通过简单的key:value对的方式,通过配置中的dependencies 来设置依赖关系,这个依赖关系必须是无环的,否则会被视为无效的工作流。Azkaban使用job配置文件建立任务之间的依赖关系,并提供一个易于使用的web用户界面维护和跟踪你的工作流。zkaban的设计首先考虑了可用性。它已经在LinkedIn上运行了几年,并驱动了许多Hadoop和数据仓库流程。
知名度比较高的应该是Apache Oozie,但是其配置工作流的过程是编写大量的XML配置,而且代码复杂度比较高,不易于二次开发。另外一个应用也比较广泛的调度系统是Airflow,但是其开发语言是Python。
选择Azkaban的理由:
- 提供功能清晰,简单易用的Web UI界面
- 提供job配置文件快速建立任务和任务之间的依赖关系
- 提供模块化和可插拔的插件机制,原生支持command、Java、Hive、Pig、Hadoop
- 基于Java开发,代码结构清晰,易于二次开发
适用场景
实际项目中经常有这些场景:每天有一个大任务,这个大任务可以分成A,B,C,D四个小任务,A,B任务之间没有依赖关系,C任务依赖A,B任务的结果,D任务依赖C任务的结果。一般的做法是,开两个终端同时执行A,B,两个都执行完了再执行C,最后再执行D。这样的话,整个的执行过程都需要人工参加,并且得盯着各任务的进度。但是我们的很多任务都是在深更半夜执行的,通过写脚本设置crontab执行。其实,整个过程类似于一个有向无环图(DAG)。每个子任务相当于大任务中的一个流,任务的起点可以从没有度的节点开始执行,任何没有通路的节点之间可以同时执行,比如上述的A,B。总结起来的话,我们需要的就是一个工作流的调度器,而Azkaban就是能解决上述问题的一个调度器。
Azkaban架构
Azkaban在LinkedIn上实施,以解决Hadoop作业依赖问题。我们有工作需要按顺序运行,从ETL工作到数据分析产品。最初是单一服务器解决方案,随着多年来Hadoop用户数量的增加,Azkaban 已经发展成为一个更强大的解决方案。Azkaban总共有三个角色:关系型数据库(MySQL)、AzkabanWebServer、AzkabanExecutorServer。
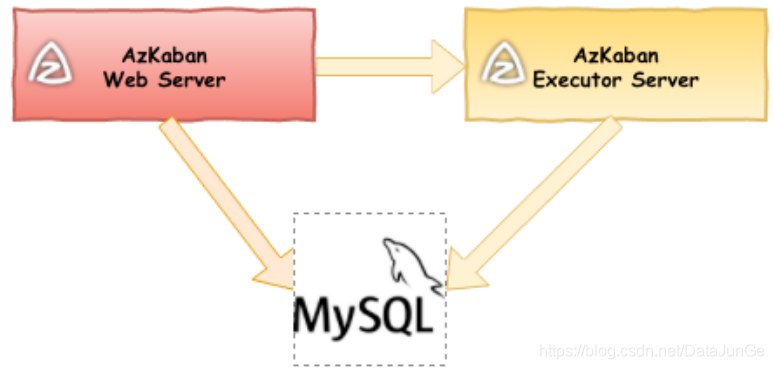
AzkabanWebServer是所有Azkaban的主要管理器。它处理项目管理,身份验证,调度程序和执行监视。它还用作Web用户界面。 使用Azkaban很容易。 Azkaban使用* .job键值属性文件来定义工作流程中的各个任务,并使用dependencies属性来定义作业的依赖关系链。这些作业文件和相关的代码可以存档为* .zip,并通过Azkaban UI或curl通过Web服务器上传。
以前的Azkaban版本(version 3.0之前)在单个服务器中同时具有AzkabanWebServer和AzkabanExecutorServer功能。此后,执行程序已被分离到单独的服务器中。拆分这些服务的原因有很多:方便的扩展Executor的数量,并在失败的情况下可以恢复。分离以后在对Azkaban升级的时候对用户的使用影响很小。
AzkabanWebServer如何使用DB?
- Project Management - The projects, the permissions on the projects as well as the uploaded files.
- Executing Flow State - Keep track of executing flows and which Executor is running them.
- Previous Flow/Jobs - Search through previous executions of jobs and flows as well as access their log files.
- Scheduler - Keeps the state of the scheduled jobs.
- SLA - Keeps all the sla rules
AzkabanExecutorServer如何使用DB?
- Acess the project - Retrieves project files from the db.
- Executing Flows/Jobs - Retrieves and updates data for flows and that are executing
- Logs - Stores the output logs for jobs and flows into the db.
- Interflow dependency - If a flow is running on a different executor, it will take state from the DB.
编译
[root@CentOS ~]# yum install git
[root@CentOS ~]# git clone https://github.com/azkaban/azkaban.git
[root@CentOS ~]# cd azkaban/
[root@CentOS azkaban]# ./gradlew build installDist
...漫长的等待...
Starting a Gradle Daemon, 1 incompatible and 1 stopped Daemons could not be reused, use --status for details
Parallel execution with configuration on demand is an incubating feature.

> Task :azkaban-web-server:npm_install
added 39 packages in 0.901s

> Task :azkaban-web-server:jsTest

  addClass
    ✓ should add class into element
    ✓ should not add a class which already exists in element

  CronTransformation
    ✓ should transfer correctly

  ValidateQuartzStr
    ✓ validate Quartz String corretly

  momentJSTest
    ✓ momentJSTest
    ✓ momentTimezoneTest

  6 passing (11ms)

BUILD SUCCESSFUL in 9s
114 actionable tasks: 8 executed, 106 up-to-date
安装
在version 3.0中我们提供了三种模式:独立的"solo-server"模式、较重的"two server"模式以及"multiple-executor"模式。其中solo server mode 使用的内嵌的H2 DB,所有的web server和executor server运行在一个相同的进程中,该种模式适合测试或者任务调度规模比较小;two server mode用于生产环境,后台的DB数据库使用MySQL,其中Webserver和executorserver应该被部署在不同的主机上;multiple executor mode 也通常用于生产环境,后台的DB数据库使用MySQL,其中Webserver和executorservers应该被部署在不同的主机上;
solo server mode
1、编译好在azkaban的安装目录下会有相应的安装包azkaban-solo-server-*.tar.gz,将该安装解压到/usr目录下
[root@CentOS azkaban]# tree azkaban-solo-server/build/distributions
azkaban-solo-server/build/distributions
├── azkaban-solo-server-3.81.0-1-g304593d.tar.gz
└── azkaban-solo-server-3.81.0-1-g304593d.zip
[root@CentOS azkaban]# tar -zxf azkaban-solo-server/build/distributions/azkaban-solo-server-3.81.0-1-g304593d.tar.gz -C /usr/
[root@CentOS azkaban]# cd /usr/
[root@CentOS usr]# mv azkaban-solo-server-3.81.0-1-g304593d azkaban-solo-server

[root@CentOS azkaban-solo-server]# ls -l
总用量 24
drwxr-xr-x. 3 root root 4096 12月 17 16:11 bin        #启动脚本
drwxr-xr-x. 2 root root 4096 12月 17 16:11 conf       #配置目录
drwxr-xr-x. 2 root root 4096 12月 17 16:11 lib        #运行所需依赖jar
drwxr-xr-x. 3 root root 4096 12月 17 16:11 plugins    #插件安装目录
drwxr-xr-x. 2 root root 4096 12月 17 16:11 sql        #sql脚本
drwxr-xr-x. 6 root root 4096 12月 17 16:11 web        #web服务相关
[root@CentOS azkaban-solo-server]# tree conf/
conf/
├── azkaban.properties
├── azkaban-users.xml
└── global.properties

0 directories, 3 files
[root@CentOS azkaban-solo-server]# tree plugins/
plugins/
└── jobtypes
    └── commonprivate.properties

1 directory, 1 file
2、修改azkaban.properties配置文件
default.timezone.id=Asia/Shanghai #修改时区
# email 相关配置
mail.sender=1152926811@qq.com
mail.host=smtp.qq.com
mail.user=1152926811@qq.com
mail.password=nvwoyoudipkjgdee # 建议使用自己的授权密码
# 任务调度成功&失败的发送邮箱
job.failure.email=1152926811@qq.com
job.success.email=1152926811@qq.com
3、修改commonprivate.properties配置文件
memCheck.enabled=false # 关闭执行节点内存检查,默认如果执行节点内存小于6GB,不会提交任务
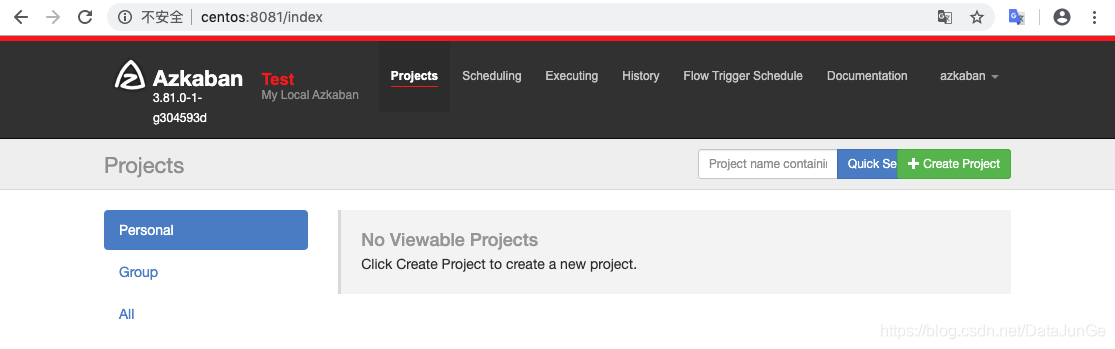
4、运行Solo Server服务器,访问CentOS:8081
[root@CentOS azkaban-solo-server]# ./bin/start-solo.sh #关闭
[root@CentOS azkaban-solo-server]# jps
5638 AzkabanSingleServer
5679 Jps

5、填写用户名azkaban密码azkaban
登录的账户信息存储在azkaban-users.xml配置文件中
6、关闭Azkaban服务
[root@CentOS azkaban-solo-server]# ./bin/shutdown-solo.sh
Killing solo-server. [pid: 5638], attempt: 1
shutdown succeeded
two server mode | multiple executor mode
- 安装和配置MySQL
1,安装MySQL,并且初始化azkaban数据
C:\Users\Administrator>mysql -u root -p1234
Welcome to the MySQL monitor.  Commands end with ; or \g.
Your MySQL connection id is 2
Server version: 5.5.61 MySQL Community Server (GPL)

Copyright (c) 2000, 2018, Oracle and/or its affiliates. All rights reserved.

Oracle is a registered trademark of Oracle Corporation and/or its
affiliates. Other names may be trademarks of their respective
owners.

Type 'help;' or '\h' for help. Type '\c' to clear the current input statement.

mysql> create database azkaban character set=latin1; # 需要设置编码为latin1
Query OK, 1 row affected (0.00 sec)

mysql> use azkaban;
Database changed
mysql> source xxx\azkaban\azkaban-db\build\sql\create-all-sql-3.81.0-1-g304593d.sql
mysql> show tables;
+-----------------------------+
| Tables_in_azkaban           |
+-----------------------------+
| active_executing_flows      |
| active_sla                  |
| execution_dependencies      |
| execution_flows             |
| execution_jobs              |
| execution_logs              |
| executor_events             |
| executors                   |
| project_events              |
| project_files               |
| project_flow_files          |
| project_flows               |
| project_permissions         |
| project_properties          |
| project_versions            |
| projects                    |
| properties                  |
| qrtz_blob_triggers          |
| qrtz_calendars              |
| qrtz_cron_triggers          |
| qrtz_fired_triggers         |
| qrtz_job_details            |
| qrtz_locks                  |
| qrtz_paused_trigger_grps    |
| qrtz_scheduler_state        |
| qrtz_simple_triggers        |
| qrtz_simprop_triggers       |
| qrtz_triggers               |
| ramp                        |
| ramp_dependency             |
| ramp_exceptional_flow_items |
| ramp_exceptional_job_items  |
| ramp_items                  |
| triggers                    |
+-----------------------------+
34 rows in set (0.00 sec)
- 安装azkaban-executor-server(循环部署多分)
1,解压azkaban-exec-server-3.81.0-1-g304593d.tar.gz解压到/usr
[root@HadoopNode00 ~]# cd azkaban
[root@HadoopNode00 azkaban]# tree azkaban-exec-server/build/distributions/
azkaban-exec-server/build/distributions/
├── azkaban-exec-server-3.81.0-1-g304593d.tar.gz
└── azkaban-exec-server-3.81.0-1-g304593d.zip

0 directories, 2 files
[root@HadoopNode00 azkaban]# tar -zxf azkaban-exec-server/build/distributions/azkaban-exec-server-3.81.0-1-g304593d.tar.gz -C /usr/
[root@HadoopNode00 azkaban]# cd /usr/
[root@HadoopNode00 usr]# mv azkaban-exec-server-3.81.0-1-g304593d azkaban-exec-server
2,配置azkaban.properties
default.timezone.id=America/Los_Angeles
azkaban.webserver.url=http://HadoopNode00:8081

mail.sender=1152926811@qq.com
mail.host=smtp.qq.com
mail.user=1152926811@qq.com
mail.password=nvwoyoudipkjgdee

job.failure.email=1152926811@qq.com
job.success.email=1152926811@qq.com

database.type=mysql
mysql.port=3306
mysql.host=192.168.126.1
mysql.database=azkaban
mysql.user=root
mysql.password=1234
mysql.numconnections=100
3,在测试的机器上,关闭内存检查(生产环境下不建议关闭),修改 commonprivate.properties
[root@HadoopNode00 azkaban-exec-server]# tree plugins/
plugins/
└── jobtypes
    └── commonprivate.properties
memCheck.enabled=false
4,启动azkaban-executor-server
[root@HadoopNode00 azkaban-exec-server]# jps
45364 Jps
45327 AzkabanExecutorServer
5,激活azkaban-executor-server
[root@HadoopNode00 azkaban-exec-server]# curl -G "localhost:$(<./executor.port)/executor?action=activate" && echo
{"status":"success"}
- 部署安装azkaban-web-server(只有一个)
1,解压azkaban-web-server-3.81.0-1-g304593d.tar.gz解压到/usr
[root@HadoopNode00 azkaban]# tree azkaban-web-server/build/distributions/
azkaban-web-server/build/distributions/
├── azkaban-web-server-3.81.0-1-g304593d.tar.gz
└── azkaban-web-server-3.81.0-1-g304593d.zip
[root@HadoopNode00 azkaban]# tar -zxf azkaban-web-server/build/distributions/azkaban-web-server-3.81.0-1-g304593d.tar.gz -C /usr/
[root@HadoopNode00 azkaban]# cd /usr/
[root@HadoopNode00 usr]# mv azkaban-web-server-3.81.0-1-g304593d azkaban-web-server
[root@HadoopNode00 usr]# cd azkaban-web-server/
2,配置azkaban.properties
[root@HadoopNode00 azkaban-web-server]# tree conf/
conf/
├── azkaban.properties
├── azkaban-users.xml
├── global.properties
└── log4j.properties
default.timezone.id=Asia/Shanghai

mail.sender=1152926811@qq.com
mail.host=smtp.qq.com
mail.user=1152926811@qq.com
mail.password=nvwoyoudipkjgdee

job.failure.email=1152926811@qq.com
job.success.email=1152926811@qq.com

database.type=mysql
mysql.port=3306
mysql.host=192.168.126.1
mysql.database=azkaban
mysql.user=root
mysql.password=1234
mysql.numconnections=100

#azkaban.executorselector.filters=StaticRemainingFlowSize,MinimumFreeMemory,CpuStatus
azkaban.executorselector.filters=StaticRemainingFlowSize,CpuStatus # 关闭内存检查,仅仅测试环境
3,启动azkaban-web-server
[root@HadoopNode00 azkaban-web-server]# ./bin/start-web.sh
[root@HadoopNode00 azkaban-web-server]# jps
51185 Jps
51145 AzkabanWebServer
45327 AzkabanExecutorServer
Flow2.0编写
basic
- xxxx.project
azkaban-flow-version: 2.0
- xxxx.flow
nodes:
  - name: QucikStart
    type: command
    config:
      command: echo 'this is a demo'
      command.1: echo 'this is a demo1'
      command.2: echo 'this is a demo2'
执行shell脚本
nodes:
- name: TestShell
type: command
config:
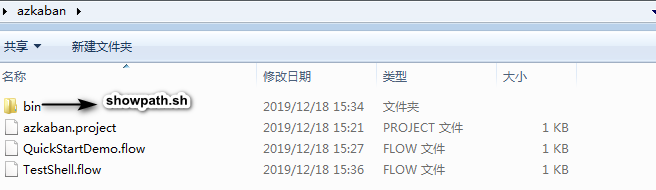
command: sh ./azkaban/bin/showpath.sh
#!/usr/bin/env bash
path=$(pwd)
tree -L 2
echo $path
调用Java代码
nodes:
- name: TestShell
type: javaprocess
config:
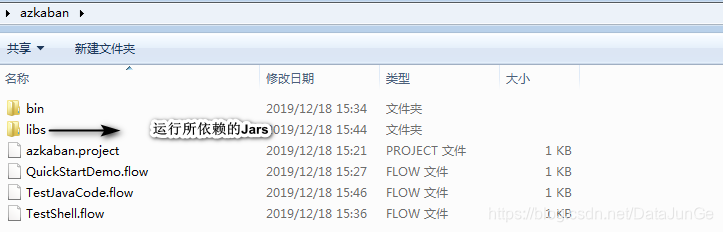
classpath: ./azkaban/libs/*
java.class: com.baizhi.demo.TestAzkaban
public class TestAzkaban {
    public static void main(String[] args) {
        System.out.println("=================");
        System.out.println("=================");
        System.out.println("this is azkaban JavaCode");
        System.out.println("=================");
        System.out.println("=================");
    }
}
需要打包成jar,放置在libs目录下。
带有依赖的Flow
nodes:
  - name: logic_job
    type: noop
    dependsOn:
      - TestShell
      - javaJob
  - name: end
    type: command
    config:
      command: echo "This is an echoed text."
    dependsOn:
      - logic_job
  - name: TestShell
    type: command
    config:
      command: sh ./azkaban/bin/showpath.sh
  - name: javaJob
    type: javaprocess
    config:
      classpath: ./azkaban/libs/*
      java.class: com.baizhi.demo.TestAzkaban
内嵌流
nodes:
  - name: logic_job
    type: noop
    dependsOn:
      - embeded01
      - embeded02
  - name: end
    type: command
    config:
      command: echo "This is an end job."
    dependsOn:
      - logic_job
  - name: embeded01
    type: flow
    nodes:
      - name: em1
        type: command
        config:
          command: echo 'hello world'
  - name: embeded02
    type: flow
    nodes:
      - name: em2
        type: command
        config:
          command: echo 'hello azkaban'
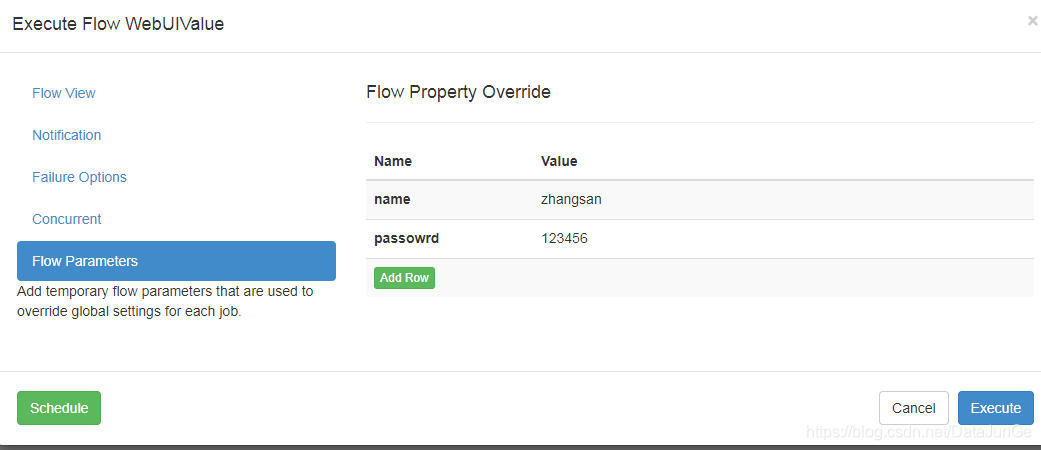
WebUI传值
nodes:
  - name: WEBUIValue
    type: command
    config:
      command: echo "Revice value from WebUI name:"${name}" password:"${password}
将值传递给Shell脚本
4nodes:
  - name: WEBUIValueToShellFile
    type: command
    config:
      command: sh ./azkaban/bin/recevicevalue.sh ${name} ${password}
#!/usr/bin/env bash
name=$1
password=$2
start=$(date -d -7day '+%Y-%m-%d')
end=$(date '+%Y-%m-%d')
echo '{"name":"'$name'","password":"'$password'","start":"'$start'","end":"'$end'"}'

Job间传值
nodes:
  - name: GenerateTime
    type: command
    config:
      command: sh ./azkaban/bin/write2file.sh

  - name: Job2JobRevice
    type: command
    config:
      command: echo ${start}' ~ '${end}
    dependsOn:
      - GenerateTime
#!/usr/bin/env bash
start=$(date -d -7day '+%Y-%m-%d')
end=$(date '+%Y-%m-%d')
echo '{"start":"'$start'","end":"'$end'"}' > $JOB_OUTPUT_PROP_FILE
表示将数据写到下游依赖的job的上下文配置中,要求格式必须json格式
CondationFlow
参考:https://azkaban.readthedocs.io/en/latest/conditionalFlow.html
nodes:
 - name: JobA
   type: command
   config:
     command: sh ./azkaban/bin/condation.sh

 - name: JobB
   type: command
   dependsOn:
     - JobA
   config:
     command: echo "This is JobB."
   condition: ${JobA:param1} == 1

 - name: JobC
   type: command
   dependsOn:
     - JobA
   config:
     command: echo "This is JobC."
   condition: ${JobA:param1} == 2

 - name: JobD
   type: command
   dependsOn:
     - JobB
     - JobC
   config:
     command: echo 'this is jodD!'
   condition: one_success
#!/usr/bin/env bash
echo '{"param1": "1"}' > $JOB_OUTPUT_PROP_FILE
Job配置
config:
  user.to.proxy: azkaban
  failure.emails: lqq950604@sina.com
  success.emails: lqq950604@sina.com
  notify.emails: lqq950604@sina.com

nodes:
  - name: RMHDFSFIle
    type: command
    config:
      command: sh ./azkaban/bin/rmfile.sh ${path}
EventTrigger配置
当前,Azkaban支持通过调度它或Ajax API来启动流。但是,它们受到限制,因为有时需要按需自动执行作业。事件触发是Azkaban引入的一项新功能。它定义了触发流程的新范例-在Kafka事件到达时触发流程。该概念使用户可以定义流所依赖的事件。一旦所有事件准备就绪,将触发工作流程。
1,修改azkaban-web-server/conf/azkaban.properties,添加一下属性
azkaban.dependency.plugin.dir=plugins/dependency
azkaban.server.schedule.enable_quartz=true
2,创建一些配置文件
[root@HadoopNode00 azkaban-web-server]# mkdir -p plugins/dependency/kafka
[root@HadoopNode00 azkaban-web-server]# touch plugins/dependency/kafka/dependency.properties
[root@HadoopNode00 azkaban-web-server]# tree plugins/
plugins/
└── dependency
    └── kafka
        └── dependency.properties

2 directories, 1 file
[root@HadoopNode00 azkaban-web-server]# touch conf/azkaban.private.properties
[root@HadoopNode00 azkaban-web-server]# tree conf/
conf/
├── azkaban.private.properties
├── azkaban.properties
├── azkaban-users.xml
├── global.properties
└── log4j.properties

0 directories, 5 files
3,拷贝azkaban下的kafka-event-trigger-3.81.0-1-g304593d-fat.jar到plugins/dependency/kafka/
[root@HadoopNode00 ~]# cd azkaban
[root@HadoopNode00 azkaban]# cp az-flow-trigger-dependency-type/kafka-event-trigger/build/libs/kafka-event-trigger-3.81.0-1-g304593d-fat.jar /usr/azkaban-web-server/plugins/dependency/kafka/
[root@HadoopNode00 azkaban]# cd /usr/azkaban-web-server/
[root@HadoopNode00 azkaban-web-server]# tree plugins/
plugins/
└── dependency
    └── kafka
        ├── dependency.properties
        └── kafka-event-trigger-3.81.0-1-g304593d-fat.jar
4,修改dependency.properties
dependency.classpath=/usr/azkaban-web-server/plugins/dependency/kafka/kafka-event-trigger-3.81.0-1-g304593d-fat.jar
dependency.class=trigger.kafka.KafkaDependencyCheck
kafka.broker.url=HadoopNode00:9092
5,修改azkaban.private.properties
org.quartz.dataSource.quartzDS.user=root
org.quartz.dataSource.quartzDS.password=1234
org.quartz.dataSource.quartzDS.driver = com.mysql.jdbc.Driver
org.quartz.dataSource.quartzDS.URL = jdbc:mysql://CentOS:3306/azkaban
org.quartz.threadPool.threadCount = 3
org.quartz.jobStore.class=org.quartz.impl.jdbcjobstore.JobStoreTX
org.quartz.jobStore.driverDelegateClass=org.quartz.impl.jdbcjobstore.StdJDBCDelegate
org.quartz.jobStore.tablePrefix=QRTZ_
org.quartz.jobStore.dataSource=quartzDS
config:
  user.to.proxy: root
  failure.emails: 1152926811@qq.com
  success.emails: 1152926811@qq.com
  notify.emails: 1152926811@qq.com

trigger:
  maxWaitMins: 2
  schedule:
    type: cron
    value: 0 0/2 * * * ?

  triggerDependencies:

    - name: dep1
      type: kafka
      params:
        match: .*
        topic: AzEvent_Topic

    - name: dep2
      type: kafka
      params:
        match: .*baizhi.*success.*
        topic: AzEvent_Topic

nodes:

  - name: demo01
    type: command
    config:
      command: echo "==========start=========="

  - name: demo02
    type: command
    dependsOn:
      - demo01
    config:
      command: echo "==========end=========="


 被折叠的 条评论
为什么被折叠?
被折叠的 条评论
为什么被折叠?
 到【灌水乐园】发言


