


📢博客主页:🏀敲代码的布莱恩特🏀
📢欢迎点赞 👍 收藏 ⭐留言 📝 欢迎讨论!👏
📢本文由 【敲代码的布莱恩特】 原创,首发于 CSDN🙉🙉🙉
📢由于博主是在学小白一枚,难免会有错误,有任何问题欢迎评论区留言指出,感激不尽!✨
📖精品专栏(不定时更新)【JavaSE】 【Java数据结构】【LeetCode】

【Spring】Bean的作用域和生命周期
引入问题:Bean作用域问题
假设现在有⼀个公共的 Bean,提供给 A ⽤户和 B ⽤户使⽤,然⽽在使⽤的途中 A ⽤户却“悄悄”地修改 了公共 Bean 的数据,导致 B ⽤户在使⽤时发⽣了预期之外的逻辑错误。(说好⼀起到⽩头,你却悄悄 焗了油)。
package com.bit.util;

import com.bit.Model.User;
import org.springframework.context.annotation.Bean;
import org.springframework.context.annotation.Scope;
import org.springframework.stereotype.Component;

@Component
public class UserBean {

    @Bean(name = {"u1"}) // 将当前对象存储到 Spring 当中
    public User user1() {
        // 查询数据库并返回对象
        // ...伪代码来构建一个对象
        User user = new User();
        user.setId(1);
        user.setName("张三");
        user.setAge(18);
        return user;
    }

    @Bean(name = "u2") // 将当前对象存储到 Spring 当中
    public User user2() {
        // 查询数据库并返回对象
        // ...伪代码来构建一个对象
        User user = new User();
        user.setId(2);
        user.setName("李四");
        user.setAge(20);
        return user;
    }

}
package com.bit.controller;

import com.bit.Model.User;
import org.springframework.stereotype.Controller;

import javax.annotation.Resource;

@Controller
public class UserController8 {

    @Resource
    private User u1;

    public User getUser() {
        User user = u1;
        user.setName("三张");
        return user;
    }

}
package com.bit.controller;

import com.bit.Model.User;
import org.springframework.beans.factory.annotation.Autowired;
import org.springframework.stereotype.Controller;

@Controller
public class UserController9 {

    @Autowired
    private User u1;

    public User getUser() {
        User user = u1;
        return user;
    }
}
public class App {
    public static void main(String[] args) {
        // 1.先获取对象的
        ClassPathXmlApplicationContext context = new ClassPathXmlApplicationContext("spring.xml");

        UserController8 userController8 = context.getBean("userController8", UserController8.class);
        User user1 = userController8.getUser();
        System.out.println("UserController8——user1:" + user1);

        UserController9 userController9 = context.getBean("userController9", UserController9.class);
        User user2 = userController9.getUser();
        System.out.println("UserController9——user2:" + user2);
运行结果观察如下:

原因分析:
操作以上问题的原因是因为 Bean 默认情况下是单例状态(singleton),也就是所有⼈的使⽤的都是同 ⼀ 个对象,之前我们学单例模式的时候都知道,使用单例可以很⼤程度上提高性能,所以在 Spring 中 Bean 的作⽤域默认也是 singleton 单例模式。
作用域定义
限定程序中变量的 可用范围 叫做作用域,或者说在源代码中定义变量的某个区域就叫做作用域。
而 Bean 的作用域是指 Bean 在 Spring 整个框架中的某种⾏为模式,比如 singleton 单例作用域,就表 示 Bean 在整个 Spring 中只有⼀份,它是全局共享的,那么当其他⼈修改了这个值之后,那么另⼀个 人读取到的就是被修改的值。
Bean 6种作用域
Spring 容器在初始化⼀个 Bean 的实例时,同时会指定该实例的作⽤域。Spring有 6 种作⽤域, 最后四种是基于 Spring MVC ⽣效的: 其中前两种是 spring 核⼼作⽤域,⽽后 4 种是 spring mvc 中的作⽤域
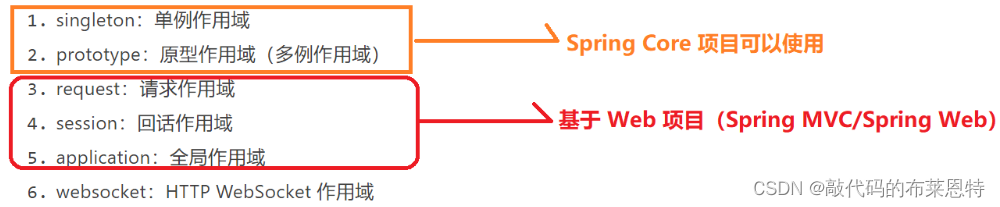
singleton:单例作⽤域
- 官⽅说明:(Default) Scopes a single bean definition to a single object instance for each Spring IoC container.
- 描述:该作⽤域下的Bean在IoC容器中只存在⼀个实例:获取Bean(即通过 applicationContext.getBean等⽅法获取)及装配Bean(即通过@Autowired注⼊)都是同⼀ 个对象。
- 场景:通常⽆状态的Bean使⽤该作⽤域。⽆状态表示Bean对象的属性状态不需要更新
- 备注:Spring默认选择该作⽤域
prototype:原型作⽤域(多例作⽤域)
- 官⽅说明:Scopes a single bean definition to any number of object instances.
- 描述:每次对该作⽤域下的Bean的请求都会创建新的实例:获取Bean(即通过 applicationContext.getBean等⽅法获取)及装配Bean(即通过@Autowired注⼊)都是新的 对象实例。
- 场景:通常有状态的Bean使⽤该作⽤域
request:请求作⽤域
- 官⽅说明:Scopes a single bean definition to the lifecycle of a single HTTP request. That is, each HTTP request has its own instance of a bean created off the back of a single bean definition. Only valid in the context of a web-aware Spring ApplicationContext.
- 描述:每次http请求会创建新的Bean实例,类似于prototype
- 场景:⼀次http的请求和响应的共享Bean
- 备注:限定SpringMVC中使⽤
session:回话作⽤域
- 官⽅说明:Scopes a single bean definition to the lifecycle of an HTTP Session. Only valid in the context of a web-aware Spring ApplicationContext.
- 描述:在⼀个http session中,定义⼀个Bean实例
- 场景:⽤户回话的共享Bean, ⽐如:记录⼀个⽤户的登陆信息
- 备注:限定SpringMVC中使⽤
application:全局作⽤域(了解)
- 官⽅说明:Scopes a single bean definition to the lifecycle of a ServletContext. Only valid in the context of a web-aware Spring ApplicationContext.
- 描述:在⼀个http servlet Context中,定义⼀个Bean实例
- 场景:Web应⽤的上下⽂信息,⽐如:记录⼀个应⽤的共享信息
- 备注:限定SpringMVC中使⽤
websocket:HTTP WebSocket 作⽤域(了解)
- 官⽅说明:Scopes a single bean definition to the lifecycle of a WebSocket. Only valid in the context of a web-aware Spring ApplicationContext.
- 描述:在⼀个HTTP WebSocket的⽣命周期中,定义⼀个Bean实例
- 场景:WebSocket的每次会话中,保存了⼀个Map结构的头信息,将⽤来包裹客户端消息 头。第⼀次初始化后,直到WebSocket结束都是同⼀个Bean。
- 备注:限定Spring WebSocket中使⽤
注意后 4 种状态是 Spring MVC 中的值,在普通的 Spring 项⽬中只有前两种
单例作用域(singleton)和全局作用域(application)区别
- singleton 是 Spring Core 的作⽤域;application 是 Spring Web 中的作⽤域; *
- singleton 作⽤于 IoC 的容器,⽽ application 作⽤于 Servlet 容器
如何设置 Bean 作用域
两种方法:
- @Scope(ConfigurableBeanFactory.SCOPE_PROTOTYPE)
- @Scope(“prototype”)
@Scope可适用于方法注解也可以用作类注解。

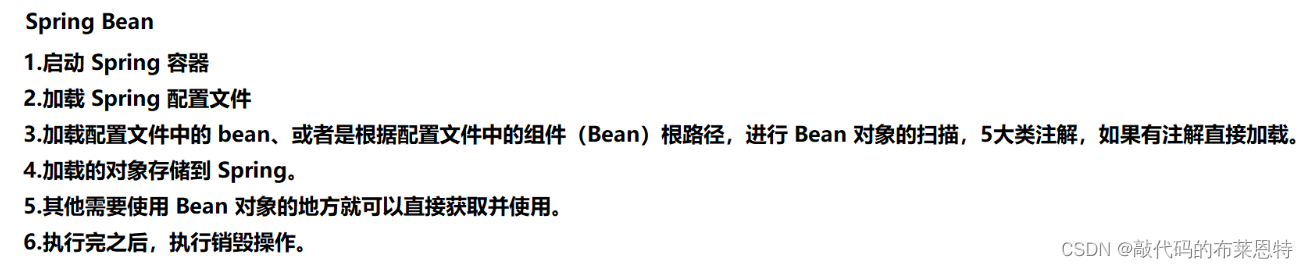
Spring Bean 大的执行流程
Bean 执⾏流程(Spring 执⾏流程):
启动 Spring 容器 -> 实例化 Bean(分配内存空间,从⽆到有) -> Bean 注册到 Spring 中(存操作) -> 将 Bean 装配到需要的类中(取操作)
Bean的生命周期
所谓的⽣命周期指的是⼀个对象从诞⽣到销毁的整个⽣命过程,我们把这个过程就叫做⼀个对象的⽣命 周期
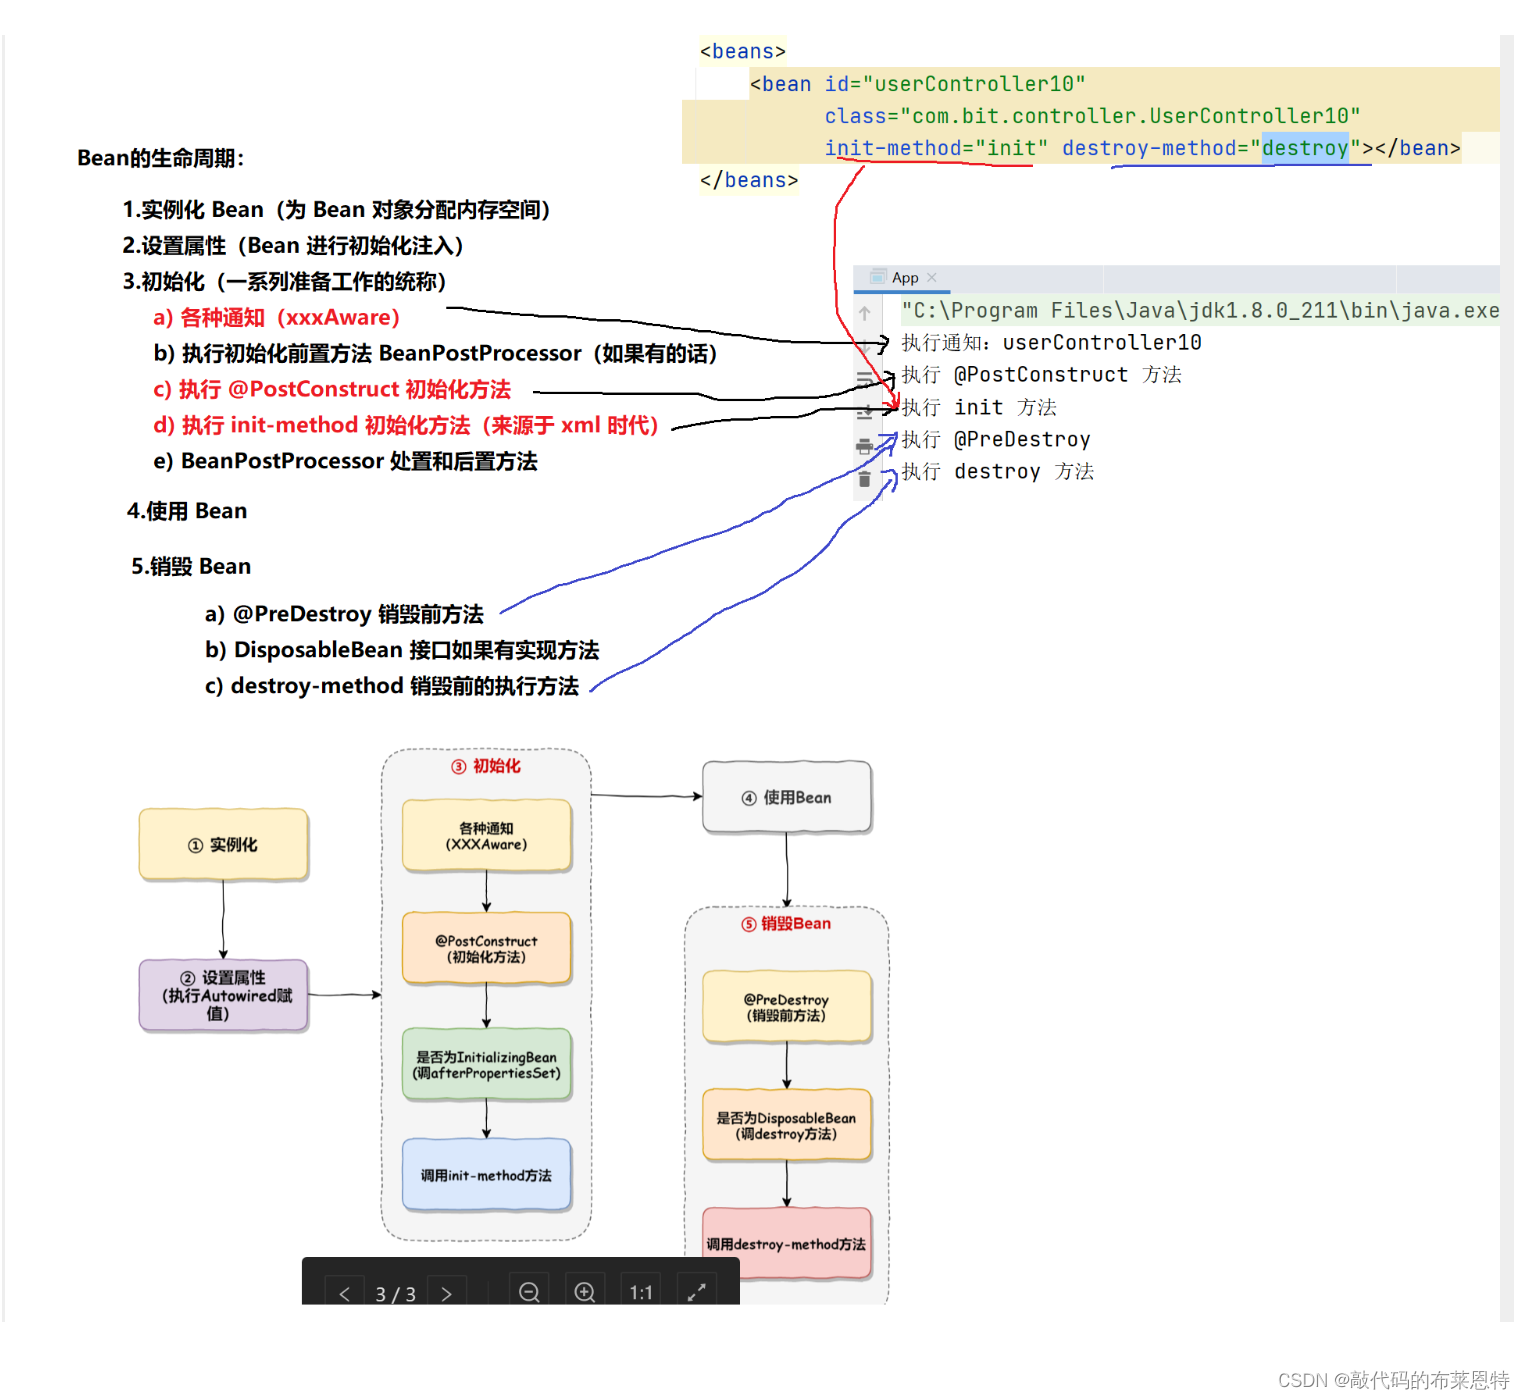
实例化和初始化的区别
实例化和属性设置是 Java 级别的系统“事件”,其操作过程不可⼈⼯⼲预和修改;⽽初始化是给 开发者提供的,可以在实例化之后,类加载完成之前进⾏⾃定义“事件”处理。
⽣命流程的“故事”
Bean 的⽣命流程看似繁琐,但咱们可以以⽣活中的场景来理解它,⽐如我们现在需要买⼀栋房⼦,那 么我们的流程是这样的:
- 先买房(实例化,从⽆到有);
- 装修(设置属性);
- 买家电,如洗⾐机、冰箱、电视、空调等([各种]初始化);
- ⼊住(使⽤ Bean);
- 卖出去(Bean 销毁)。
生命周期演示
import org.springframework.beans.factory.BeanNameAware;
import org.springframework.stereotype.Component;
import javax.annotation.PostConstruct;
import javax.annotation.PreDestroy;
@Component
public class BeanLifeComponent implements BeanNameAware {
    @PostConstruct
    public void postConstruct() {
        System.out.println("执⾏ PostConstruct()");
   }
    public void init() {
        System.out.println("执⾏ BeanLifeComponent init-method");
   }
    @PreDestroy
    public void preDestroy() {
        System.out.println("执⾏:preDestroy()");
   }
    public void setBeanName(String s) {
        System.out.println("执⾏了 setBeanName ⽅法:" + s);
   }
}
xml配置如下:
<?xml version="1.0" encoding="UTF-8"?>
<beans xmlns="http://www.springframework.org/schema/beans"
       xmlns:xsi="http://www.w3.org/2001/XMLSchema-instance"
       xmlns:content="http://www.springframework.org/schema/context"
       xsi:schemaLocation="http://www.springframework.org/schema/beans
http://www.springframework.org/schema/beans/spring-beans.xsd
http://www.springframework.org/schema/context
https://www.springframework.org/schema/context/spring-context.xsd">
    <content:component-scan base-package="com.bit.component">
</content:component-scan>
    <beans>
        <bean id="beanLifeComponent"
class="com.bit.component.BeanLifeComponent" init-method="init"></bean>
    </beans>
</beans>
调用类:
import com.bit.controller.BeanLife;
import
org.springframework.context.support.ClassPathXmlApplicationContext;
public class BeanLifeTest {
    public static void main(String[] args) {
        ClassPathXmlApplicationContext context =
                new ClassPathXmlApplicationContext("spring-config.xml");
        BeanLife life = context.getBean(BeanLife.class);
        System.out.println("执⾏ main ⽅法");
        // 执⾏销毁⽅法
        context.destroy();
   }
}
思考:为什么要先设置属性在进行初始化呢?
因为设置属性并不会涉及其他东西,就只是设置了一个成员属性,而初始化有可能回用到属性,那这时候如果属性还没被设置,岂不是就会报错了,所以要先设置属性,再进行初始化


 2166
2166


 被折叠的 条评论
为什么被折叠?
被折叠的 条评论
为什么被折叠?
 到【灌水乐园】发言


