


ES 开发环境搭建。
安装说明
- 环境: centos7
Java : java8
elasticsearch-6.5.4
- 下载地址
$ cd ~
$ cd download
$ wget https://artifacts.elastic.co/downloads/elasticsearch/elasticsearch-6.5.4.tar.gz
-
安装前置条件
注:文章默认已配置好1.8版本jdk, 如果没配置请先配置一下!- 安装git
- 安装node.js(elasticsearc-head必须)
- 安装net-tools
-
参考资料
https://www.cnblogs.com/--1024/p/9306661.html?tdsourcetag=s_pctim_aiomsg -
安装目录说明
本次安装目录均在 /opt/elasticsearch目录下,包括elasticsearch , elasticsearch-head
所以本次文档安装的有 elasticsearch ,ik , elasticsearch-head
- 安装步骤
- 安装配置ES
1). 新建好elasticsearch目录
cd /opt
sudo mkdir elasticsearch
将ES解压到 /opt/ elasticsearch目录底下
cd download
sudo tar -xvf elasticsearch-6.5.4.tar.gz -C /opt/elasticsearch/
2). Elasticsearch配置
修改elasticsearch.yml
cd /opt/elasticsearch/elasticsearch-6.5.4/config
sudo vim elasticsearch.yml
修改如下几项(配置集群名称,这里端口默认为9200,如果需要修改可以改http.port)
cluster.name: xxx-es

network.host: 0.0.0.0

path.logs: /home/apps/elasticsearch-6.3.1/logs

path.data: /home/apps/elasticsearch-6.3.1/data   #默认没有该目录,需要手动新建  mkdir data

增加以下两个配置(跨域访问)
http.cors.enabled: true

http.cors.allow-origin: "*"
保存修改。
3). 新建启动用户 (ES5.0 以后不允许使用root角色启动)
#添加用户
adduser centos

#设置密码
passwd centos

#授权
chown -R centos /centos elasticsearch

#切换用户
su centos

#启动
cd /opt/elasticsearch/elasticsearch-6.5.4/bin
./elasticsearch
启动可能会报如下错误:
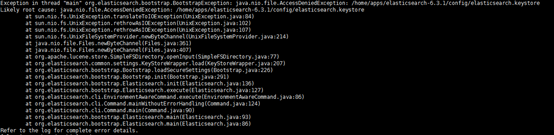
切换回root角色再为该用户授权一次就可以了, 可能是启动的时候新生成了文件没有权限
su root
chown -R centos /opt/elasticsearch/elasticsearch-6.5.4
错误解决方案
再启动一次,发现依旧报错

原因:无法创建本地文件问题,用户最大可创建文件数太小 。
解决方案:
#切换回root账户,或者sudo方式进行修改
su root
#修改limits.conf文件
vi /etc/security/limits.conf
在文件最底部增加如下配置
* soft nofile 65536
* hard nofile 131072
* soft nproc 2048
* hard nproc 4096
切换回elasticsearch账号,再启动一次ES吧,又报错了

原因:最大虚拟内存太小
解决方案:
#切换至root账户
su root
#修改sysctl.conf
vi /etc/sysctl.conf
添加如下配置
vm.max_map_count=655360
执行 sysctl -p 以刷新配置。再次切换回elasticsearch用户,启动ES
还有一种情况就是实际机器内存很小导致启动内存不足。
解决办法:配置jvm 使用大小
在config文件下有个jvm.options通过修改配置信息即可。

根据实际情况配置大小。ES中默认配置是1G。

启动成功! 我们打开浏览器访问一下吧~

Ps : 防火墙配置
发现打不开,我们之前已经配置了所有节点可以访问,并且也配置了可跨域,为什么打不开呢?
别忘了还有防火墙在啊。需要把9200的对外访问端口打开
在控制台输入以下命令
#开启9200端口
firewall-cmd --zone=public --add-port=9200/tcp --permanen

#刷新配置
firewall-cmd --reload
好~ES的配置到此结束。
- 安装IK分词器
- 下载
选择版本网站
https://github.com/medcl/elasticsearch-analysis-ik/releases
6.5.4下载链接:
https://github-production-release-asset-2e65be.s3.amazonaws.com/2993595/c26d1080-0662-11e9-8126-57843dc6fdd2?X-Amz-Algorithm=AWS4-HMAC-SHA256&X-Amz-Credential=AKIAIWNJYAX4CSVEH53A%2F20190130%2Fus-east-1%2Fs3%2Faws4_request&X-Amz-Date=20190130T031318Z&X-Amz-Expires=300&X-Amz-Signature=14938947077b9df77552345a3e199240bb9489f8abfc0c4ac2f1173ea2d0fb3b&X-Amz-SignedHeaders=host&actor_id=22309140&response-content-disposition=attachment%3B%20filename%3Delasticsearch-analysis-ik-6.5.4.zip&response-content-type=application%2Foctet-stream
下载ik分词器
cd download
wget https://github-production-release-asset-2e65be.s3.amazonaws.com/2993595/c26d1080-0662-11e9-8126-57843dc6fdd2?X-Amz-Algorithm=AWS4-HMAC-SHA256&X-Amz-Credential=AKIAIWNJYAX4CSVEH53A%2F20190127%2Fus-east-1%2Fs3%2Faws4_request&X-Amz-Date=20190127T040443Z&X-Amz-Expires=300&X-Amz-Signature=f202316c2c3cf8a0ec2492698d4ef67eaa23e10c8b8d7a84e8814e68d320352d&X-Amz-SignedHeaders=host&actor_id=22309140&response-content-disposition=attachment%3B%20filename%3Delasticsearch-analysis-ik-6.5.4.zip&response-content-type=application%2Foctet-stream
2)安装部署
// 移动
mv elasticsearch-analysis-ik-6.5.4.zip /opt/elasticsearch/elasticsearch-6.5.4/plugins/
cd /opt/elasticsearch/elasticsearch-6.5.4/plugins/ik
// 解压
unzip elasticsearch-analysis-ik-6.5.4.zip
// 删除旧文件
sudo rm -rf elasticsearch-analysis-ik-6.5.4.zip
配置好之后,重启ES 就自动加载ik 分词器。
- 安装elasticsearch-head
1). 下载elasticsearch-head
cd  /opt/ elasticsearch
git clone https://github.com/mobz/elasticsearch-head
安排配置node.js等环境信息(ps: 用yum方式安装nodejs和npm)。
参考资料:
https://blog.csdn.net/lu_embedded/article/details/79138650
https://blog.csdn.net/xiao_jun_0820/article/details/50838185
从EPEL库安装Node.js
安装Node.js的一个有效且简单的方法就是从官方库下载安装,首先确保您可以访问到EPEL库,您可以通过运行以下命令来安装。
sudo yum install epel-release
现在可以使用yum命令安装Node.js了
sudo yum install nodejs
因为在开发过程中我需要管理节点包,我还要安装新公共管理的软件包管理器,使用以下命令。 (注意:由于新版的nodejs已经集成了npm,所以这一步可以忽略。)
sudo yum install npm
检查一下:
# node --version
v6.12.2
# npm --version
3.10.10
可以看到,用这种方法安装的话,版本比较旧。
安装grunt用来启动head
#安装grunt命令行工具grunt-cli
npm install -g grunt-cli
#安装grunt及其插件
npm install grunt --save-dev
#查看安装版本情况
grunt -version
Ps: 安装的时候有可能涉及license问题解决办法:
参考:https://www.cnblogs.com/shengulong/p/6224908.html
处理方式:
打开elasticsearch-head目录下的package.json文件,找到license位置,修改为上面这个网站上存在Identifier,就可以了。
配置连接信息
vi Gruntfile.js
保存后配置防火墙,开放9100端口,在控制台输入
firewall-cmd --zone=public --add-port=9100/tcp --permanent
firewall-cmd --reload
启动head
grunt server
启动时还会报错
这些是Gruntfile.js中引用的,分别下载。ok
处理方式就是安装上述的grunt-**.
npm install grunt-contrib-copy
npm install grunt-contrib-concat
npm install grunt-contrib-uglify
npm install grunt-css
安装 sudo npm install grunt-contrib-jasmine 时报
解决办法就是:
sudo npm install phantomjs-prebuilt@2.1.16 --ignore-scripts
在浏览器输入 http://192.168.101.110:9100
安装完成 !


 1万+
1万+


 被折叠的 条评论
为什么被折叠?
被折叠的 条评论
为什么被折叠?
 到【灌水乐园】发言


