


(一) JSP创建web项目
分别用了两种方法:一种是servlet一种是jsp作后端
PART ONE 利用记事本实现增删查改功能
准备工作:安装 tomcat 8.x.x
(一)在tomcat的中新建文件MyDevice 路径如下:
apache-tomcat-8.5.59\webapps\ROOT\MyDevice
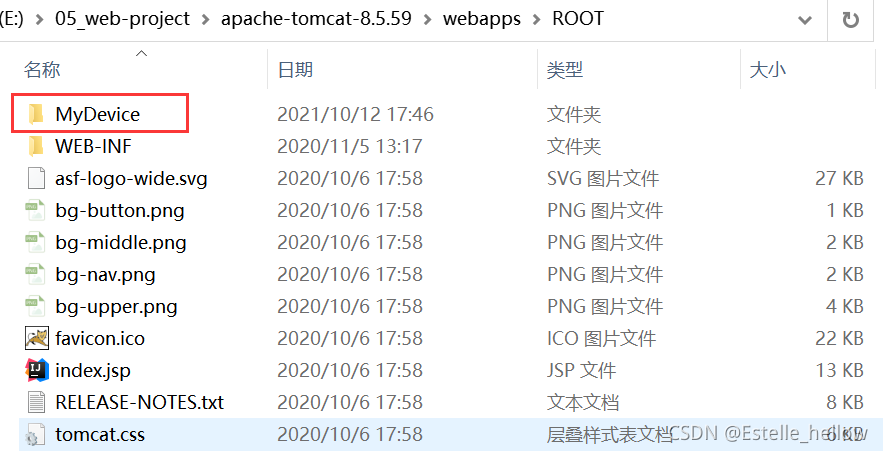
启动tomcat后,我们在浏览器中输入网址localhost:8080/xxx.html
xxx.html访问的就是apache-tomcat-8.5.59\webapps\ROOT\xxx.html 的文件
- 怎么启动tomcat 后面有详细描述)
(1)在cmd里启动
(2)有个运行程序
(二)在MyDevice下新建项目需要的jsp、html文件
jsp要写:UTF-8编码格式 如下:
<%@ page contentType="text/html; charset=UTF-8"  %>
<meta http-equiv="Content-Type" content="text/html; charset=UTF-8"/>
这是我最终的文件

- 把所有的html展示页面写好
(三)启动tomcat服务器
- 使用cmd进入/tomcat/bin 文件中:输入startup 启动tomcat服务器
- 或者E:\05_web-project\apache-tomcat-8.5.59\bin 点击startup.bat也可以启动tomcat服务器
然后在浏览器中输入localhost:8080 出现如下页面 算是成功启动

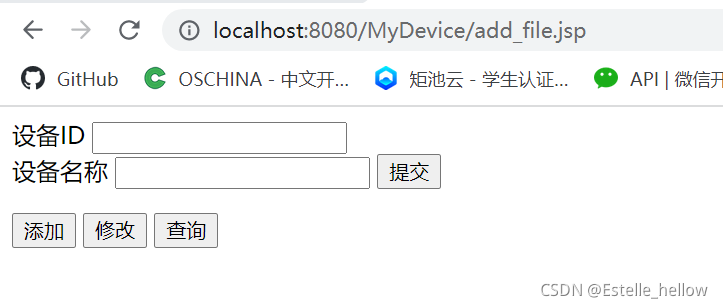
(四)输入网址:http://localhost:8080/MyDevice/add_file.jsp
查看自己创建的表单
(五)下载json.jar和mysql-connector-java 8 拷贝到 tomcat/lib
官网地址:https://downloads.mysql.com/archives/c-j/
(六)写jsp后端
注意的几个点:
-
jsp语法:
<%%>这里面可以添加java代码片段
<%! %>这里添加java方法
<%=%>将变量或表达式值输出到页面
<%-- --%>jsp注释 -
注意:
request.setCharacterEncoding("UTF-8");
必须声明在request.getparamter的前面,否则中文会乱码的 -
out.println和system.println.out的区别:
out是jsp内置对象之一,把信息输出到客户端,而System.out.println()则把信息输出到控制台
(1)jsp获取form表单中name的参数的值,不是id的值
 设备ID
        <input type="text" id="device_id" name="device_id" value="">
        <br>
 设备名称
        <input type="text" id="device_name" name="device_name" value="">
String deviceId =request.getParameter("device_id");
String deviceName= request.getParameter("device_name");
(2)开始连接数据库:
mysql5–>mysql8
com.mysql.jdbc.Driver => com.mysql.cj.jdbc.Driver
之前用springbootMVC框架配置的数据库链接:
spring:
  datasource:
    driver-class-name: com.mysql.jdbc.Driver
    url: jdbc:mysql://127.0.0.1:3306/csi_db?characterEncoding=UTF-8&useSSL=true&serverTimezone=Asia/Shanghai
    username: root
    password: 123456
  mvc:
    static-path-pattern: /static/**
在JSP里链接数据库是这样写的:
 //开始连接数据库
 <%
        try{
            Class.forName(" com.mysql.cj.jdbc.Driver");
        }catch (ClassNotFoundException classNotFoundException){
            classNotFoundException.printStackTrace();
        }
        System.out.println("加载了JDBC驱动");

        //然后连接数据库,开始操作数据表
        try{
            Connection conn = DriverManager
                    .getConnection("jdbc:mysql://127.0.0.1:3306/cly_jspdemo_db?user=root&password=123456&characterEncoding=UTF-8&useSSL=true&serverTimezone=Asia/Shanghai");

            System.out.println("准备statement");
            Statement statement = conn.createStatement();
            System.out.println("已经连接上数据库");

            String sql="insert into gas_device(device_id,device_name) values('"
            + deviceId + "','" + deviceName +"')";
            statement.executeUpdate(sql);

            statement.close(); //
            conn.close(); //如果使用到结果集 需要注释掉两个连接关闭的close()
            System.out.println("操作数据完毕 ,关闭了数据库");

    %>
            添加成功!请返回。
            <input type="button" name="listBtn" value="返回列表" onclick="window.location='index.html'">
    <%
    }catch (SQLException sqlexception){
            sqlexception.printStackTrace();
    %>
    添加失败!请返回。
    <input type="button" name="listBtn" value="返回列表" onclick="window.location='index.html'">
    <%
        }
        out.println("页面执行完毕!");
        System.out.println("页面执行完毕");
    %>
(3)然后连接数据库,开始操作数据表
- 注意:jsp中的mysql语句的用法略微有不同
'"+param+"'
(4)tomcat/log文件下可以查看log文件
PART TWO servlet 实现增删查改功能
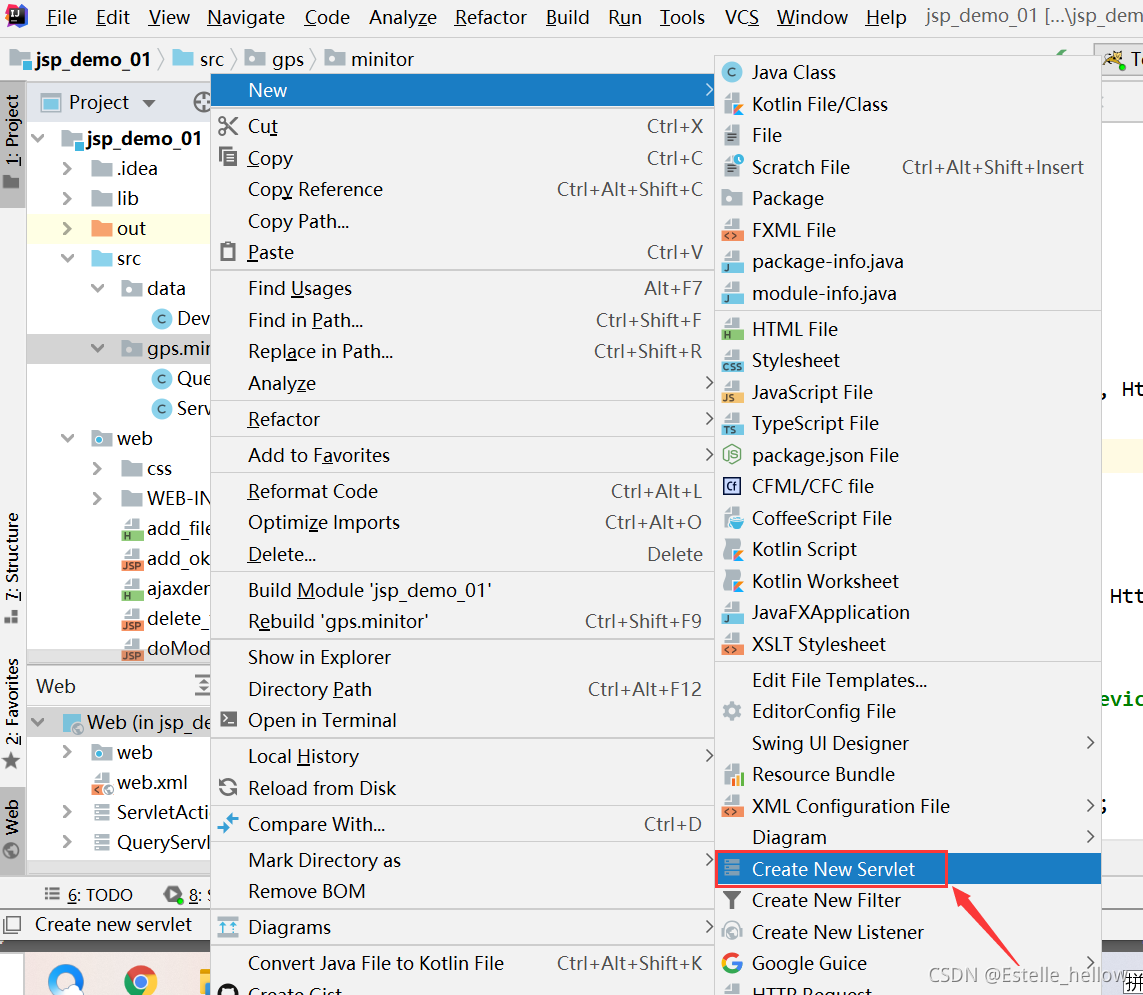
(一)选择java 中的web Application

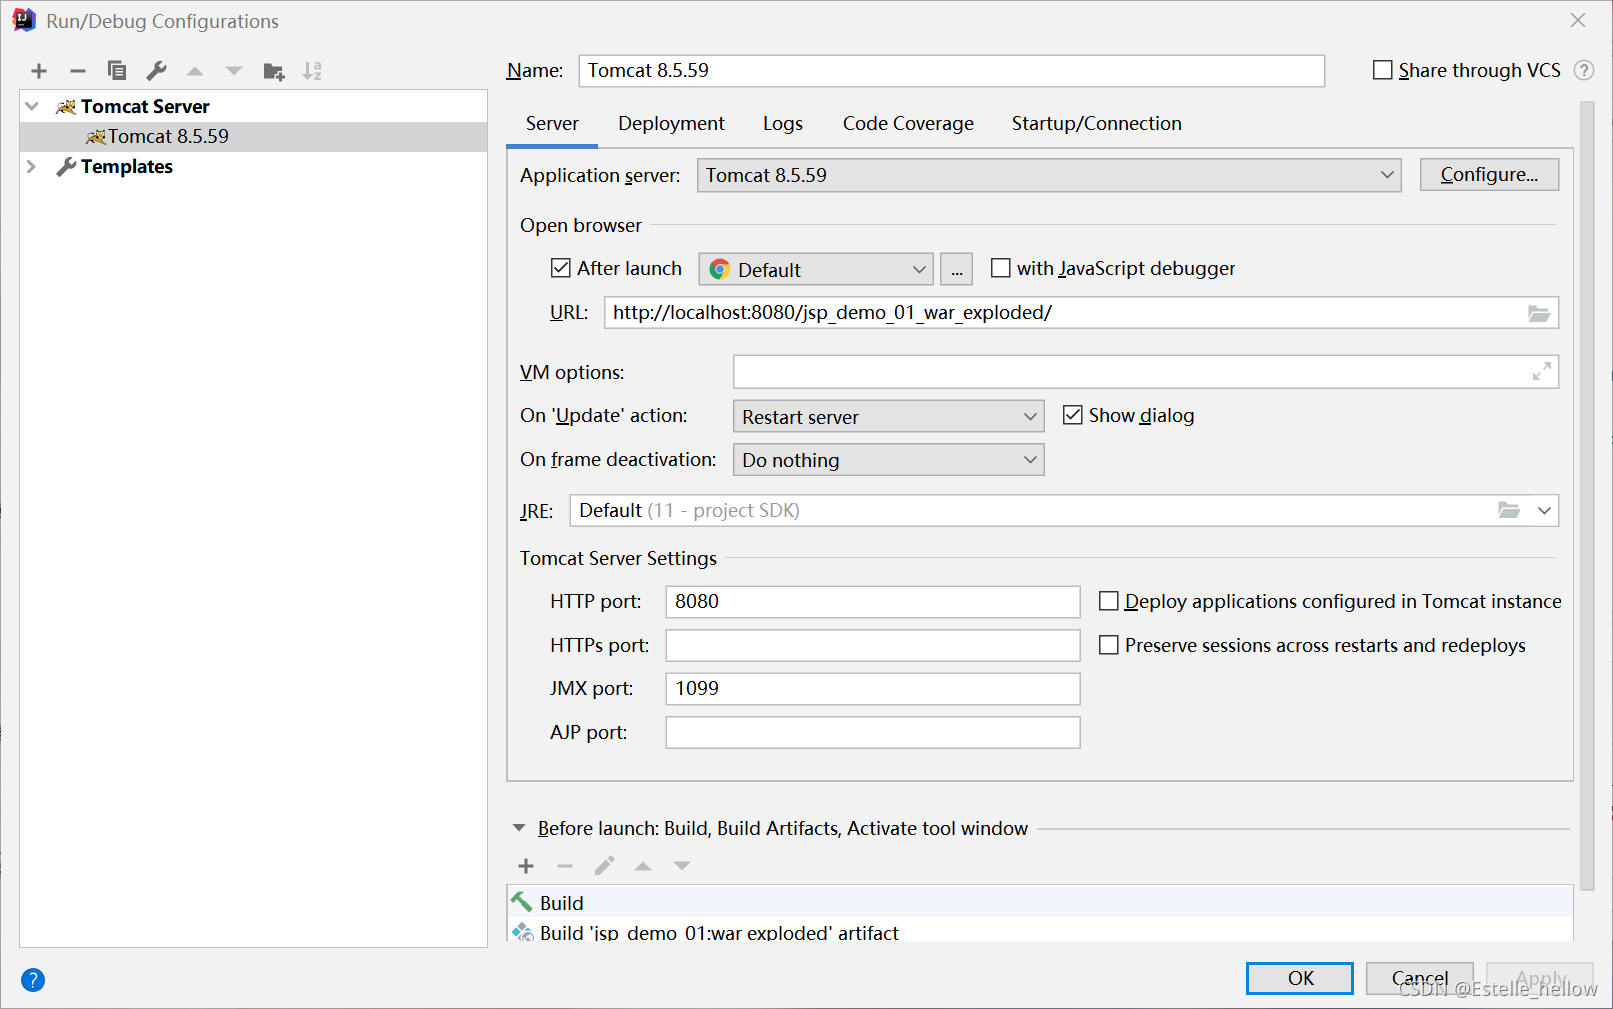
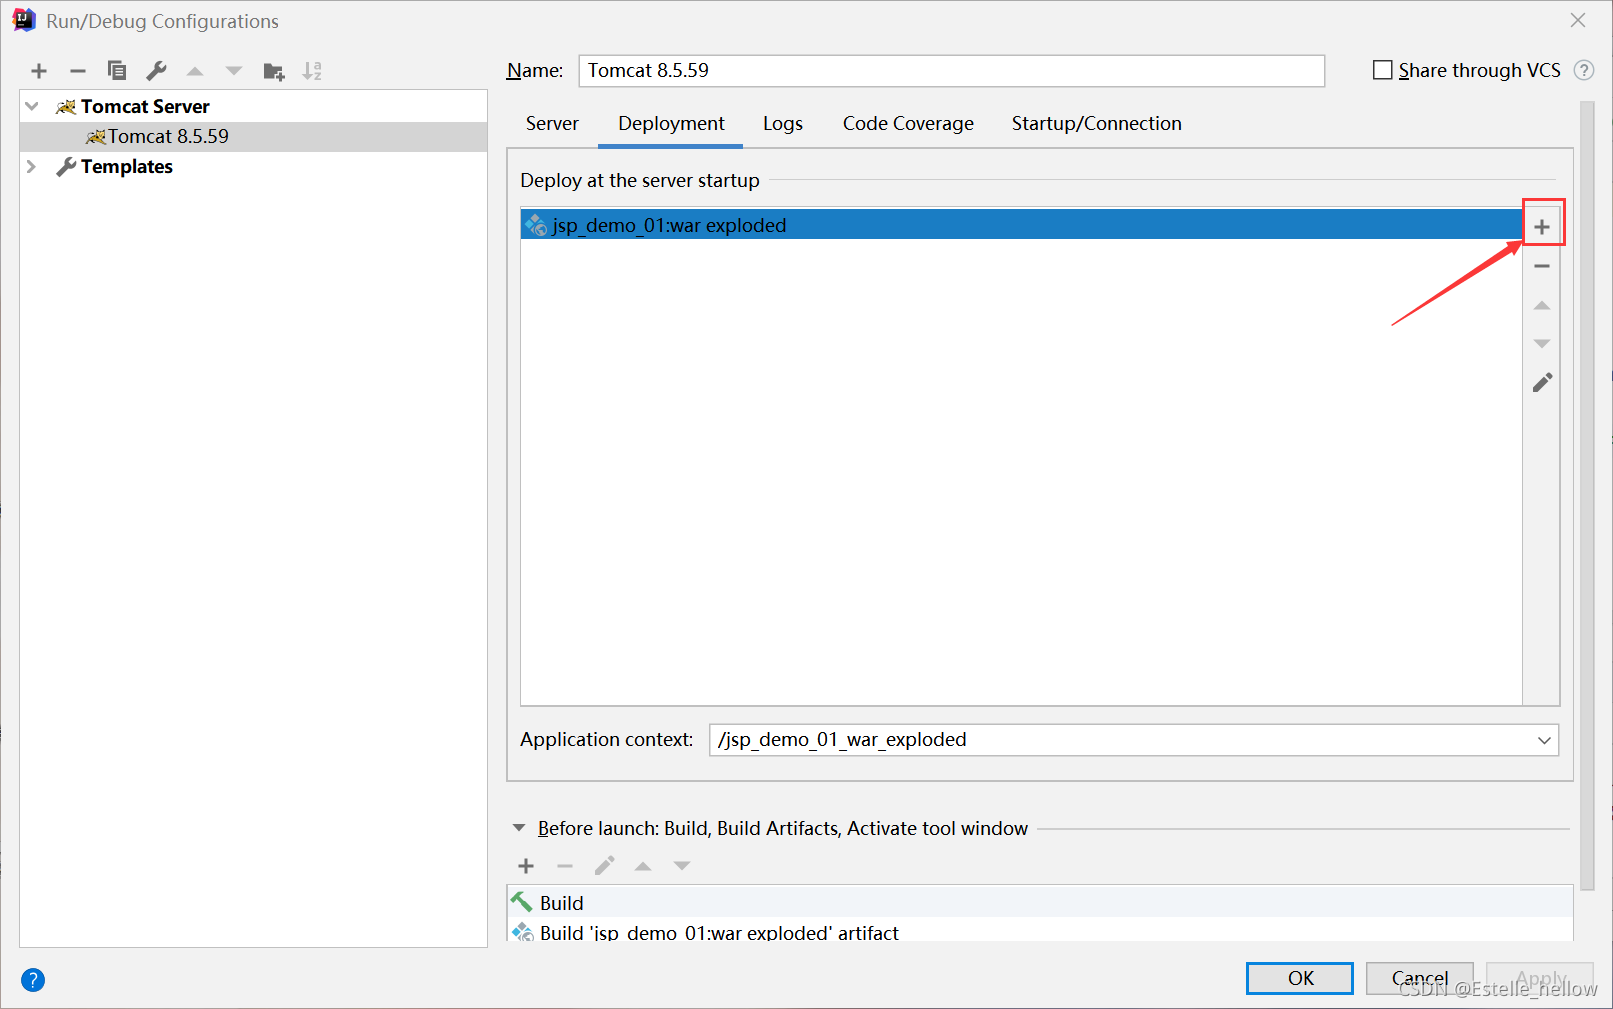
(二) 配置tomcat服务器
(三)创建、拷贝相关的文件
(1) 将之前的记事本文件拷进去,记住是在web目录下,和WEB-INF同级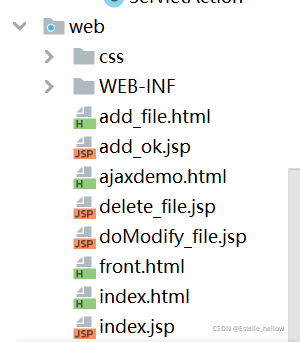
(2) 创建数据表 device table

package data;
import java.sql.Date;
/**
 * @Author ChenLanyu
 * @CreateTime 2021/10/15 17:40
 **/
public class Device {
    private String id;
    private String deviceName;
    private String deviceId;
    private String objectId;
    private int devicePort;
    private Date createTime;

    public int getDevicePort() {
        return devicePort;
    }

    public void setDevicePort(int devicePort) {
        this.devicePort = devicePort;
    }

    public String getId() {
        return id;
    }

    public void setId(String id) {
        this.id = id;
    }

    public String getDeviceName() {
        return deviceName;
    }

    public void setDeviceName(String deviceName) {
        this.deviceName = deviceName;
    }

    public String getDeviceId() {
        return deviceId;
    }

    public void setDeviceId(String deviceId) {
        this.deviceId = deviceId;
    }

    public String getObjectId() {
        return objectId;
    }

    public void setObjectId(String objectId) {
        this.objectId = objectId;
    }

    public Date getCreateTime() {
        return createTime;
    }

    public void setCreateTime(Date createTime) {
        this.createTime = createTime;
    }
}
(3) 开始修改之前的jsp做后端的文件,创建servlet
//这是一个servlet demo
public class ServletAction extends javax.servlet.http.HttpServlet {
    protected void doPost(javax.servlet.http.HttpServletRequest request, javax.servlet.http.HttpServletResponse response) throws javax.servlet.ServletException, IOException {
        System.out.println("执行了doPost.");
    }

    protected void doGet(javax.servlet.http.HttpServletRequest request, javax.servlet.http.HttpServletResponse response) throws javax.servlet.ServletException, IOException {
        System.out.println("执行了doGet");
    }
}
- Servlet中的doPost和doGet方法有什么区别?传递和获取参数上有什么区别?
区别:doPost 用来处理 post 请求,doGet 用来处理 get 请求
参数:传递的参数相同的都是 HttpServletRequest 和 HttpServletResponse
注意:不要混用post和get
在做数据查询时,建议用Get方式;而在做数据添加、修改或删除时,建议用Post方式
-
不过为了防止忘记post get方法用的是哪个,在doPost里调用doGet,在doGet里调用doPost 这样就不会出现调用不起servlet里函数的情况(然后bug也找不到)
-
————创建servlet遇到的很多坑————
- 创建后在web.xml里加上配置:
<servlet-class>要写类的包名
<servlet>
        <servlet-name>QueryServlet</servlet-name>
        <servlet-class>gps.minitor.QueryServlet</servlet-class>
    </servlet>

    <servlet-mapping>
        <servlet-name>QueryServlet</servlet-name>
        <url-pattern>/QueryServlet</url-pattern>
    </servlet-mapping>
- url-pattern的匹配规则:
1> 当servlet容器接收到浏览器发起的一个url请求后,容器会用url减去当前应用的上下文路径,以剩余的字符串作为servlet映射,假如url是http://localhost:8080/appDemo/index.html,其应用上下文是appDemo,容器会将http://localhost:8080/appDemo去掉,用剩下的/index.html部分拿来做servlet的映射匹配
2> url-pattern映射匹配过程是有优先顺序的
3> 而且当有一个servlet匹配成功以后,就不会去理会剩下的servlet了
更多详细的匹配规则 在这里
- 相对路径的访问
详细的路径总结
1.前台页面上的超链接 (浏览器问路)
2.提交form表单<form action="" >(浏览器问路)
3.重定向 response.sendRedirect(“路径”); (浏览器问路)
4.转发 request.getRequestDispatcher(“路径”).forward(request, response); (服务器问路) 一般使用/login.jsp
 不管是从服务器访问资源还是浏览器访问资源,不带斜杠都是当前路劲开始拼上我们写的路径。而对于带斜杠,浏览器访问时/代表Tomcat/Webapps ,服务器会补充上项目名 /代表 Tomcat/Webapps/项目名。
(四)写Queryservlet、Addservlet、Modifyservlet、代码
(1)Queryservlet 部分代码
//获取query_file.html页面提交后的参数
        String deviceId = request.getParameter("device_id");
        request.setCharacterEncoding("UTF-8");
        System.out.println("页面数据获取完毕");
        System.out.println("deviceId = " + deviceId);

        //开始连接数据库
        try {
            Class.forName(" com.mysql.cj.jdbc.Driver");
        } catch (ClassNotFoundException classNotFoundException) {
            classNotFoundException.printStackTrace();
        }
        System.out.println("加载了JDBC驱动");


        //然后连接数据库,开始操作数据表
        try {
            Connection conn = DriverManager
                    .getConnection("jdbc:mysql://127.0.0.1:3306/cly_jspdemo_db?user=root&password=123456&characterEncoding=UTF-8&useSSL=true&serverTimezone=Asia/Shanghai");
            System.out.println("准备statement");
            Statement statement = conn.createStatement();
            System.out.println("Connect Database OK");

            //数据库查询语句
            String sql = "select * from gas_device " +
                    "where id like '%" + deviceId + "%'";
            System.out.println("即将执行的SQL语句:" + sql);

            //执行executeQuery
            //resultset是 sql 结果集
            ResultSet rs = statement.executeQuery(sql);

            List<Device> listDevice = new ArrayList<Device>();

            while (rs.next()) {

                //创建一个Device对象
                Device device = new Device();
                device.setId(rs.getString("id"));
                device.setDeviceId(rs.getString("device_id"));
                device.setDeviceName(rs.getString("device_name"));
                device.setDevicePort(rs.getInt("device_port"));
                device.setObjectId(rs.getString("object_id"));
                device.setCreateTime(rs.getDate("create_time"));
                listDevice.add(device);
            }

            request.setAttribute("listDevice",listDevice);

            //关闭连接
            rs.close();
            statement.close();
            conn.close();

        } catch (SQLException sqlexception) {
            sqlexception.printStackTrace();

        } request.getRequestDispatcher("query_file.jsp")
                .forward(request, response);
    }
- request.getRequestDispatcher()有两种跳转:
1 跳转到一个servlet
request.getRequestDispatcher("想跳转的servlet名").forward(request, response);
2 跳转到一个页面
request.getRequestDispatcher("文件路径").forward(request, response);
(2) query_file.jsp
- 增加:如下引用
<%@page import="java.util.List"%>
<%@page import="data.Device"%>
<html></html>
- 创建一个列表,用getAttribute()获得它的值
在servlet中是这样写的:request.setAttribute("listDevice",listDevice);
在query.jsp中:
 <%
 List<Device> deviceList = (List<Device>) request.getAttribute("listDevice");
    for(Device device:deviceList){//这里循环遍历 得到值
    %>
    <td><%= device.getId() %></td>
            <td><%= device.getDeviceName()%></td>
            <td><%= device.getDeviceId()%></td>
            <td><%= device.getObjectId()%></td>
            <td><%= device.getDevicePort()%></td>
            <td><%= device.getCreateTime()%></td>
<%
}
%>
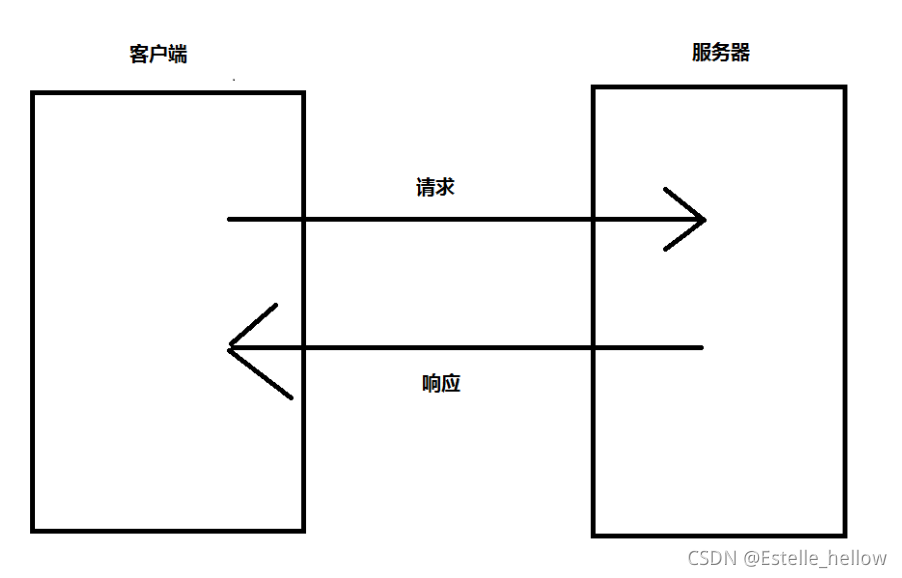
(二)前后端交互的数据传递
前端存储:localStorage和sessionStorage [html css js]
后台存储:session和application [servlet]
Part One: 在href上添加参数
将数据传递给后端
https://localhost:8080//myServlet?userName="1"&userId="2"
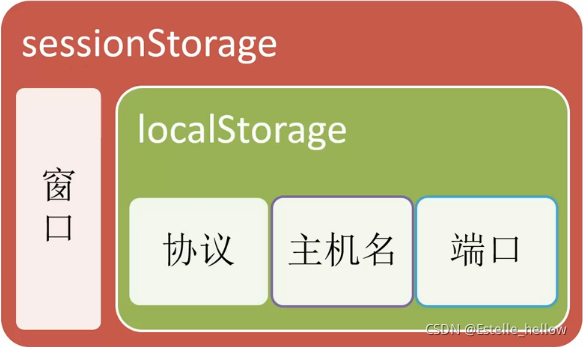
Part Two: localstorage —— 存在于 window 对象中:
localstorage分为localStorage和sessionStorage
-
localStorage
(1) localStorage 对应 window.localStorage
(2) localStorage只要在相同的协议、相同的主机名、相同的端口下,就能读取/修改到同一份localStorage数据
(3) 生存期: 如果你想在浏览器窗口关闭后还保留数据,可以使用 localStorage 属性, 该数据对象没有过期时间,今天、下周、明年都能用,除非你手动去删除。 -
sessionStorage
(1) sessionStorage 对应 window.sessionStorage
(2) sessionStorage比localStorage更严苛一点,除了协议、主机名、端口外,还要求在同一窗口(也就是浏览器的标签页)下
(3) 生存期: sessionStorage的生存期顾名思义,类似于session,只要关闭浏览器(也包括浏览器的标签页),就会被清空。
应用:
保存数据语法:
sessionStorage.setItem("key", "value");
读取数据语法:
var lastname = sessionStorage.getItem("key");
删除指定键的数据语法:
sessionStorage.removeItem("key");
删除所有数据:
sessionStorage.clear();
Part Three: session和application
参考链接 https://www.cnblogs.com/guochangxin/p/9153709.html
1.Session(会话)
(1) 什么是Session?
服务器为了保存用户状态而创建的一个特殊的对象。
当浏览器第一次访问服务器时,服务器创建一个session对象(该
对象有一个唯一的id,一般称之为sessionId),服务器会将sessionId
以cookie的方式发送给浏览器。
当浏览器再次访问服务器时,会将sessionId发送过来,服务器依据
sessionId就可以找到对应的session对象。
(2)如何获取session对象:
HttpSession s = request.getSession();
(3)常用方法
绑订数据:
session.setAttribute(String name,Object obj);
依据绑订名获得绑订值:
Object session.getAttribute(String name);
注:如果绑订名对应的值不存在,返回null。
解除绑订:
session.removeAttribute(String name);
(4)Session 的销毁
为了避免Session中存储的数据过大,Session需要销毁:
1、超时自动销毁。
- 从用户最后一次访问网站开始,超过一定时间后,服务器自动销毁Session,以及保存在Session中的数据。
- Tomcat 服务器默认的Session超时时间是30分钟
- 可以利用web.xml设置超时时间单位是分钟,设置为0表示不销毁。
<session-config> <session-timeout>20</session-timeout> </session-config>
2、调用API方法,主动销毁Session
session.invalidate()
2. Application
对于application在整个项目中,变量是有且只有1个,所有客户端都共享同一个application对象。
人类社会,就是要解决资源的分配问题
那些应用场景是资源共享呢?
1、 抢火车票
2、 抽奖
3、 统计点击次数
3. 过滤器 Filter
Part Four: GET和POST的区别
| 名 | 用法 |
|---|---|
| console.log(“hello,world”) | 在控制台输出 hello,world |
GET、POST、PUT 和 DELETE 就对应着对这个资源的查,改,增,删 4个操作。具体来说,GET 一般用于获取/查询资源信息,而 POST 一般用于更新资源信息
GET 提交:
请求的数据会附在 url 之后(就是把数据放在 HTTP 协议头中),以 ?分割 url 和 传输数据,多个参数用 & 连接;
POST 提交:
把提交的数据放置在是 HTTP 包的包体中。
因此,GET 提交的数据会在地址栏中显示出来,而 POST 提交,地址栏不会改变。
- @RequestMapping 中get 和post 都支持
- GET在浏览器回退时是无害的,而POST会再次提交请求
- GET请求会被浏览器主动cache,而POST不会,除非手动设置。
- GET请求参数会被完整保留在浏览器历史记录里,而POST中的参数不会被保留
(2) json对象转换
JSON.parse
(3)微信小程序中
使用method:‘get’, header:可以不填
使用method:‘post’,header:要填–》header:{‘content-type’:‘applicaiton/json’},
(4)前端传入后端的数据名(例如userName)一定要和controller层的函数 public TUser query(String userName)一样!【否则传值为空 我也不知道这是为什么】
(三) Ajax技术
Part One: 基础知识
(1)Ajax技术需要运行在网站环境中才能生效,这里使用了tomcat服务器
(2)Ajax运行原理:
ajax——服务器的代言人
Part Two: 实现步骤
- 创建Ajax对象
var xhr = new XMLHttpRequest
- 告诉Ajax请求地址以及请求方式
xhr.open('get','http://ww.example.com',true); //请求方法、请求url,异步/同步
- 发送请求
xhr.send();
- 获取服务器给客户端的响应数据
需要一个响应函数:当浏览器对客户端进行响应,就会自动调用onload函数
xhr.onload = function(){
	console.log(xhr.responseText); //通过xhr.responseText获取响应的数据
}
Part Three: 实际实现
- 在webapp中创建 ajax.html 发送请求
  //1.创建ajax对象
    var xhr =new XMLHttpRequest();

    //2.告诉ajax对象向哪发送请求
    xhr.open('get','http://localhost:8080/first')

    //3.发送请求
    xhr.send();

    //4.获取服务器端相应到客户端的数据
    xhr.onload = function () {
        console.log(xhr.responseText);
    }
-
创建路由地址
-
服务器响应数据
- 服务器会以JSON对象作为相应数据的格式。
js要处理json数据
(四)实现文件上传下载功能
Part One : 文件上传:
- 要用post
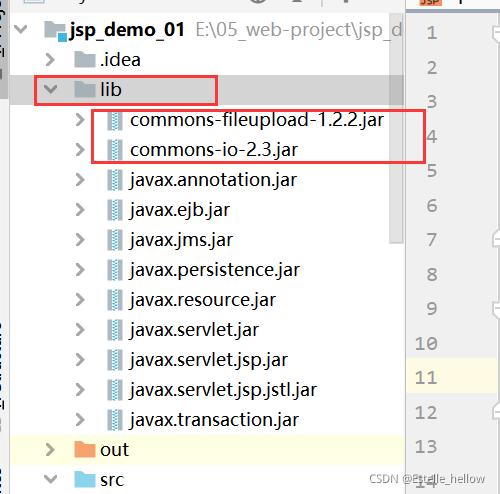
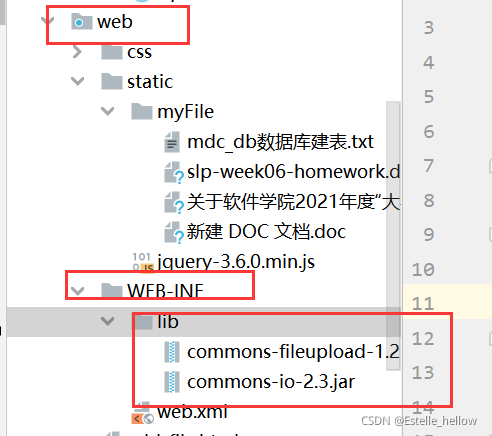
(1)下载两个jar包 放到lib中
- 要放在两个lib中 一个是idea目录下的,一个是web-inf下的,不然会报错
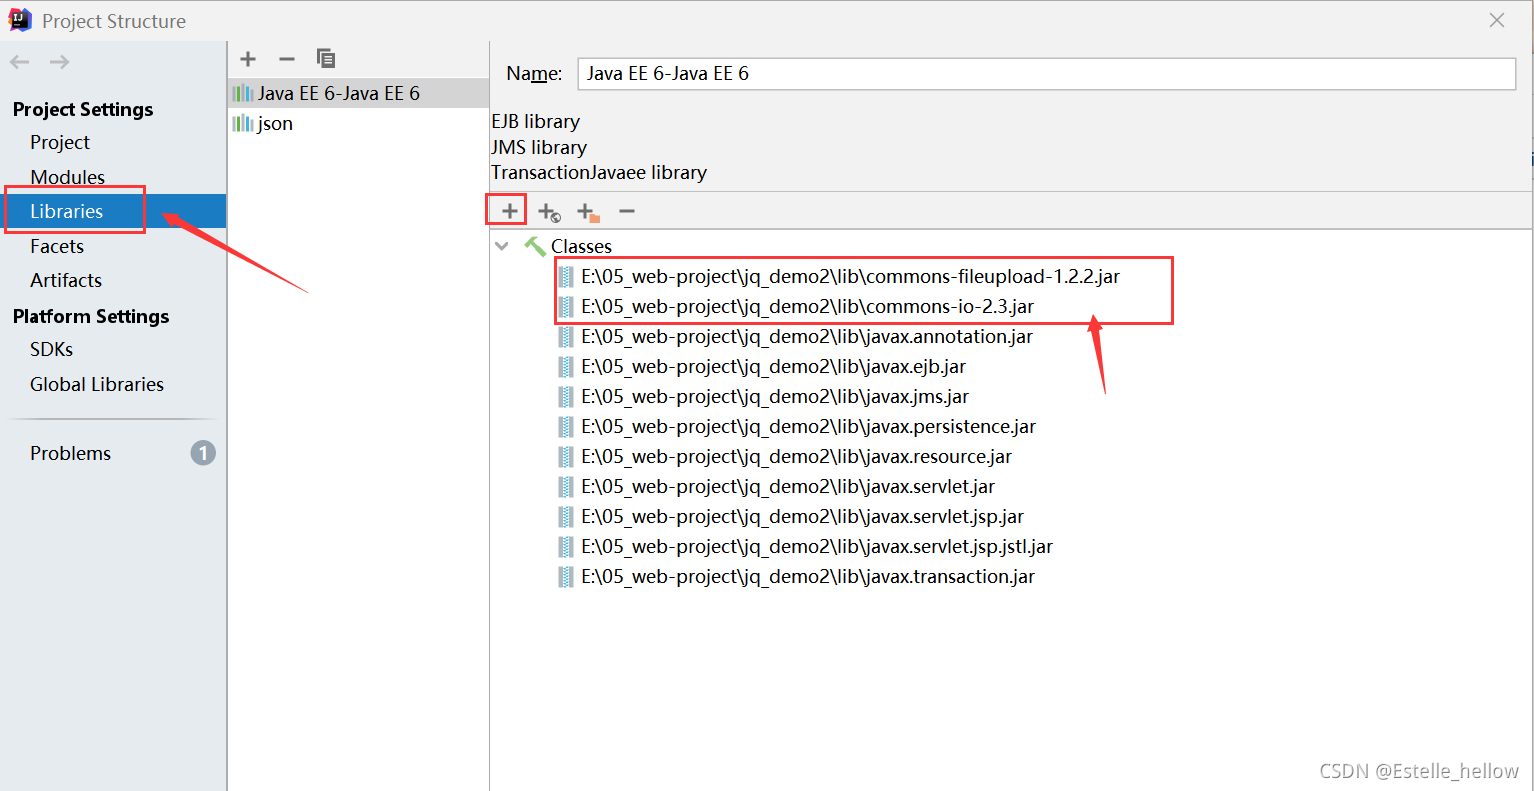
(2)打开project structure 在library中 添加上这两个包
(3)
- request.getScheme() 返回当前链接使用的协议;一般应用返回http;SSL返回https;
- 在程序中的应用如下:
String path = request.getContextPath();
String basePath = request.getScheme()+"://"+request.getServerName()+":"+request.getServerPort()+path+"/";
    <base href="<%=basePath%>">
- 复习一下request 的常用方法:
request.getSchema()可以返回当前页面使用的协议,http 或是 https;
request.getServerName()可以返回当前页面所在的服务器的名字;
request.getServerPort()可以返回当前页面所在的服务器使用的端口,就是80;
request.getContextPath()可以返回当前页面所在的应用的名字;
(五)常用的jar包汇总
- springboot MVC用maven仓库下载
- 下载jar包网址


 384
384


 被折叠的 条评论
为什么被折叠?
被折叠的 条评论
为什么被折叠?
 到【灌水乐园】发言


