


最近在封装一些原来自定义组.顺手把做好的组件发布到npm方便自己也为其他有兴趣的小伙伴使用.早些年前发布npm.但是随着时间推移,工作中居户没有机会发布一些自己写的小组件和框架.现在重新整理下整个发布的过程.
网上好多传统的webpack+Babel. vite和swc也出了好多年了,一直都是外网项目比较流行的.所以写一个react + vite+ swc 的发布流程.
0.前期准备
1.发布到npm首先要有一个npm的账号,注册地址npm | Home
2.开始编写组件.,网上很多rolloption和vue的打包教程,但是还是习惯react.写起来很舒服
安装nodejs.
在nodejs环境新建组件项目.这里我选的是vite + swc.
npm create vite@latest xxx项目名称 --template react-ts选择react -> react-> Typescript + SWC
 然后cd到项目中,执行npm i ,npm dev 启动项目 或则yarn dev
默认端口; http://localhost:5174/
 项目启动成功.进行到下一步开始配置和编写我们的组件
1.编写组件
默认项目中的src/App.js 清空默认代码后如下
import { useState } from 'react'

function App() {

  return (
    <>

    </>
  )
}

export default App
1.1 组件样式
App.css删除掉,index.css的默认样式也清空掉,毕竟我们是制作组件.尽量少的css减少,做一个纯纯的js组件.
安装tailwindcss 和postcss.tailwindcss是目前比较流行的样式库. 习惯后写起来很舒服,尤其是做一些动画效果很是不错. 官网: Tailwind CSS - Rapidly build modern websites without ever leaving your HTML.
npm i tailwindcss postcss autoprefixer -D初始化tailwindcss
npx tailwindcss init在生成的tailwind.config.js 文件添加约束文件后缀 tailwindcss支持自定义的模版样式,还可安装其他扩展,详细的以后另开文章详解.
添加postcss.config.js 文件如果没有被init生成,自己手动创建一下:

最后一步在清空后的index.css文件中引入tailwindcss,postcss
@tailwind base;
@tailwind components;
@tailwind utilities;
1.2 制作React组件
简单的css库配置完成,接下来编写一个简单的组件.功能就是输入后显示结果
在src下新建components->inputComponent.tsx文件
import { useState } from 'react'

interface Args {
  extendStyle?:String;
  labelVal?:String;
}

export const InputComponent = (props:Args)  => {
  const [val, setVal] = useState<String | undefined | number>("");
  return (
    <>
      <div className={`flex flex-col border border-solid w-[300px] m-2 + ${props.extendStyle}`}>
        <div className=''>
          <input className='w-full border outline-none text-[16px]' type="text" onChange={(e) => setVal(e.target.value)}/>
        </div>
        <div className='mt-5 text-red-200'>{props.labelVal||'Input Value' }: {val}</div>
      </div>
    </>
  )
}
其中className里对应的就是tailwindcss的写法,很方便易懂. 可以扩展组件的传入参数,demo的话我只开放了css样式和显示的label值两个接口.
修改App.tsx文件
import {InputComponent} from './components/inputComponent'
function App(props:any) {
  return (
    <>
      <InputComponent {...props}/>
    </>
  )
}

export default App
在根目录下创建入口文件index.ts 并添加导出组件的引用
export {InputComponent} from './src/components/inputComponent';运行项目npm run dev 或者 yarn dev 查看结果如下

一切ok,回到我们的初衷发布npm上,
2.发布配置
2.1 验证npm账号
在你的terminal里的输入npm adduser 然后在点击link跳转到npm页面登录账号,
回到terminal输入whoami 显示名称则登录成功.
npm whoami2.2 配置package.json文件
  "main": "dist/index.umd.js",
  "module": "dist/index.es.js",
"types": "dist/index.d.ts",- main: 指定你项目的入口文件
- module: 指定项目的 esmodule 入口文件
- types: 指定项目的类型声明文件(.d.ts)
添加exports配置
  "exports": {
    ".": {
      "import": "./dist/index.es.js",
      "require": "./dist/index.umd.js",
      "types": "./dist/index.d.ts"
    }
  },
添加file,发布权限
  "files": [
    "/dist"
  ],
  "publishConfig": {
    "access": "public"
  },
 "license":"MIT",
在sctipt中添加 "prepare": "npm run build"
  "scripts": {
    "dev": "vite",
    "build": "tsc && vite build",
    "preview": "vite preview",
    "prepare": "npm run build"
  },
git地址,keyword等配置就不占篇幅多说了.
2.3 tsconfig.json 配置
添加如下配置
  "declaration": true,
  "typeRoots": ["./dist/index.d.ts", "node_modules/@types"],
修改include属性
"include": ["src", "./index.ts"],typeRoots 里的包会被 ts 编译器自动包含进来,typeRoots 默认指向 node_modules/@types
2.4 vite.config.ts 配置
重头戏来了.vite打包配置npm使用的还是rolloption的选项配置,配置项跟webpack还是很像的
首先安装一个插件dts
npm i vite-plugin-dts -Dimport { defineConfig } from 'vite'
import react from '@vitejs/plugin-react-swc'
import path from 'path'
import dts from 'vite-plugin-dts'
// https://vitejs.dev/config/
export default defineConfig({
build:{
lib:{
entry:path.resolve(__dirname, 'index.ts'),
name: 'fCustomNpm',
fileName: (format) => `index.${format}.js`
},
rollupOptions:{
external:['react', 'react-dom'],
output:{
globals:{
react:"React",
"react-dom":"ReactDom",
},
},
},
sourcemap:true,
emptyOutDir:true,
},
plugins: [react(), dts()],
})name: 'fcustomNpm',可以自定义.配置项很简单,这里指出下如果是css-in-js这种的写法的.需要额外安装相应的插件,当你打包后会发现你的css没有生成文件.vite小组的解释是 当用vite进行库模式编程下不希望更多的css生成造成主项目的污染.其实不难理解类似微前端的css隔离机制一样.多个css可能导致会互相覆盖.所以这里默认我们的css会以include的方式引入到es打包后的文件的顶部.但是如果就是需要生成css文件就安装一些css-in-js的插件,其实我比较推荐的还是还是style-in-js这种.但是操作style的成本在动画效果&&响应上很高.所以尽量简洁.
3.开始发布
注意下package.json文件的
"private": false,3.1 打包发布库到npm
发布前可自行打包 查看是否有错误
npm run build要设置false公开的才能进行publish
输入命令:npm publish or yarn publish
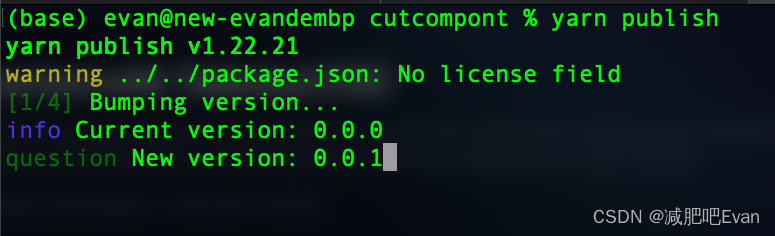 输入上传版本号,版本号每次更新都推荐+1,具体细节大,中,小(0.0.1)版本的顺序.
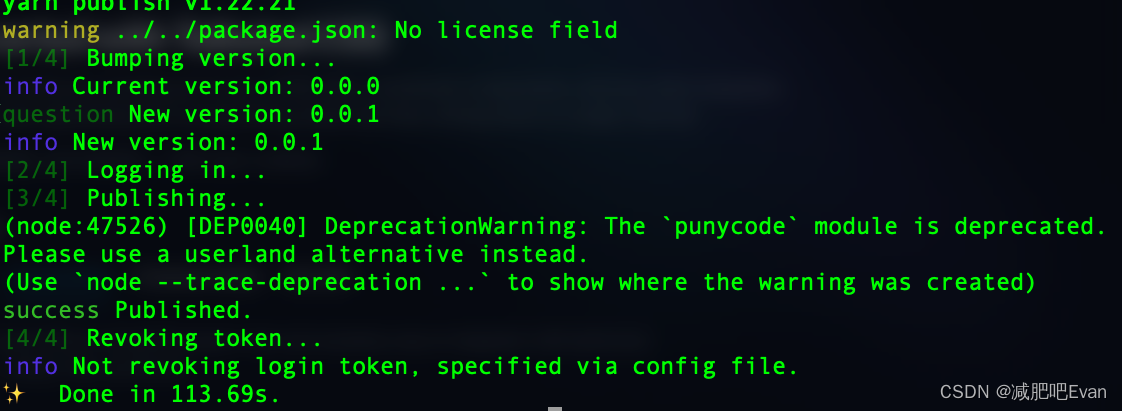
发布成功,回到npm上查看下结果

已经上传好了,默认的readme文件后期自行更改下就好
3.2 测试发布结果
做完当然要测试下,简单的测试就是将我们App.tsx中引用的的本地组件换成我们自己做的
首先安装我们的库
npm i f-cutcompont-npm
修改App.tsx文件的引用组件方式,换成自己刚做好的
并添加参数labelVal 给一个成功的值
// import {InputComponent} from './components/inputComponent'
import {InputComponent} from 'f-cutcompont-npm'
function App(props:any) {
  return (
    <>
      <InputComponent {...props} labelVal={"Success !!!"}/>
    </>
  )
}

export default App
npm run dev运行

参数传递正确,组件库正常工作.然后就可以分享给别的小伙伴了. 写了大半天.如有问题可以留言交流.


 2952
2952

 被折叠的 条评论
为什么被折叠?
被折叠的 条评论
为什么被折叠?
 到【灌水乐园】发言


