


(1)LinerLayout
线性布局:用来控制其子View以水平或垂直方式展开显示

(2)理解LinearLayout权重

(3)创建项目搭建上面的界面
1)创建项目工程


2)创建新的布局


liner_layout.xml
<?xml version="1.0" encoding="utf-8"?><LinearLayout xmlns:android=“http://schemas.android.com/apk/res/android”
android:layout_width=“match_parent”
android:layout_height=“match_parent”
android:orientation=“vertical” >
<EditText
android:layout_width=“match_parent”
android:layout_height=“wrap_content”
android:hint=“To” >
<EditText
android:layout_width=“match_parent”
android:layout_height=“wrap_content”
android:hint=“Subject” >
<EditText
android:layout_width=“match_parent”
android:layout_height=“0dp”
android:layout_weight=“1”
android:hint=“Message”
android:gravity=“top”
<LinearLayout
android:layout_width=“match_parent”
android:layout_height=“wrap_content” >
<Button
android:layout_width=“0dp”
android:layout_height=“wrap_content”
android:layout_weight=“1”
android:text=“Reset”
/>
<Button
android:layout_width=“0dp”
android:layout_height=“wrap_content”
android:layout_weight=“1”
android:text=“Send”
/>
3)修改MainActivity

package com.itzheng.l03_layout;
import android.app.Activity;
import android.os.Bundle;
import android.view.Menu;
import android.view.MenuItem;
public class MainActivity extends Activity {
@Override
protected void onCreate(Bundle savedInstanceState) {
super.onCreate(savedInstanceState);
setContentView(R.layout.liner_layout);
}
}

(4)RelativeLayout相对布局

1)创建布局实现上述案例


对应的页面的代码
<?xml version="1.0" encoding="utf-8"?><RelativeLayout xmlns:android=“http://schemas.android.com/apk/res/android”
android:layout_width=“match_parent”
android:layout_height=“match_parent” >
<TextView
android:id=“@+id/et_relative_msg”
android:layout_width=“wrap_content”
android:layout_height=“wrap_content”
android:layout_alignParentLeft=“true”
android:layout_alignParentRight=“true”
android:hint=“Message” />
<Button
android:id=“@+id/btn_relative_ok”
android:layout_width=“wrap_content”
android:layout_height=“wrap_content”
android:text=“OK”
android:layout_below=“@+id/et_relative_msg”
android:layout_alignRight=“@+id/et_relative_msg” />
<Button
android:id=“@+id/btn_relative_cancle”
android:layout_width=“wrap_content”
android:layout_height=“wrap_content”
android:text=“Cancle”
android:layout_alignTop=“@id/btn_relative_ok”
android:layout_toLeftOf=“@id/btn_relative_ok”
android:layout_marginRight=“10dp”
/>

(5)FrameLayout

1)创建布局

2)完成上述案例当中的样式
<?xml version="1.0" encoding="utf-8"?><FrameLayout xmlns:android=“http://schemas.android.com/apk/res/android”
android:layout_width=“match_parent”
android:layout_height=“match_parent” >
<TextView
android:layout_width=“280dp”
android:layout_height=“280dp”
android:background=“#33ffff”
android:layout_gravity=“center”
/>
<TextView
android:layout_width=“240dp”
android:layout_height=“240dp”
android:background=“#33aaff”
android:layout_gravity=“center”
/>
<TextView
android:layout_width=“200dp”
android:layout_height=“200dp”
android:background=“#33ccff”
android:layout_gravity=“center”
/>
<TextView
android:layout_width=“160dp”
android:layout_height=“160dp”
android:background=“#3399ff”
android:layout_gravity=“center”
/>
<TextView
android:layout_width=“120dp”
android:layout_height=“120dp”
android:background=“#3366ff”
android:layout_gravity=“center”
/>
<TextView
android:layout_width=“80dp”
android:layout_height=“80dp”
android:background=“#3311ff”
android:layout_gravity=“center”
/>
<TextView
android:layout_width=“40dp”
android:layout_height=“40dp”
android:background=“#3300ff”
android:layout_gravity=“center”
/>

2、常用视图标签的属性
(1)属性的划分

(2)常用的基本属性

(3)内边距与外边距
内边距属性

(4)创建新的视图


实现上述的视图

<RelativeLayout xmlns:android=“http://schemas.android.com/apk/res/android”
android:layout_width=“match_parent”
android:layout_height=“match_parent” >
<EditText
android:id=“@+id/editText1”
android:layout_width=“fill_parent”
android:layout_height=“wrap_content”
android:layout_margin=“20dp”
android:hint=“Messsage”
android:paddingLeft=“20dp”
/>
<Button
android:id=“@+id/button1”
android:layout_width=“wrap_content”
android:layout_height=“wrap_content”
android:layout_alignRight=“@+id/editText1”
android:layout_below=“@id/editText1”
android:layout_marginTop=“20dp”
android:text=“OK” />
(5)同方向对齐与反方向对齐

(6)相对父视图定位


3、ListView


(1)Adapter

(2)ListView和ArrayAdapter

实现上述效果
1)创建项目


2)页面搭建


<ListView xmlns:android=“http://schemas.android.com/apk/res/android”
android:id=“@+id/lv_main”
android:layout_width=“fill_parent”
android:layout_height=“fill_parent” >
3)创建新的页面

<TextView xmlns:android=“http://schemas.android.com/apk/res/android”
android:layout_width=“match_parent”
android:layout_height=“match_parent” >
4)实现上述样式
修改item_array_adapter.xml

<TextView xmlns:android=“http://schemas.android.com/apk/res/android”
android:layout_width=“match_parent”
android:layout_height=“60dp”
android:textSize=“20sp”
android:gravity=“center_vertical”
修改activity_main.xml
<ListView xmlns:android=“http://schemas.android.com/apk/res/android”
android:id=“@+id/lv_main”
android:layout_width=“fill_parent”
android:layout_height=“fill_parent” >
修改MainActivity
package com.itzheng.l03_listview;
import android.app.Activity;
import android.os.Bundle;
import android.view.Menu;
import android.view.MenuItem;
import android.widget.ArrayAdapter;
import android.widget.ListView;
public class MainActivity extends Activity {
private ListView lv_main;
@Override
protected void onCreate(Bundle savedInstanceState) {
super.onCreate(savedInstanceState);
setContentView(R.layout.activity_main);
lv_main = (ListView)findViewById(R.id.lv_main);
//准备集合数据
String[] data = {“A”,“B”,“C”,“D”,“E”,“F”,“H”,“I”,“J”,“K”,“L”,“M”};
//准备ArrayAdaper对象
ArrayAdapter adapter = new ArrayAdapter(this, R.layout.item_array_adapter,data);
//设置Adatper显示列表
lv_main.setAdapter(adapter);
}
}

(3)ListView+SimpleAdapter

a、准备一些图片

复制到

b、更改上述的MainActivity

public class MainActivity extends Activity {
private ListView lv_main;
@Override
protected void onCreate(Bundle savedInstanceState) {
super.onCreate(savedInstanceState);
setContentView(R.layout.activity_main);
lv_main = (ListView)findViewById(R.id.lv_main);
//准备集合数据
List<Map<String,Object>> data = new ArrayList<Map<String,Object>>();
Map<String,Object> map = new HashMap<String, Object>();
map.put(“icon”, R.drawable.f1);
map.put(“name”, “name–1”);
map.put(“content”, “content–1”);
data.add(map);
map = new HashMap<String, Object>();
map.put(“icon”, R.drawable.f2);
map.put(“name”, “name–2”);
map.put(“content”, “content–2”);
map = new HashMap<String, Object>();
map.put(“icon”, R.drawable.f3);
map.put(“name”, “name–3”);
map.put(“content”, “content–3”);
data.add(map);
map = new HashMap<String, Object>();
map.put(“icon”, R.drawable.f4);
map.put(“name”, “name–4”);
map.put(“content”, “content–4”);
data.add(map);
map = new HashMap<String, Object>();
map.put(“icon”, R.drawable.f5);
map.put(“name”, “name–5”);
map.put(“content”, “content–5”);
data.add(map);
map = new HashMap<String, Object>();
map.put(“icon”, R.drawable.f6);
map.put(“name”, “name–6”);
map.put(“content”, “content–6”);
data.add(map);
map = new HashMap<String, Object>();
map.put(“icon”, R.drawable.f7);
map.put(“name”, “name–7”);
map.put(“content”, “content–7”);
data.add(map);
map = new HashMap<String, Object>();
map.put(“icon”, R.drawable.f8);
map.put(“name”, “name–8”);
map.put(“content”, “content–8”);
data.add(map);
map = new HashMap<String, Object>();
map.put(“icon”, R.drawable.f9);
map.put(“name”, “name–9”);
map.put(“content”, “content–9”);
data.add(map);
map = new HashMap<String, Object>();
map.put(“icon”, R.drawable.f10);
map.put(“name”, “name–10”);
map.put(“content”, “content–10”);
data.add(map);
//map对象当中key的数组,用于得到对应的value
String[] from = {“icon”,“name”,“content”};
//Item布局文件中子view的id的数组
int[] to = {R.id.iv_item_icon,R.id.tv_item_name,R.id.tv_item_content};
//准备SimpleAdapter对象
SimpleAdapter adapter = new SimpleAdapter(this, data, R.layout.item_simple_adapter, from, to);
//设置Adatper显示列表
lv_main.setAdapter(adapter);
}
}
c、创建布局


<LinearLayout xmlns:android=“http://schemas.android.com/apk/res/android”
android:layout_width=“match_parent”
android:layout_height=“wrap_content”
android:orientation=“horizontal” >
<ImageView
android:id=“@+id/iv_item_icon”
android:layout_width=“70dp”
android:layout_height=“70dp”
android:src=“@drawable/f1” />
<LinearLayout
android:layout_width=“match_parent”
android:layout_height=“match_parent”
android:orientation=“vertical”
android:gravity=“center_vertical”
android:layout_marginLeft=“10dp”
<TextView
android:id=“@+id/tv_item_name”
android:layout_width=“wrap_content”
android:layout_height=“wrap_content”
android:text=“TextView” />
<TextView
android:id=“@+id/tv_item_content”
android:layout_width=“wrap_content”
android:layout_height=“wrap_content”
android:text=“TextView” />
(4)ListView+BaseAdapter

a、创建实体类ShopInfo

package com.itzheng.l03_listview;
/*
- 每行的Item的数据信息分装类
*/
public class ShopInfo {
private int icon;
private String name;
private String content;
public ShopInfo(int icon, String name, String content) {
this.icon = icon;
this.name = name;
this.content = content;
}
public int getIcon() {
return icon;
}
public void setIcon(int icon) {
this.icon = icon;
}
public String getName() {
return name;
}
public void setName(String name) {
this.name = name;
}
public String getContent() {
return content;
}
public void setContent(String content) {
this.content = content;
}
@Override
public String toString() {
return “ShopInfo [icon=” + icon + “, name=” + name + “, content=”
- content + “]”;
}
}
b、修改MainActivity

public class MainActivity extends Activity {
private ListView lv_main;
private List data = null;
@Override
protected void onCreate(Bundle savedInstanceState) {
super.onCreate(savedInstanceState);
setContentView(R.layout.activity_main);
lv_main = (ListView) findViewById(R.id.lv_main);
// 准备集合数据
data = new ArrayList();
data.add(new ShopInfo(R.drawable.f1, “name—1”, “content—1”));
data.add(new ShopInfo(R.drawable.f2, “name—2”, “content—2”));
data.add(new ShopInfo(R.drawable.f3, “name—3”, “content—3”));
data.add(new ShopInfo(R.drawable.f4, “name—4”, “content—4”));
data.add(new ShopInfo(R.drawable.f5, “name—5”, “content—5”));
data.add(new ShopInfo(R.drawable.f6, “name—6”, “content—6”));
data.add(new ShopInfo(R.drawable.f7, “name—7”, “content—7”));
data.add(new ShopInfo(R.drawable.f8, “name—8”, “content—8”));
data.add(new ShopInfo(R.drawable.f9, “name—9”, “content—9”));
data.add(new ShopInfo(R.drawable.f10, “name—10”, “content—10”));
// 准备SimpleAdapter对象
MyAdapter adapter = new MyAdapter();
// 设置Adatper显示列表
lv_main.setAdapter(adapter);
}
class MyAdapter extends BaseAdapter {
// 返回集合数据的数量
@Override
public int getCount() {
return data.size();
}
// 返回指定下标对应数据对象
@Override
public Object getItem(int position) {
// TODO Auto-generated method stub
return data.get(position);
}
@Override
public long getItemId(int position) {
// TODO Auto-generated method stub
return 0;
}
// 返回指定下标所对应的item的View对象
// position:下标
// convertView:
// parent:ListView对象
@Override
public View getView(int position, View convertView, ViewGroup parent) {
// 加载item的布局,得到View对象(得到XML页面的对象)
View view = View.inflate(MainActivity.this,
R.layout.item_simple_adapter, null);
// 根据position设置对应的数据
// 得到当前行的数据对象
ShopInfo shopInfo = data.get(position);
// 得到子View对象,得到XML页面上的子View对象
ImageView imageView = (ImageView) view
.findViewById(R.id.iv_item_icon);
TextView name = (TextView) view.findViewById(R.id.tv_item_name);
TextView contentTV = (TextView) view.findViewById(R.id.tv_item_content);
// 设置数据
imageView.setImageResource(shopInfo.getIcon());
name.setText(shopInfo.getName());
contentTV.setText(shopInfo.getContent());
return view;
}
}
}
运行效果显示

c、上述方式效率不高(改进上述方式)
如果没有复用视图对象而不断的产生新的视图对象,会内存溢出,提前判断使用复用视图对象,并使用convertView来创建视图,添加判断以后只加载六次布局

package com.itzheng.l03_listview;
public class MainActivity extends Activity {
private ListView lv_main;
private List data = null;
@Override
protected void onCreate(Bundle savedInstanceState) {
super.onCreate(savedInstanceState);
setContentView(R.layout.activity_main);
lv_main = (ListView) findViewById(R.id.lv_main);
// 准备集合数据
data = new ArrayList();
data.add(new ShopInfo(R.drawable.f1, “name—1”, “content—1”));
data.add(new ShopInfo(R.drawable.f2, “name—2”, “content—2”));
data.add(new ShopInfo(R.drawable.f3, “name—3”, “content—3”));
data.add(new ShopInfo(R.drawable.f4, “name—4”, “content—4”));
data.add(new ShopInfo(R.drawable.f5, “name—5”, “content—5”));
data.add(new ShopInfo(R.drawable.f6, “name—6”, “content—6”));
data.add(new ShopInfo(R.drawable.f7, “name—7”, “content—7”));
data.add(new ShopInfo(R.drawable.f8, “name—8”, “content—8”));
data.add(new ShopInfo(R.drawable.f9, “name—9”, “content—9”));
data.add(new ShopInfo(R.drawable.f10, “name—10”, “content—10”));
// 准备SimpleAdapter对象
MyAdapter adapter = new MyAdapter();
// 设置Adatper显示列表
lv_main.setAdapter(adapter);
}
class MyAdapter extends BaseAdapter {
// 返回集合数据的数量
@Override
public int getCount() {
return data.size();
}
// 返回指定下标对应数据对象
@Override
public Object getItem(int position) {
// TODO Auto-generated method stub
return data.get(position);
}
@Override
public long getItemId(int position) {
// TODO Auto-generated method stub
return 0;
}
// 返回指定下标所对应的item的View对象
// position:下标
// convertView:可复用的缓存Item视图对象,前n+1个是为空
// parent:ListView对象
@Override
public View getView(int position, View convertView, ViewGroup parent) {
Log.e(“TAG”,“测试:”+“position:”+position+“convertView:”+convertView+“parent:”+parent);
//判断如果没有复用
if(convertView == null){//说明没有复用的视图对象,不断的在创建新的视图对象
// 加载item的布局,得到View对象(得到XML页面的对象)
convertView = View.inflate(MainActivity.this,
R.layout.item_simple_adapter, null);
}
// 根据position设置对应的数据
// 得到当前行的数据对象
ShopInfo shopInfo = data.get(position);
// 得到子View对象,得到XML页面上的子View对象
ImageView imageView = (ImageView) convertView
.findViewById(R.id.iv_item_icon);
TextView name = (TextView) convertView.findViewById(R.id.tv_item_name);
TextView contentTV = (TextView) convertView.findViewById(R.id.tv_item_content);
// 设置数据
imageView.setImageResource(shopInfo.getIcon());
name.setText(shopInfo.getName());
contentTV.setText(shopInfo.getContent());
return convertView;
}
}
}
4、样式(Style)和主题(theme)

(1)实现上述效果:(Style)
a、创建新的安卓工程


b、修改style.xml

c、修改activity_main.xml

<LinearLayout xmlns:android=“http://schemas.android.com/apk/res/android”
android:layout_width=“fill_parent”
android:layout_height=“fill_parent”
android:orientation=“vertical” >
<TextView
style=“@style/myStyle”
android:text=“SIM卡变更报警” />
<TextView
style=“@style/myStyle”
android:text=“GPS追踪” />
<TextView
style=“@style/myStyle”
android:text=“远程销毁数据” />
<TextView
style=“@style/myStyle”
android:text=“远程锁屏” />
效果

(3)主题(theme)

a、修改style.xml

b、在AndroidManifest.xml当中引用对应的样式

运行样式

c、修改activity_main.xml当中一个单独的字体样式(最近优先原则)


d、引用没有标题样式(修改AndroidManifest.xml)

运行效果

e、引用全屏样式(修改AndroidManifest.xml)


f、对话框样式


1、显示应用程序列表

(1)创建新的工程

(2)分析界面结构,编写布局
1)整体的布局文件:ListView:activity_main.xml

<LinearLayout xmlns:android=“http://schemas.android.com/apk/res/android”
android:layout_width=“fill_parent”
android:layout_height=“fill_parent”
android:orientation=“vertical” >
<TextView
android:layout_width=“fill_parent”
android:layout_height=“wrap_content”
android:text=“所有应用”
android:gravity=“center_horizontal”
android:textSize=“20sp”
android:textColor=“#ffffff”
android:background=“#000000”
android:padding=“7dp”
/>
<ListView
android:id=“@+id/lv_main”
android:layout_width=“match_parent”
android:layout_height=“fill_parent”

2)item的布局文件:RelativeLayout(相对布局)
创建新的布局


<RelativeLayout xmlns:android=“http://schemas.android.com/apk/res/android”
android:layout_width=“match_parent”
android:layout_height=“wrap_content” >
<ImageView
android:id=“@+id/iv_item_icon”
android:layout_width=“wrap_content”
android:layout_height=“wrap_content”
android:src=“@drawable/ic_launcher” />
<TextView
android:id=“@+id/tv_item_name”
android:layout_width=“wrap_content”
android:layout_height=“wrap_content”
android:layout_toRightOf=“@id/iv_item_icon”
android:layout_centerInParent=“true”
android:text=“应用名称”
android:layout_marginLeft=“10dp”
android:textSize=“20sp”
/>

自我介绍一下,小编13年上海交大毕业,曾经在小公司待过,也去过华为、OPPO等大厂,18年进入阿里一直到现在。
深知大多数初中级Android工程师,想要提升技能,往往是自己摸索成长或者是报班学习,但对于培训机构动则近万的学费,着实压力不小。自己不成体系的自学效果低效又漫长,而且极易碰到天花板技术停滞不前!
因此收集整理了一份《2024年Android移动开发全套学习资料》,初衷也很简单,就是希望能够帮助到想自学提升又不知道该从何学起的朋友,同时减轻大家的负担。


既有适合小白学习的零基础资料,也有适合3年以上经验的小伙伴深入学习提升的进阶课程,基本涵盖了95%以上Android开发知识点,真正体系化!
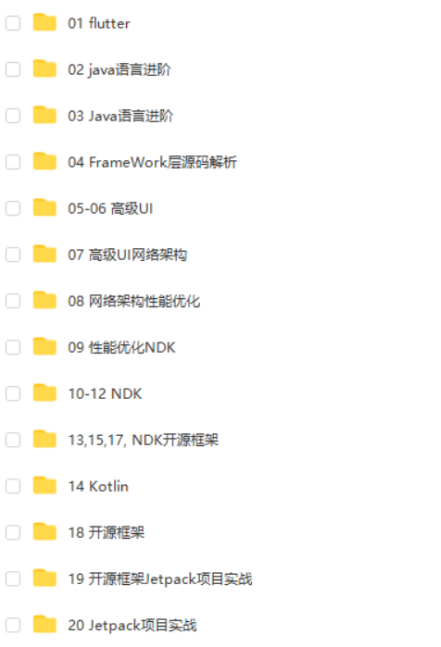
由于文件比较大,这里只是将部分目录截图出来,每个节点里面都包含大厂面经、学习笔记、源码讲义、实战项目、讲解视频,并且会持续更新!
如果你觉得这些内容对你有帮助,可以扫码获取!!(备注:Android)

最后
文章所有资料全部已经打包整理好,另外小编手头上整理了大量Android架构师全套学习资料,Android核心高级技术PDF文档+全套高级学习资料+视频+2021 BAT 大厂面试真题解析
资料展示:


《互联网大厂面试真题解析、进阶开发核心学习笔记、全套讲解视频、实战项目源码讲义》点击传送门即可获取!
h_parent"
android:layout_height=“wrap_content” >
<ImageView
android:id=“@+id/iv_item_icon”
android:layout_width=“wrap_content”
android:layout_height=“wrap_content”
android:src=“@drawable/ic_launcher” />
<TextView
android:id=“@+id/tv_item_name”
android:layout_width=“wrap_content”
android:layout_height=“wrap_content”
android:layout_toRightOf=“@id/iv_item_icon”
android:layout_centerInParent=“true”
android:text=“应用名称”
android:layout_marginLeft=“10dp”
android:textSize=“20sp”
/>
自我介绍一下,小编13年上海交大毕业,曾经在小公司待过,也去过华为、OPPO等大厂,18年进入阿里一直到现在。
深知大多数初中级Android工程师,想要提升技能,往往是自己摸索成长或者是报班学习,但对于培训机构动则近万的学费,着实压力不小。自己不成体系的自学效果低效又漫长,而且极易碰到天花板技术停滞不前!
因此收集整理了一份《2024年Android移动开发全套学习资料》,初衷也很简单,就是希望能够帮助到想自学提升又不知道该从何学起的朋友,同时减轻大家的负担。
[外链图片转存中…(img-x3LJyXyB-1713261423293)]
[外链图片转存中…(img-ykiSPPCx-1713261423295)]
[外链图片转存中…(img-CiOTS3cP-1713261423295)]
[外链图片转存中…(img-UBr1Aw9u-1713261423296)]
[外链图片转存中…(img-S0wWf5xV-1713261423297)]
既有适合小白学习的零基础资料,也有适合3年以上经验的小伙伴深入学习提升的进阶课程,基本涵盖了95%以上Android开发知识点,真正体系化!
由于文件比较大,这里只是将部分目录截图出来,每个节点里面都包含大厂面经、学习笔记、源码讲义、实战项目、讲解视频,并且会持续更新!
如果你觉得这些内容对你有帮助,可以扫码获取!!(备注:Android)
最后
文章所有资料全部已经打包整理好,另外小编手头上整理了大量Android架构师全套学习资料,Android核心高级技术PDF文档+全套高级学习资料+视频+2021 BAT 大厂面试真题解析
资料展示:
[外链图片转存中…(img-uG7YuOr2-1713261423298)]
[外链图片转存中…(img-Q5Ea8937-1713261423300)]
[外链图片转存中…(img-hVCMBQg2-1713261423301)]
[外链图片转存中…(img-GI3R7wBl-1713261423301)]
《互联网大厂面试真题解析、进阶开发核心学习笔记、全套讲解视频、实战项目源码讲义》点击传送门即可获取!


 1571
1571


 被折叠的 条评论
为什么被折叠?
被折叠的 条评论
为什么被折叠?
 到【灌水乐园】发言


