


1. Web Api 测试工具选型
目前市场有很多的用于API 测试的工具,如Postman, SoapUI, YApi, HttpRunner等等。
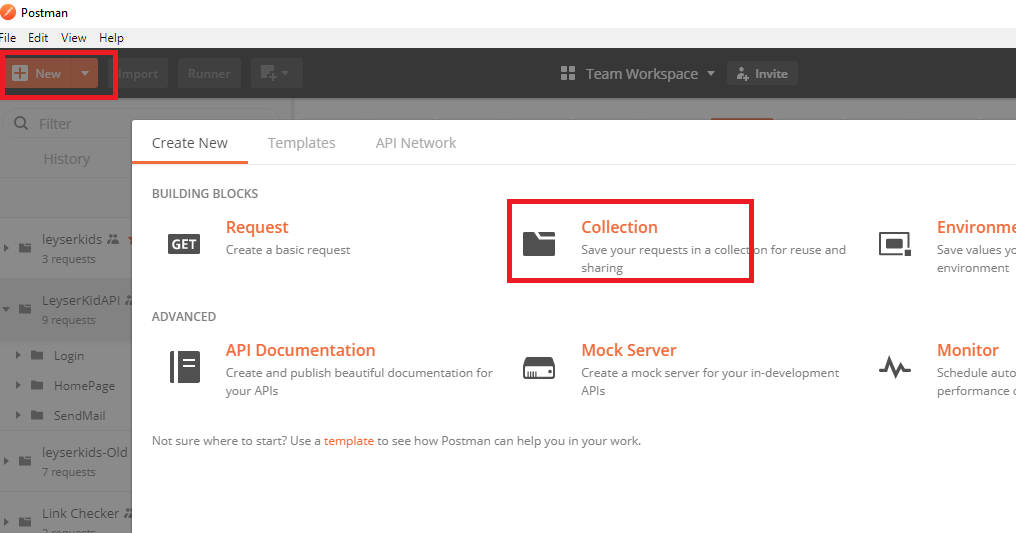
2. 用Postman创建项目
选型做好了,第二步当然是Postman用起来了,创建自己的项目。参照Postman官网的文档。https://learning.getpostman.com/docs/postman/collections/intro_to_collections/
创建 LeyserkidsApi项目
3. 源码管理
因为我们项目使用TFS做源码管理,这里就以TFS为例。
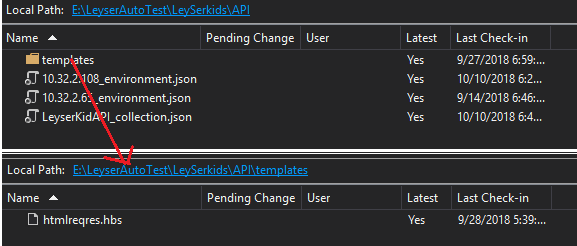
- 把Postman中项目LeyserkidsApi的Collection和Envrionment导出为json文件。
- TFS创建项目LeyserKids,追加Postman导出的JSON文件,进行资源版本管理。接下来展示的项目结构如下:
4. Jenkins服务搭建
我们称搭建Jenkins Server的机器为:机器A,后续步骤需要对这台机器安装一些Services。
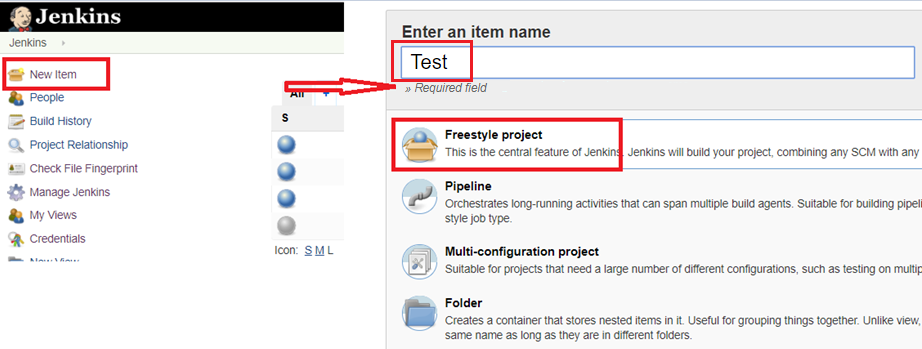
5. Jenkins与TFS关联
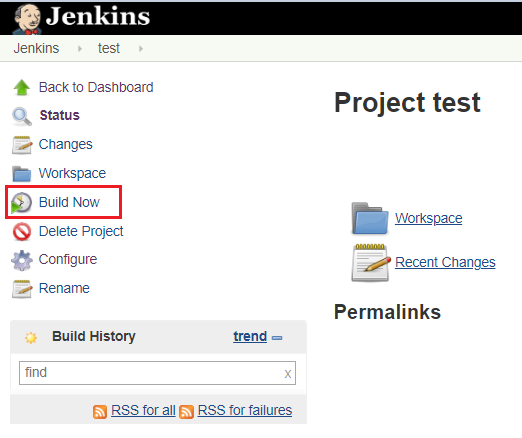
- 创建FreeStyle Project :Test

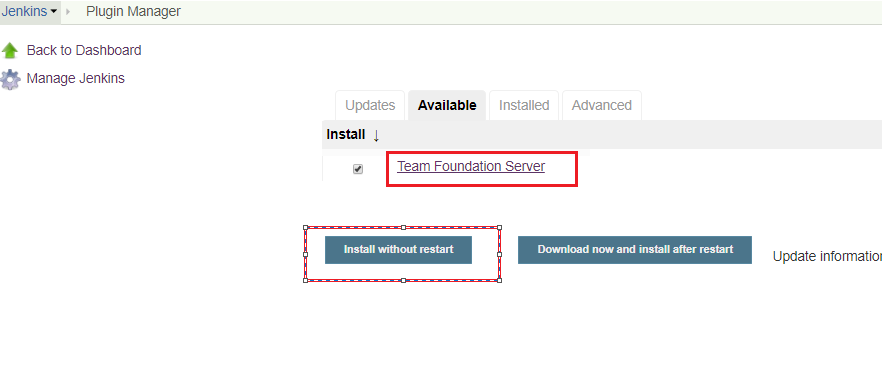
Jenkins主页->Manage Jenkins->Manage Plugins->找到Team Foundation Server插件并安装。
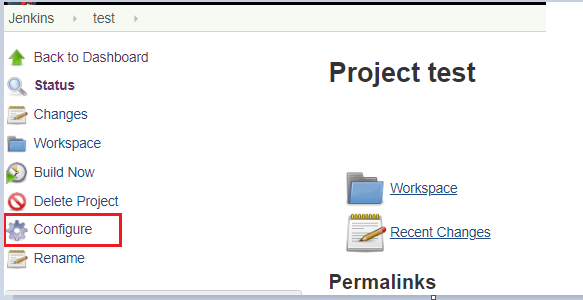
进入Project Test详细页面->Configure->Source Code Management

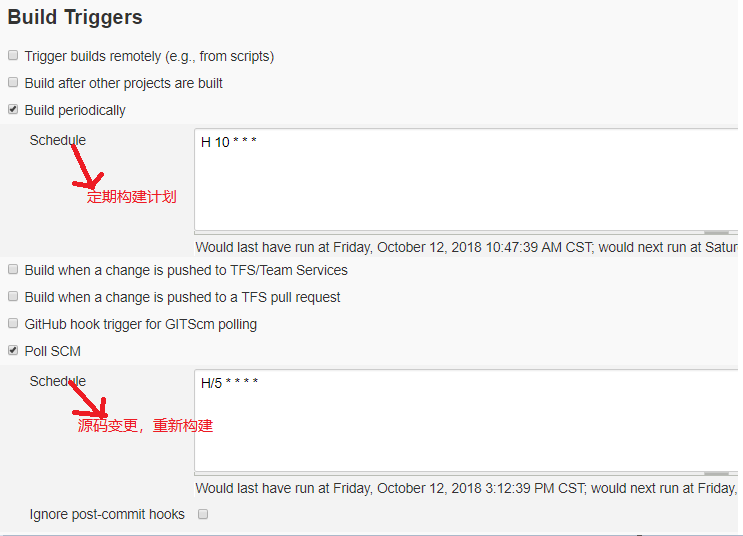
Build Triggers 设置当源码发生变化时,重新构建。可以每天定时构建。
6. Jenkins构建(Build)
Newman是用命令行来执行Postman的Collection。可以很容易的和Jenkins集成。Newman是基于Nodejs的,所以首先得安装Nodejs。
- 在机器A(Jenkins Server)上安装nodejs和newman。参照:https://learning.getpostman.com/docs/postman/collection_runs/command_line_integration_with_newman
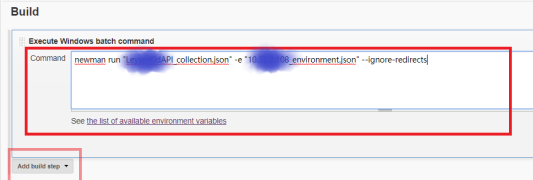
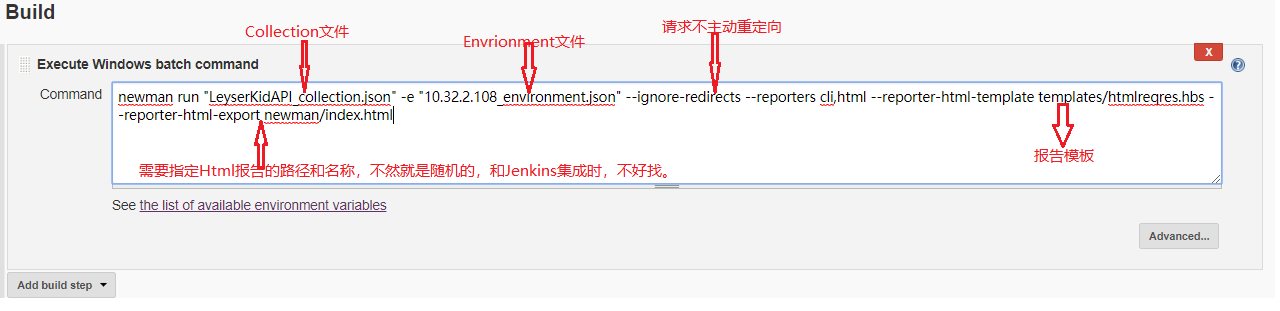
- 进入Test详细页面->Configure ->Build->Add Build Step->Execute Windows batch command->command
7. 邮件配置
Jenkins构建之后,发送邮件,通知构建结果。邮件配置步骤如下:
- Jenkins主页->ManageJenkins->Manage Plugins->找到Email Extension Plugin插件并安装->插件安装之后需要重启jenkins 服务

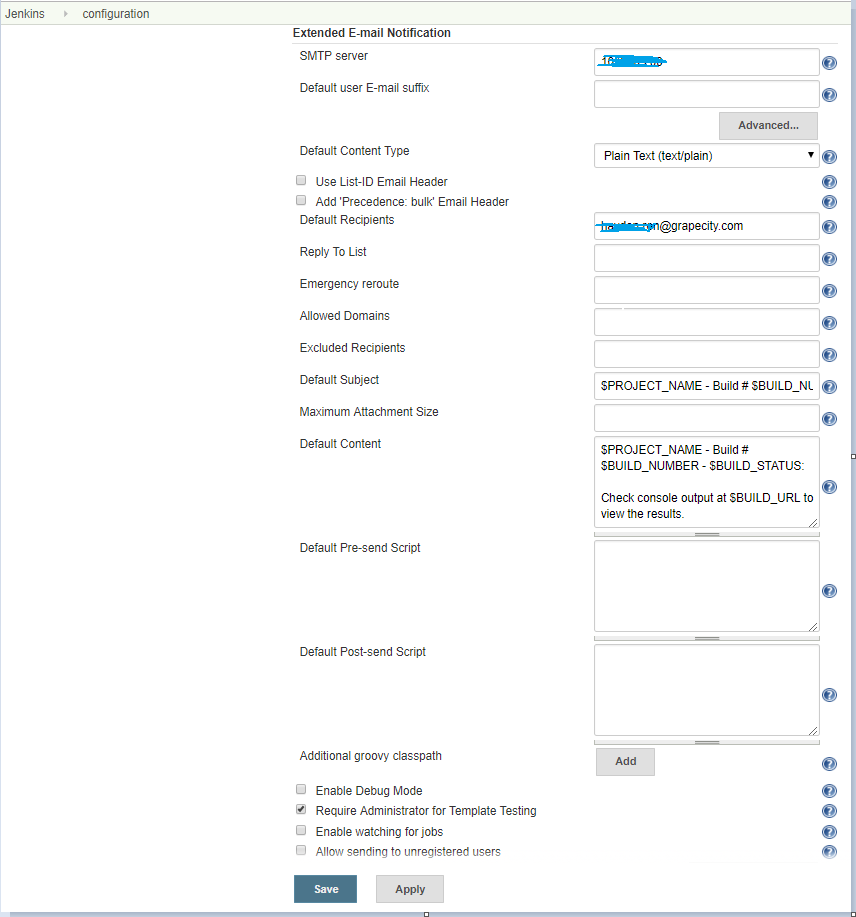
Jenkins主页->Manage Jenkins->Configure System-> Extended E-mail Notification, 配置邮件Server
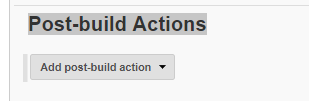
进入Test详细页面->Configure-> Post-build Actions->Add post-build action(Editable-Email Notification)
- 进入Test详细页面
- 对Test进行配置
- Post-build Actions追加动作:Editable-Email Notification
- 配置Editable-Email Notification

8. 项目构建
9. 更优美的邮件模板
默认的邮件内容过于简单,用Email Extension Plugin 提供的Groovy标准HTML模板:groovy-html.template
进入Test详细页面->Configure-> Editable-Email Notification-> Default Content配置模板 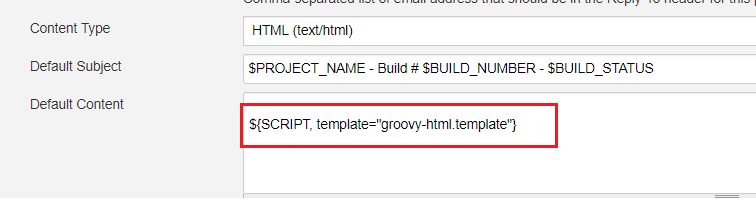
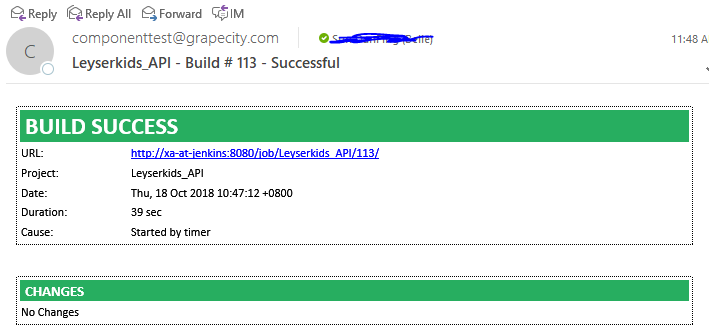
- 重新Build,查看邮件,邮件内容变的易读行,发送错误红色显示很是醒目。成功则显示为绿色,一目了然。

10. 更简洁精炼,美观的构建报告:Html Report
查看Console Output 中的构建结果,易读性差,而且也不美观,所以我们要改进。用newman生成HTML Report,再通过HTML Publisher插件展示到Jenkins。
- Jenkins主页->ManageJenkins->Manage Plugins->找到HTML Publisher插件并安装。

- 在机器A(Jenkins Server)上通过Nodejs安装reporter-html-template
$ npm install -g newman-reporter-html
newman-reporter-html使用参见:GitHub - postmanlabs/newman-reporter-html
- 环境准备好了,把准备好的模板:htmlreqres.hbs上传到TFS项目的templates下。我用了GitHub - MarcosEllys/awesome-newman-html-template: A newman html report very detailed 这个小伙伴的模板,进行了些许改造。
- 进入Test详细页面->Configure-> Execute Windows batch command->command
把导出的index.html放在了当前Job对于的newman文件夹(文件夹会自动创建)下。此路径将在下一步配置中使用。
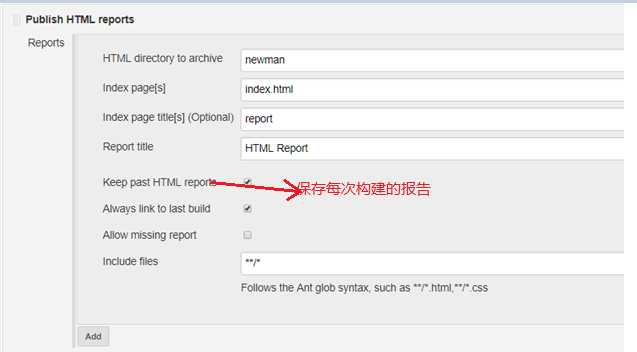
- 进入Test详细页面->Configure-> Post-build Actions->Add post-build action(Publish Html report)
配置Html Report ,展示上一个步骤生成的Index.html文件。
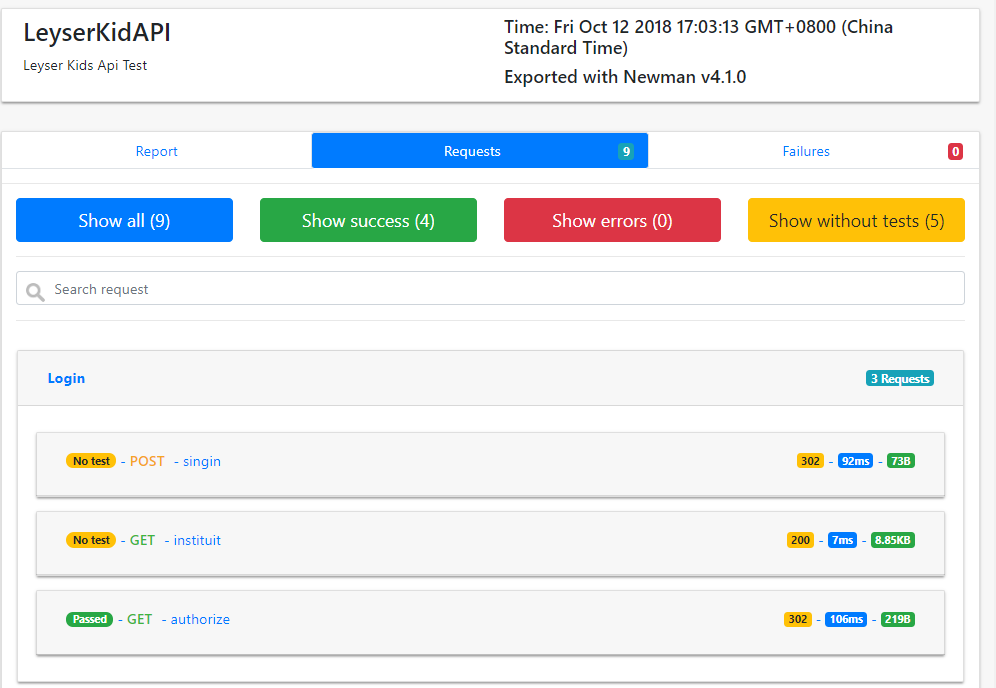
- 重新构建,查看生成的HTML Report,结果如下,是不是好很多
进入Test详细,查看最新Html Report

查看某次构建的Report,选中一个build history,查看HTML Report。

Report详细
B站讲的最详细的Python接口自动化测试实战教程全集(实战最新版)


 909
909


 被折叠的 条评论
为什么被折叠?
被折叠的 条评论
为什么被折叠?
 到【灌水乐园】发言


