


1. 关于本实验
这个实验使用与静态路由实验相同的拓扑,以此突显动态路由协议的灵活性,帮助读者理解OSPF的基础概念、配置和排错。
2. 实验目的
理解OSPF的基本概念。
掌握单区域OSPF的配置。
掌握OSPF邻居状态的解读。
掌握通过Cost控制OSPF选路的方法。
掌握OSPF默认路由发布的方法。
掌握OSPF认证的配置方法。
3. 实验组网介绍

设备 | 接口 | IP地址 | 子网掩码 | 默认网关 |
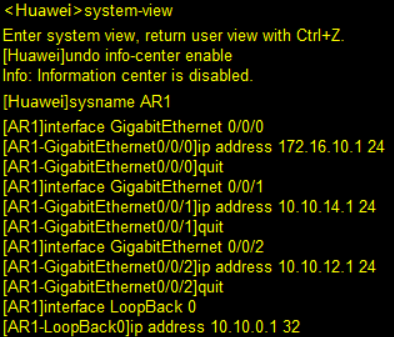
AR1 | G0/0/0 G0/0/1 G0/0/2 Lo0 | 172.16.10.1 10.10.14.1 10.10.12.1 10.10.0.1 | 255.255.255.0 255.255.255.0 255.255.255.0 255.255.255.255 | |
AR2 | G0/0/0 G0/0/1 Lo0 | 10.10.12.2 10.10.23.2 10.10.0.2 | 255.255.255.0 255.255.255.0 255.255.255.255 | |
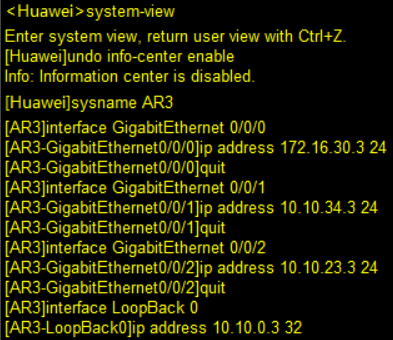
AR3 | G0/0/0 G0/0/1 G0/0/2 Lo0 | 172.16.30.3 10.10.34.3 10.10.23.3 10.10.0.3 | 255.255.255.0 255.255.255.0 255.255.255.0 255.255.255.255 | |
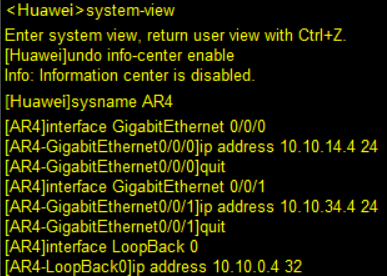
AR4 | G0/0/0 G0/0/1 Lo0 | 10.10.14.4 10.10.34.4 10.10.0.4 | 255.255.255.0 255.255.255.0 255.255.255.255 | |
PC1 | E0/0/1 | 172.16.10.10 | 255.255.255.0 | 172.16.10.1 |
PC2 | E0/0/1 | 172.16.30.10 | 255.255.255.0 | 172.16.30.3 |
4. 实验任务列表
建立单区域OSPF。
通过开销进行选路。
通过OSPF发布默认路由。
配置OSPF认证。
5. 实验配置任务
建立单区域OSPF。
1.路由器上的基础IP地址配置。

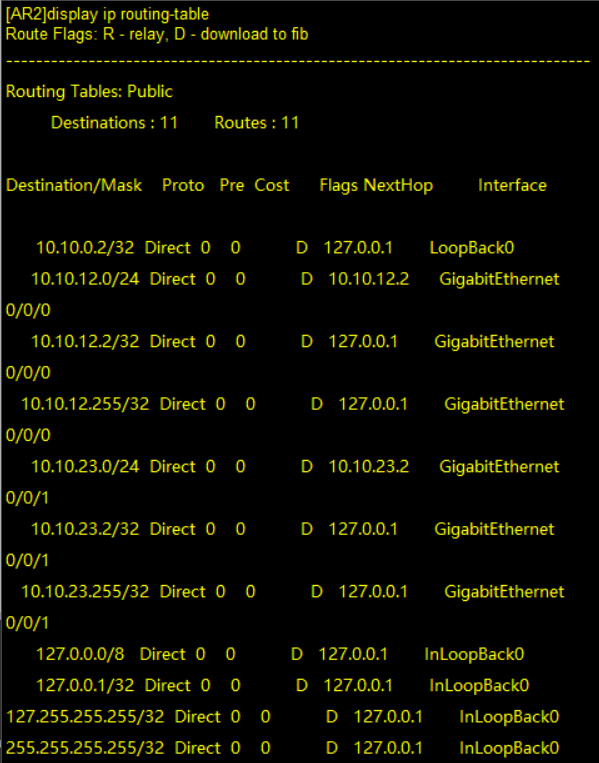
2.查看AR2的路由表是否已构建直连路由。
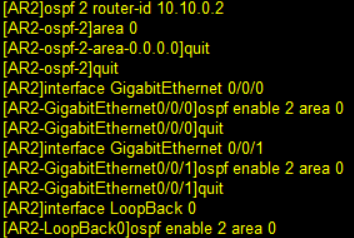
2.在AR1、AR2上配置OSPF。

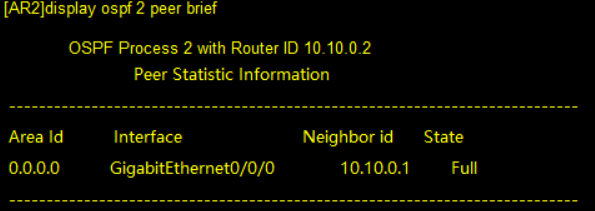
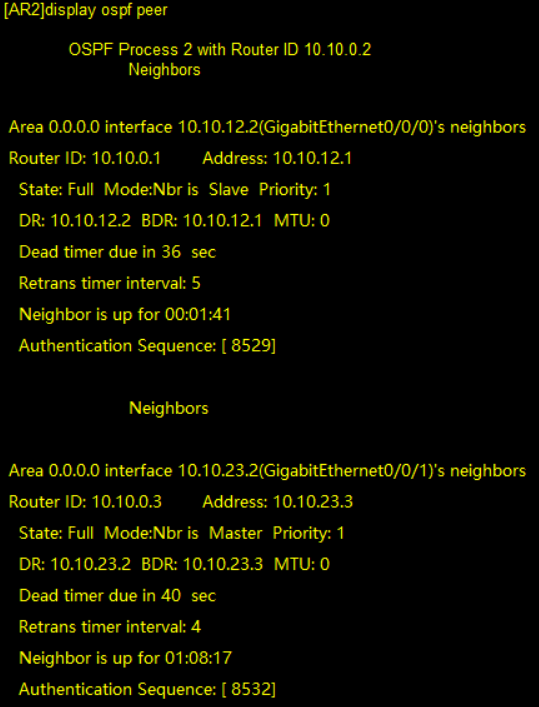
3.在AR2上查看OSPF邻居AR1。
4.在AR3上配置OSPF。

5.在AR3上启用OSPF的接口。

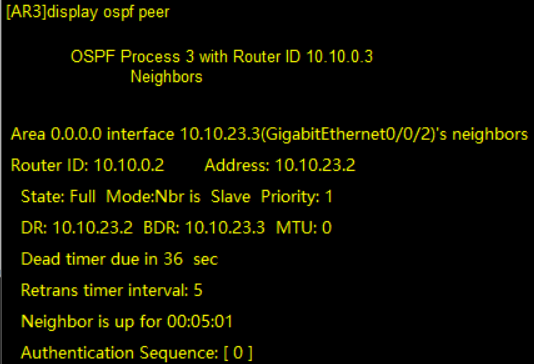
6.在AR3上查看OSPF邻居详细信息。
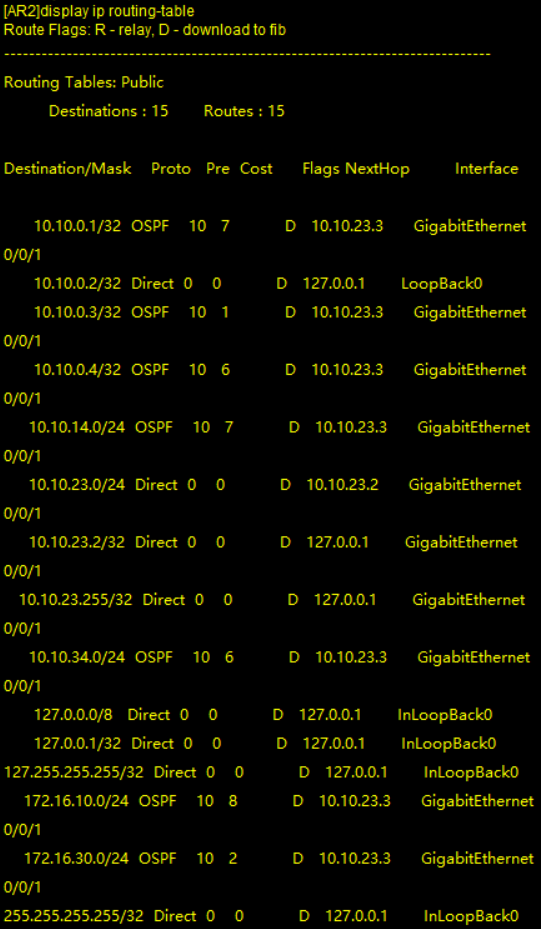
7.在AR2上查看路由表中的OSPF路由。

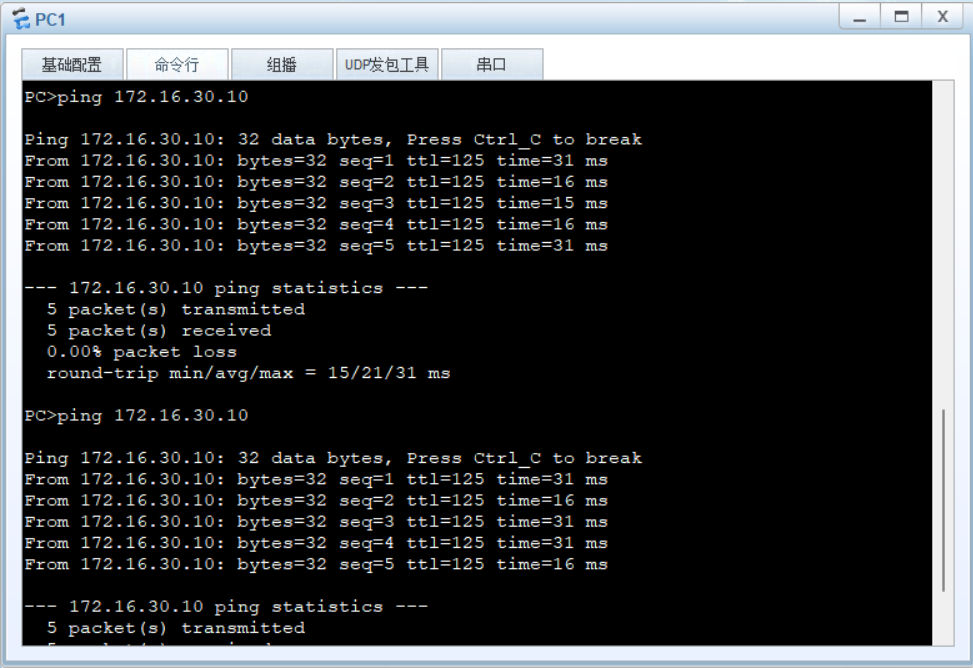
8.从PC1向PC2发起ping测试。
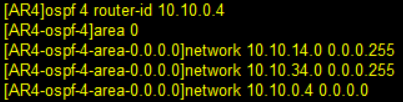
9.在AR4上配置OSPF。
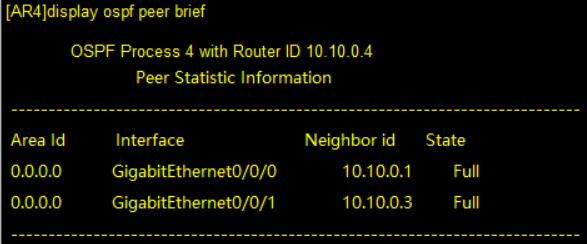
10.查看AR4上的OSPF邻居关系。
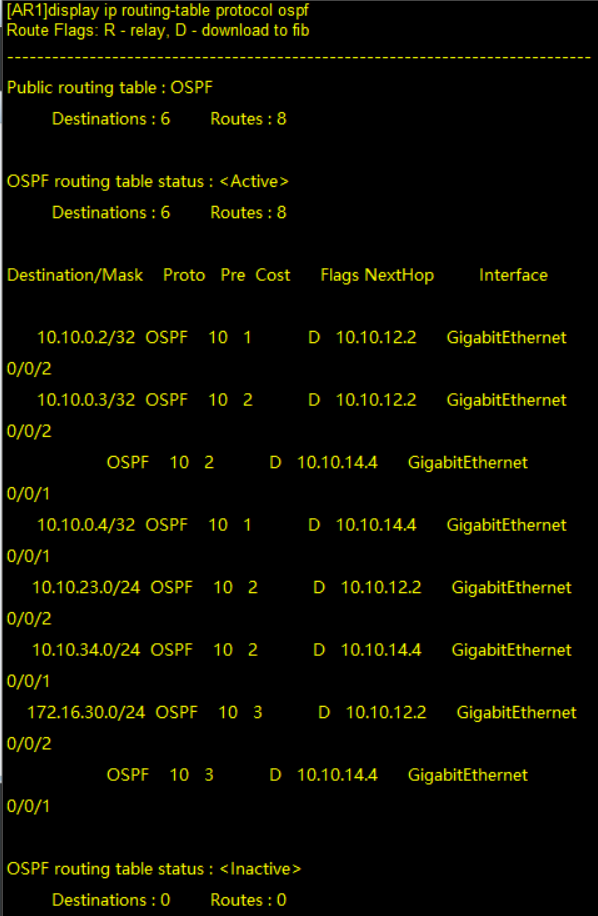
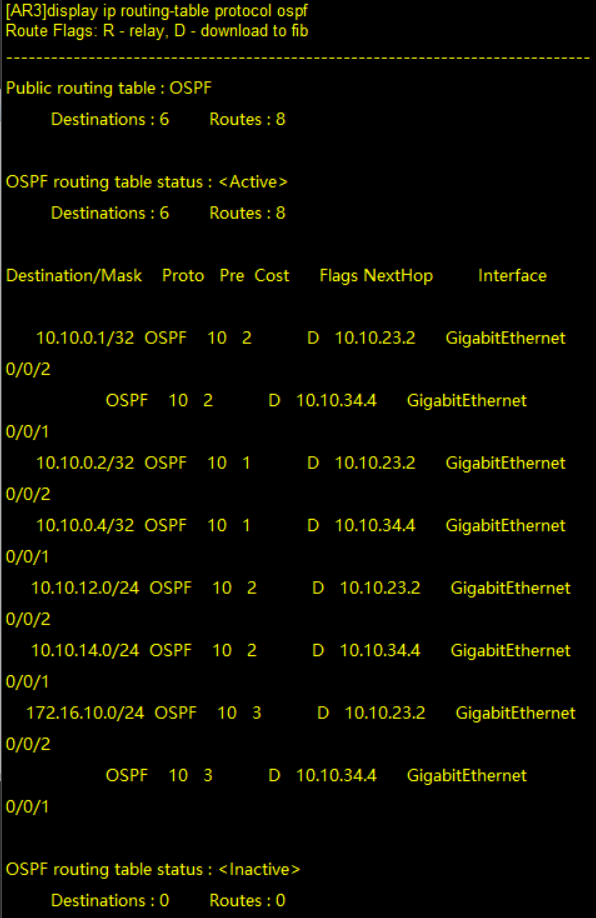
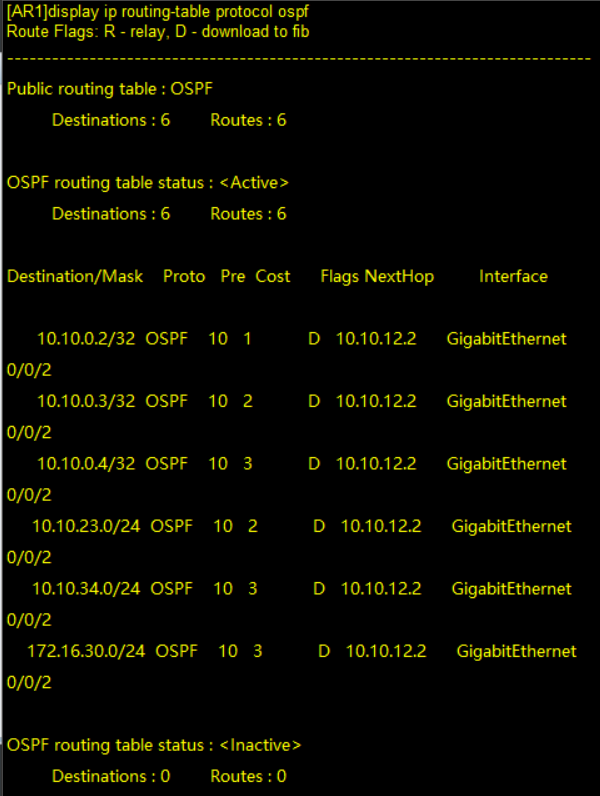
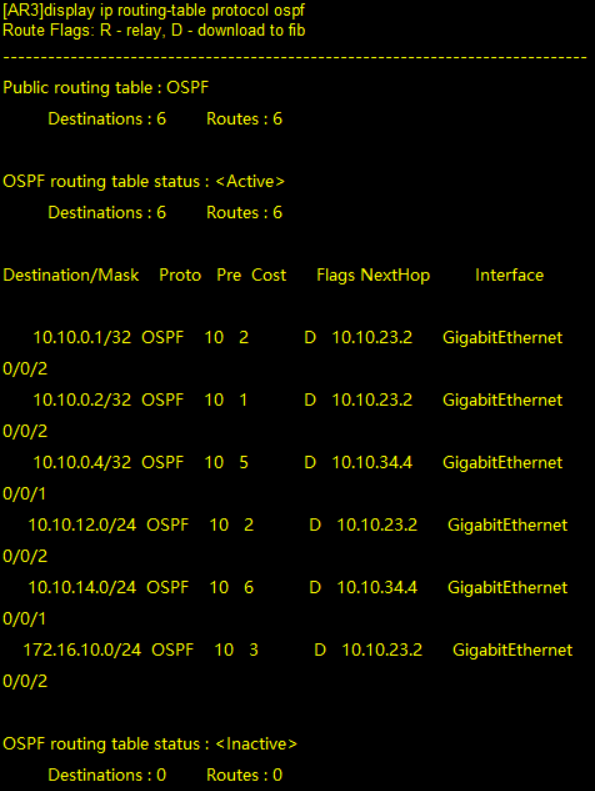
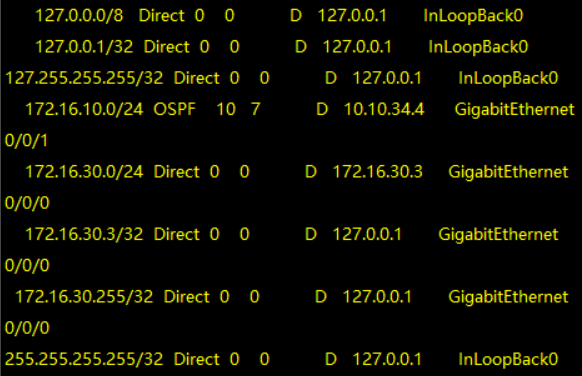
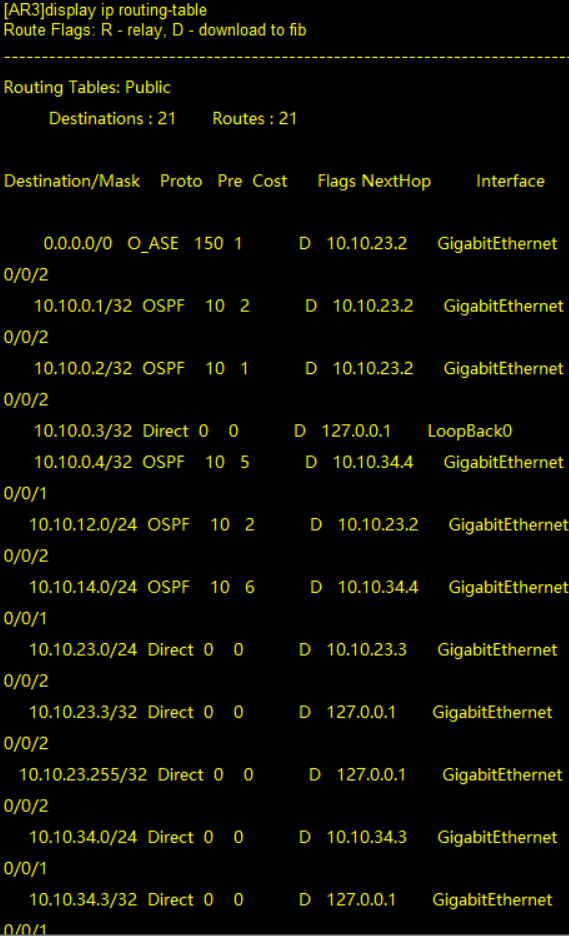
11.查看AR1、AR3路由表中的OSPF路由。
通过开销进行选路。
1.更改AR1、AR3的 G0/0/1接口的OSPF开销为5。


2.查看变更后AR1、AR3路由表中的OSPF路由。
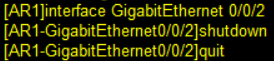
3.验证备用路由的效果,关闭AR1的G0/0/2接口。
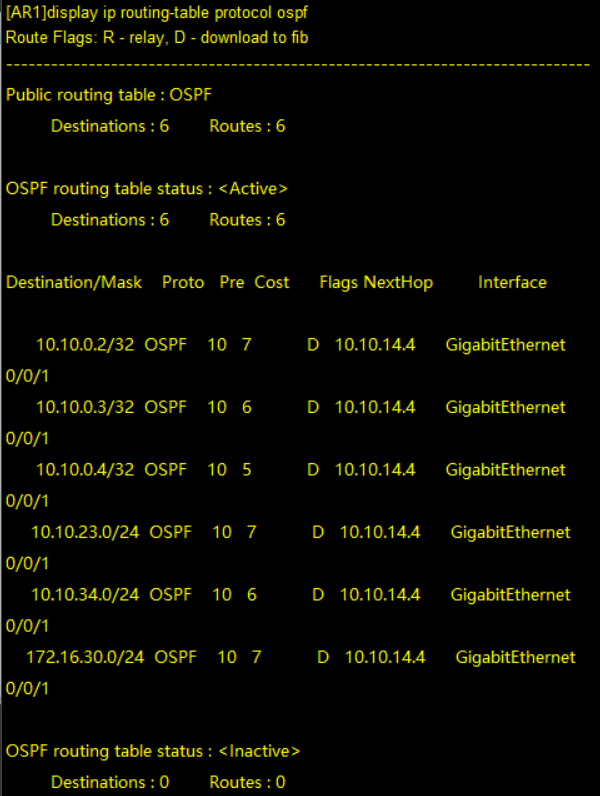
4.查看链路断开后的AR1、AR2、AR3路由表。

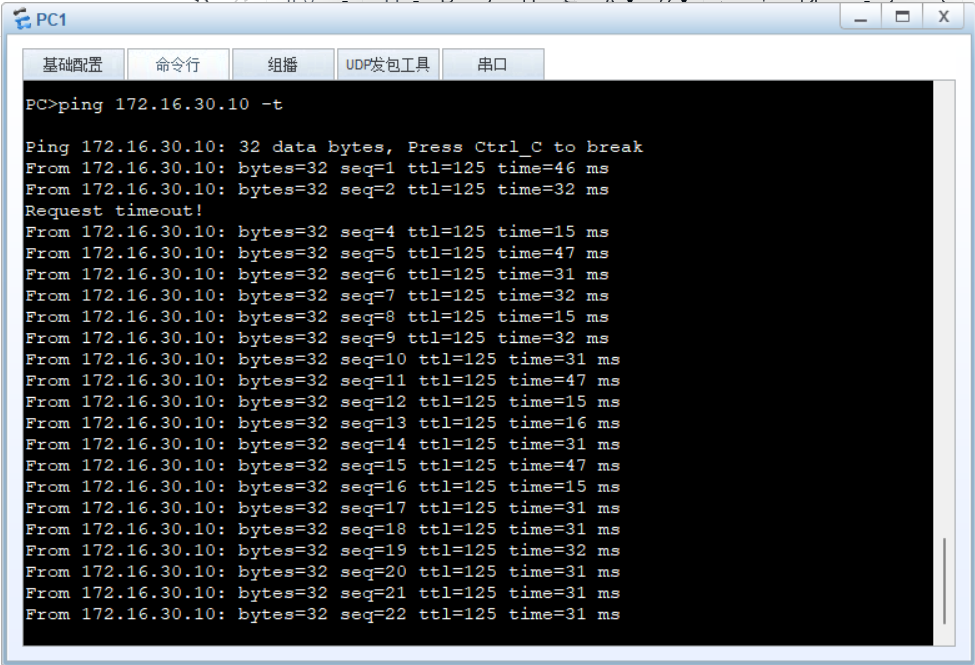
5.PC1上的持续ping测试。
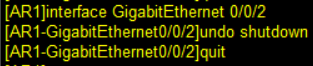
6.再次启用AR1的G0/0/2接口。
通过OSPF发布默认路由。
1.使用AR1向OSPF发布默认路由。

2.在AR1上创建新的环回接口。

3.查看AR3的IP路由表。
4.验证默认路由的效果。

配置OSPF认证。
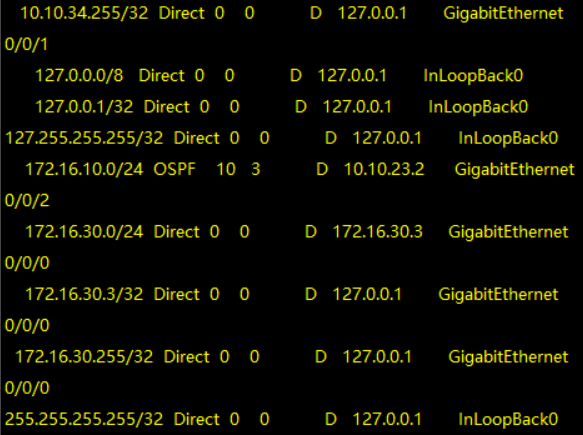
1.在路由器上配置OSPF区域认证。


2.AR2的邻居关系建立时长。
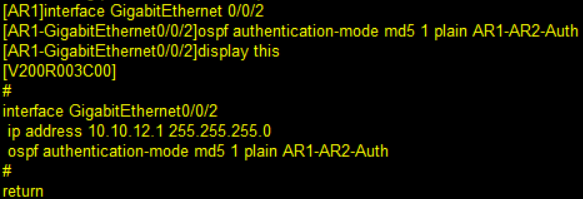
3.在AR1的G0/0/2接口上配置接口认证。
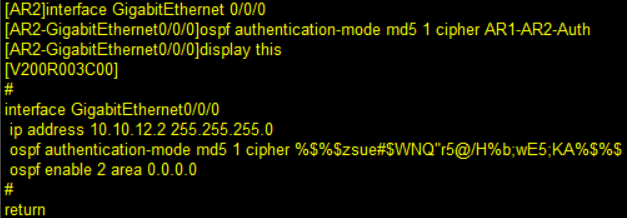
4.在AR2的G0/0/0接口上配置接口认证。


 6584
6584


 被折叠的 条评论
为什么被折叠?
被折叠的 条评论
为什么被折叠?
 到【灌水乐园】发言


