


安装
npm 安装
- 创建文件夹,在文件夹目录执行指令
vue init webpack myvue(vue2)- 手动创建所需环境
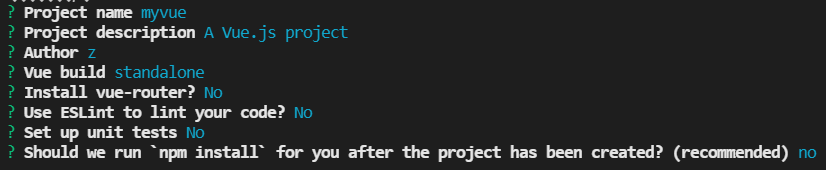
- cd 文件夹 :
cd myvue - 安装依赖环境 在当前目录:
npm install - 运行:
npm run dev
引入
	开发环境版本,包含了有帮助的命令行警告
	<script src="https://cdn.jsdelivr.net/npm/vue/dist/vue.js"></script>
vue-cli
vue2
vue init webpack project
vue3
vue create project
图形化界面
vue ui
指令
runtime-compiler 和runtime-only
runtime-compiler
template ->(解析) ast(抽象语法树)->(编译) -> render函数 ->虚拟dom - > 渲染到真实dom
runtime-only
具有更好的性能
render -> virtual dom -> ui

前端路由
以往的后端路由
到现在主流的前后端分流
现在vue路由
- location.hash=’ ’
- history.pushState({},’ ‘,’ ') data,title,url
- history.replaceState({},’ ‘,’ ') data,title,url 无法返回
vue-router
配置

index.js

默认路由
export default new Router({
  routes: [
    // 默认路由
    {
        path:'/',
        redirect:'/Home'  //重定向到Home
    },
    {
        path:'/Home',
        name:'Home',
        component:Home
    },
    {
        path:'/About',
        name:'About',
        component:About
    },
  ]
})
hash模式修改

main.js
引入相关文件
render函数(相当于el:)

页面导出

router-link
- 路由定向
to=“”
<router-link to="/Home">Home</router-link>
- 指定渲染 tag
tag=“button” 将当前元素渲染成buton
<router-link to="/Home" tag="button">Home</router-link>
- replace 相当于 replaceState
将不可返回
<router-link to="/Home" tag="button" replace>Home</router-link>
<router-link to="/About" tag="button"  replace>About</router-link>
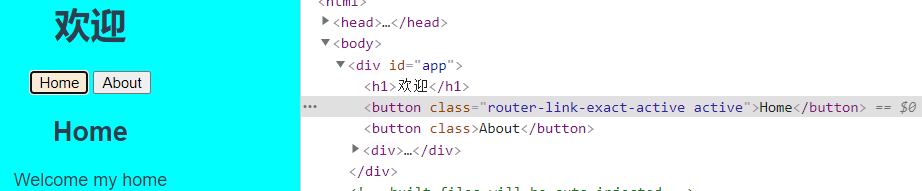
- active-class(默认类名)
在vue中router-link 默认触发的类名为
router-link-class

可以使用active-class修改默认类名
<router-link to="/Home" tag="button" replace active-class="active">Home</router-link>
5. linkActiveClass 全局修改默认class
在配置路由处
export default new Router({
  routes: [
    // 默认路由
    {
        path:'/',
        redirect:'/Home'  //重定向到Home
    },
    {
        path:'/Home',
        name:'Home',
        component:Home
    },
    {
        path:'/About',
        name:'About',
        component:About
    },
  ],
  mode:'history',
  linkActiveClass:'linkActive'
})
$router (代码跳转路由)
route 与 router
      //	$router 是 const router = new VueRouter({})
      //	$route 获取当前活跃的路径
代码跳转路由
1.添加事件
<template>
  <div id="app">
     <h1>欢迎</h1>
    <button @click="linkToHome">首页</button>
    <button @click="linkToAbout">关于</button>
    <router-view></router-view>
  </div>
</template>
2.使用vue中的$router(每个组件都有的属性)修改路径
this.$router.push/replace无法返回
export default {
  name: 'App',
  methods:{
      linkToHome(){
          this.$router.replace('/Home').catch(err=>err) //需要catch 否则控制台报错
      },
      linkToAbout(){
          this.$router.replace('/About').catch(function(err){return err;})
      }
  }
}
动态路由 (同组件使用不同路径)
默认子路由

动态路径参数 /user/:userid
1.this.$router
2.this.$route
3.配置路径参数'user/:userid'  冒号后为参数 ,不同路径会跳转到同一个user路由
在某些情况,路径可能不确定,或者需要传递值
index.js
实例化路径配置与导出
// 1.引入相关组件
import Vue from 'vue'


import Home from '../components/Home'
import About from '../components/About'
import User from '../components/User.vue'
import VueRouter from 'vue-router'

// 2.Vue实例化router
Vue.use(VueRouter)

// 配置路径
const routes=[
    // 默认路径
    {
        path:'',
        redirect:'/home'
    },
    {
        path:'/home',
        component:Home
    },
    {
        path:'/about',
        component:About
    },
    {
        //$route
        path:'/user/:userid',
        component:User
    }
]

//配置路由和组件间的应用关系
const router=new VueRouter({
    routes,
    mode:'history',
    linkActiveClass:'active'
})


// 3.导出路由相关配置
export default router
app.vue
拼接data到 router-link 实现 动态path
<template>
  <div id="app">
    <!-- 动态路由
    某些情况需要动态修改path路径,或者传值 -->

    <router-link to="/home">首页</router-link>
    <router-link to="/about">关于</router-link>
    <router-link :to="'/user/'+name">用户</router-link>

    <router-view></router-view>
  </div>
</template>

<script>

export default {
  name: 'App',
  data(){
      return{
          name:'xwt',
      }
  },
  methods:{
      linkToHome(){
          //$router 是 const router = new VueRouter({})
          //$route 获取当前活跃的路径
          this.$router.replace('/Home').catch(err=>err) //需要catch 否则控制台报错
      },
      linkToAbout(){
          this.$router.replace('/About').catch(function(err){return err;})
      }
  }
}
</script>
User.vue
this.$route获取当前活跃路径
<template>
<div>
   <h1>{{$route.params.userid}}</h1>
   欢迎用户: {{userID}}
</div>

</template>

<script>
export default {
    name:'User',
    computed:{
        userID(){
            // this.$route 获取当前活跃的路由
            console.log(this.$route);
            return this.$route.params.userid
        }
    }
}
</script>
开启props传参

vue-router懒加载
当打包构建应用时,JS文件会非常大,影响页面加载
如果打包时将不同的路由分割成不同的代码块,
并在需要使用时再引入进来,这样效率会高很多
传统引入路由方式
import Home from '../components/Home'
import About from '../components/About'
import User from '../components/User.vue'
懒加载
const Home=()=>import('../components/Home.vue')
const About=()=>import('../components/About.vue')
{
    path:'/about',
    component:About
}
或
{
	path:'/about',
	component:()=>import('../components/About.vue')
}
路由嵌套

News.vue
- 子路由导出
<template>
  <ul>
      <li>金泰</li>
      <li>阿斯顿</li>
      <li>官方</li>
      <li>自行车</li>
  </ul>
</template>

<script>
export default {
    name:'News'
}
</script>
<style>
</style>
Home.vue
2. 父组件router-link 指定跳转路由
router-view 显示子路由
<template>
  <div>
      <h2>Home</h2>
     <h3> Welcome my home</h3>
     <router-link  to="/home/main">个性化</router-link>
     <router-link  to="/home/News">新闻</router-link>
     <router-view></router-view>
  </div>
</template>

<script>
export default {
    name:'Home'
}
</script>

<style>
body{
    background-color:rgb(106, 196, 202);
}
</style>
index.js
3. 在父路由中使用数组嵌套子路由
children:[ ] 一个路由可以有多个子路由,所以为数组[ ]
 {
        path:'/home',
        component:Home,
        children:[
            // 默认路径
            {
                path:'',
                redirect:'main'
            },
            {
                path:'main',
                component:Profile
            },
            {
                path:'News',
                component:News
            }
        ]

    }
路由传参
路由参数传递 router-link

params
index.js在路由配置中 指定参数名
	{
        path:'/user/:userid',
        component:User
    }
主页App.vue路由地址拼接上参数
<router-link :to="'/user/'+name">用户</router-link>
export default {
  name: 'App',
  data(){
      return{
          name:'小文涛',
      }
  }
}
User.vue中可以使用$route.params.参数名 获取参数
<template>
<div>
  <h1>{{$route.params.userid}}</h1>
   欢迎用户: {{userID}}
</div>
</template>
<script>
export default {
    name:'User',
    computed:{
        userID(){
            // this.$route 获取当前活跃的路由
            console.log(this.$route);
            return this.$route.params.userid
        }
    }
}
</script>
<style>
</style>
$this.route 获取当前活跃路由

query
- 配置路由(普通方式)
    {
        path:'/Info',
        component:Info
    }
- 指定路径与参数
    <router-link :to="{path:'/Info',
                       query:{name:'dfs',age:18,height:1.88}}">信息
    </router-link>
- 获取数据
<template>
<div>
  <ul>
      <li>name:{{$route.query.name}}</li>
      <li>age:{{$route.query.age}}</li>
      <li>height:{{$route.query.height}}</li>

  </ul>
  <!-- 获取query -->
    <h1>{{$route.query}}</h1>

  <!-- 获取当前活跃路由 -->
    <h2>{{getQuery}}</h2>
</div>
</template>

<script>
export default {
    name:'Info',
    computed:{
        getQuery(){
            return console.log(this.$route);
        }
    }
}
路由参数传递 方法形式
params
<button @click="aboutClick">关于 </button>
	aboutClick(){
          // params
          this.$router.push({
              path:'/about',
              params:'小问题'
          })
          console.log(this.$route);
      }
query
<button @click="infoClick">信息</button>
	infoClick(){
          // query
          this.$router.push({
              path:'/Info',
              query:{
                  name:'大番薯',
                  age:18
              }
          })
      }
导航守卫
next的3中调用方式

[全局前置守卫] beforeEach
to: 将要进入的路由
from: 当前导航将要离开的路由
next: function()
动态添加标题 (同级)
传统js方式 (性能较差)
    // 实例被创建后调用
    created(){
        document.title='信息'
    }
为每个路由添加meta,meta的值将会保存到to中
to.matched[0].meta.title 调用
    {
        path:'/about',
        meta:{title:'关于'},
        component:About
    },
    {
        //$route
        path:'/user/:userid',
        meta:{title:'用户'},
        component:User
    },
    {
        path:'/Info',
        meta:{title:'信息'},
        component:Info
    }
to.matched[0].meta.title
const router=new VueRouter({
    routes,
    mode:'history',
    linkActiveClass:'active'
})
router.beforeEach((to,from,next)=>{
    console.log(this); //VueRouter
    console.log('to',to);
    console.log('from',from);
    document.title=to.matched[0].meta.title
    next()
})
全局后置钩子
没有next 参数
router.afterEach((to,from)=>{
    console.log('after');
})
路由独享守卫
在路由定义,方法与全局相同 Each 改为 Enter
    {
        path:'/about',
        meta:{title:'关于'},
        beforeEnter:(to,from,next)=>{
            console.log('路由守卫to',to);
            console.log('路由守卫from',from);
            next()
        },
        component:About,
    }
组件守卫
权限控制
token


封装path 权限控制
- 将需要权限控制的路径 模块化

- 在需要出导入 判断是否存在该路径

基本
1. {{}}插值表达式 v-text v-html v-on
v-on=“” 简写
:事件=“方法”
<div id="app">
            {{}}替换部分内容 存在替换不及时问题,需要加入v-cloak.
            使用v-text不会出现这种问题
            <p>{{name}}{{age+'岁:'}} {{}}替换部分内容</p>

             v-text将会替换所有内容
            <p v-text="name+':'">替换这里所有内容</p>

             v-html
             存在安全性问题
            <p v-html="content">将会解析为html标签</p>

			 v-on:方法=""  简写 @方法=""		:keyup.enter="num(1,2)" 可以传参
            <div id="colorChange" v-on:click="changeColor" @dblclick="alert"></div>
</div>

    <script>
    let app=new Vue({
        el:'#app',		//挂载到id为app
        data:{			//数据
            name:"大番薯",
            age:22,
            content:'<a href="http://www.baidu.com">跳转百度</a>'
        },
        methods:{		//方法
            changeColor:function(){
                let changeColordiv=document.querySelector("#colorChange");
                changeColordiv.style.backgroundColor="blue";
            },
            alert:function(){
               this.name+="很聪明,"   //通过this可以获取到data的数据
            }
        }
    })
</script>

v-cloak 解决{{}} 解析延迟的问题
在某些情况可能出现解析延迟,{{}}闪动
<style>
	[v-cloak]{
		display:none
	}
</style>
<div v-cloak>{{message}}
</div>
事件的传参
传递event 需要将 $event 放在最后一位参数
<div @click="test(1,$event)">{{mes}} </div>
 methods:{
            test:function(a,event){
                console.log(a);
                console.log(event.target);
            }
        }
没有传参可以省略括号
<button @click='btn1()'>btn1 </button>
<button @click='btn1'>btn1 </button>
 	  //有参数,不传参数不会报错,   但传了参数必须声明参数
      //没有传参可以省略()
      btn1(v){
        console.log('btn1');
      },
不传参数默认传递event
<button @click='btn2'>btn2 </button>
//不传参数浏览器默认传递 event
      btn2(event){
        console.log('btn2',event);
      }
传参+传递event
event需要放在最后一位
<button @click='btn3(123,$event)'>btn3 </button>
//传参数,传event 传参时需要加上 $
      btn3(var1,event){
        console.log('btn3',var1,event);
      }
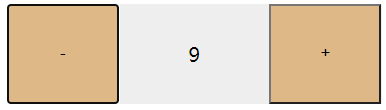
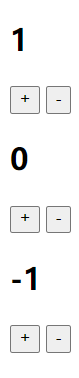
计数器
通过this可以获取到data的数据
<div class="count">
        <button id="pre" @click="pre" >-</button>
        <div>{{num}}</div>
        <button id="next" @click="next">+</button>
</div>
    <script>
        let count=new Vue({
            el:".count",
            data:{
                num:0
            },
            methods: {
                pre:function(){
                     if(this.num<=0){
                         alert("Err")
                     }
                     else
                     this.num--;
                },
                next:function(){
                    if(this.num>=10){
                        alert("太大了")
                    }
                    else
                    this.num++;
                }
            },
        })
    </script>
v-show v-if
根据表达式判断显示与否
v-show:适合频繁使用
v-if:性能较差
v-show 对表达式进行判断,true为显示,false 不显示
实际上切换display
v-if
删除dom树

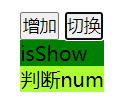
<div id="app">
        <button @click="add">增加</button>
        <button @click="toggle">切换</button>
        <div style="background-color: green;" v-if="isShow">isShow</div>
        <div style="background-color: greenyellow;" v-show="num>=18">判断num</div>
    </div>
</body>
<script>
    let app = new Vue({
        el: "#app",
        data: {
             isShow:false,      //boll值
             num:17,            //条件表达式
        },
        methods: {
             add:function(){
                 this.num++;
             },
             toggle:function(){
                 this.isShow=!(this.isShow);
             }
        },
    })
</script>
v-bind
v-bind :代替标签属性
简写 :src :title :class 等等
<style>
        .filter{
            filter: invert(1);
        }
    </style>
<div id="app">
    // v-bind  简写:src 可以使用任何属性title,class 等
    // 三目运算符,active为真时,使用filter,否则使用''
    <img v-bind:src="VBind" :class="!active?'filter':'' "@click="toggle">

    //filter是否生效,取决于active
    <img :src="dx" :class="{filter:active}" @click="toggle">
    <img :src="imgSrc" :title="title" :class="changeClass" @click="toggle">
</div>
</body>
<script>
    let app=new Vue({
        el:"#app",
        data:{
            imgSrc:'https://ss1.bdstatic.com/70cFvXSh_Q1YnxGkpoWK1HF6hhy/it/u=394698104,1302019637&fm=26&gp=0.jpg',
            VBind:'https://ss2.bdstatic.com/70cFvnSh_Q1YnxGkpoWK1HF6hhy/it/u=4092687158,279235402&fm=11&gp=0.jpg',
            dx:'https://ss2.bdstatic.com/70cFvnSh_Q1YnxGkpoWK1HF6hhy/it/u=3197142773,3370367977&fm=26&gp=0.jpg',
            title:'测试一下v-bind',
            active:false,
            changeClass:'filter'
        },
        methods: {
            toggle:function(){
                this.active=!this.active;
            }
        },
    })
</script>
对象操作类的切换
在以往js操作dom修改类过于复杂
在vue里可以使用对象较为简单
 <div id ="app">
    <!-- 对象操作类的切换 -->
    <div :class="{greenYellow:greenYellow,skyBlue:skyBlue}"></div>
    <button @click="changeColor">切换</button>
  </div>
data: {
      message:'hello',
      greenYellow:true,
      skyBlue:true
    },
    methods: {
      changeColor:function(){
        this.skyBlue=!this.skyBlue
      }
    }
方法return 类
也可以通过方法 return 返回类名
记得带括号()
<div :class="changeColor()"></div>
changeColor:function(){
        return this.greenYellow;
      }
数组形式
以数组形式也可以添加多个类(不常用)
<div :class="[greenYellow,skyBlue]"></div>
data: {
      greenYellow:'greenYellow',
      skyBlue:'skyBlue'
    },
同样也可以同时添加多个类
<div :class="changeColor()"></div>
changeColor:function(){
        return [this.greenYellow,this.skyBlue]
      }
:class 不会覆盖 原有的class
可以将静态的不改变的类使用class=‘’ 添加
动态则操作数据 :class
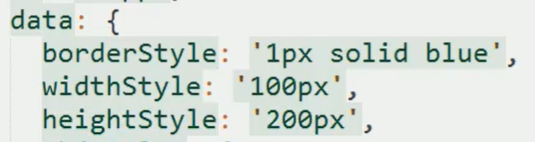
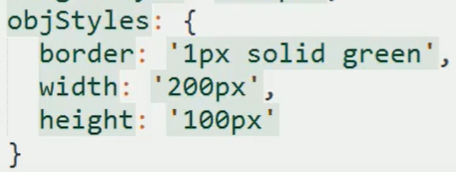
:style
style里的属性使用驼峰命名
							拼接
<div :style='{width:width ,height:height+"px",backgroundColor:backgroundColor}'></div>
data:{
	  width:'200px',
      height:200,
      fontSize:'20px',
      backgroundColor:'green'
}
或者使用方法返回
<div :style='getStyle()'></div>
getStyle:function(){
        return {width:this.width ,height:this.height+"px",backgroundColor:this.backgroundColor}
      }
绑定样式2
{ }
对象形式 { 类名 : bool值 }
style{
	border:1px solid black
}
对象的方式添加类名,后接上bool值
<div :class="{style:isActive}"></div>
可以添加多个
<div :class="{style:isActive,bg:isBg}"></div>
data:{
	isActive:true;
},
[ ]
[ data1 , data2 ] 添加数据
<div :class="[data1 ,data2 ]">大番薯</div>
在data 里添加类名 添加值
data:{
        data1:'style1',	类名 style1
        data2:'style2'
     },
混合使用
<div :class="[class1,class2,{style:isstyle}]"></div>
不会覆盖原来的class
将会添加两个类 class=" style1 style2 "
<div> class="style1" :class="{style2:isStyle2}" </div>
内联样式添加

对象

也可以使用 [ ] 添加多个对象形式的样式
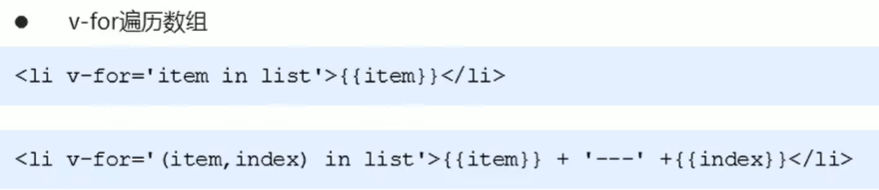
v-for
三个值
v-for=" value key index" 值 键 下标
两个值
v-for=" key index " 键 下标
<body>
    <ul id="app">
    <button  @click="add">添加</button>
    <button @click="remove">删除</button>
        <li v-for="items in arr1">	//items名称可自定义  a in arr1
            {{items}}
        </li>
        <li v-for="(items,index) in arr2">	//打印下标
           {{index+1}} {{items.name}}		//index从0开始,itmes对象.name取值
        </li>
    </ul>
</body>
<script>
    let app=new Vue({
        el:"#app",
        data: {
            arr1:["大地瓜","小番茄","大头"],
            arr2:[
                {name:"大番薯"},
                {name:"小地瓜"},
                {name:"好好吃"}
            ]
        },
        methods: {
            add:function(){
                this.arr1.push("香啊~");
            },
            remove:function(){
                this.arr2.shift();
            }
        },
    })
</script>

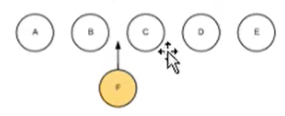
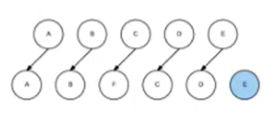
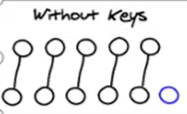
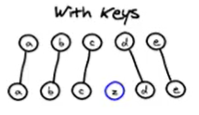
key
使用v-for 建议加上key key唯一的
items的增删改查 没有key 将会使diff 算法效率低下
在B后插入F
没有加上key的执行状况
将C更新为F, D更新为C E更新为D
vue中清除/添加 类
在原生js中,点击添加类需要先清除,后添加
vue中给类添加判断表达式 {类名:CurrentIndex===index}
通过修改CurrentIndex为v-for的 index
- 0===0
- 1===0
- 2===0
<button v-for="(item,index) in page" :class="{green:CurrentIndex===index}" @click="changeColor(index)">{{item}}</button>
data: {
      page:[1,2,3,4,5,6,7,8],
      CurrentIndex:0
    },
    methods: {
      changeColor(index){
        this.CurrentIndex=index
}

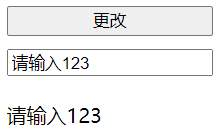
v-model
便捷设置和获取表单元素的值
绑定的数据会表单元素相关联
数据===表单元素 双向绑定
<body>
   <div id="app">
       <input type="button" value="更改" @click="change">
       <input type="text" v-model="value" @keyup.enter="click"><br>
       {{value}}
   </div>
</body>
<script>
    let app=new Vue({
        el:"#app",
        data:{
            value:"请输入"
        },
        methods: {
            click:function(){
                alert(this.value);
            },
            change:function(){
                this.value="随便改";
            }
        },
    })
</script>
实际上是v-bind 和v-on的结合
input 有一个 事件 oninput 输入事件
@input=" "
把事件获取的值传给数据mes

v-model 绑定input其他类型
radio
可以省略name 使用v-model=''绑定data值" v-model相当于替换name
v-model选中值为当前input 的value
设置初始值为value 则默认选中
<!-- for绑定id   相同name 绑定同类, value, 使用v-model可以省略name  -->
    <label for="male">
      <input type="radio" name="sex" id="male" value="男"  v-model="picked">男
    </label>
    <label for="famale">
      <input type="radio" name="sex" id="female" value="女" v-model="picked">女
    </label>
    <h2>{{picked}}</h2>
data: {
      picked:'男'
    }
  <div id ="app">
    <label for="male">
    <!-- v-model 绑定value , 相当于替代name, 只有name相同时,才可以提交,只能提交一个值 , 给v-model赋初始值,则默认选中(设置为value值) -->
      <input type="radio"   id="male" value="男性"  v-model="sex">男
    </label>
    <label for="famale">
      <input type="radio"   id="female" value="女性" v-model="sex">女
    </label>
    <h2>{{sex}}</h2>
  </div>
data: {
      sex:'male',
    }
checkbox
单选绑定的是bool值,无论data何
<!-- checkbox单选 绑定的是bool值,无论data何值 -->
    <input type="checkbox"  value="check" id="single" v-model="bool">
    <label for="single">是否选中{{bool}}</label>
    <button :disabled="!bool">我已阅读</button>
 data: {
      bool:false,
    }
多选绑定value值
<!-- checkbox多选,绑定value值 -->
    <input type="checkbox"  value="小文涛" id="xwt" v-model="name">
    <label for="xwt">小文涛</label>

    <input type="checkbox" value="林枸杞" id="lgq" v-model="name">
    <label for="lgq">林枸杞</label>

    <input type="checkbox" value="大番薯" id="dfs" v-model="name">
    <label for="dfs">大番薯</label>
    <h2>{{name}}</h2>
data: {
      name:[]
    }
值绑定
<label v-for="item in bind" :for="item">
                          <!-- 值绑定 -->
     <input :id="item" type="checkbox" :value="item" v-model="name">{{item}}
     </label>
     <h2>{{name}}</h2>
data: {
      name:[],
      bind:["可口可乐","百事可乐","雪碧","果粒橙","王老吉"]
    }
select
单选, 绑定给select, 绑定value
<select   v-model="select">
      <option value="小文涛">小文涛</option>
      <option value="林枸杞">林枸杞</option>
      <option value="刘德华">刘德华</option>
      <option value="大番薯">大番薯</option>
      <option value="张学友">张学友</option>
    </select>
    <h2>selected:{{select}}</h2>
data: {
      select:"刘德华",
    }
多选
<select v-model="multipleSelect" multiple style="width: 50px;">
      <option value="苹果">苹果</option>
      <option value="香蕉">香蕉</option>
      <option value="菠萝">菠萝</option>
      <option  value="西瓜">西瓜</option>
    </select>
    <h2>多选:{{multipleSelect}}</h2>
data: {
      multipleSelect:[]
    }
v-model修饰符
 <!-- lazy将在 change时改变, 而不是input时 -->
    <input type="text" v-model.lazy="lazy">
    <h2>{{lazy}}</h2>

      <!-- .number将input.value内容转换为number -->
    <input type="text" v-model.number="number">
    {{typeof(number)}}
    <br>
    <br>

    <input type="text" v-model.trim="trim" >
    {{trim}}
data: {
      lazy:'',
      number:'',
      trim:''
    }
v-html
将值解析为html
v-pre
不解析
分支结构 v-if v-else-if v-else

虚拟dom问题
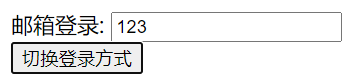
在vue中 会尽可能复用不改变的内容, 这里如果不加key,不会改变 input框的value 加上key 会重新创建一个input
不加key将会复用
      <div v-if='showForm'>
      用户名: <input type="text" placeholder="请输入账号">
      </div>
      <div v-else>
        邮箱登录: <input type="email" placeholder="请输入邮箱">
      </div>
      <button @click='changeType'>切换登录方式</button>
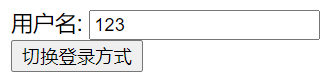
vue虚拟dom将会复用相同的内容,导致value值不被改变
加上key , 将会重新创建
<div v-if='showForm'>
      用户名: <input type="text" placeholder="请输入账号" key='text'>
      </div>
循环结构

v-cloak
插值表达式{{}} 存在加载慢导致"闪动"替换不及时等问题
使用[v-cloak]提前设置display:none 在要使用的地方加上v-cloak
css
    [v-cloak]{
        display: none;
        background-color: white;
    }
html
	<div id="app">
        <div v-cloak>{{mes}} </div>
    </div>
js
    let app=new Vue({
        el:'#app',
        data:{
            mes:'测试cloak'
        },
    })
v-pre
v-pre将会跳过编译 {{ }}
<div v-pre>{{mes}} </div>
v-once
v-once将只会渲染一次,不会再更改
应用:不需要再次修改的数据
<div v-once>{{mes}}</div>
事件修饰符
取消冒泡
原生js
function(event){
	 event.stopPropagation();
}
vue
<div @click.stop="test">跳转</div>
取消默认行为
原生js
function(event){
	 event.preventDefault();
}
vue
<a @click.prevent="test" href="http://www.baidu.com">跳转</a>
按键修饰符
keyup.enter 事件.按键
<div @keyup.enter="method"></div>
<div @keyup.delete="method"></div>
也可以自定义
自定义按键
a键
<input type="text" @keyup.a="test()" >点击</input>
keyCodes
<input type="text" @keyup.65="test()" >点击</input>
computed 计算属性
计算属性将会被缓存,具有更好的性能
<h2>{{fullName}}</h2>
computed:{
      fullName:{
        //set 一般不使用    set可以传值
        set:function(setName){
          const name=setName.split(' ');
          this.firstName=name[0],
          this.lastName=name[1]
        },
        get:function(firstName){
          return this.firstName+' '+this.lastName
        }
      }
    }
   });
调用fullName 相当于调用set 方法

watch 侦听器
方法侦听器
缺点:
- 无法在页面初始化时调用
- 无法侦听对象中的属性值
参数 1. 新值 2.旧值
watch:{
	get(newVal,oldVal){
	}
}
对象侦听器
立即执行 immediate
优点:
- 可以立即触发
immediate:true - 可以侦听对象中的属性
deep对象.属性
将侦听器改为对象
使用handle() 作为执行函数
immediate:true
// true 为立即执行
// false
<div id="app">
        <input type="text" v-model="mes"  id="">
        {{mes}}
    </div>
    <script>
        new Vue({
            el:'#app',
            data() {
                return {
                    mes:'你好'
                }
            },
            watch:{

               /*  mes(newVal,oldVal){
                    console.log(newVal,oldVal);
                }, */
                // 立即执行侦听器
                mes:{
                    handler(newVal,oldVal){
                        console.log(newVal+'立即执行',oldVal);
                    },
                    immediate:true
                }
            }
        })
    </script>
单个属性侦听
	 watch:{
                // 单属性侦听
                'mes.name':{
                    handler(newVal){
                        console.log(newVal);
                    }
                }

            }

deep 深度监听
对象中任意一个属性变化,都会触发侦听器

$nextTick
$nextTick(callback) 将callback推迟到下一下Dom更新周期之后执行
等组件Dom更新完成后再执行callback函数

自定义指令
私有自定义指令
与data el同级

bind
bind函数只会触发一次, dom刷新不会继续执行bind函数

update
dom 更新会触发update函数

指令简写
当bind 和 update函数相同时 可以将自定义函数写成函数
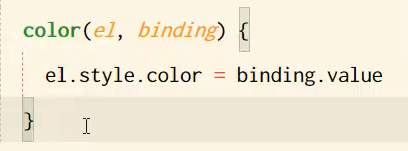
全局自定义指令
Vue.directive(‘指令’,{})
也可简写成函数形式

- binding

生命周期


组件


  <div id ="app">
    <!-- 3. 使用组件 -->
    <cop></cop>
  </div>

  <script>
     1. 创建组件构造器对象
    const comp=Vue.extend({
      template:
      `<div>hellow compoent</div>`

    })
    2. 注册组件 (这里是全局组件, 可以在多个vue实例下使用)
    Vue.component("cop", comp)

   let vm = new Vue({
    el: '#app',
    data: {},
    methods: {},

    局部组件, 仅在app下使用
    components:{
      cop:comp // key : value
    }

   });
  </script>
子组件
构造父子两个组件
在父组件内注册子组件
在vue实例中 注册父组件
 <div id ="app">
    <Parent></Parent>
  </div>
const son=Vue.extend({
      template:`
        <h2>son</h2>
      `
    })

    // 父组件内注册子组件    哪里注册,哪里使用
    const parent=Vue.extend({
      template:`<div class="parent">
          		<sonWrap></sonWrap>
       	 		</div>`
        ,
      components:{
        sonWrap:son
      }
    })
    //Vue实例 为根组件
   let vm = new Vue({
    el: '#app',
    data: {},
    methods: {},
    // 调用父组件
    components:{
      Parent:parent,
    }
   })
组件语法糖
 (自定义组件名,{template:'绑定id'})
    Vue.component('head',{
      template:'#head'
    })
components:{
      'head1':{
        template:'#head'
      }
    }
 <div id ="app">
    <template id="head">
      <div>
        <h2>这里是header</h2>
      </div>
    </template>
  </div>
components:{
‘自定义标签名’:{
template : ’ #id ’
}
}
let vm = new Vue({
    el: '#app',
    data: {},
    methods: {},
    components:{
      'head1':{
        template:'#head'
      }
    }
   })
为什么组件data 是一个函数
如果vue使用对象保存data:{}
那么每次使用的组件将会共用这个data
<div id="app">
    <!--  使用自定义组件 -->
    <count></count>
    <count></count>
    <count></count>
</div>


  <template id="counter">
    <!-- template要包含一层div -->
    <div>
      <h2>{{num}}</h2>
      <button @click="num++">+</button>
      <button @click="num--">-</button>
    </div>

  </template>
    // 注册全局组件
    Vue.component('count', {
      template: '#counter',
      // 如果组件的data 不是函数,而是以对象形式,组件的data将会被每一个相同的组件使用
      // 相当于定义了一个const 类型的变量
      data() {
        return {
          num: 0,
        }
      }
    })

    let vm = new Vue({
      el: '#app',
    });
不同的作用域
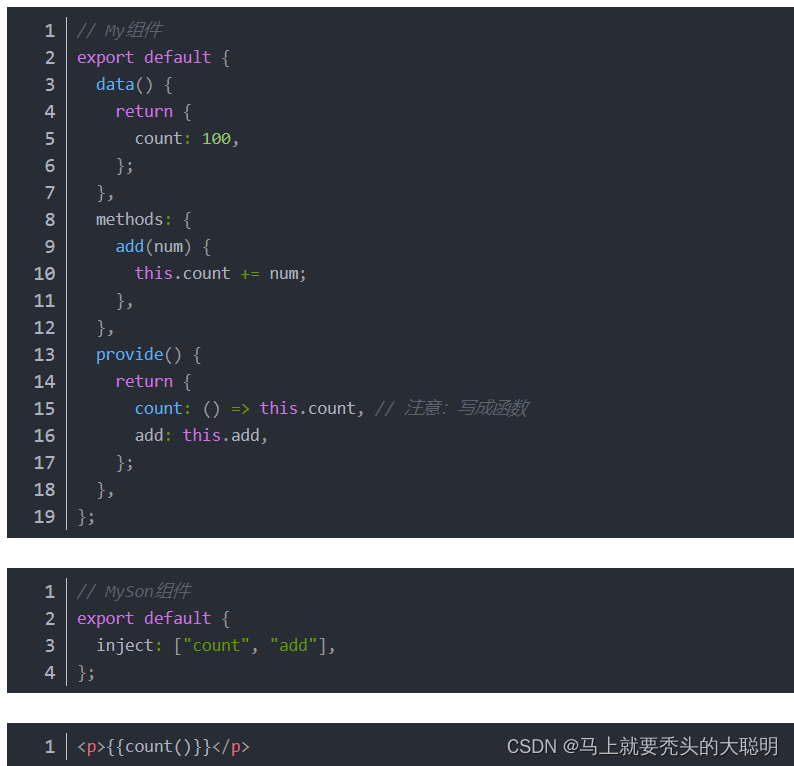
数据共享的六种方案

provide inject
- 原理 Object.create()
父子组件的通信

父->子 props(自定义属性)
props只读属性
父->子传递数据 props
vue 向子组件child 传递 parent,age数组
不建议改变props的值
  <div id ="app">
    <child :parent="parent" :age="age"></child>
  </div>
 <template id="child">
   <div>
     <ul>
       <li v-for="item in parent ">
        {{item}}
       </li>
     </ul>
     <h2>{{age}}</h2>
   </div>
 </template>
let vm = new Vue({
    el: '#app',
    data: {
      parent:['小文涛','林枸杞','大番薯'],
      age:[21,22,20]
    },
    components:{
      'child':{
        template:'#child' ,
        // props 使用数组或对象
        props:['parent','age']
    }
多个传值
		{
         props:['parent','age']
        }
类型限制
components:{
      'child':{
       template:'#child' ,
         props:{
	         parent:String,
	         age:Number
         }
       }
}
必传值
required:true
 	props:{
          age:{
            // 必填字符串
            required:true
          },
        }
自定义验证函数
props:{
        // 5.自定义验证函数
        validator:function(value){
          return ["success","error","null"].indexOf(value)!=-1
        }
}
默认值
当数据为 Array 或 Object 时
默认值必须是函数
	 age:{
             // 4. 类型是对象或数组时, 默认值必须是函数
            type:Array,
            // vue2.* 版本以下
            // default:[] , 将会报错 ,使用函数形式return
            default(){
              return [6,8,10]
            },
          }
驼峰命名需要使用- 连接
  <div id ="app">
    <!-- html Attribute 不区分大小写,如果使用驼峰命名,需要使用 -连接 -->
    <cmessage :c-info="info"></cmessage>
  </div>
<template id="cmes">
  <div>
    {{cInfo}}
  </div>
</template>
<script>
   const cmessage={
     template:'#cmes',
     props:{
       cInfo:{
         type:Array
       }
     }
   }

   let vm = new Vue({
    el: '#app',
    data: {
      info:[{
        class:1,
        name:'小文涛'
      },{
        class:2,
        name:'林枸杞'
      }]
    },

    components:{
       cmessage
    },

   });
</script>
$parent
获取当前组件的上一级组件
$root
获取根组件 vue实例
子->父 this.$emit
事件接收
在使用组件出监听 @自定义事件=‘接收事件’
接收事件使用形参获取 值
<div @send="get"></div>
methods:{
	get(val){
		console.log(val);
	}
}
<div id ="app">
    <!-- 在使用组件处 监听   @自定义事件="接收事件"  -->
    <child :childid="father"  @childsend="ParentGet"></child>
</div>
  <template id="childcomp">
    <div>
      <button v-for="item in childid" @click="send">{{item.name}}</button>
    </div>
  </template>
  <!-- 子组件向父组件发送信息,父组件接收信息返回 -->
<script>
    // 构造组件
    const child={
      template:'#childcomp',
      data(){
        return{
          childId:[1,2]
        }
      },
      props:{
        'childid':{
          type:Array
        }

      },
      methods:{
         send(){
           console.log('发射!',this.childId);
           //子组件 发送 this.$emit

           return this.$emit('childsend',this.childId)
         }
      }
    }
   let vm = new Vue({
    el: '#app',
    data: {
      father:[{
        id:1,
        name:'大番茄'
      },
      {
        id:2,
        name:'小地瓜'
      },
      {
        id:3,
        name:'林枸杞'
      }]
    },
    components:{
      child
    },
    // 接收子组件的数据
    methods:{
      ParentGet(childId){
        console.log("爸爸接收到啦~",childId);
      }
    }
   });
  </script>
$event接收
$event 可接收子组件发给父组件的值


获取组件
$children
this.$children获取所有子组件 (基本不使用)
<div id ="app">
        <cpn ref="message"></cpn>
        <cpn></cpn>
        <button @click="click">点击</button>
    </div>
<template id="cpn">
    <div >
        子组件
    </div>
</template>
<script>
        const cpn={
            template:'#cpn'
        }
     let vm = new Vue({
        el: '#app',
        data: {
            message:'大番薯'
        },
        components:{
            cpn
        },
        methods:{
            click(){
                // 1.$this.children 获取所有子组件
                console.log(this.$children);
                // 2.this.$refs 默认为空对象  需要在子组件处 声明 ref=""
                console.log("$refs",this.$refs);
            }
        }
     });
    </script>
$refs (dom,组件)
this.$refs 在子组件处添加 ref=“”
默认为空对象
可设置 ref=“” 相当于设置id选择器
通过this.$ref. 获取
动态组件component

keep-alive
不执行destory 生命周期 仅调用actived 保留了组件状态
初次使用时created 失活时deactived
<keep-alive>
	<btn></btn>
</keep-alive>
include exclude
指定需要被缓存/不缓存 的组件
<keep-alive @include="Left">
	<btn></btn>
</keep-alive>
默认组件名
组件没有声明(导出名)名字时,组件名默认为注册组件名
components:{ Left }

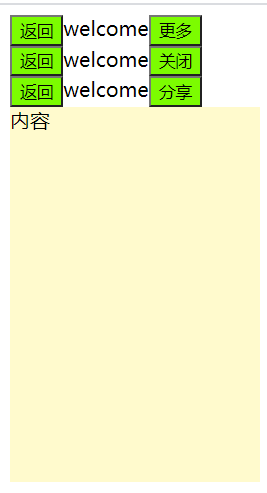
插槽slot
在template定义slot 作为替换内容 slot内容将作为默认值
在使用组件处填充
每一个插槽都需要指定一个 name 没有则默认default
v-slot 指定渲染插槽
<tempalte v-slot:Left> </template>
简写形式
<tempalte #Left> </template>

<div id ="app">
        <!-- 替换slot内容 -->
        <cpn><button>更多</button></cpn>
        <cpn> <button>关闭</button></cpn>
        <cpn>
            <!-- 添加多值 -->
            <button>分享</button>
            <div class="body">内容 </div>
        </cpn>
    </div>
<template id="cpn">
    <div class="header">
        <!-- 除了slot都作为默认值 -->
        <button>返回</button>
        welcome
        <slot></slot>

    </div>
</template>
<script>
     const cpn={
        template:'#cpn'
     }
     let vm = new Vue({
        el: '#app',
        data: {

        },
        components:{
            cpn
        }
     });
    </script>
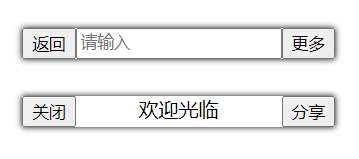
具名插槽
div id ="app">
        <cpn>
            <!-- 在使用出引用 slot="" -->
            <button slot="left">返回</button>
            <input slot="center" type="text" placeholder="请输入">
            <button slot="right">更多</button>
        </cpn>
        <cpn>
            <button slot="left">关闭</button>
            <div slot="center">欢迎光临</div>
            <button slot="right">分享</button>
        </cpn>

    </div>
    <template id="cpn">
        <div class="nav-bar">
            <!-- 具名插槽 -->
            <slot name="left"></slot>
            <slot name="center"></slot>

            <slot name="right"></slot>

        </div>
    </template>
作用域插槽 (有名字,带数据)
父组件替换插槽的标签,内容由子组件决定
内容在子组件,需要父组件告诉如何处理
<slot :data=“”>传递给 <cpn v-slot=“slot”>
接收数据
- 自定义接收所有数据 <template #content=“Obj”>
- 解构参数 <template #content=“{ msg, name }”>

	<div id ="app">
         <!-- 2.6以上废弃 slot-scoped  使用 v-slot-->
        <cpn v-slot="slot">
            <!-- 必要的template -->
            <template>
                <!-- slot获取插槽,data获取插槽的data属性 ,-->
                <h3 v-for="item in slot.data">{{item}}</h3>
            </template>
        </cpn>
    </div>
    <template id="cpn">
        <div>
            <ul>
                <li v-for="item  in star">{{item}}</li>
            </ul>
            <!-- :data名字任意 person获取data()的数据 -->
            <slot :data="star"></slot>
        </div>
    </template>
    <script>
    const cpn={
        template:'#cpn',
        data(){
            return{
                star:['刘德华','梁朝伟','大番薯','张国荣']
            }
        }
    }
     let vm = new Vue({
        el: '#app',
        data: {
        },
        components:{
            cpn
        }
     });
    </script>
递归组件
内置组件
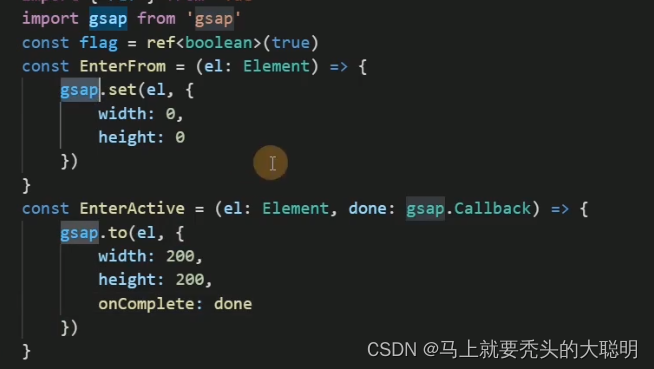
transition
生命周期
<Transition
  @before-enter="onBeforeEnter"
  @enter="onEnter"
  @after-enter="onAfterEnter"
  @enter-cancelled="onEnterCancelled"
  @before-leave="onBeforeLeave"
  @leave="onLeave"
  @after-leave="onAfterLeave"
  @leave-cancelled="onLeaveCancelled"
>
  <!-- ... -->
</Transition>
// 在元素被插入到 DOM 之前被调用
// 用这个来设置元素的 "enter-from" 状态
function onBeforeEnter(el) {},

// 在元素被插入到 DOM 之后的下一帧被调用
// 用这个来开始进入动画
function onEnter(el, done) {
  // 调用回调函数 done 表示过渡结束
  // 如果与 CSS 结合使用,则这个回调是可选参数
  done()
}

// 当进入过渡完成时调用。
function onAfterEnter(el) {}
function onEnterCancelled(el) {}

// 在 leave 钩子之前调用
// 大多数时候,你应该只会用到 leave 钩子
function onBeforeLeave(el) {}

// 在离开过渡开始时调用
// 用这个来开始离开动画
function onLeave(el, done) {
  // 调用回调函数 done 表示过渡结束
  // 如果与 CSS 结合使用,则这个回调是可选参数
  done()
}

// 在离开过渡完成、
// 且元素已从 DOM 中移除时调用
function onAfterLeave(el) {}

// 仅在 v-show 过渡中可用
function leaveCancelled(el) {}
配合动画库使用
TransitionGroup
Vuex
state
相当于data 用于保存数据
访问state
通过$store.commit 触发定义在mutations中的方法
Home.vue
<template>
  <div>
    <button @click="mul">按钮{{$store.state}} </button>
    <h2>{{$store.state.count}}</h2>
    <h2>{{count}}</h2>
  </div>
</template>
<script>
export default {
  methods: {
    mul(){
      this.$store.commit('add')
    }
  },
}
</script>
main.js
const store= new Vuex.Store({
  state:{
    count:0
  },
  mutations:{
    add(state){
      state.count++
    }
  },
})
mapState 组件中访问state的第二种方式
将mutations函数映射为当前组件的computed函数

<template>
  <div>
    <button @click="mul">按钮{{$store.state}} </button>
    <h2>{{$store.state.count}}</h2>
    <h2>{{count}}</h2>
  </div>
</template>

<script>
import { mapState } from 'vuex'

export default {
  methods: {
    // 使用方法调用mutations方法
    mul(){
      this.$store.commit('add')
    }
  },
  computed:{
    // 获取state的值
    ...mapState(['count']),
  }
}
mutations
在mutations中定义方法
在使用时调用this.$state.commit(params)
main.js
const store= new Vuex.Store({
  state:{
    count:0
  },
  mutations:{
    add(state){
      state.count++
    }
  }
})
更改state的唯一方式 提交mutation
$store.commit(mutation)
Home.vue
  methods: {
    add(){
      this.$store.commit('add')
    }
  }
mapMutations() 调用mutations第二种方式
import { mapMutations } from 'vuex'
将mutations函数 映射为当前组件的methods函数
在使用mutations处导入mapMutations
import { mapMutations } from 'vuex'

export default {
  methods: {
    ...mapMutations(['add']),
    mul(){
      // 调用mutations中的add函数
      this.add()
    }
  },
}
const store= new Vuex.Store({
  state:{
    count:0
  },
  mutations:{
    add(state){
      state.count++
    }
  },

})


actions 异步处理mutations
- 异步操作处理数据必须使用actions
- 仍旧通过mutations间接操作数据 通过context.commit(‘’)
- 使用this.$store.dispatch(‘decAsync’) 使用

const store= new Vuex.Store({
  state:{
    count:0
  },
  mutations:{
    add(state){
      state.count++
    }
  },
  actions:{
    // 异步操作数据必须使用actions 仍然需要通过mutations间接改变数据
    decAsync(context){
      setTimeout(() => {
        console.log(context);
        context.commit('dec')
      }, 1500);
    }
})
methods: {
    handle(){
      //触发actions 异步操作
      this.$store.dispatch('decAsync')
    }
  }
mapActions 调用actions的第二种方式
import { mapActions} from 'vuex'
将actions映射为组件的methods
也可以直接使用映射过来的方法
<button @click="decAsync">减少{{$store.state}}</button>
import { mapState,mapActions } from 'vuex'

export default {
  methods: {
    ...mapActions(['decAsync']),
  },
}
  actions:{
    // 异步操作数据必须使用actions 仍然需要通过mutations间接改变数据
    decAsync(context){
      setTimeout(() => {
        context.commit('dec')
      }, 1500);
    }
  }
Getter
用于对Store数据进行加工处理
- 不会修改state中的数据,仅对state包装处理

调用$store.getters中的函数
<h2>{{$store.getters.multiple}}</h2>
  getters:{
    multiple(state){
      return  '1*10 ' +state.count*10
    }
  }
mapGetter getter第二种方式
import { mapGetters } from 'vuex'
<h2>{{multiple}}</h2>
  computed:{
    ...mapGetters(['multiple'])
  }
modules
当state中数据过多时,单一的文件不易维护
因此可以将不同的store封装成独立的模块
home.js home模块
const Home={
    namespaced:true,
    state:{
        username:'xwt',
        age:18
    },
    mutations:{},
    getters:{},
    actions:{},
    modules:{}
}
export default Home
car.js
const Car={
    namespaced:true,
    state:{},
    mutations:{},
    getters:{},
    actions:{},
    modules:{}
}
export default Car
main.js 根store
import Car from './store/cart'
import Home from './store/home'
const store= new Vuex.Store({
  state:{},
  mutations:{},
  actions:{},
  getters:{},
  modules:{
    homeModule:Home,
    carModule:Car
  }
})
调用模块

<button @click="$store.commit('carModule/add')">psuh</button>
    <div>{{$store.state.carModule}}</div>
const Car={
    namespaced:true,
    state:{
        Purchase:['香蕉','苹果'],
        num:0
    },
    mutations:{
        add(state){
            state.Purchase.push('牛奶')
        }
    },
    getters:{},
    actions:{},
    modules:{}
}
export default Car
样式冲突
style scoped
在使用组件时,css可能重复导致样式的覆盖
style scoped
本质上为每个标签添加了自定义属性 data-v 使选择样式唯一
.header[data-1] 为包含data-1属性的header类添加样式
/deep/ 深度选择器 (父组件修改子组件样式)
/deep/ h5 查找为 [属性] 标签

global 全局选择器

:slotted 插槽选择器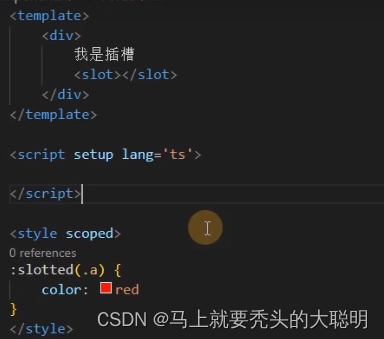
axios 全局配置(挂载到Vue原型中)
将axios挂载到Vue原型
在main.js 为Vue实例添加axios到原型中
使用时 this.axios

默认路径与缺点

request封装
可以将不同请求封装成独立js文件

记事本实例
<body>
    <h1>记事本</h1>
    <div class="container">
        <input type="text" @keyup.enter="addList" v-model="value" placeholder="请输入">
        <ul>
            <li v-for="(items,index) in List">
                    <span>{{index+1}}</span>
                    {{List[index]}}
                    <span  @click="remove(index)" class="remove">x</span>
            </li>
        </ul>
        <li class="left" v-show="List.length>0" >//List数组长度大于0
                    <span > {{List.length+' left in items'}} </span>
                    <span @click="clear">clear</span>
        </li>
    </div>
</body>
<script>
    let app=new Vue({
        el:".container",
        data:{
            List:["起床","刷牙洗脸","吃早饭","上课"],
            value:""
        },
        methods:{
            addList:function(){
                if(this.value!="")
                this.List.push(this.value)  //在队尾插入v-model值
                this.value="";
            },
            remove:function(index){         //需要传参index
                console.log(index);
                this.List.splice(index,1)  //这里写错了shift固定删除第一个,应该使用splice(开始位置,几位)
            },
            clear:function(){
                this.List=[]                //清空数组
            }
        }
    })
</script>

天气预报
<body>
    <div class="container">
        <h1>天知道</h1>
        <div class="input-form">
            <input type="text" placeholder="请输入城市" v-model="city" @keyup.enter="search">
            <input type="button" value="搜索"  @click="changeCity(city)" >
        </div>
        <ul class="hotCity">
            <li @click="changeCity('北京')">北京</li>
            <li @click="changeCity('上海')">上海</li>
            <li @click="changeCity('广州')">广州</li>
            <li @click="changeCity('深圳')">深圳</li>
        </ul>
        <div class="wheather">
            <div class="wheatherList" v-for="items in weatherList" >
                <h2>{{items.type}}</h2>
                <span>{{items.low}}  {{items.high}}</span>
                <span>{{items.date}}</span>
            </div>


        </div>
    </div>

</body>
<script>
    let app=new Vue({
        el:".container",
        data:{
            city:'',
            weatherList:[]
        },
        methods: {
            search:function(){
                console.log(this);      //this 指向vue
                var that=this;

                axios.get("http://wthrcdn.etouch.cn/weather_mini?city="+this.city)
                .then(function(res){
                    console.log(this);  //this 指向window
                    that.weatherList=res.data.data.forecast;   //回调函数这里的this和search函数的this不一样,应该保存上一次的this才能得到正确的数据
                    // console.log(res.data.data.forecast);
                },function(err){
                    console.log(err);
                })
            },
            changeCity:function(city){
                this.city=city;
                this.search();          //this指向vue整个项目,所以能够执行search方法
            }
        },
    })
</script>

Tabbar
准备
- vue init webpack tabbar
- 删除不必要的文件
- npm run dev
模块化
- 将html css代码抽取到独立vue文件
- 新建组件文件用于用插槽替换
Vue2
Filters
私用过滤器
常用于文本格式化 用于插值表达式和v-bind
与el,data同级 申明filters:{} 将方法定义到filters
filters本质是个函数 必须有返回值
<div id="app">
        // 插值 v-bind
        //  mes为uppercase方法的形参   值 | 方法
        <p>{{mes | uppercase}}</p>
    </div>
    <script>
        new Vue({
            el:'#app',
            data() {
                return {
                    mes:'hello filters'
                }
            },
            filters:{
                // 用任意值接收mes
                uppercase(val){
                    return val.toUpperCase()
                }
            }
        })
    </script>
全局过滤器
私有过滤器只能在filters定义的实例内使用
Vue.filter() 定义全局过滤器 1.过滤器名 2.回调函数
全局过滤器和私有过滤器命名冲突时,就近原则
<div id="app">
        <!-- // 插值 v-bind -->
        <!-- mes为uppercase方法的形参   值 | 方法 -->
        <p>{{mes | uppercase}}</p>
        <p>{{Info | lowercase}}</p> 就近原则使用私有过滤器
    </div>
    <div id="app2">
        <!-- <p>{{mes | uppercase}}</p>  无法被app1中的过滤器所执行  -->
        <p>{{Info | lowercase}}</p> 全局过滤器
    </div>
    <script>
        // 参数     1.过滤器名  2.回调函数
        Vue.filter('lowercase',function(val){
            return val.toLowerCase()+'全局'
        })
        new Vue({
            el:'#app',
            data() {
                return {
                    mes:'hello filters',
                    Info:'Info'
                }
            },
            filters:{
                // 用任意值接收mes
                uppercase(val){
                    return val.toUpperCase()
                },
                lowercase(val){
                    return val.toLowerCase()
                }
            }
        })
        new Vue({
            el:'#app2',
            data(){
                return{
                    Info:'Info'
                }
            },

        })
    </script>
可连续调用

传参

Problems
Vue中赋值会变为双向绑定
	handleEdit(index, row) {
      this.EditFormVisible = true;
      //  绑定row会影响编辑与展示
      // this.editInfo = row;
      this.editInfo=JSON.parse(JSON.stringify(row))
      console.log(index, row);
    }
解决:
将v-model JSON.parse(JSON.stringify())
相同组件路由跳转不会重复创建
vue会复用相同组件,不重新创建
解决:
1.在routeview中添加 :key=“$route.path”
2. 使用watch 监听路由变化
深拷贝
res.data.data
在使用ElementUi,Cascader时,想要为两个选择器赋予不同值,
但实际上他们被赋予了相同的地址,可以理解为绑定了this.data 使用
JSON.parse(JSON.stringify) 取消深拷贝
this.seOptions=res.data.data
let arr = res.data.data;
arr.unshift({ label: "全选", value: "全选" });
this.options = arr;

$route监听
立即执行侦听器
  watch: {
    $route: {
      handler() {
        if (this.currentView == "Left" && this.$route.path == "/category")
          this.currentView = "typeLeft";
      },
      immediate: true,
    },
  },
$router.resolve
Vue 中没有新窗口Api
let {href} =this.$router.resolve({
	path:''
})
window.open(href,'_blank')


 3961
3961


 被折叠的 条评论
为什么被折叠?
被折叠的 条评论
为什么被折叠?
 到【灌水乐园】发言


