


checkBox
imageView
ArrayAdapter
SimpleAdapter
checkBox
1.checkBox比较简单,一般用于多属性的选择,例如一个人的爱好有好多种(打篮球,跑步,打游戏等),这种情况下就不用RadioButton了,就用checkBox
2.下面代码是checBox的一般应用
<LinearLayout
        android:layout_width="match_parent"
        android:layout_height="wrap_content"
        android:orientation="vertical"
        >
        <TextView
            android:layout_width="wrap_content"
            android:layout_height="wrap_content"
            android:text="爱好"
            />
        <CheckBox
            android:id="@+id/checkbox_basketball"
            android:layout_width="wrap_content"
            android:layout_height="wrap_content"
            android:text="篮球"
            />
        <CheckBox
            android:id="@+id/checkbox_pingpang"
            android:layout_width="wrap_content"
            android:layout_height="wrap_content"
            android:text="乒乓球"
            />
        <CheckBox
            android:id="@+id/checkbox_soccer"
            android:layout_width="wrap_content"
            android:layout_height="wrap_content"
            android:text="足球"
            />
        <CheckBox
            android:id="@+id/checkbox_badminton"
            android:layout_width="wrap_content"
            android:layout_height="wrap_content"
            android:text="羽毛球"
            />
        <CheckBox
            android:id="@+id/checkbox_football"
            android:layout_width="wrap_content"
            android:layout_height="wrap_content"
            android:text="橄榄球"
            />
        <EditText
            android:id="@+id/editext_password"
            android:layout_width="match_parent"
            android:layout_height="wrap_content"
            android:password="true"
            />
        <CheckBox
            android:id="@+id/checkbox_isshow"
            android:layout_width="wrap_content"
            android:layout_height="wrap_content"
            android:text="显示密码"
            android:layout_gravity="right"
            />
    </LinearLayout>
3.布局效果为
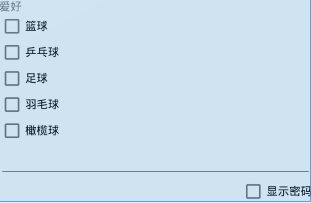
4.可以在上面显示密码上添加点击事件,选中则代表显示密码,
mCheckBoxIsShow.setOnCheckedChangeListener(new CompoundButton.OnCheckedChangeListener() {
            @Override
            public void onCheckedChanged(CompoundButton buttonView, boolean isChecked) {
                if(isChecked){
                    mEditTextPassword.setTransformationMethod(null);
                }else{
                    mEditTextPassword.setTransformationMethod(new PasswordTransformationMethod());
                }
            }
        });
5.选中多个checkBox可以用ArrayList数组对选中的数据进行封装,然后输出所选择的内容
代码实现入下:先创建一个button然后点击提交就会打印所选中的内容
mButtonSubmit.setOnClickListener(new View.OnClickListener() {
            @Override
            public void onClick(View v) {
                int checkedId=mRadioGroup.getCheckedRadioButtonId();
                RadioButton rb= (RadioButton) findViewById(checkedId);
                Log.d("job","选择的工作是:"+rb.getText());
                ArrayList<String> hobbys=new ArrayList<String>();
                if(mCheckBoxBasketball.isChecked()){
                    hobbys.add("篮球");
                }
                if(mCheckBoxSoccer.isChecked()){
                    hobbys.add("足球");
                }
                if(mCheckBoxFootball.isChecked()){
                    hobbys.add("橄榄球");
                }
                if(mCheckBoxBadminton.isChecked()){
                    hobbys.add("羽毛球");
                }
                if(mCheckBoxPingpang.isChecked()){
                    hobbys.add("乒乓球");
                }
                for(String hobby:hobbys){
                    Log.d("hobby","我的爱好有"+hobby);
                }
            }
        });
imageView
1.image用于显示图片,属于简单的应用
2.xml例子
<?xml version="1.0" encoding="utf-8"?>
<ScrollView xmlns:android="http://schemas.android.com/apk/res/android"
    android:orientation="vertical"
    android:layout_width="match_parent"
    android:layout_height="match_parent">
    <LinearLayout
        android:layout_width="match_parent"
        android:layout_height="match_parent"
        android:orientation="vertical"
        >
        <ImageView
            android:id="@+id/image_mumu"
            android:layout_width="match_parent"
            android:layout_height="wrap_content"
            android:src="@mipmap/mumu"
            android:scaleType="center"

            />
        <LinearLayout
            android:layout_width="wrap_content"
            android:layout_height="wrap_content">
            <Button
                android:id="@+id/button_alpha_add"
                android:layout_width="wrap_content"
                android:layout_height="wrap_content"
                android:text="增加透明度"/>
            <Button
                android:id="@+id/button_alpha_sub"
                android:layout_width="wrap_content"
                android:layout_height="wrap_content"
                android:text="降低透明度"/>
        </LinearLayout>
        <ImageView
            android:layout_width="match_parent"
            android:layout_height="wrap_content"
            android:src="@mipmap/mumu"
            android:scaleType="centerCrop"
            />
        <ImageView
            android:layout_width="match_parent"
            android:layout_height="wrap_content"
            android:src="@mipmap/mumu"
            android:scaleType="centerInside"
            android:background="@mipmap/mumumu"
            />
        <ImageView
            android:layout_width="match_parent"
            android:layout_height="wrap_content"
            android:src="@mipmap/mumu"
            android:scaleType="fitCenter"
            android:tint="#55FF0000"
            />
        <ImageView
            android:layout_width="match_parent"
            android:layout_height="wrap_content"
            android:src="@mipmap/mumu"
            android:scaleType="fitEnd"
            />
        <ImageView
            android:layout_width="match_parent"
            android:layout_height="wrap_content"
            android:src="@mipmap/mumu"
            android:scaleType="fitStart"
            />
        <ImageView
            android:layout_width="match_parent"
            android:layout_height="wrap_content"
            android:src="@mipmap/mumu"
            android:scaleType="fitXY"
            />
        <ImageView
            android:layout_width="match_parent"
            android:layout_height="wrap_content"
            android:src="@mipmap/mumu"
            android:scaleType="matrix"
            />
    </LinearLayout>
</ScrollView>
3.增加透明度和减少透明度的程序为:
package com.my.twentyoneaug;

import android.annotation.TargetApi;
import android.app.Activity;
import android.os.Build;
import android.os.Bundle;
import android.util.Log;
import android.view.View;
import android.widget.Button;
import android.widget.ImageView;

/**
 * Created by Administrator on 2015/8/24.
 */
public class ImageViewTest extends Activity implements View.OnClickListener{
    private ImageView mImageView;
    private Button mButtonAdd;
    private Button mButtonSub;
    private int mAlphaCount;
    @Override
    protected void onCreate(Bundle savedInstanceState) {
        super.onCreate(savedInstanceState);
        setContentView(R.layout.activity_imageview);
        mImageView= (ImageView) findViewById(R.id.image_mumu);
        mButtonAdd= (Button) findViewById(R.id.button_alpha_add);
        mButtonSub= (Button) findViewById(R.id.button_alpha_sub);
        mButtonAdd.setOnClickListener(this);
        mButtonSub.setOnClickListener(this);
        mImageView.setImageResource(R.mipmap.mumumu);
    }

    @TargetApi(Build.VERSION_CODES.JELLY_BEAN)
    @Override
    public void onClick(View v) {
        int code=Build.VERSION.SDK_INT;
        switch (v.getId()){
            case R.id.button_alpha_add:
                if(code<16){
                mAlphaCount+=5;
                    Log.d("versioncode","当前版本号是:"+code);
                mImageView.setAlpha(mAlphaCount);
                }else{
                    mAlphaCount+=5;
                    mImageView.setImageAlpha(mAlphaCount);
                }
                break;
            case R.id.button_alpha_sub:
                if(code>16){
                    mAlphaCount-=5;
                    mImageView.setAlpha(mAlphaCount);
                }else{
                    mAlphaCount-=5;
                    mImageView.setImageAlpha(mAlphaCount);
                }
                break;
            default:
                break;
        }

    }
}
ArrayAdapter
1.arrayAdapter是最简单的一种Adapter,它创建的步骤是:
(1)提供一个数据源一个String的数据即可
(2)创建一个LinearLayout,里面填写一个空白的ListView来当做接受数据的容器
(3)调用该方法:ArrayAdapter adapter=new ArrayAdapter(this,android.R.layout.simple_list_item_1,array);其中android.R.layout.simple_list_item_1是系统自带的布局模式,用来当做数据的模板,可以用四个字来概括:简单粗暴
2.程序代码如下,
public class ListViewActivityTest extends Activity {
    private ListView mListView;
    private String[] array={"tom","jim","kitty","json"};
    @Override
    protected void onCreate(Bundle savedInstanceState) {
        super.onCreate(savedInstanceState);
        setContentView(R.layout.activity_listview);
        mListView= (ListView) findViewById(R.id.listview);
        ArrayAdapter<String> adapter=new ArrayAdapter<String>(this,android.R.layout.simple_list_item_1,array);
        mListView.setAdapter(adapter);
}
simpleAdapter
1.simpleAdapter是用起来很麻烦的一种Adapter因此只需要了解怎么回事就可以了
2.simpleAdapter的创建步骤为
(1)创建一个LinearLayout,里面填写一个空白的ListView来当做接受数据的容器
(2)创建一个自定义的模板,用来布局数据显示的格式
(3)传入数据,由于传入的数据必须是List类型,而且还得的是hashMap类型,因此在定义数据的时候要定义为private List
public class ListViewActivityTest extends Activity {
    private ListView mListView;
    private List<HashMap<String,String>> mData;
    @Override
    protected void onCreate(Bundle savedInstanceState) {
        super.onCreate(savedInstanceState);
        setContentView(R.layout.activity_listview);
        mListView= (ListView) findViewById(R.id.listview);
initDat();
    SimpleAdapter adapter=new SimpleAdapter(this,mData,R.layout.item_simple_adapter,new String[]{"name","age","sex","hobby"},new int[]{R.id.textview_name,R.id.textview_age,R.id.textview_sex,R.id.textview_hobby});
   mListView.setAdapter(adapter);
  //      下面是点击事件
        mListView.setOnItemClickListener(new AdapterView.OnItemClickListener() {
            @Override
            public void onItemClick(AdapterView<?> parent, View view, int position, long id) {
                HashMap<String,String> itemData=mData.get(position);
                Log.d("data",""+itemData.get("name")+itemData.get("age")+itemData.get("sex")+itemData.get("hobby"));
            }
        });
    private void initDat() {
        mData=new ArrayList<>();
        HashMap<String,String> zhangsan=creatHashMap("张三","18","男","足球");
        mData.add(zhangsan);
        HashMap<String,String> lisi=creatHashMap("李四","19","男","蓝球");
        mData.add(lisi);
        HashMap<String,String> wangwu=creatHashMap("王五","20","男","羽毛球");
        mData.add(wangwu);
        HashMap<String,String> zhaoliu=creatHashMap("赵六","21","男","台球");
        mData.add(zhaoliu);
        HashMap<String,String> tom=creatHashMap("赵六","21","男","台球");
        mData.add(tom);
        HashMap<String,String> jim=creatHashMap("赵六","21","男","台球");
        mData.add(jim);
        HashMap<String,String> kitty=creatHashMap("赵六","21","男","台球");
        mData.add(kitty);
        HashMap<String,String> json=creatHashMap("赵六","21","男","台球");
        mData.add(json);
    }
    private HashMap<String,String> creatHashMap(String name,String age,String sex,String hobby){
        HashMap<String,String> man=new HashMap<>();
        man.put("name",name);
        man.put("age",age);
        man.put("sex",sex);
        man.put("hobby",hobby);
        return man;
    }
}
XMl代码是
<?xml version="1.0" encoding="utf-8"?>
<LinearLayout xmlns:android="http://schemas.android.com/apk/res/android"
    android:orientation="vertical"
    android:layout_width="match_parent"
    android:layout_height="match_parent"
    android:layout_margin="20dp"
    android:gravity="center_vertical"
    >

    <LinearLayout
        android:layout_width="match_parent"
        android:layout_height="wrap_content"
        android:gravity="center_vertical"
        >
        <ImageView
            android:id="@+id/imageview_photo"
            android:layout_width="100dp"
            android:layout_height="100dp" />
        <TextView
            android:id="@+id/textview_name"
            android:layout_width="wrap_content"
            android:layout_height="wrap_content"
            android:text="姓名"
            android:textColor="@color/blue"/>
        <LinearLayout
            android:layout_width="wrap_content"
            android:layout_height="wrap_content"
            android:orientation="vertical"
            android:layout_margin="10dp">
            <TextView
                android:id="@+id/textview_age"
                android:layout_width="wrap_content"
                android:layout_height="wrap_content"
                android:text="年龄"
                android:textColor="@color/red"/>
            <TextView
                android:id="@+id/textview_sex"
                android:layout_width="wrap_content"
                android:layout_height="wrap_content"
                android:text="性别"
                android:textColor="@color/dameinong"/>
        </LinearLayout>
        <TextView
             android:id="@+id/textview_hobby"
             android:layout_width="wrap_content"
             android:layout_height="wrap_content"
             android:text="爱好"
            android:textColor="@color/black"/>
    </LinearLayout>
</LinearLayout>


 647
647


 被折叠的 条评论
为什么被折叠?
被折叠的 条评论
为什么被折叠?
 到【灌水乐园】发言


