


目录
一.command,shell,raw,script模块的作用和区别
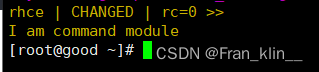
1.command 模块的使用: 去执行一个脚本文件command.sh, command.sh文件的功能是echo "I am command module"
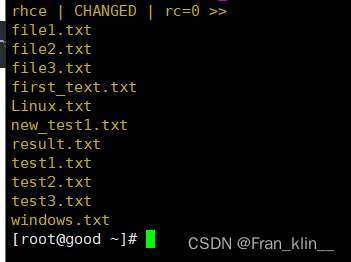
2.shell模块执行命令 ls /root | grep txt
4.script模块执行 script.sh文件,文件的内容为 echo "I am script module"
1.创建文件,并指定用户,用户组为student, 且权限为600
2.创建目录,并指定用户,用户组为student, 且权限为755
一.command,shell,raw,script模块的作用和区别
1.command 模块的使用: 去执行一个脚本文件command.sh, command.sh文件的功能是echo "I am command module"
| 名称 | 必选 | 备注 |
| chdir | no | 运行command命令前先cd到这个目录 |
| creates | no | 如果这个参数对应的文件存在,就不运行command |
| free_form | yes | 需要执行的脚本(没有真正的参数为free_form) |
| executable | no | 改变用来执行命令的shell,应该是可执行文件的绝对路径。 |
| removes | no | 如果这个参数对应的文件不存在,就不运行command,与creates参数的作用相反 |
| stdin(2.4后新增) | no | 将命令的stdin设置为指定的值 |
[root@good ~]# ansible rhce -m command -a "sh command.sh chdir=/root"
2.shell模块执行命令 ls /root | grep txt
让远程主机在shell进程下执行命令,从而支持shell的特性,如管道等。与command模块几乎相同,但在执行命令的时候使用的是/bin/sh。
| 名称 | 必选 | 备注 |
| chdir | no | 运行command命令前先cd到这个目录 |
| creates | no | 如果这个参数对应的文件存在,就不运行command |
| executable | no | 改变用来执行命令的shell,应该是可执行文件的绝对路径。 |
| free_form | yes | 需要执行的脚本(没有真正的参数为free_form) |
| removes | no | 如果这个参数对应的文件不存在,就不运行command,与creates参数的作用相反 |
| stdin(2.4后新增) | no | 将命令的stdin设置为指定的值 |
[root@good ~]# ansible rhce -m shell -a "ls /root | grep txt chdir=/root"
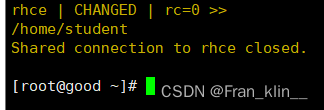
3.raw模块执行pwd命令
[root@good ~]# ansible rhce -m raw -a "pwd"
4.script模块执行 script.sh文件,文件的内容为 echo "I am script module"
先把script.sh文件内容链接到远程主机
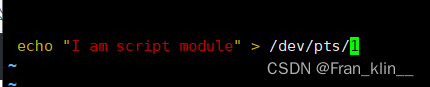
[root@good ~]# ansible rhce -m script -a "script.sh chdir=/root"
rhce | CHANGED => {
    "changed": true,
    "rc": 0,
    "stderr": "Shared connection to rhce closed.\r\n",
    "stderr_lines": [
        "Shared connection to rhce closed."
    ],
    "stdout": "",
    "stdout_lines": []
}
可在远程主机看到已执行

二.file模块:
1.创建文件,并指定用户,用户组为student, 且权限为600
[root@rhcsa ~]# ansible rhel -m file -a "path=/home/student/test2.txt owner=student group=student mode=600 state=touch"
rhel | CHANGED => {
    "ansible_facts": {
        "discovered_interpreter_python": "/usr/libexec/platform-python"
    },
    "changed": true,
    "dest": "/home/student/test2.txt",
    "gid": 2002,
    "group": "student",
    "mode": "0600",
    "owner": "student",
    "secontext": "unconfined_u:object_r:user_home_t:s0",
    "size": 0,
    "state": "file",
    "uid": 2002
}
2.创建目录,并指定用户,用户组为student, 且权限为755
[root@rhcsa ~]# ansible rhel -m file -a "path=/home/student/test_dir owner=student group=student mode=755 state=directory"
rhel | CHANGED => {
    "ansible_facts": {
        "discovered_interpreter_python": "/usr/libexec/platform-python"
    },
    "changed": true,
    "gid": 2002,
    "group": "student",
    "mode": "0755",
    "owner": "student",
    "path": "/home/student/test_dir",
    "secontext": "unconfined_u:object_r:user_home_t:s0",
    "size": 6,
    "state": "directory",
    "uid": 2002
}
3.创建链接文件
[root@rhcsa ~]# ansible rhel -m file -a "path=/home/student/test4.txt src=test2.txt state=link"
rhel | CHANGED => {
    "ansible_facts": {
        "discovered_interpreter_python": "/usr/libexec/platform-python"
    },
    "changed": true,
    "dest": "/home/student/test4.txt",
    "gid": 0,
    "group": "root",
    "mode": "0777",
    "owner": "root",
    "secontext": "unconfined_u:object_r:user_home_t:s0",
    "size": 9,
    "src": "test2.txt",
    "state": "link",
    "uid": 0
}
4.删除第一个创建的文件
[root@rhcsa ~]# ansible rhel -m file -a "path=/home/student/test2.txt state=absent"
rhel | CHANGED => {
    "ansible_facts": {
        "discovered_interpreter_python": "/usr/libexec/platform-python"
    },
    "changed": true,
    "path": "/home/student/test2.txt",
    "state": "absent"
}
三.copy模块
1.复制文件
[root@rhcsa ~]# ansible rhel -m copy -a "src=/root/test.txt dest=/home/student"
rhel | CHANGED => {
    "ansible_facts": {
        "discovered_interpreter_python": "/usr/libexec/platform-python"
    },
    "changed": true,
    "checksum": "da39a3ee5e6b4b0d3255bfef95601890afd80709",
    "dest": "/home/student/test.txt",
    "gid": 0,
    "group": "root",
    "md5sum": "d41d8cd98f00b204e9800998ecf8427e",
    "mode": "0644",
    "owner": "root",
    "secontext": "unconfined_u:object_r:user_home_t:s0",
    "size": 0,
    "src": "/home/student/.ansible/tmp/ansible-tmp-1659519729.6693015-3382-265136890969898/source",
    "state": "file",
    "uid": 0
}
2.复制目录
[root@rhcsa test_dir]# ansible rhel -m copy -a "src=/root/test_dir dest=/home/student"
rhel | CHANGED => {
    "ansible_facts": {
        "discovered_interpreter_python": "/usr/libexec/platform-python"
    },
    "changed": true,
    "checksum": "da39a3ee5e6b4b0d3255bfef95601890afd80709",
    "dest": "/home/student/test_dir/666.xt",
    "gid": 0,
    "group": "root",
    "md5sum": "d41d8cd98f00b204e9800998ecf8427e",
    "mode": "0644",
    "owner": "root",
    "secontext": "unconfined_u:object_r:user_home_t:s0",
    "size": 0,
    "src": "/home/student/.ansible/tmp/ansible-tmp-1659521079.1086252-4202-160722513414600/source",
    "state": "file",
    "uid": 0
}
四.fetch模块
1.从被控制主机上取文件
[root@rhcsa test_dir]# ansible rhel -m fetch -a "dest=/root src=/home/student/test4.txt"
rhel | CHANGED => {
    "changed": true,
    "checksum": "da39a3ee5e6b4b0d3255bfef95601890afd80709",
    "dest": "/root/rhel/home/student/test4.txt",
    "md5sum": "d41d8cd98f00b204e9800998ecf8427e",
    "remote_checksum": "da39a3ee5e6b4b0d3255bfef95601890afd80709",
    "remote_md5sum": null
}
五.synchronize模块
1.pull: 从被控制主机上拉取目录
[root@rhcsa student]# ansible rhel -m synchronize -a "src=/home/student/test2_dir dest=/home/student mode=pull"
rhel | CHANGED => {
    "changed": true,
    "cmd": "/usr/bin/rsync --delay-updates -F --compress --archive --rsh='/usr/bin/ssh -S none -o StrictHostKeyChecking=no -o UserKnownHostsFile=/dev/null' --rsync-path='sudo -u root rsync' --out-format='<<CHANGED>>%i %n%L' student@rhel:/home/student/test2_dir /home/student",
    "msg": "cd+++++++++ test2_dir/\n>f+++++++++ test2_dir/d\n>f+++++++++ test2_dir/e\n",
    "rc": 0,
    "stdout_lines": [
        "cd+++++++++ test2_dir/",
        ">f+++++++++ test2_dir/d",
        ">f+++++++++ test2_dir/e"
    ]
}
2.push:往被控制主机上推送目录
[root@rhcsa ~]# ansible rhel -m synchronize -a "src=/root/test6_dir dest=/home/student mode=push"
rhel | CHANGED => {
    "changed": true,
    "cmd": "/usr/bin/rsync --delay-updates -F --compress --archive --rsh='/usr/bin/ssh -S none -o StrictHostKeyChecking=no -o UserKnownHostsFile=/dev/null' --rsync-path='sudo -u root rsync' --out-format='<<CHANGED>>%i %n%L' /root/test6_dir student@rhel:/home/student",
    "msg": "cd+++++++++ test6_dir/\n",
    "rc": 0,
    "stdout_lines": [
        "cd+++++++++ test6_dir/"
    ]
}


 2076
2076


 被折叠的 条评论
为什么被折叠?
被折叠的 条评论
为什么被折叠?
 到【灌水乐园】发言


