


两种部署方式:
一、 手工搭建
分析:最终效果,通过Nginx搭建两个网站blog和zh,通过域名访问。在lnmp的基础上,域名访问,要么搭建DNS服务器,要么修改主机hosts文件。
1、安装Nginx:
进入yum目录配置网络源,Nginx官网、清华源均可,以清华源为例。

添加以下内容:
[base]
name=CentOS-\$releasever - Base
baseurl=https://mirrors.tuna.tsinghua.edu.cn/centos/\$releasever/os/\$basearch/
enabled=1
gpgcheck=0

#released updates
[updates]
name=CentOS-\$releasever - Updates
baseurl=https://mirrors.tuna.tsinghua.edu.cn/centos/\$releasever/updates/\$basearch/
#baseurl=https://mirrors.aliyun.com/centos/\$releasever/updates/\$basearch/
#mirrorlist=http://mirrorlist.centos.org/?release=\$releasever&arch=\$basearch&repo=updates
enabled=1
gpgcheck=0

#additional packages that may be useful

[centosplus]
name=CentOS-\$releasever - Plus
baseurl=https://mirrors.tuna.tsinghua.edu.cn/centos/\$releasever/centosplus/\$basearch/
#baseurl=https://mirrors.aliyun.com/centos/\$releasever/centosplus/\$basearch/
#mirrorlist=http://mirrorlist.centos.org/?release=\$releasever&arch=\$basearch&repo=centosplus
enabled=1
gpgcheck=0

[cloud]
name=CentOS-\$releasever - Cloud
baseurl=https://mirrors.tuna.tsinghua.edu.cn/centos/\$releasever/cloud/\$basearch/openstack-train/
#baseurl=https://mirrors.aliyun.com/centos/\$releasever/cloud/\$basearch/openstack-train/
enabled=1
gpgcheck=0

[paas]
name=CentOS-\$releasever - paas
baseurl=https://mirrors.tuna.tsinghua.edu.cn/centos/\$releasever/paas/\$basearch/openshift-origin13/
#baseurl=https://mirrors.aliyun.com/centos/\$releasever/paas/\$basearch/openshift-origin13/
enabled=1
gpgcheck=0

[kvm]
name=CentOS-\$releasever - kvm
baseurl=https://mirrors.tuna.tsinghua.edu.cn/centos/\$releasever/virt/\$basearch/kvm-common/
#baseurl=https://mirrors.aliyun.com/centos/\$releasever/virt/\$basearch/kvm-common/
enabled=1
gpgcheck=0

[extras]
name=CentOS-\$releasever - extras
baseurl=https://mirrors.tuna.tsinghua.edu.cn/centos/\$releasever/extras/\$basearch/
#baseurl=https://mirrors.aliyun.com/centos/\$releasever/extras/\$basearch/
enabled=1
gpgcheck=0

[epel]
name=Extra Packages for Enterprise Linux 7 - $basearch
baseurl=https://mirrors.tuna.tsinghua.edu.cn/epel/7/$basearch
#mirrorlist=https://mirrors.fedoraproject.org/metalink?repo=epel-7&arch=$basearch
failovermethod=priority
enabled=1
gpgcheck=0

[epel-debuginfo]
name=Extra Packages for Enterprise Linux 7 - $basearch - Debug
baseurl=https://mirrors.tuna.tsinghua.edu.cn/epel/7/$basearch/debug
#mirrorlist=https://mirrors.fedoraproject.org/metalink?repo=epel-debug-7&arch=$basearch
failovermethod=priority
enabled=1
gpgcheck=0

[epel-source]
name=Extra Packages for Enterprise Linux 7 - $basearch - Source
baseurl=https://mirrors.tuna.tsinghua.edu.cn/epel/7/SRPMS
#mirrorlist=https://mirrors.fedoraproject.org/metalink?repo=epel-source-7&arch=$basearch
failovermethod=priority
enabled=1
gpgcheck=0

2、使用第三方扩展epel源安装PHP7.2:
rpm -Uvh https://dl.fedoraproject.org/pub/epel/epel-release-latest-7.noarch.rpm
rpm -Uvh https://mirror.webtatic.com/yum/el7/webtatic-release.rpm

 安装 php72 版本
yum -y install php72w php72w-cli php72w-common php72w-devel php72w-embedded php72w-gd php72w-mbstring php72w-pdo php72w-xml php72w-fpm php72w-mysqlnd php72w-opcache
报错:
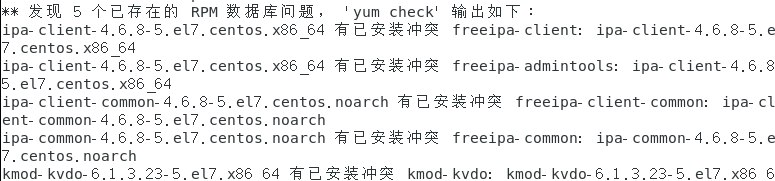
解决方案:更换网络yum源。
换成上图的。
成功如下图:

3、安装mysql(mariadb):
上传下载好的mysql文件到指定目录:


启动:lnmp
systemctl start nginx php-fpm mysqld
4.应用1:搭建wordpress
(1)下载wordpress源码包
(2)复制wordpress安装包,到虚拟机/,解压并赋权
unzip wordpress-4.9.4-zh_CN.zip
chmod -R 777 /wordpress

(3)创建虚拟主机配置文件
vim /etc/nginx/conf.d/blog.conf
添加:
server {
    listen 80;
    server_name blog.benet.com;
    root /wordpress;
    index index.php index.html;

    location ~ \.php$ {
            root /wordpress;
 最低0.47元/天 解锁文章


 384
384


 被折叠的 条评论
为什么被折叠?
被折叠的 条评论
为什么被折叠?
 到【灌水乐园】发言


