


概述:
本文讲述的是Ol3中的control的介绍和应用。
OL2和OL3 control比较:
相比较Ol2的control,OL3显得特别少,下图分别为Ol2和Ol3的control:
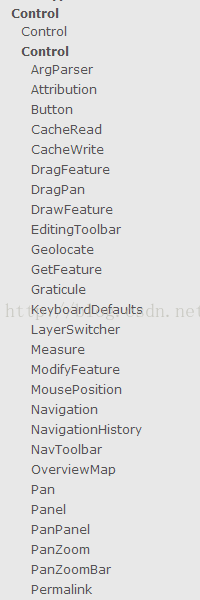
Ol2的control
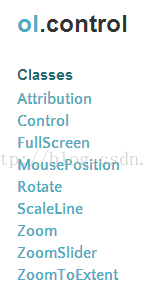
Ol3的control
相比较Ol2,OL3保留了mouseposition,scaleline,zoom,zoomslider,而将很多东西例如draw等转移到了interaction下面,下图为Ol3的interaction:

OL3中control的常用操作:
Ol3中control的常用操作包括获取control集,添加,删除。
获取control集
var controls = map.getControls();添加
map.addControl(ctrl);删除
map.removeControl(ctrl);OL3添加control示例:
下面是一个比较完成的OL3的Control的示例,
<html xmlns="http://www.w3.org/1999/xhtml">
<head>
	<meta http-equiv="Content-Type" content="text/html; charset=utf-8" />
	<title>control</title>
	<link rel="stylesheet" type="text/css" href="http://localhost/ol3/css/ol.css"/>
	<style type="text/css">
		body, #map {
			border: 0px;
			margin: 0px;
			padding: 0px;
			width: 100%;
			height: 100%;
			font-size: 13px;
		}
		#location{
			position: absolute;
			bottom: 10px;
			left: 45%;
			font-weight: bold;
			z-index: 99;
		}
		#switch{
			position:absolute;
			right:20pt;
			top:40pt;
			z-index:999;
		}
		#rotation{
			position: absolute;
			top: 10px;
			left: 45%;
			font-weight: bold;
			z-index: 99;
		}
		.ol-zoomslider{
			background: #d0e5f5;
			width: 20px;
		}
		.zoom-to-extent{
			position: absolute;
			top: 5pt;
			left: 28pt;
		}
		.map-rotate{
			position: absolute;
			top: 5pt;
			left: 45%;
		}
	</style>
	<script type="text/javascript" src="http://localhost/ol3/build/ol.js"></script>
	<script type="text/javascript" src="http://localhost/jquery/jquery-1.8.3.js"></script>
	<script type="text/javascript">
		function init(){
			var format = 'image/png';
			var bounds = [73.4510046356223, 18.1632471876417,
				134.976797646506, 53.5319431522236];
			var controls = new Array();
			//鼠标位置
			var mousePositionControl = new ol.control.MousePosition({
				className: 'custom-mouse-position',
				target: document.getElementById('location'),
				coordinateFormat: ol.coordinate.createStringXY(5),//保留5位小数
				undefinedHTML: ' '
			});
			controls.push(mousePositionControl);

			//缩放至范围
			var zoomToExtentControl = new ol.control.ZoomToExtent({
				extent: bounds,
				className: 'zoom-to-extent',
				tipLabel:"全图"
			});
			controls.push(zoomToExtentControl);

			//比例尺
			var scaleLineControl = new ol.control.ScaleLine({});
			controls.push(scaleLineControl);

			//全图
			var fullScreenControl = new ol.control.FullScreen({});
			controls.push(fullScreenControl);

			//缩放控件
			var zoomSliderControl = new ol.control.ZoomSlider({});
			controls.push(zoomSliderControl);

			var rotate = new ol.control.Rotate({
//				label:"↑",
				tipLabel:"重置",
				target:document.getElementById('rotation'),
				autoHide:false
			});
			controls.push(rotate);

			var untiled = new ol.layer.Image({
				source: new ol.source.ImageWMS({
					ratio: 1,
					url: 'http://localhost:8081/geoserver/lzugis/wms',
					params: {'FORMAT': format,
						'VERSION': '1.1.1',
						LAYERS: 'lzugis:province',
						STYLES: ''
					}
				})
			});
			var projection = new ol.proj.Projection({
				code: 'EPSG:4326',
				units: 'degrees'
			});
			var map = new ol.Map({
				controls: ol.control.defaults({
					attribution: false
				}).extend(controls),
				interactions: ol.interaction.defaults().extend([
					new ol.interaction.DragRotateAndZoom()
				]),
				target: 'map',
				layers: [
					untiled
				],
				view: new ol.View({
					projection: projection,
					rotation:-45
				})
			});
			map.getView().fitExtent(bounds, map.getSize());

			$("#setRotate").on("click",function(){
				var angle = $("#rotate").val();
				map.getView().setRotation(angle);
			});
		}
	</script>
</head>
<body onLoad="init()">
<div class="layer-change-switch" id="switch">
	<div id="slider">
		<input id="rotate" type="text" value="-45" maxlength="10" style="width: 50px;" /><button id="setRotate">旋转</button>
	</div>
</div>
<div id="map">
	<div id="rotation"></div>
	<div id="location"></div>
</div>
</body>
</html>
上述代码效果如下:

相关课程:


 1518
1518


 被折叠的 条评论
为什么被折叠?
被折叠的 条评论
为什么被折叠?
 到【灌水乐园】发言


