


转载请标明出处:
http://blog.csdn.net/hai_qing_xu_kong/article/details/50916258
本文出自:【顾林海的博客】
##前言
在上一遍《对Volley网络框架的一些理解》文章中记录一些自己刚看Volley源码时的一些内容,大体知道了从创建请求队列、添加请求到请求队列、最后请求数据的一个流程,内容比较杂乱,这边文章是今天重新看Volley源码时的一些笔记,记录的内容不是笔记系统(最主要的是对自己思路的一个总结,方便以后回头看Volley时,对当时一些思路的纠正),还望多多海涵,有不对的地方欢迎指出。
##第一次源码分析
查看Volley这个类的源码:
/*
* Copyright (C) 2012 The Android Open Source Project
*
* Licensed under the Apache License, Version 2.0 (the "License");
* you may not use this file except in compliance with the License.
* You may obtain a copy of the License at
*
* http://www.apache.org/licenses/LICENSE-2.0
*
* Unless required by applicable law or agreed to in writing, software
* distributed under the License is distributed on an "AS IS" BASIS,
* WITHOUT WARRANTIES OR CONDITIONS OF ANY KIND, either express or implied.
* See the License for the specific language governing permissions and
* limitations under the License.
*/
package com.android.volley.toolbox;
import android.content.Context;
import android.content.pm.PackageInfo;
import android.content.pm.PackageManager.NameNotFoundException;
import android.net.http.AndroidHttpClient;
import android.os.Build;
import com.android.volley.Network;
import com.android.volley.RequestQueue;
import java.io.File;
public class Volley {
/** Default on-disk cache directory. */
private static final String DEFAULT_CACHE_DIR = "volley";
/**
* Creates a default instance of the worker pool and calls {@link RequestQueue#start()} on it.
*
* @param context A {@link Context} to use for creating the cache dir.
* @param stack An {@link HttpStack} to use for the network, or null for default.
* @return A started {@link RequestQueue} instance.
*/
public static RequestQueue newRequestQueue(Context context, HttpStack stack) {
File cacheDir = new File(context.getCacheDir(), DEFAULT_CACHE_DIR);
String userAgent = "volley/0";
try {
String packageName = context.getPackageName();
PackageInfo info = context.getPackageManager().getPackageInfo(packageName, 0);
userAgent = packageName + "/" + info.versionCode;
} catch (NameNotFoundException e) {
}
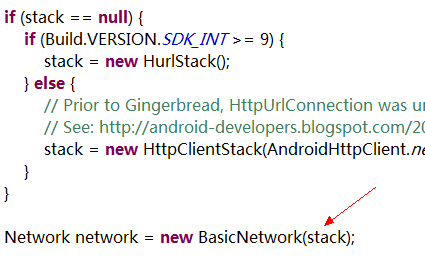
if (stack == null) {
if (Build.VERSION.SDK_INT >= 9) {
stack = new HurlStack();
} else {
// Prior to Gingerbread, HttpUrlConnection was unreliable.
// See: http://android-developers.blogspot.com/2011/09/androids-http-clients.html
stack = new HttpClientStack(AndroidHttpClient.newInstance(userAgent));
}
}
Network network = new BasicNetwork(stack);
RequestQueue queue = new RequestQueue(new DiskBasedCache(cacheDir), network);
queue.start();
return queue;
}
/**
* Creates a default instance of the worker pool and calls {@link RequestQueue#start()} on it.
*
* @param context A {@link Context} to use for creating the cache dir.
* @return A started {@link RequestQueue} instance.
*/
public static RequestQueue newRequestQueue(Context context) {
return newRequestQueue(context, null);
}
}
一般我们通过newRequest(Context context)方法来创建我们的请求队列的,但请看上面这个方法内部是调用了newRequestQueue(context, null),第二个参数就是我们的实现HttpStack这个接口的类,上一篇文章也说过了在Volley中,http的处理请求,默认 Android2.3 及以上基于 HttpURLConnection的 HurlStack,2.3 以下基于 HttpClient 的 HttpClientStack,也就是说这两个类都实现了HttpStack,先看看基于HttpURLConnection的 HurlStack这个类,HurlStack实现了HttpStack接口并实现了performRequest这个方法:
HurlStack类:
	@Override
    public HttpResponse performRequest(Request<?> request, Map<String, String> additionalHeaders)
            throws IOException, AuthFailureError {
        String url = request.getUrl();
        HashMap<String, String> map = new HashMap<String, String>();
        map.putAll(request.getHeaders());
        map.putAll(additionalHeaders);
        if (mUrlRewriter != null) {
            String rewritten = mUrlRewriter.rewriteUrl(url);
            if (rewritten == null) {
                throw new IOException("URL blocked by rewriter: " + url);
            }
            url = rewritten;
        }
        URL parsedUrl = new URL(url);
        HttpURLConnection connection = openConnection(parsedUrl, request);
        for (String headerName : map.keySet()) {
            connection.addRequestProperty(headerName, map.get(headerName));
        }
        setConnectionParametersForRequest(connection, request);
        // Initialize HttpResponse with data from the HttpURLConnection.
        ProtocolVersion protocolVersion = new ProtocolVersion("HTTP", 1, 1);
        int responseCode = connection.getResponseCode();
        if (responseCode == -1) {
            // -1 is returned by getResponseCode() if the response code could not be retrieved.
            // Signal to the caller that something was wrong with the connection.
            throw new IOException("Could not retrieve response code from HttpUrlConnection.");
        }
        StatusLine responseStatus = new BasicStatusLine(protocolVersion,
                connection.getResponseCode(), connection.getResponseMessage());
        BasicHttpResponse response = new BasicHttpResponse(responseStatus);
        response.setEntity(entityFromConnection(connection));
        for (Entry<String, List<String>> header : connection.getHeaderFields().entrySet()) {
            if (header.getKey() != null) {
                Header h = new BasicHeader(header.getKey(), header.getValue().get(0));
                response.addHeader(h);
            }
        }
        return response;
    }
这里面的Request就是我们的StringRequest、JsonRequest、ImageReques以及我们自定义的Request,比如:
StringRequest stringRequest = new StringRequest(Request.Method.GET,
                url, new Response.Listener<String>() {

                    @Override
                    public void onResponse(String response) {

                    }
                }, new Response.ErrorListener() {

                    @Override
                    public void onErrorResponse(VolleyError error) {

                    }
     });
接着我们主要看performRequest 这个方法中到底做了什么,这里要搞明白方法中的两个参数分别代表什么含义,第一个参数之前已经说过了是我们通过请求队列add进去的Request,第二个参数additionalHeaders是存放的缓存的请求头,这部分会在后面提到。
String url = request.getUrl();
通过request获取我们的请求地址。
HashMap<String, String> map = new HashMap<String, String>();
map.putAll(request.getHeaders());
map.putAll(additionalHeaders);
创建HashMap存放请求头的信息。
if (mUrlRewriter != null) {
            String rewritten = mUrlRewriter.rewriteUrl(url);
            if (rewritten == null) {
                throw new IOException("URL blocked by rewriter: " + url);
            }
            url = rewritten;
 }
通过rewriteUrl获取一个URL,并赋值给url,这里面的mUrlRewriter为空,暂时可以不用管它。
URL parsedUrl = new URL(url);
HttpURLConnection connection = openConnection(parsedUrl, request);
通过调用openConnection方法创建HttpURLConnection对象:
private HttpURLConnection openConnection(URL url, Request<?> request) throws IOException {
        HttpURLConnection connection = createConnection(url);

        int timeoutMs = request.getTimeoutMs();
        connection.setConnectTimeout(timeoutMs);
        connection.setReadTimeout(timeoutMs);
        connection.setUseCaches(false);
        connection.setDoInput(true);

        // use caller-provided custom SslSocketFactory, if any, for HTTPS
        if ("https".equals(url.getProtocol()) && mSslSocketFactory != null) {
            ((HttpsURLConnection)connection).setSSLSocketFactory(mSslSocketFactory);
        }

        return connection;
 }

 protected HttpURLConnection createConnection(URL url) throws IOException {
        return (HttpURLConnection) url.openConnection();
  }
上面代码很简单,创建HttpURLConnection对象,并配置连接超时时间、读超时时间、是否设置缓存、通过设置setDoInput为tue获取输入流,接着判断我们请求接口是否以"https"开头,并判断是否使用了证书的HTTPS连接方式。
SSL(Secure Sockets Layer 安全套接层),及其继任者传输层安全(Transport Layer Security,TLS)是为网络通信提供安全及数据完整性的一种安全协议。TLS与SSL在传输层对网络连接进行加密。SSL/TLS协议位于HTTP协议与传输层协议之间,采用公钥技术,为两个应用间的通讯提供加密、完整性校验以及身份认证。SSL协议提供了三个功能:
使用公钥证书对双端进行认证(一般仅进行服务器认证,客户端认证为可选)
通信加密(Confidentiality)
数据完整性检查(Data integrity)
继续看performRequest方法:
for (String headerName : map.keySet()) {
    connection.addRequestProperty(headerName, map.get(headerName));
}
添加http信息头。
setConnectionParametersForRequest(connection, request);

static void setConnectionParametersForRequest(HttpURLConnection connection,
            Request<?> request) throws IOException, AuthFailureError {
        switch (request.getMethod()) {
            case Method.DEPRECATED_GET_OR_POST:
                // This is the deprecated way that needs to be handled for backwards compatibility.
                // If the request's post body is null, then the assumption is that the request is
                // GET.  Otherwise, it is assumed that the request is a POST.
                byte[] postBody = request.getPostBody();
                if (postBody != null) {
                    // Prepare output. There is no need to set Content-Length explicitly,
                    // since this is handled by HttpURLConnection using the size of the prepared
                    // output stream.
                    connection.setDoOutput(true);
                    connection.setRequestMethod("POST");
                    connection.addRequestProperty(HEADER_CONTENT_TYPE,
                            request.getPostBodyContentType());
                    DataOutputStream out = new DataOutputStream(connection.getOutputStream());
                    out.write(postBody);
                    out.close();
                }
                break;
            case Method.GET:
                // Not necessary to set the request method because connection defaults to GET but
                // being explicit here.
                connection.setRequestMethod("GET");
                break;
            case Method.DELETE:
                connection.setRequestMethod("DELETE");
                break;
            case Method.POST:
                connection.setRequestMethod("POST");
                addBodyIfExists(connection, request);
                break;
            case Method.PUT:
                connection.setRequestMethod("PUT");
                addBodyIfExists(connection, request);
                break;
            default:
                throw new IllegalStateException("Unknown method type.");
        }
 }

private static final String HEADER_CONTENT_TYPE = "Content-Type";

private static void addBodyIfExists(HttpURLConnection connection, Request<?> request)
            throws IOException, AuthFailureError {
        byte[] body = request.getBody();
        if (body != null) {
            connection.setDoOutput(true);
            connection.addRequestProperty(HEADER_CONTENT_TYPE, request.getBodyContentType());
            DataOutputStream out = new DataOutputStream(connection.getOutputStream());
            out.write(body);
            out.close();
        }
}
这里面的代码也比较简单,根据我们创建Request时定义的请求方式,进行相应的配置。这里面关注一下如果是PUT方式,会调用addBodyIfExists方法,在这个方法中通过设置setDoOutput为true,来获取输出流并设置了实体头(Content-Type 响应的对象的类型),以此向服务器发送数据。
HTTP的头域包括通用头、请求头、响应头和实体头四个部分。每个头域由一个域名,冒号(:)和域值三部分组成(说白了就是键值对)。
通用头:是客户端和服务器都可以使用的头部,可以在客户端、服务器和其他应用程序之间提供一些非常有用的通用功能,如Date头部。
请求头:是请求报文特有的,它们为服务器提供了一些额外信息,比如客户端希望接收什么类型的数据,如Accept头部。
响应头:便于客户端提供信息,比如,客服端在与哪种类型的服务器进行交互,如Server头部。
实体头:指的是用于应对实体主体部分的头部,比如,可以用实体头部来说明实体主体部分的数据类型,如Content-Type头部。
ProtocolVersion protocolVersion = new ProtocolVersion("HTTP", 1, 1);
        int responseCode = connection.getResponseCode();
        if (responseCode == -1) {
            // -1 is returned by getResponseCode() if the response code could not be retrieved.
            // Signal to the caller that something was wrong with the connection.
            throw new IOException("Could not retrieve response code from HttpUrlConnection.");
        }
        StatusLine responseStatus = new BasicStatusLine(protocolVersion,
                connection.getResponseCode(), connection.getResponseMessage());
        BasicHttpResponse response = new BasicHttpResponse(responseStatus);
        response.setEntity(entityFromConnection(connection));
        for (Entry<String, List<String>> header : connection.getHeaderFields().entrySet()) {
            if (header.getKey() != null) {
                Header h = new BasicHeader(header.getKey(), header.getValue().get(0));
                response.addHeader(h);
            }
  }

 private static HttpEntity entityFromConnection(HttpURLConnection connection) {
        BasicHttpEntity entity = new BasicHttpEntity();
        InputStream inputStream;
        try {
            inputStream = connection.getInputStream();
        } catch (IOException ioe) {
            inputStream = connection.getErrorStream();
        }
        entity.setContent(inputStream);
        entity.setContentLength(connection.getContentLength());
        entity.setContentEncoding(connection.getContentEncoding());
        entity.setContentType(connection.getContentType());
        return entity;
    }
以上代码就是performRequest最后的部分了,这段代码主要是将请求的结果进行相应的初始化,重点关注entityFromConnection,获取输入流、数据大小、网络编码并通过for循环获取头信息,最好将这些信息封装在BasicHttpResponse 对象中。
总结一下HurlStack中performRequest方法通过HttpURLConnection进行网络连接,并获取返回的网络数据。
以上是HurlStack的performRequest方法,相应的HttpClientStack中的performRequest方法也是进行了一系列的网络请求。
知道了HttpStack这个接口中的performRequest方法的用处后,我们就得找找什么进行网络请求的,这时回到newRequestQueue(Context context, HttpStack stack)方法中,看看这个stack给谁了
这个stack在通过实例化BasicNetwork时传递给了BasicNetwork对象中,接着让我们扒开BasicNetwork源码看看。
public BasicNetwork(HttpStack httpStack) {
        // If a pool isn't passed in, then build a small default pool that will give us a lot of
        // benefit and not use too much memory.
        this(httpStack, new ByteArrayPool(DEFAULT_POOL_SIZE));
    }

public BasicNetwork(HttpStack httpStack, ByteArrayPool pool) {
        mHttpStack = httpStack;
        mPool = pool;
    }
最终stack赋值给了mHttpStack,那这个mHttpStack在哪里被用到的,继续看BasicNetwork,它实现Network这个接口:
public interface Network {
    /**
     * Performs the specified request.
     * @param request Request to process
     * @return A {@link NetworkResponse} with data and caching metadata; will never be null
     * @throws VolleyError on errors
     */
    public NetworkResponse performRequest(Request<?> request) throws VolleyError;
}
于是乎,在BasicNetwork中的performRequest中找到了我们mHttpStack,也就是说在performRequest方法中调用HttpStack进行网络的请求处理,
方法返回的是NetworkResponse对象,NetworkResponse保存返回以字节形式的数据。那这里的 performRequest方法又是在什么时候调用的呢?


通过上面一步一步的查找,创建请求队列时进行了一些列的初始化,到这里还是没有看到哪里调用网络请求的操作,最后我们查看
queue.start();
在start方法中我们终于找到了Network,接着查看NetworkDispatcher:
NetworkDispatcher是一个线程,用于调度处理网络的请求。启动后会不断从网络请求队列中取请求处理,队列为空则等待,请求处理结束则将结果传递给ResponseDelivery去执行后续处理,并判断结果是否要进行缓存。因此只要找到NetworkDispatcher中的run方法就能找到网络请求:
@Override
    public void run() {
        Process.setThreadPriority(Process.THREAD_PRIORITY_BACKGROUND);
        Request request;
        while (true) {
            try {
                // Take a request from the queue.
                request = mQueue.take();
            } catch (InterruptedException e) {
                // We may have been interrupted because it was time to quit.
                if (mQuit) {
                    return;
                }
                continue;
            }

            try {
                request.addMarker("network-queue-take");

                // If the request was cancelled already, do not perform the
                // network request.
                if (request.isCanceled()) {
                    request.finish("network-discard-cancelled");
                    continue;
                }

                // Tag the request (if API >= 14)
                if (Build.VERSION.SDK_INT >= Build.VERSION_CODES.ICE_CREAM_SANDWICH) {
                    TrafficStats.setThreadStatsTag(request.getTrafficStatsTag());
                }

                // Perform the network request.
                NetworkResponse networkResponse = mNetwork.performRequest(request);
                request.addMarker("network-http-complete");

                // If the server returned 304 AND we delivered a response already,
                // we're done -- don't deliver a second identical response.
                if (networkResponse.notModified && request.hasHadResponseDelivered()) {
                    request.finish("not-modified");
                    continue;
                }

                // Parse the response here on the worker thread.
                Response<?> response = request.parseNetworkResponse(networkResponse);
                request.addMarker("network-parse-complete");

                // Write to cache if applicable.
                // TODO: Only update cache metadata instead of entire record for 304s.
                if (request.shouldCache() && response.cacheEntry != null) {
                    mCache.put(request.getCacheKey(), response.cacheEntry);
                    request.addMarker("network-cache-written");
                }

                // Post the response back.
                request.markDelivered();
                mDelivery.postResponse(request, response);
            } catch (VolleyError volleyError) {
                parseAndDeliverNetworkError(request, volleyError);
            } catch (Exception e) {
                VolleyLog.e(e, "Unhandled exception %s", e.toString());
                mDelivery.postError(request, new VolleyError(e));
            }
        }
    }
从上面的代码中找到这么几条语句:
 NetworkResponse networkResponse = mNetwork.performRequest(request);
                request.addMarker("network-http-complete");

                // If the server returned 304 AND we delivered a response already,
                // we're done -- don't deliver a second identical response.
                if (networkResponse.notModified && request.hasHadResponseDelivered()) {
                    request.finish("not-modified");
                    continue;
                }

                // Parse the response here on the worker thread.
                Response<?> response = request.parseNetworkResponse(networkResponse);
以上就是进行网络请求,最终通过Request中的parseNetworkResponse方法获取返回的Response。

最终结果转换为可被ResponseDelivery处理的NetworkResponse,目前只有基于ExecutorDelivery的 handler 对应线程内进行分发。
找到ExecutorDelivery中的handler分发事件源码:
@Override
    public void postResponse(Request<?> request, Response<?> response) {
        postResponse(request, response, null);
    }

    @Override
    public void postResponse(Request<?> request, Response<?> response, Runnable runnable) {
        request.markDelivered();
        request.addMarker("post-response");
        mResponsePoster.execute(new ResponseDeliveryRunnable(request, response, runnable));
    }
通过execute进行任务分发ResponseDeliveryRunnable实现了Runnable接口,查看ResponseDeliveryRunnable中的run方法
  public void run() {
            // If this request has canceled, finish it and don't deliver.
            if (mRequest.isCanceled()) {
                mRequest.finish("canceled-at-delivery");
                return;
            }

            // Deliver a normal response or error, depending.
            if (mResponse.isSuccess()) {
                mRequest.deliverResponse(mResponse.result);
            } else {
                mRequest.deliverError(mResponse.error);
            }

            // If this is an intermediate response, add a marker, otherwise we're done
            // and the request can be finished.
            if (mResponse.intermediate) {
                mRequest.addMarker("intermediate-response");
            } else {
                mRequest.finish("done");
            }

            // If we have been provided a post-delivery runnable, run it.
            if (mRunnable != null) {
                mRunnable.run();
            }
       }
最终返回的数据回调给Request的deliverResponse方法,查看StringRequest方法中的deliverResponse方法:
@Override
    protected void deliverResponse(String response) {
        mListener.onResponse(response);
    }
最后通过接口回调将从网络获取的数据返回给客户端。
##第二次源码分析
Volley文件:
public static RequestQueue newRequestQueue(Context context, HttpStack stack) {
		File cacheDir = new File(context.getCacheDir(), DEFAULT_CACHE_DIR);

        String userAgent = "volley/0";
        try {
            String packageName = context.getPackageName();
            PackageInfo info = context.getPackageManager().getPackageInfo(packageName, 0);
            userAgent = packageName + "/" + info.versionCode;
        } catch (NameNotFoundException e) {
        }

        if (stack == null) {
            if (Build.VERSION.SDK_INT >= 9) {
                stack = new HurlStack();
            } else {
                // Prior to Gingerbread, HttpUrlConnection was unreliable.
                // See: http://android-developers.blogspot.com/2011/09/androids-http-clients.html
                stack = new HttpClientStack(AndroidHttpClient.newInstance(userAgent));
            }
        }

        Network network = new BasicNetwork(stack);

        RequestQueue queue = new RequestQueue(new DiskBasedCache(cacheDir), network);
        queue.start();

        return queue;
}
对此方法解析:
File cacheDir = new File(context.getCacheDir(), DEFAULT_CACHE_DIR);
通过context.getCacheDir() 获取 /data/data//cache目录下文件叫volley的文件,DEFAULT_CACHE_DIR的值是"volley"。
String userAgent = "volley/0";
 try {
            String packageName = context.getPackageName();
            PackageInfo info = context.getPackageManager().getPackageInfo(packageName, 0);
            userAgent = packageName + "/" + info.versionCode;
        } catch (NameNotFoundException e) {
        }
这个userAgent是传给服务器的,在创建HttpClient之前(SDK版本小于9),packageName获取到项目包名,info.versionCode获取版本号,userAgent为 :项目包名/项目版本号。
userAgent在获取包名异常时会使用默认的"volley/0",否则为“包名/版本号”。
if (stack == null) {
            if (Build.VERSION.SDK_INT >= 9) {
                stack = new HurlStack();
            } else {
                // Prior to Gingerbread, HttpUrlConnection was unreliable.
                // See: http://android-developers.blogspot.com/2011/09/androids-http-clients.html
                stack = new HttpClientStack(AndroidHttpClient.newInstance(userAgent));
            }
  }
一般情况下stack为null,这时就会去判断SDK的版本,如果是大于等于9,使用HttpURLConnection;否则使用HttpClient。
使用HttpClient时通过AndroidHttpClient的静态方法newInstance创建。
查看AndroidHttpClient源码:
public final class AndroidHttpClient implements HttpClient {
}
HttpClient其实是一个接口,HttpClient封装了对象需要执行的Http请求、身份验证、连接管理和其它特性, 从文档上看,HttpClient有三个已知的实现类分别是:AbstractHttpClient, AndroidHttpClient, DefaultHttpClient,会发现有一个专门为Android应用准备的实现类AndroidHttpClient,当然使用常规的DefaultHttpClient也可以实现功能。
从两个类包所有在位置就可以看出区别,AndroidHttpClient定义在android.net.http.AndroidHttpClient包下,属于Android原生的http访问,而DefaultHttpClient定义在org.apache.http.impl.client.DefaultHttpClient包下,属于对apche项目的支持。而AndroidHttpClient没有公开的构造函数,只能通过静态方法newInstance()方法来获得AndroidHttpClient对象。AndroidHttpClient对于DefaultHttpClient做了一些改进,使其更适用于Android项目:
- 关掉过期检查,自连接可以打破所有的时间限制。
- 可以设置ConnectionTimeOut(连接超时)和SoTimeout(读取数据超时)。
- 关掉重定向。
- 使用一个Session缓冲用于SSL Sockets。
- 如果服务器支持,使用gzip压缩方式用于在服务端和客户端传递的数据。
- 默认情况下不保留Cookie。
简单来说,用HttpClient发送请求、接收响应都很简单,只需要几个步骤即可:
- 创建HttpClient对象。
- 创建对应的发送请求的对象,如果需要发送GET请求,则创建HttpGet对象,如果需要发送POST请求,则创建HttpPost对象。
- 对于发送请求的参数,GET和POST使用的方式不同,GET方式可以使用拼接字符串的方式,把参数拼接在URL结尾;POST方式需要使用setEntity(HttpEntity entity)方法来设置请求参数。
- 调用HttpClient对象的execute(HttpUriRequest request)发送请求,执行该方法返回一个HttpResponse对象。
- 调用HttpResponse的对应方法获取服务器的响应头、响应内容等。
Network network = new BasicNetwork(stack);
实例化BasicNetwork对象,将stack通过构造器传递过去。
public BasicNetwork(HttpStack httpStack) {
        // If a pool isn't passed in, then build a small default pool that will give us a lot of
        // benefit and not use too much memory.
        this(httpStack, new ByteArrayPool(DEFAULT_POOL_SIZE));
    }
new ByteArrayPool(DEFAULT_POOL_SIZE),实例化ByteArrayPool 类并指定了最大缓存区的大小,DEFAULT_POOL_SIZE值是4096。
public BasicNetwork(HttpStack httpStack, ByteArrayPool pool) {
        mHttpStack = httpStack;
        mPool = pool;
    }
最后将stack和pool分别赋值给mHttpStack和mPool。
RequestQueue queue = new RequestQueue(new DiskBasedCache(cacheDir), network);
实例化RequestQueue这个类,通过RequestQueue构造器传递了DiskBasedCache对象和network(BasicNetwork对象),在实例化DiskBasedCache这个类时指定了缓存的根目录也就是cacheDir,这个值在上面已经提到过。
public DiskBasedCache(File rootDirectory) {
        this(rootDirectory, DEFAULT_DISK_USAGE_BYTES);
 }

 public DiskBasedCache(File rootDirectory, int maxCacheSizeInBytes) {
        mRootDirectory = rootDirectory;
        mMaxCacheSizeInBytes = maxCacheSizeInBytes;
  }
指定了最大缓存数为DEFAULT_DISK_USAGE_BYTES,默认5MB。mRootDirectory指定了缓存根目录,mMaxCacheSizeInBytes指定了缓存的大小。
public RequestQueue(Cache cache, Network network) {
this(cache, network, DEFAULT_NETWORK_THREAD_POOL_SIZE);
}
public RequestQueue(Cache cache, Network network, int threadPoolSize) {
this(cache, network, threadPoolSize,
new ExecutorDelivery(new Handler(Looper.getMainLooper())));
}
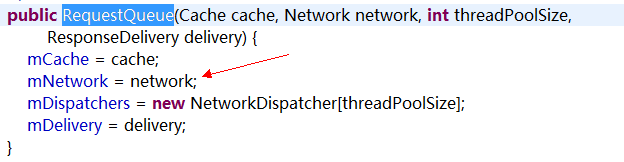
public RequestQueue(Cache cache, Network network, int threadPoolSize,
ResponseDelivery delivery) {
mCache = cache;
mNetwork = network;
mDispatchers = new NetworkDispatcher[threadPoolSize];
mDelivery = delivery;
}
创建RequestQueue对象时进行了相应的初始化(缓冲、网络请求、网络请求调度线程数、请求结果的分发)。
到这里,整理下上面的逻辑:
-
根据版本号创建了HurlStack或HttpClientStack对象为stack。
-
创建了BasicNetwork对象network,并初始化了BasicNetwork内的属性值:
-mHttpStack:第一步根据版本号创建的访问网络的种类。
-mPool :实例化ByteArrayPool类,并指定了ByteArrayPool中mSizeLimit缓冲区为4096。 -
创建我们的请求队列RequestQueue对象queue,实例化对本地缓冲和网络类型进行初始化:
mCache:指定了磁盘缓冲的目录和大小。
mNetwork:BasicNetwork网络请求
mDispatchers:创建4个网络请求调度的线程
mDelivery:指定返回请求结果的分发。
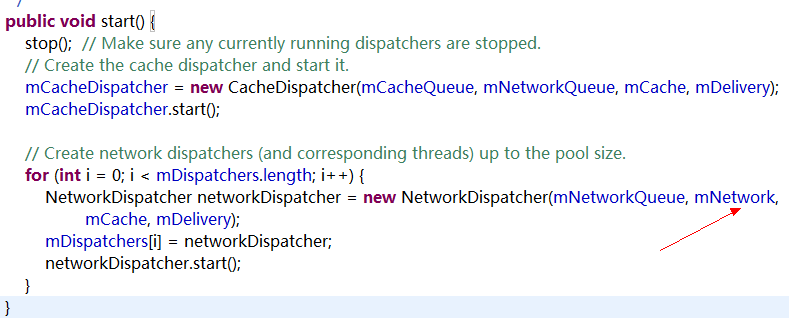
最后开始请求:
queue.start();


public void start() {
        stop();  // Make sure any currently running dispatchers are stopped.
        // Create the cache dispatcher and start it.
        mCacheDispatcher = new CacheDispatcher(mCacheQueue, mNetworkQueue, mCache, mDelivery);
        mCacheDispatcher.start();

        // Create network dispatchers (and corresponding threads) up to the pool size.
        for (int i = 0; i < mDispatchers.length; i++) {
            NetworkDispatcher networkDispatcher = new NetworkDispatcher(mNetworkQueue, mNetwork,
                    mCache, mDelivery);
            mDispatchers[i] = networkDispatcher;
            networkDispatcher.start();
        }
    }
在开始请求时先确保正在执行的请求调度线程是否已经终止掉,查看stop方法:
public void stop() {
        if (mCacheDispatcher != null) {
            mCacheDispatcher.quit();
        }
        for (int i = 0; i < mDispatchers.length; i++) {
            if (mDispatchers[i] != null) {
                mDispatchers[i].quit();
            }
        }
    }
mCacheDispatcher和mDispatchers分别是缓冲调度线程和网络调度线程,这里面分别将缓冲和网络的调度线程终止。
stop方法后:
mCacheDispatcher = new CacheDispatcher(mCacheQueue, mNetworkQueue, mCache, mDelivery);
创建缓冲调度线程,mCacheQueue是缓冲的请求队列,mNetworkQueue是网络的请求队列,mCache是缓冲,mDelivery是用于请求结果的分发。
public CacheDispatcher(
            BlockingQueue<Request> cacheQueue, BlockingQueue<Request> networkQueue,
            Cache cache, ResponseDelivery delivery) {
        mCacheQueue = cacheQueue;
        mNetworkQueue = networkQueue;
        mCache = cache;
        mDelivery = delivery;
    }
接着mCacheDispatcher.start()进行了缓存线程开启,执行run方法:
@Override
    public void run() {
        if (DEBUG) VolleyLog.v("start new dispatcher");
        Process.setThreadPriority(Process.THREAD_PRIORITY_BACKGROUND);

        // Make a blocking call to initialize the cache.
        mCache.initialize();

        while (true) {
            try {
                // Get a request from the cache triage queue, blocking until
                // at least one is available.
                final Request request = mCacheQueue.take();
                request.addMarker("cache-queue-take");

                // If the request has been canceled, don't bother dispatching it.
                if (request.isCanceled()) {
                    request.finish("cache-discard-canceled");
                    continue;
                }

                // Attempt to retrieve this item from cache.
                Cache.Entry entry = mCache.get(request.getCacheKey());
                if (entry == null) {
                    request.addMarker("cache-miss");
                    // Cache miss; send off to the network dispatcher.
                    mNetworkQueue.put(request);
                    continue;
                }

                // If it is completely expired, just send it to the network.
                if (entry.isExpired()) {
                    request.addMarker("cache-hit-expired");
                    request.setCacheEntry(entry);
                    mNetworkQueue.put(request);
                    continue;
                }

                // We have a cache hit; parse its data for delivery back to the request.
                request.addMarker("cache-hit");
                Response<?> response = request.parseNetworkResponse(
                        new NetworkResponse(entry.data, entry.responseHeaders));
                request.addMarker("cache-hit-parsed");

                if (!entry.refreshNeeded()) {
                    // Completely unexpired cache hit. Just deliver the response.
                    mDelivery.postResponse(request, response);
                } else {
                    // Soft-expired cache hit. We can deliver the cached response,
                    // but we need to also send the request to the network for
                    // refreshing.
                    request.addMarker("cache-hit-refresh-needed");
                    request.setCacheEntry(entry);

                    // Mark the response as intermediate.
                    response.intermediate = true;

                    // Post the intermediate response back to the user and have
                    // the delivery then forward the request along to the network.
                    mDelivery.postResponse(request, response, new Runnable() {
                        @Override
                        public void run() {
                            try {
                                mNetworkQueue.put(request);
                            } catch (InterruptedException e) {
                                // Not much we can do about this.
                            }
                        }
                    });
                }

            } catch (InterruptedException e) {
                // We may have been interrupted because it was time to quit.
                if (mQuit) {
                    return;
                }
                continue;
            }
        }
    }
 if (DEBUG) VolleyLog.v("start new dispatcher");
 打印日志信息。
Process.setThreadPriority(Process.THREAD_PRIORITY_BACKGROUND);
设置线程优先级为后台,这样当多个线程并发后很多无关紧要的线程分配的CPU时间将会减少,有利于主线程的处理
mCache.initialize();
缓存目录的初始化。
查看DiskBasedCache中的initialize方法:
    @Override
    public synchronized void initialize() {
        if (!mRootDirectory.exists()) {
            if (!mRootDirectory.mkdirs()) {
                VolleyLog.e("Unable to create cache dir %s", mRootDirectory.getAbsolutePath());
            }
            return;
        }

        File[] files = mRootDirectory.listFiles();
        if (files == null) {
            return;
        }
        for (File file : files) {
            FileInputStream fis = null;
            try {
                fis = new FileInputStream(file);
                CacheHeader entry = CacheHeader.readHeader(fis);
                entry.size = file.length();
                putEntry(entry.key, entry);
            } catch (IOException e) {
                if (file != null) {
                   file.delete();
                }
            } finally {
                try {
                    if (fis != null) {
                        fis.close();
                    }
                } catch (IOException ignored) { }
            }
        }
    }
initialize方法中判断缓存的根目录是否存在,不存在创建;否则的话:
 File[] files = mRootDirectory.listFiles();
获取目录下的文件。
        for (File file : files) {
            FileInputStream fis = null;
            try {
                fis = new FileInputStream(file);
                CacheHeader entry = CacheHeader.readHeader(fis);
                entry.size = file.length();
                putEntry(entry.key, entry);
            } catch (IOException e) {
                if (file != null) {
                   file.delete();
                }
            } finally {
                try {
                    if (fis != null) {
                        fis.close();
                    }
                } catch (IOException ignored) { }
            }
        }
遍历更目录下的文件,进行读取,读取是文件存在但出现异常将文件删除,读取时调用DiskBasedCache内部类CacheHeader中的readHeader方法:

        public static CacheHeader readHeader(InputStream is) throws IOException {
            CacheHeader entry = new CacheHeader();
            int magic = readInt(is);
            if (magic != CACHE_MAGIC) {
                // don't bother deleting, it'll get pruned eventually
                throw new IOException();
            }
            entry.key = readString(is);
            entry.etag = readString(is);
            if (entry.etag.equals("")) {
                entry.etag = null;
            }
            entry.serverDate = readLong(is);
            entry.ttl = readLong(is);
            entry.softTtl = readLong(is);
            entry.responseHeaders = readStringStringMap(is);
            return entry;
        }

创建CacheHeader对象,并将读取到的数据赋值给CacheHeader中的Filed。

private void putEntry(String key, CacheHeader entry) {
        if (!mEntries.containsKey(key)) {
            mTotalSize += entry.size;
        } else {
            CacheHeader oldEntry = mEntries.get(key);
            mTotalSize += (entry.size - oldEntry.size);
        }
        mEntries.put(key, entry);
   }
读取完缓存根目录中的某个文件后,进行统计,如果之前没有缓存过这个数据,就进行缓存大小的累加mTotalSize,否则新的累加上新旧缓存文件的差值。最后将相应的缓存文件以键值对保存起来。
继续回到run方法中,以下是了无限循环操作:
final Request request = mCacheQueue.take();
   request.addMarker("cache-queue-take");
从缓存队列中取出我们的Request,并记录线程的事件日志。
if (request.isCanceled()) {
                    request.finish("cache-discard-canceled");
                    continue;
 }
如果这个请求已经取消,跳过这次循环,继续取出请求Request 。
Cache.Entry entry = mCache.get(request.getCacheKey());
根据相应缓存的键值取出对应缓存的数据。
  if (entry == null) {
                    request.addMarker("cache-miss");
                    // Cache miss; send off to the network dispatcher.
                    mNetworkQueue.put(request);
                    continue;
    }
取出来的数据为空,跳过这次循环。
if (entry.isExpired()) {
                    request.addMarker("cache-hit-expired");
                    request.setCacheEntry(entry);
                    mNetworkQueue.put(request);
                    continue;
 }
判断缓存是否过期,如果过期,就重新请求网络,因此将本次的请求放入请求网络队列中。
request.addMarker("cache-hit");
                Response<?> response = request.parseNetworkResponse(
                        new NetworkResponse(entry.data, entry.responseHeaders));
                request.addMarker("cache-hit-parsed");
取出缓存数据Response 并回调给Request中的parseNetworkResponse方法。
  if (!entry.refreshNeeded()) {
                    mDelivery.postResponse(request, response);
                } else {
                    request.addMarker("cache-hit-refresh-needed");
                    request.setCacheEntry(entry);

                    response.intermediate = true;

                    mDelivery.postResponse(request, response, new Runnable() {
                        @Override
                        public void run() {
                            try {
                                mNetworkQueue.put(request);
                            } catch (InterruptedException e) {
                                // Not much we can do about this.
                            }
                        }
                    });
                }
是否进行数据刷新,不需要直接通过ExecutorDelivery进行结果的分发。否则的话添加到网络请求队列中。
到这里为止缓存调度线程已经开启,接着看下面的这条语句:
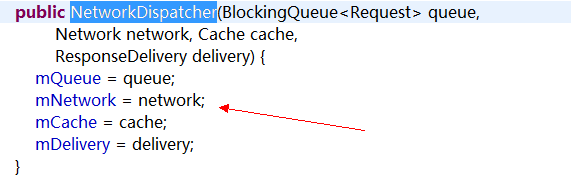
for (int i = 0; i < mDispatchers.length; i++) {
            NetworkDispatcher networkDispatcher = new NetworkDispatcher(mNetworkQueue, mNetwork,
                    mCache, mDelivery);
            mDispatchers[i] = networkDispatcher;
            networkDispatcher.start();
 }
依次执行网络调度线程,这里面是默认4个线程,查看NetworkDispatcher线程中的run方法。
	@Override
    public void run() {
        Process.setThreadPriority(Process.THREAD_PRIORITY_BACKGROUND);
        Request request;
        while (true) {
            try {
                // Take a request from the queue.
                request = mQueue.take();
            } catch (InterruptedException e) {
                // We may have been interrupted because it was time to quit.
                if (mQuit) {
                    return;
                }
                continue;
            }

            try {
                request.addMarker("network-queue-take");

                // If the request was cancelled already, do not perform the
                // network request.
                if (request.isCanceled()) {
                    request.finish("network-discard-cancelled");
                    continue;
                }

                // Tag the request (if API >= 14)
                if (Build.VERSION.SDK_INT >= Build.VERSION_CODES.ICE_CREAM_SANDWICH) {
                    TrafficStats.setThreadStatsTag(request.getTrafficStatsTag());
                }

                // Perform the network request.
                NetworkResponse networkResponse = mNetwork.performRequest(request);
                request.addMarker("network-http-complete");

                // If the server returned 304 AND we delivered a response already,
                // we're done -- don't deliver a second identical response.
                if (networkResponse.notModified && request.hasHadResponseDelivered()) {
                    request.finish("not-modified");
                    continue;
                }

                // Parse the response here on the worker thread.
                Response<?> response = request.parseNetworkResponse(networkResponse);
                request.addMarker("network-parse-complete");

                // Write to cache if applicable.
                // TODO: Only update cache metadata instead of entire record for 304s.
                if (request.shouldCache() && response.cacheEntry != null) {
                    mCache.put(request.getCacheKey(), response.cacheEntry);
                    request.addMarker("network-cache-written");
                }

                // Post the response back.
                request.markDelivered();
                mDelivery.postResponse(request, response);
            } catch (VolleyError volleyError) {
                parseAndDeliverNetworkError(request, volleyError);
            } catch (Exception e) {
                VolleyLog.e(e, "Unhandled exception %s", e.toString());
                mDelivery.postError(request, new VolleyError(e));
            }
        }
    }
Process.setThreadPriority(Process.THREAD_PRIORITY_BACKGROUND);
设置线程优先级为后台,这样当多个线程并发后很多无关紧要的线程分配的CPU时间将会减少,有利于主线程的处理
request = mQueue.take();
老样子通过无限循环从网络请求队列中取出我们定义的Request。
如果出现异常情况下执行:
if (mQuit) {
        return;
 }

mQuit用于退出循环的标志位,在start方法中的第一步执行stop时,就将mQuit置为true。
if (request.isCanceled()) {
                    request.finish("network-discard-cancelled");
                    continue;
 }
如果这个请求已经取消,跳过这次循环,继续取出请求Request 。
// Tag the request (if API >= 14)
                if (Build.VERSION.SDK_INT >= Build.VERSION_CODES.ICE_CREAM_SANDWICH) {
                    TrafficStats.setThreadStatsTag(request.getTrafficStatsTag());
                }
对网络连接打上tag。
NetworkResponse networkResponse = mNetwork.performRequest(request);
                request.addMarker("network-http-complete");
进行网络请求,并获取请求结果。
if (networkResponse.notModified && request.hasHadResponseDelivered()) {
                    request.finish("not-modified");
                    continue;
 }
服务器返回304,并且我们已经提供了响应,这是跳过本次循环。
Response<?> response = request.parseNetworkResponse(networkResponse);
                request.addMarker("network-parse-complete");
拿到请求结果,并回调给Request中的parseNetworkResponse方法。
if (request.shouldCache() && response.cacheEntry != null) {
                    mCache.put(request.getCacheKey(), response.cacheEntry);
                    request.addMarker("network-cache-written");
 }
进行缓存。
request.markDelivered();
mDelivery.postResponse(request, response);
最后通过ExecutorDelivery进行结果的分发。
##写在最后的话
写到这里基本已经结束,Volley的源码很值得大家研究,目前本人只是粗略的研究了下,在业余时间还是会继续研究。


 241
241

 被折叠的 条评论
为什么被折叠?
被折叠的 条评论
为什么被折叠?
 到【灌水乐园】发言


