


最近在做文件搜索功能(搜索用的ElasticSearch),需要在前端搜索得到文档后,在浏览器预览文档,并将搜索关键词高亮和定位。文档预览选用的开源项目kkfileview,可以很好地预览文档,但是并没有预览文档关键词高亮的功能。经kkfileview技术交流群大佬的指导,得知要修改pdfjs,具体步骤请往下看。【注,这里只实现了kkfileview用pdf格式预览时的高亮和定位功能】
关键词:ElasticSearch kkFileView Pdf.js 多关键词高亮 关键词定位
参考博客:https://blog.csdn.net/a973685825/article/details/81285819
kkfileview的GitHub地址:https://github.com/kekingcn/kkFileView
pdf.js的GitHub地址:https://github.com/mozilla/pdf.js
目录
一 ES获取高亮关键词
其他的先不管,首先我们需要获取高亮关键词。对于我们搜索,我是采用的_analyze这个API去获取查询语句的分词结果,作为我们的高亮关键词。关于elasticsearch网上资料很多,我这里就不赘述了。将获取到的关键词组成字符串,用空格进行分隔(当然,你也可以用其他的分隔符,之后将字符串转为数组的时候注意分隔符就可以了),命名为keyString,在调用kkfileview的时候把关键词参数传入进去(关于kkfileview如何调用,请看其官方文档)。
# keyString为由关键词组成的字符串,用空格分隔。示例: "知识 图谱 综述"
# 相比较于之前,最后面添加了keyString
'http://127.0.0.1:8012/onlinePreview?url='+encodeURIComponent(Base64.encode(url)) + keyString;
二 kkfileview传递关键词
kkfileview这部分主要是承上启下的作用,先从ES那边获取到keyString,然后把它传递给pdf.js。先来看看怎么获取,这个项目文件不少,但是放心,我们只需要修改server/src/main/resources/web/pdf.ftl和server/src/main/java/cn/keking/web/controller/OnlinePreviewController.java这两个文件。
kkfileview通过OnlinePreviewController.java文件中的onlinePreview函数获取到url中的参数,所以我们要修改这个函数来获取keyString。需要修改两处:1 函数参数添加keyString;2 给model添加keyword属性,详情请看下面代码块中的注释。
    @RequestMapping(value = "/onlinePreview")
    // 传给这个函数的参数添加了keyString
    public String onlinePreview(String url, String keyword, Model model, HttpServletRequest req) {
        String fileUrl;
        try {
            fileUrl = new String(Base64.decodeBase64(url), StandardCharsets.UTF_8);
        } catch (Exception ex) {
            String errorMsg = String.format(BASE64_DECODE_ERROR_MSG, "url");
            return otherFilePreview.notSupportedFile(model, errorMsg);
        }
        FileAttribute fileAttribute = fileHandlerService.getFileAttribute(fileUrl, req);
        model.addAttribute("file", fileAttribute);
        model.addAttribute("keyword", keyword);  // 添加了这一行
        FilePreview filePreview = previewFactory.get(fileAttribute);
        logger.info("预览文件url:{},previewType:{}", fileUrl, fileAttribute.getType());
        return filePreview.filePreviewHandle(fileUrl, model, fileAttribute);
}修改完上面的部分,kkfileview就已经获取到了高亮关键词,现在需要把它传递给pdf.js,需要修改pdf.ftl文件中的script部分,其实就是先获取关键词 ,再通过url传给pdf.js。注意这里的pdfExt,这是我新建的一个文件夹,在第五部分会讲到。
    var url = '${finalUrl}';
    var baseUrl = '${baseUrl}'.endsWith('/') ? '${baseUrl}' : '${baseUrl}' + '/';
    if (!url.startsWith(baseUrl)) {
        url = baseUrl + 'getCorsFile?urlPath=' + encodeURIComponent(url);
    }
    // 首先从我们的model中获取keyword
    var keyword = '${keyword}';

    // 然后在最后添加了keyword参数
    // 在kkfileview的源码中,参数里还有disabledownload,被我删掉了
    // 注意这里的pdfExt,这是我新建的一个文件夹,之后会提到
    document.getElementsByTagName('iframe')[0].src = "${baseUrl}pdfExt/web/viewer.html?file=" + encodeURIComponent(url)+ "&keyword="+ keyword;

    document.getElementsByTagName('iframe')[0].height = document.documentElement.clientHeight - 10;
三 pdf.js获取关键词
pdf.js是可以获取文件地址参数的,我们首先找到这部分代码在哪里写的,然后添加获取keyword参数的代码。pdf.js是在web/viewer.js这部分代码获取文件地址的。
  (function rewriteUrlClosure() {
    // Run this code outside DOMContentLoaded to make sure that the URL
    // is rewritten as soon as possible.
    const queryString = document.location.search.slice(1);
    const m = /(^|&)file=([^&]*)/.exec(queryString);
    defaultUrl = m ? decodeURIComponent(m[2]) : "";

    // Example: chrome-extension://.../http://example.com/file.pdf
    const humanReadableUrl = "/" + defaultUrl + location.hash;
    history.replaceState(history.state, "", humanReadableUrl);
    if (top === window) {
      // eslint-disable-next-line no-undef
      chrome.runtime.sendMessage("showPageAction");
    }
  })();
那我们只需要仿照着这个获取keyword参数就可以了,我把获取keyword参数的代码放在了这个文件的getViewerConfiguration函数中。
function getViewerConfiguration() {

  // 添加了这部分代码
  const queryString = document.location.search.slice(1);
  const m = /(^|&)keyword=([^&]*)/.exec(queryString);
  const keyword = m ? decodeURIComponent(m[2]) : "";
  console.log("keyword", keyword);

  let errorWrapper = null;
  if (typeof PDFJSDev === "undefined" || !PDFJSDev.test("MOZCENTRAL")){
    errorWrapper = {
      container: document.getElementById("errorWrapper"),
      errorMessage: document.getElementById("errorMessage"),
      closeButton: document.getElementById("errorClose"),
      errorMoreInfo: document.getElementById("errorMoreInfo"),
      moreInfoButton: document.getElementById("errorShowMore"),
      lessInfoButton: document.getElementById("errorShowLess"),
    };
  }

  // 内容太多,这里省略了
}
好了,现在我们的pdf.js终于拿到了关键词,下面说一下怎么对关键词进行高亮
四 pdf.js高亮关键词
现在我们看一下pdf.js文件的内容,在看这部分内容之前,强烈建议先看一遍文章最前参考博客的内容。 如同参考博客讲的,我们高亮关键词的方法就是调用pdf.js自带的搜索功能,把关键词传进去,那我们看一下这部分怎么做。
(1)我们需要把关键词传入web/viewer.html文件中id="findInput" 的输入框里,也就是下面这里。
          <div id="findbarInputContainer">
            <input id="findInput" class="toolbarField" title="Find" placeholder="Find in document…" tabindex="91" data-l10n-id="find_input">
            <div class="splitToolbarButton">
              <button id="findPrevious" class="toolbarButton findPrevious" title="Find the previous occurrence of the phrase" tabindex="92" data-l10n-id="find_previous">
                <span data-l10n-id="find_previous_label">Previous</span>
              </button>
              <div class="splitToolbarButtonSeparator"></div>
              <button id="findNext" class="toolbarButton findNext" title="Find the next occurrence of the phrase" tabindex="93" data-l10n-id="find_next">
                <span data-l10n-id="find_next_label">Next</span>
              </button>
            </div>
          </div>
找到了id,修改值就很简单了,我选择还是在getViewerConfiguration函数中修改,具体如下
function getViewerConfiguration() {

  //这里是刚才添加的代码
  const queryString = document.location.search.slice(1);
  const m = /(^|&)keyword=([^&]*)/.exec(queryString);
  const keyword = m ? decodeURIComponent(m[2]) : "";
  console.log("keyword", keyword);

  let errorWrapper = null;
  if (typeof PDFJSDev === "undefined" || !PDFJSDev.test("MOZCENTRAL")) {
    errorWrapper = {
      container: document.getElementById("errorWrapper"),
      errorMessage: document.getElementById("errorMessage"),
      closeButton: document.getElementById("errorClose"),
      errorMoreInfo: document.getElementById("errorMoreInfo"),
      moreInfoButton: document.getElementById("errorShowMore"),
      lessInfoButton: document.getElementById("errorShowLess"),
    };
  }

  // 添加了这部分代码,把keyword的值传给input
  document.getElementById("findInput").value = keyword;
  // 要把findbar给禁用掉,具体原因见参考博客
  document.getElementById("findbar").style.display = "none";

  return {
      //内容太多这里省略了
  }
}
(2)然后我们要处理一下传递给findinput的值,要修改web/app.js中的这个函数
  async _initializeViewerComponents() {
    // 省略

    //修改这个判断里的内容
    if (!this.supportsIntegratedFind) {
      this.findBar = new PDFFindBar(appConfig.findBar, eventBus, this.l10n); // 实例化PDFFindBar

      // 获取value值
      const highLightStr = appConfig.findBar.findField.value;
      // 把字符串转换成数组(如果你在调用kkfileview时传入的keystring分隔符不是用的空格,这里记得也修改一下
      const highLightWords = highLightStr.split(" ");
      // 把数组传递给我们新加的这个函数(下一步会讲)
      wordHighLight(highLightWords);
    }

    // 省略
}(3)然后我们去web/app.js文件中添加刚刚提到的函数wordHighLight,在这里调用了搜索执行函数
function wordHighLight(hightLightWords) {
  // 从参考博客那里复制来的

  const evt = {
    // source: PDFFindBar, // PDFFindBar的实例,不确定是干嘛用的?
    type: "", // 这里默认应该是空的
    // 这里能默认跳转到query的位置,刚好能满足要求
    query: hightLightWords, // 高亮的关键词
    phraseSearch: false, // 支持整段文字匹配,如果时多个词的匹配只能是false
    caseSensitive: false, // 默认为false,搜索时忽略大小写
    highlightAll: true, // 设为true即关键词全部高亮
    // findPrevious: true,
  };
  PDFViewerApplication.findController.executeCommand("find" + evt.type, {
    // 搜索执行函数
    query: evt.query,
    phraseSearch: evt.phraseSearch,
    caseSensitive: evt.caseSensitive,
    highlightAll: evt.highlightAll,
    findPrevious: evt.findPrevious,
  });
}(4)现在我们要去修改执行搜索的代码,我们是要对多关键词进行高亮(毕竟搜索语句的关键词经常不止一个),但是pdf.js自带的搜索功能只能对单个关键词进行高亮,所以我们需要去稍微修改一下web/pdf_find_controller.js文件。
wordHighLight ==> executeCommand ==>_nextMatch ==> _calculateMatch ==> _calculateWordMatch(==>为调用的意思),我们先去修改_calculateMatch,详细修改的内容见下面的代码和注释。
_calculateMatch(pageIndex) {
    let pageContent = this._pageContents[pageIndex];
    const pageDiffs = this._pageDiffs[pageIndex];

    // 一会我们要去修改这里的_query函数
    // 注意,之前的query是字符串,现在是数组
    const query = this._query;
    const { caseSensitive, entireWord, phraseSearch } = this._state;

    if (query.length === 0) {
      // Do nothing: the matches should be wiped out already.
      return;
    }

    if (!caseSensitive) {
      pageContent = pageContent.toLowerCase();
      // 修改了这里,添加了循环,因为现在的query已经不是一个字符串了,而是一个数组
      for (let i = 0; i < query.length; i++) {
        query[i] = query[i].toLowerCase();
      }
    }

    if (phraseSearch) {
      this._calculatePhraseMatch(
        query,
        pageIndex,
        pageContent,
        pageDiffs,
        entireWord
      );
    } else {
      this._calculateWordMatch(
        query,
        pageIndex,
        pageContent,
        pageDiffs,
        entireWord
      );
    }

    // When `highlightAll` is set, ensure that the matches on previously
    // rendered (and still active) pages are correctly highlighted.
    if (this._state.highlightAll) {
      this._updatePage(pageIndex);
    }
    if (this._resumePageIdx === pageIndex) {
      this._resumePageIdx = null;
      this._nextPageMatch();
    }

    // Update the match count.
    const pageMatchesCount = this._pageMatches[pageIndex].length;
    if (pageMatchesCount > 0) {
      this._matchesCountTotal += pageMatchesCount;
      this._updateUIResultsCount();
    }
  }
然后我们要去修改_query的内容
  get _query() {
    const query = this._state.query;
    // 之前的query语句是字符串,现在改成了数组,所以需要循环处理
    if (typeof query === "object" && query.length !== 0) {
      for (let i = 0; i < query.length; i++) {
        if (query[i] !== this._rawQuery[i]) {
          this._rawQuery[i] = query[i];
          [this._normalizedQuery[i]] = normalize(query[i]);
        }
      }
    } else {
      // 这里是原先的版本,其实这个分支现在用不到,因为肯定是obj类型
      if (query !== this._rawQuery) {
        this._rawQuery = this._state.query;
        [this._normalizedQuery] = normalize(this._state.query);
      }
    }
    return this._normalizedQuery;
  }
同样,由于我们把this._rawQuery和 this._normalizedQuery 都变成了数组类型来使用,所以这两个变量用之前需要先定义一下,不然会报错。可以在executeCommand这个函数里定义。
  executeCommand(cmd, state) {
    if (!state) {
      return;
    }
    const pdfDocument = this._pdfDocument;

    if (this._state === null || this._shouldDirtyMatch(cmd, state)) {
      this._dirtyMatch = true;
    }
    this._state = state;
    if (cmd !== "findhighlightallchange") {
      this._updateUIState(FindState.PENDING);
    }

    // 添加了下面这两行
    this._rawQuery = new Array(this._state.query.length);
    this._normalizedQuery = new Array(this._state.query.length);

    this._firstPageCapability.promise.then(
    // 内容太多了,这里省略了,没有粘贴上来
    );
  }
然后我们去修改_calculateWordMatch函数,主要就是添加个循环
  _calculateWordMatch(query, pageIndex, pageContent, pageDiffs, entireWord) {
    const matchesWithLength = [];

    // Divide the query into pieces and search for text in each piece.

    // 改成了循环
    for (let x = 0; x < query.length; x++) {
      const queryArray = query[x].match(/\S+/g);
      for (let i = 0, len = queryArray.length; i < len; i++) {
        const subquery = queryArray[i];
        const subqueryLen = subquery.length;

        let matchIdx = -subqueryLen;
        while (true) {
          matchIdx = pageContent.indexOf(subquery, matchIdx + subqueryLen);
          if (matchIdx === -1) {
            break;
          }
          if (
            entireWord &&
            !this._isEntireWord(pageContent, matchIdx, subqueryLen)
          ) {
            continue;
          }
          const originalMatchIdx = getOriginalIndex(matchIdx, pageDiffs),
            matchEnd = matchIdx + subqueryLen - 1,
            originalQueryLen =
              getOriginalIndex(matchEnd, pageDiffs) - originalMatchIdx + 1;

          // Other searches do not, so we store the length.
          matchesWithLength.push({
            match: originalMatchIdx,
            matchLength: originalQueryLen,
            skipped: false,
          });
        }
      }
    }

    // Prepare arrays for storing the matches.
    this._pageMatchesLength[pageIndex] = [];
    this._pageMatches[pageIndex] = [];

    // Sort `matchesWithLength`, remove intersecting terms and put the result
    // into the two arrays.
    this._prepareMatches(
      matchesWithLength,
      this._pageMatches[pageIndex],
      this._pageMatchesLength[pageIndex]
    );
  }
到这里,我们的代码就修改完了。
五 打包pdf.js
现在我们要把修改后的pdf.js打包放到kkfileview里,让kkfileview调用我们修改后的而不是默认的。
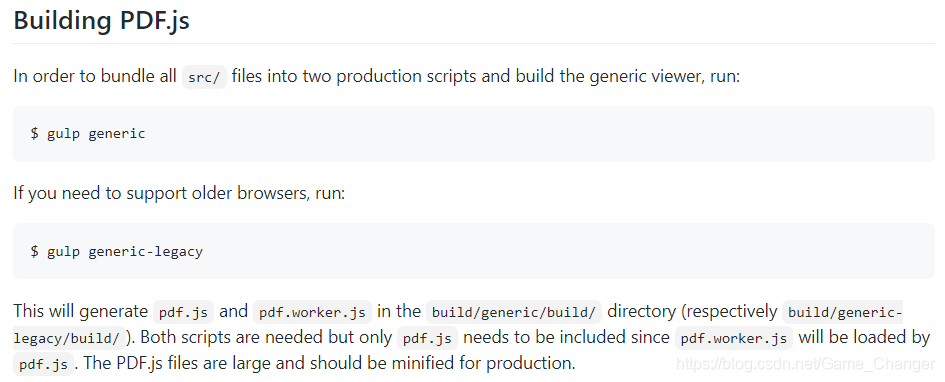
(1)打包pdf.js
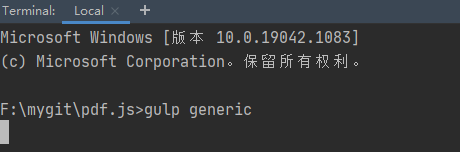
打包pdf.js的方法在GitHub的readme里面有写,直接在terminal里运行gulp generic就可以了。
在terminal里运行gulp generic
打包成功

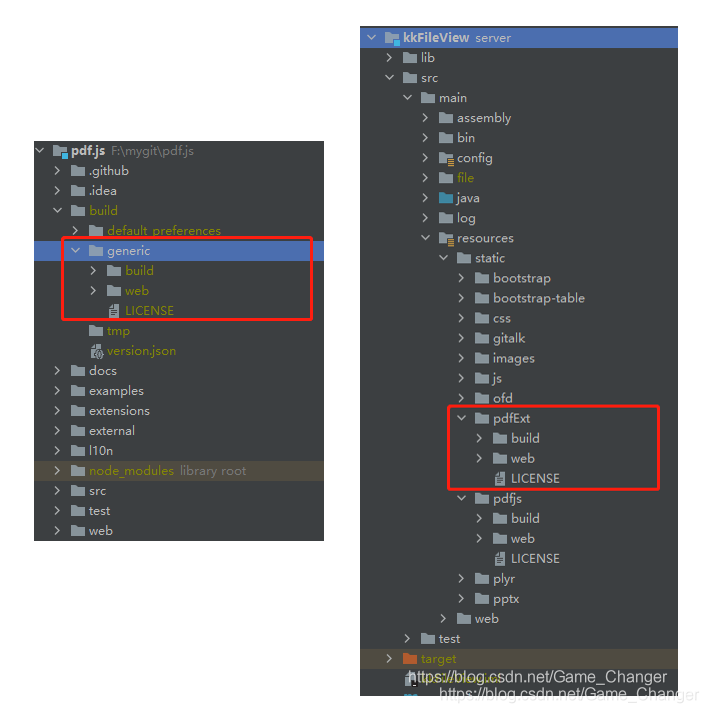
(2)kkfileview新建文件夹
kkfileview默认使用的打包后的pdf.js放在了server/src/main/resources/static/pdfjs这个文件夹里。我在server/src/main/resources/static下新建了一个名为pdfExt的文件夹,准备把修改后的pdf.js文件打包放在这里。
(3)复制文件
然后就很简单了,把pdf.js项目build/generic目录下的内容复制到kkfileview新建的pdfExt文件夹里,就可以了。
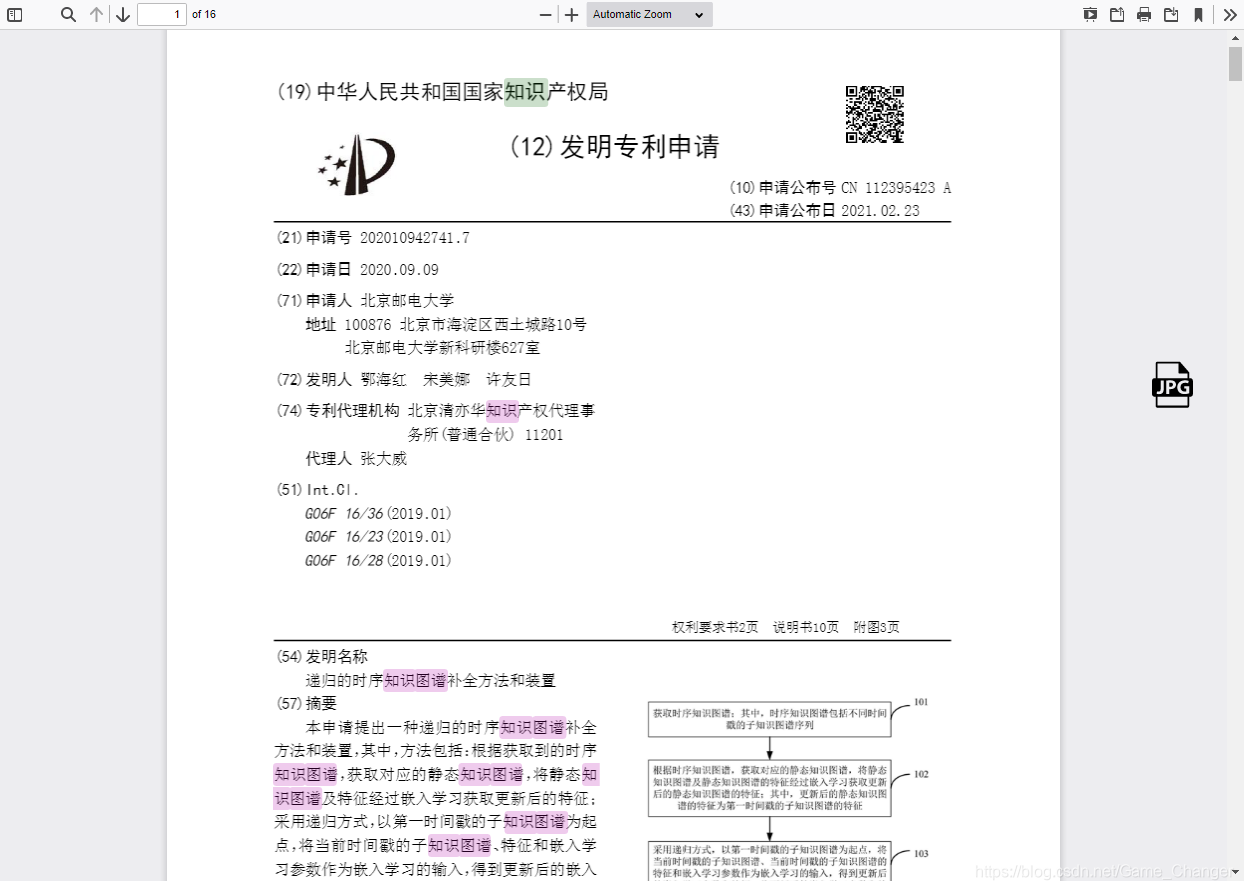
运行效果
我的查询语句是“知识图谱”,_analyze返回的结果(也就是对查询语句进行分词等预处理之后的结果)是“知识”和“图谱”。这两个词也就是我的高亮关键词,打开预览文件可以看到,所有和“知识”和“图谱”相关的词都被高亮标注了。并且可以在打开文件时自动定位到首个关键词出现的位置。
结语
到这里就全部修改完毕了,可以运行一下试试看效果。第一次写博客,不完善之处请各位大佬们包容,希望能够帮助到大家。什么?你说我怎么这里只讲了怎么实现高亮,没有讲怎么实现定位啊?运行后可以发现,pdf.js自带的搜索功能,已经帮我们把关键词定位实现了,只要你能把高亮关键词按照上面的方法成功传进去,关键词定位的问题也就自然而然地解决了
最后,特此感谢kk开源技术交流2群里的高雄大佬,给我提供修改的思路并且帮忙找到了参考博客。


 3112
3112

 被折叠的 条评论
为什么被折叠?
被折叠的 条评论
为什么被折叠?
 到【灌水乐园】发言


