


spring的数据库编程快速入门(xml版)
一.导包:
    <dependencies>
<!--        spring配置包-->
        <dependency>
            <groupId>org.springframework</groupId>
            <artifactId>spring-context</artifactId>
            <version>5.2.8.RELEASE</version>
        </dependency>

<!--        mysql驱动-->
        <dependency>
            <groupId>mysql</groupId>
            <artifactId>mysql-connector-java</artifactId>
            <version>8.0.11</version>
        </dependency>

<!--        spring jdbc包-->
        <dependency>
            <groupId>org.springframework</groupId>
            <artifactId>spring-jdbc</artifactId>
            <version>5.3.23</version>
        </dependency>

<!--        spring事务管理-->
        <dependency>
            <groupId>org.springframework</groupId>
            <artifactId>spring-tx</artifactId>
            <version>5.3.18</version>
        </dependency>
    </dependencies>
二.配置spring xml文件
<?xml version="1.0" encoding="UTF-8"?>
<beans xmlns:xsi="http://www.w3.org/2001/XMLSchema-instance"
xmlns="http://www.springframework.org/schema/beans"
xsi:schemaLocation="http://www.springframework.org/schema/beans
http://www.springframework.org/schema/beans/spring-beans.xsd
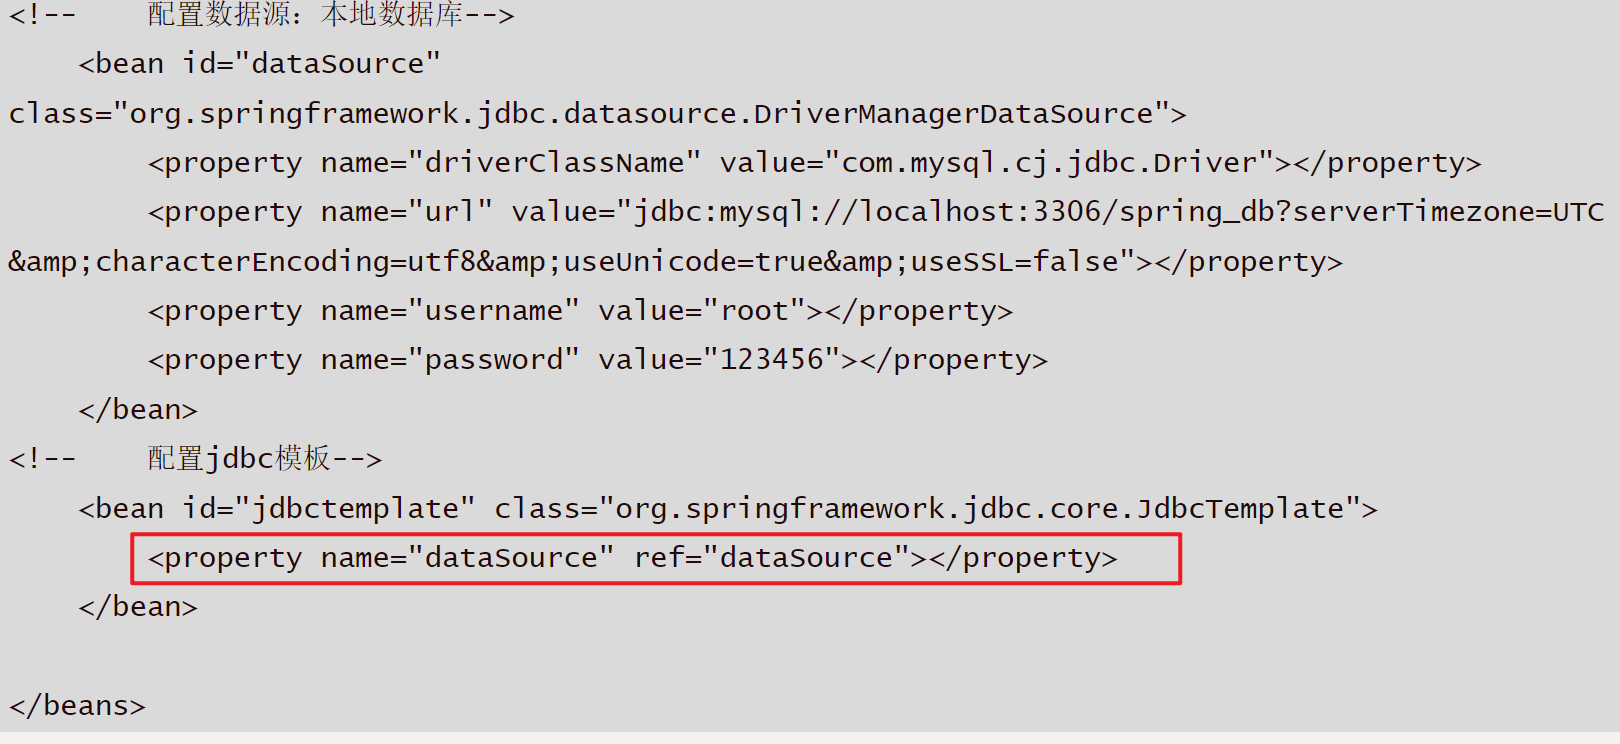
<!-- 配置数据源:本地数据库-->
<bean id="dataSource" class="org.springframework.jdbc.datasource.DriverManagerDataSource">
<property name="driverClassName" value="com.mysql.cj.jdbc.Driver"></property>
<property name="url" value="jdbc:mysql://localhost:3306/spring_db?serverTimezone=UTC
&characterEncoding=utf8&useUnicode=true&useSSL=false"></property>
<property name="username" value="root"></property>
<property name="password" value="123456"></property>
</bean>
<!-- 配置jdbc模板-->
<bean id="jdbctemplate" class="org.springframework.jdbc.core.JdbcTemplate">
<property name="dataSource" ref="dataSource"></property>
</bean>
</beans>
1、两个bean解析
jdbcTemlate:是个模板类,里面是装了一些执行sql语句的方法
DriverManagerDataSource:类是 Spring 框架提供的一个简单的数据源实现,它主要用于通过 JDBC 驱动管理器直接创建数据库连接
在这配置文件中主要是先配置DriverManagerDataSource连接数据库,连接后就能操作该数据库了
操作数据库通过jdbcTemlate这个类,操作前需要将配置好的DriverManagerDataSource,将它注入到模板类的dataSource字段中
三.创建数据库
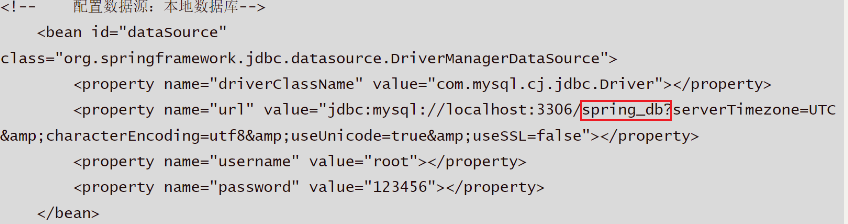
创建spring_db数据库与这边对应
(也可以先创建数据库然后在编写spring xml文件)
四.测试
import org.springframework.context.ApplicationContext;
import org.springframework.context.support.ClassPathXmlApplicationContext;
import org.springframework.jdbc.core.JdbcTemplate;

public class creat_tb01 {
    public static void main(String[] args) {
    //加载配置文件
        ApplicationContext a = new ClassPathXmlApplicationContext("ApplicationContext.xml");
    //获取JdbcTemplate 对象
        JdbcTemplate jdbcTemplate= a.getBean("jdbctemplate",JdbcTemplate.class);
    //通过jdbcTemplate对象调用执行sql语句的方法
        jdbcTemplate.execute(
        "create table account(" +
                "id int primary key auto_increment," +
                "username varchar (50)," +
                "balance double )");
        System.out.println("创建成功");
    }

}
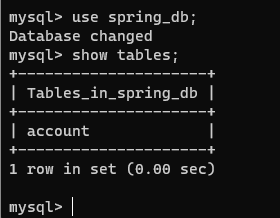 运行代码后就可以看到这边创建account表成功了
五.JdbcTemplate方法
一.update()
该方法用于插入更新输入数据的操作
update的重载:
int update(String sql Object.. args)//String 类型的sql语句和任意类型的参数,可以是数组
int update(String sql)//只传sql语句
....
这里只介绍这两种方法
1.使用
1.1数据库跟表使用上面创建的
1.2创建Account POJO与account表中的字段对应:
public class Account {
    private int id;
    private  String username;
    private Double balance;


    public int getId() {
        return id;
    }

    public Account setId(int id) {
        this.id = id;
        return null;
    }

    public String getUsername() {
        return username;
    }

    public void setUsername(String username) {
        this.username = username;
    }


    public Double getBalance() {
        return balance;
    }

    public void setBalance(Double balance) {
        this.balance = balance;
    }
}
1.3创建AccountDAO
public interface AccountDAO {
    int addAccount(Account account);
    int updataAccount(Account account);
    int deletAccount(Account account);
}
1.4创建AccountDAOImpl 实现AccountDAO
public class AccountDAOImpl implements AccountDAO {
	//添加JdbcTemplate 属性成员 用于从xml配置文件种注入配置好的JdbcTemplate  Bean
    private JdbcTemplate jdbcTemplate;

    public void setJdbcTemplate(JdbcTemplate jdbcTemplate) {
        this.jdbcTemplate = jdbcTemplate;
    }

    //实现添加记录方法
    @Override
    public int addAccount(Account account)
    {
        int num=0;
//        获取值
        Object[] parameter = new Object[]{account.getName(),account.getBalance()};

//        定义sql语句
        String sql="INSERT INTO account(username,balance) VALUES(?,?)";
        System.out.println(jdbcTemplate);
//        使用jdbcTemplate对象调用update方法
        num = jdbcTemplate.update(sql, parameter);
        return num;
    }
	//实现更新记录方法
    @Override
    public int updataAccount(Account account) {
        int num=0;
//        获取需要改的参数和id
        Object[] paraneter=new Object[]{account.getName(),account.getBalance(),account.getId()};
//        定义sql语句
        String sql ="UPDATE account SET username=?,balance=? WHERE id=?";
        num = jdbcTemplate.update(sql,paraneter);
        return num;
    }

    @Override
    public int deletAccount(Account account) {
        int num=0;

        Object[] paraneter =new Object[]{account.getId()};
        String sql ="DELETE FROM account WHERE id=?";
        num= jdbcTemplate.update(sql,paraneter);
        return num;
    }
}
2.介绍:
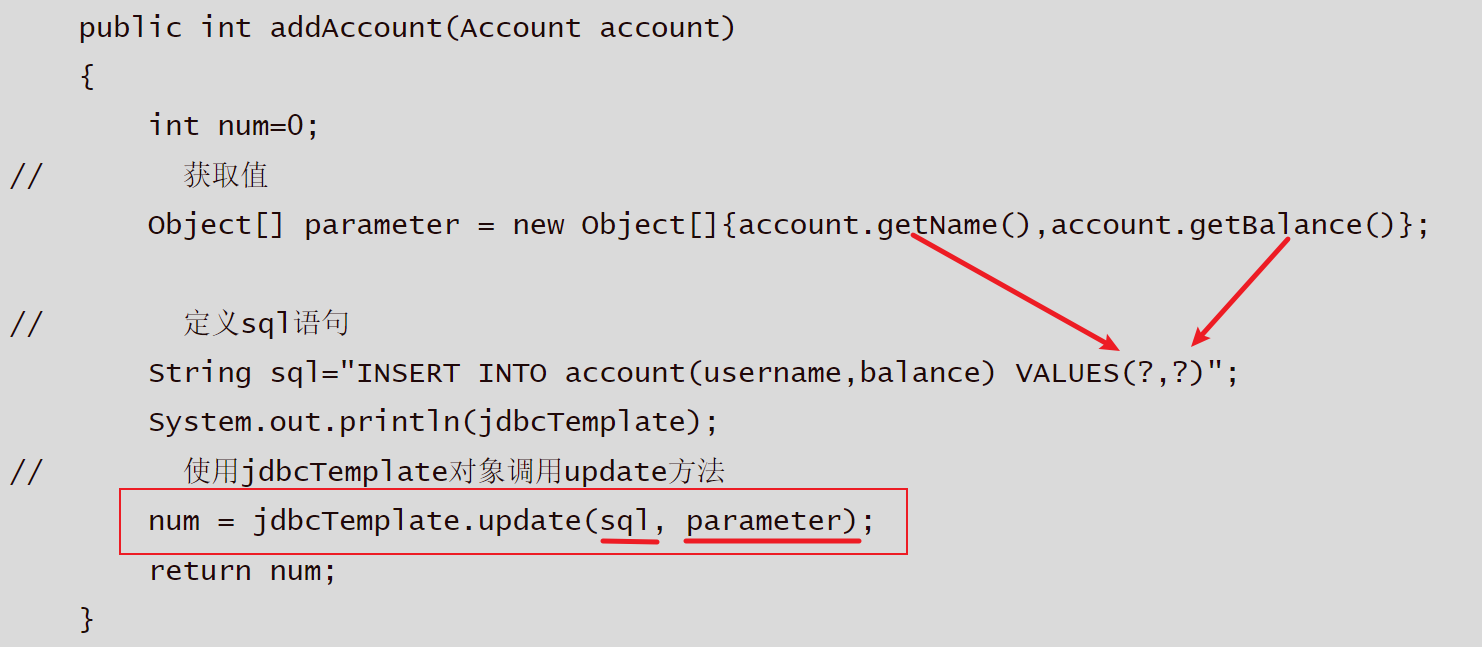
首先我们 这个方法需要接收一个Account对象用于获取设置好的值添加到Object数组中
创建sql语句 这边需要的参数需要使用?号来占位(也可以直接写传输人,这边是从测试类那边传过来的参数)
然后再通过jdbcTemplate对象调用update方法传入sql语句跟我们的获取到的parameter(参数)
然后update这个方法会将parameter获取到的参数依次传入sql语句种替换它的?占位符
这边只使用到了
int update(String sql Object.. args)
这个形式,还有一个
int update(String sql)
这个就是不用动态获取值来传入sql语句,直接定义好sql语句给update方法执行
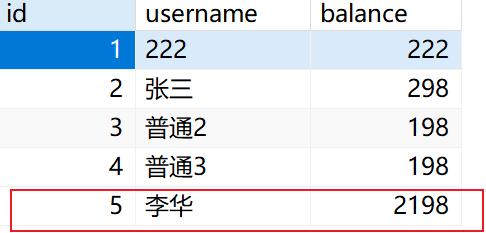
3.测试类:
public class add_account {
    public static void main(String[] args) {
        ApplicationContext applicationContext =new ClassPathXmlApplicationContext("ApplicationContext.xml");
        Account account =new Account();
       //设置参数
        account.setName("李华");
        account.setBalance(2198.0);

        AccountDAOImpl accountDAOImpl =applicationContext.getBean(AccountDAOImpl.class);
        int num = accountDAOImpl.addAccount(account);
        System.out.println("更新了"+num+"条记录");
    }
}

其他的方法也这样测试
二.query()
该方法用于查询数据
query的重载:
List query(String sql, RowMapper rowMapper)
//sql语句,rowmapper是将结果映射到哪个类,需要传入该类的字节码文件

List query(String sql, RowMapper rowMapper, object args)
//args是sql语句所需要的参数,可传入数组
....
1.使用
数据库、pojo、xml文件和上面使用一致
1.1创建AccountDao
public interface AccountDao {
    public List<Account> select_id(int i);
    public Account select_1(int i);
    public List<Account> select_form();
}
1.2创建AccounDaoImpl
public class AccountDaoImpl implements AccountDao{
private JdbcTemplate jdbcTemplate;
public void setJdbcTemplate(JdbcTemplate jdbcTemplate) {
this.jdbcTemplate = jdbcTemplate;
}
//根据id查询返回Lists
public List<Account> select_id(int i) {
String sql ="SELECT * FROM account WHERE id=?";
RowMapper<Account> rowMapper =new BeanPropertyRowMapper<>(Account.class);
return jdbcTemplate.query(sql,rowMapper,i);
}
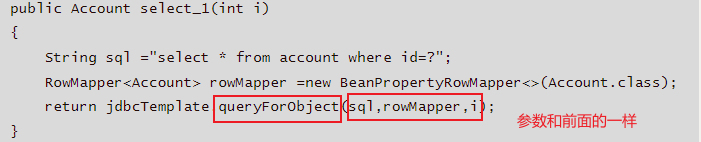
//根据id查询返回一个Account对象
public Account select_1(int i)
{
String sql ="select * from account where id=?";
RowMapper<Account> rowMapper =new BeanPropertyRowMapper<>(Account.class);
return jdbcTemplate.queryForObject(sql,rowMapper,i);
}
//查询account表中的全部记录返回List集合
public List<Account> select_form() {
String sql ="select * from account";
RowMapper<Account> rowMapper = new BeanPropertyRowMapper<>(Account.class);
return jdbcTemplate.query(sql,rowMapper);
}
}
2.介绍:
可以看到这边有一个不一样的方法(queryForObject)这个是只返回一条结果记录的方法,当我们只需要查询一条记录时可以用上
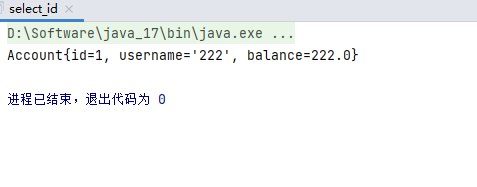
3.测试
- 1根据id查询返回Lists(这边演示的使用id查询使用返回lists的这种形式更麻烦了点,因为id一般只有一个)
public class select_id {
    public static void main(String[] args) {
        ApplicationContext applicationContext =new
                ClassPathXmlApplicationContext("ApplicationContext.xml");
        AccountDao Ad = applicationContext.getBean(AccountDaoImpl.class);
        List<Account> accounts = Ad.select_id(1);

        for (Account a: accounts
             ) {
            System.out.println(a);
        }

    }
}

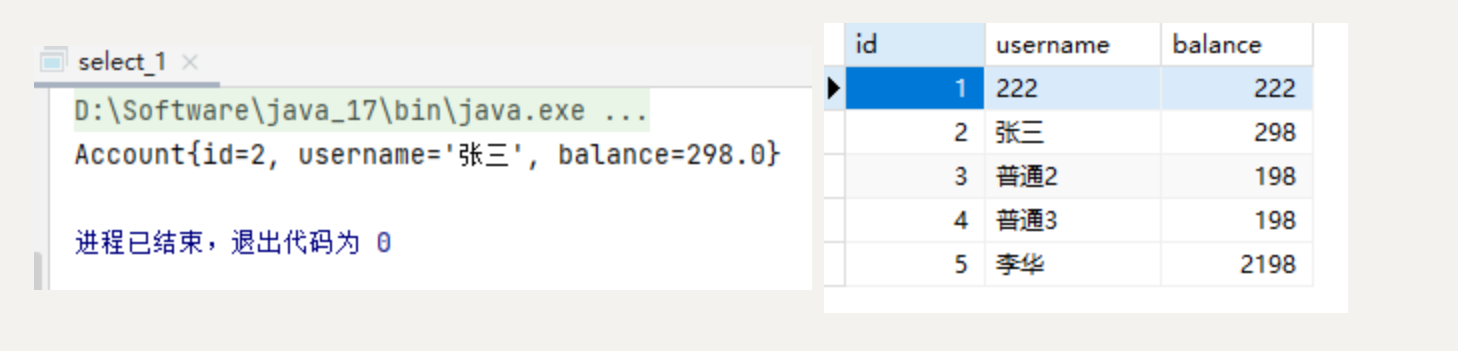
3.2根据id查询返回一个Account对象
public class select_1 {
    public static void main(String[] args) {
        ApplicationContext applicationContext =new ClassPathXmlApplicationContext("ApplicationContext.xml");
        AccountDao Ad = applicationContext.getBean(AccountDaoImpl.class);
        Account account = Ad.select_1(2);
        System.out.println(account);

    }
}
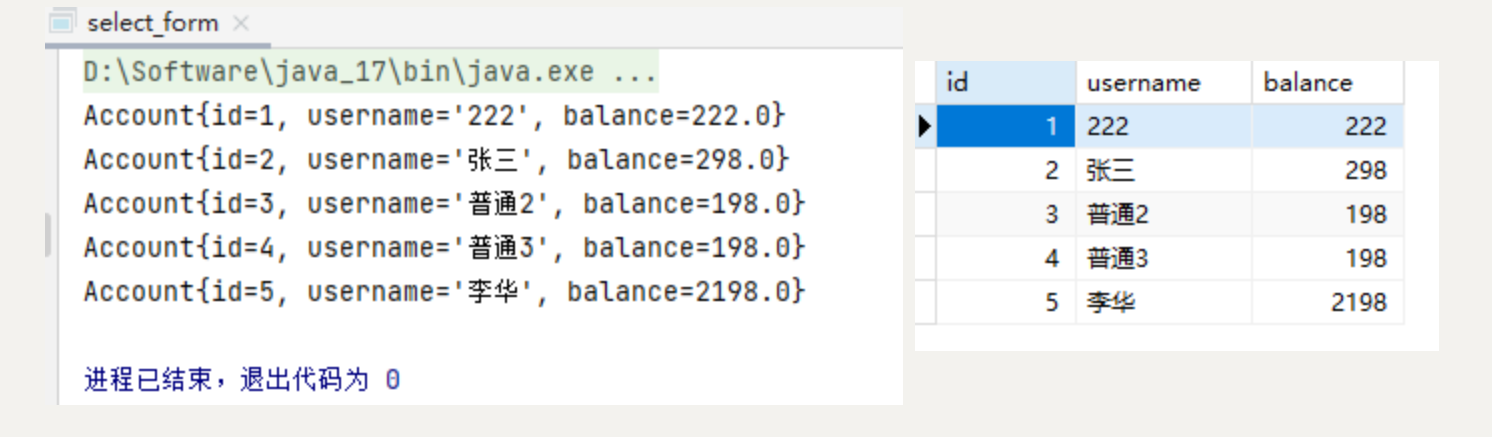
3.3查询account表中的全部记录返回List集合
public class select_form {
    public static void main(String[] args) {
        ApplicationContext applicationContext =new
                ClassPathXmlApplicationContext("ApplicationContext.xml");
        AccountDao bean = applicationContext.getBean(AccountDaoImpl.class);
        List<Account> accounts = bean.select_form();
        for (Account a: accounts
             ) {
            System.out.println(a);
        }

    }
}


 2287
2287


 被折叠的 条评论
为什么被折叠?
被折叠的 条评论
为什么被折叠?
 到【灌水乐园】发言


