


 本文介绍了如何使用Spring Boot与MyBatis-Plus配合,通过配置application.yml和自定义配置类,实现根据实体类动态生成数据库表的过程。关键步骤包括引入依赖、配置数据源和Mapper扫描,以及展示了一个User实体类示例。
1、导入依赖
<!--mybatisplus启动器-->
<dependency>
	<groupId>com.baomidou</groupId>
	<artifactId>mybatis-plus-boot-starter</artifactId>
	<version>3.3.2</version>
</dependency>
<!--创建表的插件-->
<dependency>
	<groupId>com.gitee.sunchenbin.mybatis.actable</groupId>
	<artifactId>mybatis-enhance-actable</artifactId>
	<version>1.1.1.RELEASE</version>
</dependency>
<!--druid数据源-->
<dependency>
	<groupId>com.alibaba</groupId>
	<artifactId>druid</artifactId>
	<version>1.1.21</version>
</dependency>
2、application.yml配置文件
#数据库配置
spring:
  datasource:
    driver-class-name: com.mysql.cj.jdbc.Driver
    url: jdbc:mysql://localhost:3306/myblog?useSSL=false&useUnicode=true&characterEncoding=utf-8&serverTimezone=GMT%2B8
    username: root
    password: 123456
    type: com.alibaba.druid.pool.DruidDataSource
#mybatisplus配置
mybatis:
  table:
    auto: create
    #create	    系统启动后,会将所有的表删除掉,然后根据model中配置的结构重新建表,该操作会破坏原有数据。
    #update	    系统会自动判断哪些表是新建的,哪些字段要修改类型等,哪些字段要删除,哪些字段要新增,该操作不会破坏原有数据。
    #none 		系统不做任何处理。
    #add		新增表/新增字段/新增索引/新增唯一约束的功能,不做做修改和删除 (只在版本1.0.9.RELEASE及以上支持)。
  model:
    pack: com.blog.table.entity #扫描用于创建表的对象的包名,多个包用“,”隔开
  database:
    type: mysql #数据库类型 目前只支持mysql
mybatis-plus:
  mapper-locations: classpath:/mapper/*mapper.xml
3、编写DataSourceConfig、MyBatisMapperScannerConfig这两个配置类(不能将这两个配置类合并)
- DataSourceConfig
@Configuration
@ComponentScan(basePackages = {"com.gitee.sunchenbin.mybatis.actable.manager.*"})
public class DataSourceConfig {

    @Value("${spring.datasource.driver-class-name}")
    private String driver;

    @Value("${spring.datasource.url}")
    private String url;

    @Value("${spring.datasource.username}")
    private String username;

    @Value("${spring.datasource.password}")
    private String password;

    @Bean
    public PropertiesFactoryBean configProperties() throws Exception{
        PropertiesFactoryBean propertiesFactoryBean = new PropertiesFactoryBean();
        PathMatchingResourcePatternResolver resolver = new PathMatchingResourcePatternResolver();
        propertiesFactoryBean.setLocations(resolver.getResources("classpath*:application.properties"));
        return propertiesFactoryBean;
    }

    @Bean
    public DruidDataSource dataSource() {
        DruidDataSource dataSource = new DruidDataSource();
        dataSource.setDriverClassName(driver);
        dataSource.setUrl(url);
        dataSource.setUsername(username);
        dataSource.setPassword(password);
        dataSource.setMaxActive(30);
        dataSource.setInitialSize(10);
        dataSource.setValidationQuery("SELECT 1");
        dataSource.setTestOnBorrow(true);
        return dataSource;
    }

    @Bean
    public DataSourceTransactionManager dataSourceTransactionManager() {
        DataSourceTransactionManager dataSourceTransactionManager = new DataSourceTransactionManager();
        dataSourceTransactionManager.setDataSource(dataSource());
        return dataSourceTransactionManager;
    }

    @Bean
    public SqlSessionFactoryBean sqlSessionFactory() throws Exception{
        SqlSessionFactoryBean sqlSessionFactoryBean = new SqlSessionFactoryBean();
        sqlSessionFactoryBean.setDataSource(dataSource());
        PathMatchingResourcePatternResolver resolver = new PathMatchingResourcePatternResolver();
        sqlSessionFactoryBean.setMapperLocations(resolver.getResources("classpath*:com/gitee/sunchenbin/mybatis/actable/mapping/*/*.xml"));
        sqlSessionFactoryBean.setTypeAliasesPackage("com.example.entity.*");
        return sqlSessionFactoryBean;
    }
}- MyBatisMapperScannerConfig
@Configuration
@AutoConfigureAfter(DataSourceConfig.class)
public class MyBatisMapperScannerConfig {

    @Bean
    public MapperScannerConfigurer mapperScannerConfigurer() throws Exception{
        MapperScannerConfigurer mapperScannerConfigurer = new MapperScannerConfigurer();
        mapperScannerConfigurer.setBasePackage("com.blog.table.mapper.*;com.gitee.sunchenbin.mybatis.actable.dao.*");
        mapperScannerConfigurer.setSqlSessionFactoryBeanName("sqlSessionFactory");
        return mapperScannerConfigurer;
    }

}
3、实体类
@Data
@AllArgsConstructor
@NoArgsConstructor
@Table(name = "user")//设置表名
public class User extends BaseModel {

    @TableId(type = IdType.AUTO)//mybatis-plus主键注解
    @IsAutoIncrement   //自增
    @IsKey             //actable主键注解
    @Column(comment = "用户ID")//对应数据库字段,不配置name会直接采用属性名作为字段名comment是注解
    private Long id;
    @Column(comment = "昵称")
    private String nickName;
    @Column(comment = "邮箱")
    private String email;
    @Column(name = "create_time",comment = "创建时间")
    private Date createTime;
    @Column(name = "update_time",comment = "修改时间")
    private Date updateTime;
    @Column(comment = "头像")
    private String avatar;
    @Column(comment = "用户名")
    private String username;
    @Column(comment = "密码")
    private String password;
}
配置完这些之后,启动springboot应用
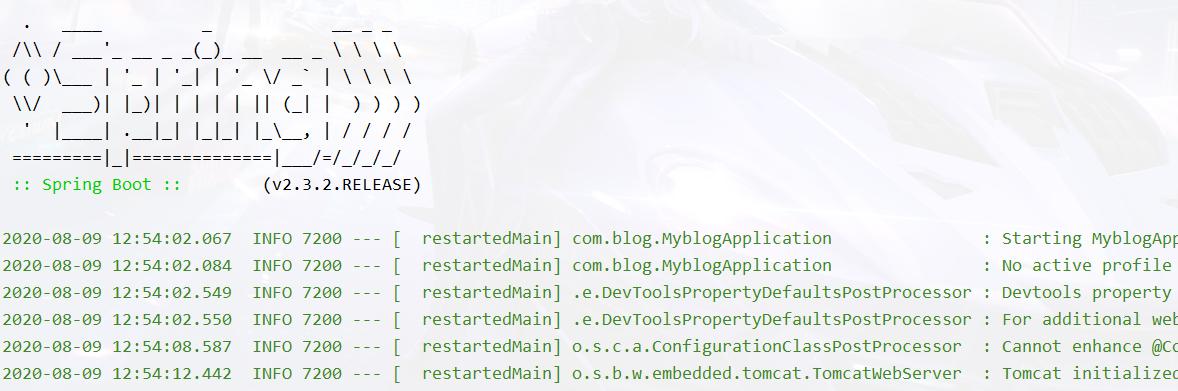
启动完成之后可以在控制台找到这样的一组信息:

如果是这样的话就说明自动建表成功!
可以跳转到数据库里面查看是否创建成功

可以看到我们这里的数据库表已经自动创建成功了
版权声明:本文为weixin_48413163原创文章,遵循 CC 4.0 BY-SA 版权协议,转载请附上原文出处链接和本声明。
本文链接:springboot+mybatis/mybatis-plus根据实体类自动创建数据库表_学java的穷鬼的博客-CSDN博客_mybatisplus根据实体类生成表


 1187
1187

 被折叠的 条评论
为什么被折叠?
被折叠的 条评论
为什么被折叠?
 到【灌水乐园】发言


