


 本文介绍了如何在SpringBoot应用中,通过自定义配置文件支持多个邮箱账号发送邮件,包括重写MailSenderPropertiesConfiguration并使用JavaMailSender和MailProperties来实现这一功能。
springboot带有spring-boot-starter-mail包,可用于发送邮件。但是SpringBoot mail默认只能配置一个账号,配置如下:
spring:
  mail:
    protocol: smtp
    host: smtp.126.com
    port: 25
    username: xxxx@126.com
    password: xxxxxxx
    default-encoding: UTF-8
    properties:
      mail:
        smtp:
          socketFactoryClass: javax.net.ssl.SSLSocketFactory
        debug: true
为了支持多个账号,需要自定义IOC的机制。
查看Springboot mail相关的源代码,发现邮件的配置主要是在类org.springframework.boot.autoconfigure.mail.MailSenderPropertiesConfiguration里完成,这里会配置JavaMailSender和MailProperties
因此解决问题的关键是重写MailSenderPropertiesConfiguration类,能够按照自定义的prefix配置单独的JavaMailSender和MailProperties。
代码如下:
- 引入依赖
		<dependency>
			<groupId>org.springframework.boot</groupId>
			<artifactId>spring-boot-starter-mail</artifactId>
		</dependency>

		<!-- 使用 thymeleaf 编写邮箱内容模板 -->
		<dependency>
			<groupId>org.springframework.boot</groupId>
			<artifactId>spring-boot-starter-thymeleaf</artifactId>
		</dependency>
- 配置 yml:
spring:
  mail:
  	# springBoot原配置  这里做默认配置
  	protocol: smtp
    host: xxxx.xxxx.com
    port: 25
    username: xxxx@xxxxx.com
    password: xxxxx
    default-encoding: UTF-8
    properties:
      fromName: 程序员小软(Boo)
      mail:
#        smtp:
#          ssl:
#            enable: true
#          socketFactoryClass: javax.net.ssl.SSLSocketFactory
        debug: false
    # 自定义扩展的配置 (支持多邮箱)
    mails:
      - protocol: smtp
        host: smtp.126.com
        port: 25
        username: xxxxx@126.com
        password: xxxxx
        default-encoding: UTF-8
        properties:
          mail:
            smtp:
              socketFactoryClass: javax.net.ssl.SSLSocketFactory
            # 是否开启debug模式  开启后会打印邮箱发送的详细信息
            debug: true
      - protocol: smtp
        host: smtp.163.com
        port: 25
        username: xxxxx@163.com
        password: xxxxx
      - protocol: smtp
        host: xxxxx
        port: 0000
        username: xxxxx
        password: xxxxx

  thymeleaf:
    mode: HTML
    encoding: utf-8
    # 禁用缓存
    cache: false
import org.springframework.boot.autoconfigure.mail.MailProperties;
import org.springframework.boot.context.properties.ConfigurationProperties;

import java.util.List;

/** 加载邮箱账号配置列表
 * description: BooMailProperties <br>
 * date: 2024/3/26 13:44 <br>
 * author: Boo <br>
 * version: 1.0 <br>
 */
@ConfigurationProperties(
        prefix = "spring.mail"
)
public class BooMailsProperties {
    private List<MailProperties> mails;

    public List<MailProperties> getMails() {
        return mails;
    }

    public void setMails(List<MailProperties> mails) {
        this.mails = mails;
    }
}
import org.springframework.beans.factory.annotation.Autowired;
import org.springframework.boot.autoconfigure.mail.MailProperties;
import org.springframework.mail.javamail.JavaMailSender;
import org.springframework.mail.javamail.JavaMailSenderImpl;
import org.springframework.stereotype.Component;
import org.springframework.util.CollectionUtils;

import java.util.HashMap;
import java.util.List;
import java.util.Map;
import java.util.Properties;

/** 获取邮件发送者
 * description: MailSenderFactory <br>
 * date: 2024/3/26 14:24 <br>
 * author: Boo <br>
 * version: 1.0 <br>
 */
@Component
public class MailSenderFactory {

    @Autowired
    BooMailsProperties booMailsProperties;

    private Map<String, JavaMailSender> mailSenderMap;

    /** 功能描述:
     * @param booMailsProperties 多个邮箱配置
     * @param mailPropertiesCommon springBoot原有的邮箱配置  这里做默认配置用
    * @Author: Boo
    * @Date: 2024/4/7 14:00
    */
    public MailSenderFactory(BooMailsProperties booMailsProperties,
                             MailProperties mailPropertiesCommon){
        List<MailProperties> emailArr = booMailsProperties.getMails();
        if (CollectionUtils.isEmpty(emailArr)){
            emailArr.add(mailPropertiesCommon);
            log.error("You must configuration the mails for spring.mail!");
            return;
        }

        mailSenderMap = new HashMap<>();
        for (MailProperties mailProperties : emailArr) {
            copyNonNullProperties(mailPropertiesCommon, mailProperties);
            JavaMailSenderImpl sender = new JavaMailSenderImpl();
            this.applyProperties(mailProperties, sender);
            mailSenderMap.put(mailProperties.getUsername(), sender);
        }
    }

    /**
     * 获取邮件发送者
     * @param username
     * @return
     */
    public JavaMailSender getMailSender(String username){
        return mailSenderMap.get(username);
    }

    private void applyProperties(MailProperties properties, JavaMailSenderImpl sender) {
        sender.setHost(properties.getHost());
        if (properties.getPort() != null) {
            sender.setPort(properties.getPort());
        }

        sender.setUsername(properties.getUsername());
        sender.setPassword(properties.getPassword());
        sender.setProtocol(properties.getProtocol());
        if (properties.getDefaultEncoding() != null) {
            sender.setDefaultEncoding(properties.getDefaultEncoding().name());
        }

        if (!properties.getProperties().isEmpty()) {
            sender.setJavaMailProperties(this.asProperties(properties.getProperties()));
        }

    }

    private Properties asProperties(Map<String, String> source) {
        Properties properties = new Properties();
        properties.putAll(source);
        return properties;
    }

	/** 功能描述: 拷贝target中没有的属性
     * @param source
     * @param target
    * @return: void
    * @Author: Boo
    * @Date: 2024/4/7 14:01
    */
    public void copyNonNullProperties(Object source, Object target) {
        BeanWrapper sourceWrapper = PropertyAccessorFactory.forBeanPropertyAccess(source);
        BeanWrapper targetWrapper = PropertyAccessorFactory.forBeanPropertyAccess(target);

        PropertyDescriptor[] propertyDescriptors = BeanUtils.getPropertyDescriptors(source.getClass());
        for (PropertyDescriptor propertyDescriptor : propertyDescriptors) {
            String propertyName = propertyDescriptor.getName();
            Object srcValue = sourceWrapper.getPropertyValue(propertyName);
            Object targetValue = targetWrapper.getPropertyValue(propertyName);
            if (srcValue != null && targetValue == null) {
                targetWrapper.setPropertyValue(propertyName, srcValue);
            }

            if (srcValue != null && srcValue instanceof Map && targetValue instanceof Map) {
                copyNonNullProperties4Map(srcValue, targetValue);
            }
        }
    }

	/** 拷贝target中没有的属性 */
    private void copyNonNullProperties4Map(Object srcValue, Object targetValue) {
        Map srcMap = (Map) srcValue;
        Map targetMap = (Map) targetValue;

        srcMap.forEach((k, v) -> {
            if (targetMap.get(k) == null) {
                targetMap.put(k, v);
            }
        });
    }

}
import lombok.Synchronized;
import lombok.extern.slf4j.Slf4j;
import org.springframework.beans.factory.annotation.Autowired;
import org.springframework.boot.autoconfigure.mail.MailProperties;
import org.springframework.mail.MailAuthenticationException;
import org.springframework.mail.MailException;
import org.springframework.mail.javamail.JavaMailSender;
import org.springframework.mail.javamail.MimeMessageHelper;
import org.springframework.stereotype.Component;
import org.thymeleaf.TemplateEngine;
import org.thymeleaf.context.Context;

import javax.mail.MessagingException;
import javax.mail.internet.MimeMessage;
import java.io.File;
import java.util.Arrays;
import java.util.Date;
import java.util.List;

/**
 * description: EmailSender <br>
 * date: 2023/12/4 11:07 <br>
 * author: Boo <br>
 * version: 1.0 <br>
 */
@Component
@Slf4j
public class EmailSender {

	private List<MailProperties> mailPropertiesList;

	private int activitedMailIndex = 0;
	private String activitedMailDate = "";

	@Autowired
	BooMailsProperties booMailsProperties;

	@Autowired
	MailSenderFactory mailSenderFactory;

	@Autowired
	TemplateEngine templateEngine;

	public EmailSender(BooMailsProperties booMailsProperties) {
		// 参数mail.mime.splitlongparameters 在linux下 会默认为 true,附件名过长,就会被截断
		System.getProperties().setProperty("mail.mime.splitlongparameters", "false");
		this.mailPropertiesList = booMailsProperties.getMails();
	}


	public boolean send(String[] mailAddressArr,
						String subject,
						String title,
						String text,
						File file) {

		String errMsg = "";

		initActivitedMailIndex();

		MailProperties mailProperties = mailPropertiesList.get(activitedMailIndex);
		JavaMailSender javaMailSender = mailSenderFactory.getMailSender(mailProperties.getUsername());
		MimeMessage msg = javaMailSender.createMimeMessage();

		if (mailAddressArr == null || mailAddressArr.length < 1){
			throw new RuntimeException("Sending email failed: The recipient's email must not be empty!");
		}

		// 收件邮箱去重
		if (mailAddressArr.length > 0){
			mailAddressArr = Arrays.stream(mailAddressArr)
					.map(a -> a.trim())
					.distinct().toArray(String[]::new);
		}

		// 校验邮箱格式
		for (int i = 0; i < mailAddressArr.length; i++) {
			if (!Validator.isEmail(mailAddressArr[i])){
				throw new RuntimeException(String.format("The mail [%s] incorrect format!", mailAddressArr[i]));
			}
		}

		try {
			MimeMessageHelper helper = new MimeMessageHelper(msg,true);
			//设置邮件元信息
			helper.setTo(mailAddressArr);
			// 自定义发送方名称
			String fromName = mailProperties.getProperties().get("fromName");
			if (StrUtil.isNotBlank(fromName)){
				helper.setFrom(String.format("%s<%s>", fromName, mailProperties.getUsername()));
			}else {
				helper.setFrom(mailProperties.getUsername());
			}
			helper.setSubject(subject);
			helper.setSentDate(new Date());
			if (file!=null && file.exists()){
				// helper.addAttachment(file.getName(), file);
				// 防止附件名乱码
				helper.addAttachment(MimeUtility.encodeWord(file.getName(),"utf-8","B"), file);

			}

			//模板渲染
			Context context = new Context();
			context.setVariable("title", title);
			context.setVariable("text", text);
			String mail = templateEngine.process("mail/def", context);
			helper.setText(mail, true);
			javaMailSender.send(msg);
			return true;
		} catch (MessagingException e) {
			changeMail();
			errMsg = e.getMessage();
		}catch(MailAuthenticationException e){
			changeMail();
			errMsg = e.getMessage();
		}catch(MailException e){
			changeMail();
			errMsg = e.getMessage();
		}
		throw new RuntimeException(String.format("Send email fail: %s, please adjust or try again!",  errMsg));
	}


	@Synchronized
	private void changeMail() {
		if (activitedMailIndex < mailPropertiesList.size() - 1){
			activitedMailIndex ++;
		}else {
			activitedMailIndex = 0;
		}
	}

	@Synchronized
	private void initActivitedMailIndex() {
		String today = DateUtil.today();
		if (!activitedMailDate.equals(today)){
			activitedMailIndex = 0;
			activitedMailDate = today;
		}
	}

}
问题
- JavaMail发送带附件邮件时附件名变成了ATT00002、未命名的附件、或者附件名显示不全的原因及解决方案
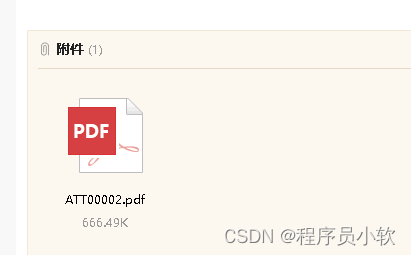
原因:附件名过长,触发了校验导致进行了截取
解决方案1:文件名缩短
解决方案2:干掉这个校验-在调用MimeBodyPart.setFileName(String fileName)之前加一行代码:
System.getProperties().setProperty("mail.mime.splitlongparameters", "false");
参数mail.mime.splitlongparameters 在linux下 会默认为 true,附件名过长,就会被截断
以上代码只需要配置一次,因此可以写到启动类中;我这里写在了EmailSender的构造函数中,这样容器启动会执行一次。
- debug模式
日志打印超级长的内容(有附件),线上建议关闭 — 配置spring.mail.properties.mail.debug=false


 2438
2438


 被折叠的 条评论
为什么被折叠?
被折叠的 条评论
为什么被折叠?
 到【灌水乐园】发言


