


之前,npm run build打包时输出信息一直提示设置 mode:

所以,记录一下如何设置一个开发环境。
修改webpack.config.js,将 mode 设置为 'development',并将 title 设置为 'Development'。
webpack.config.js:
const path = require('path')
const HtmlWebpackPlugin = require('html-webpack-plugin');

module.exports = {
  mode: 'development',
  entry: {
    index: './src/index.js',
    print: './src/print.js',
  },
  plugins: [
    new HtmlWebpackPlugin({
      title: 'Development',
    }),
  ],
  output: {
    filename: '[name].bundle.js',
    path: path.resolve(__dirname, 'dist'),
    clean: true
  }
}
使用 source map
当 webpack 打包源代码时,可能会很难追踪到 error(错误) 和 warning(警告) 在源代码中的原始位置。
例如,如果将三个源文件(a.js, b.js 和 c.js)打包到一个 bundle(bundle.js)中,而其中一个源文件包含一个错误,那么堆栈跟踪就会直接指向到 bundle.js。
为了更容易地追踪 error 和 warning,JavaScript 提供了 source maps功能,可以将编译后的代码映射回原始源代码。
例如,如果一个错误来自于 b.js,source map 就会明确的告诉你。
inline-source-map
接下来,使用 inline-source-map 选项,这有助于解释说明示例意图(此配置仅用于示例,不要用于生产环境):
修改webpack.config.js:
const path = require('path')
const HtmlWebpackPlugin = require('html-webpack-plugin');

module.exports = {
  mode: 'development',
  entry: {
    index: './src/index.js',
    print: './src/print.js',
  },
  devtool: 'inline-source-map',
  plugins: [
    new HtmlWebpackPlugin({
      title: 'Development',
    }),
  ],
  output: {
    filename: '[name].bundle.js',
    path: path.resolve(__dirname, 'dist'),
    clean: true
  }
}
然后,在 print.js 文件中生成一个错误:
修改src/print.js:
 export default function printMe() {
  console.log('I get called from print.js!');
  cosnole.log('I get called from print.js!');
 }
运行 npm run build:
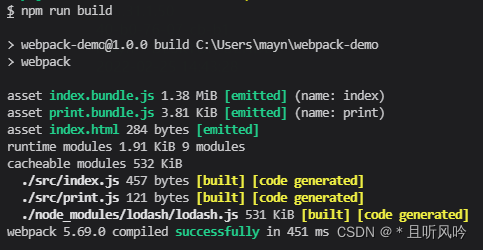
由于已经设置了 mode,所以打包时不会再出现之前的模式设置提示了。
在浏览器中打开生成的 index.html 文件,点击按钮,在控制台查看:

可以看到,此错误包含有发生错误的文件(print.js)和行号(3)的引用。
现在可以确切地知道,所要解决问题的文件以及代码位置。
自动编译代码
在每次编译代码时,手动运行 npm run build 会显得很麻烦。
webpack 提供几种可选方式,可以在代码发生变化后自动编译代码:
- webpack’s Watch Mode
- webpack-dev-server
- webpack-dev-middleware
使用 watch mode(观察模式)
可以指示 webpack “watch” 依赖图中所有文件的更改。
如果其中一个文件被更新,代码将被重新编译,就不必再去手动运行整个构建。
修改 package.json 文件,添加一个用于启动 webpack watch mode 的 npm scripts:
{
  "name": "webpack-demo",
  "version": "1.0.0",
  "description": "",
  "private": true,
  "scripts": {
    "test": "echo \"Error: no test specified\" && exit 1",
    "watch": "webpack --watch",
    "build": "webpack"
  },
  "keywords": [],
  "author": "",
  "license": "ISC",
  "devDependencies": {
    "html-webpack-plugin": "^5.5.0",
    "webpack": "^5.69.0",
    "webpack-cli": "^4.9.2"
  },
  "dependencies": {
    "lodash": "^4.17.21"
  }
}
运行 npm run watch:
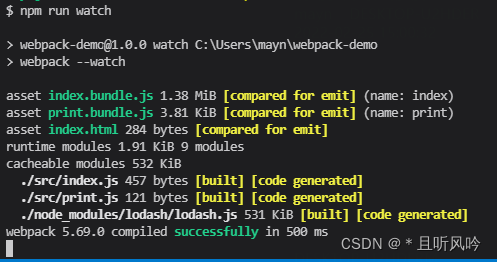
但是,运行完成之后没有退出命令行。
因为 script 当前还在 watch 文件。
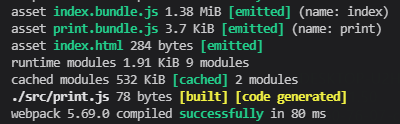
修改src/print.js:
export default function printFunx () {
  console.log('This is print.js~');
}
保存文件, 在terminal(终端) 窗口看到 webpack 在自动地重新编译修改后的模块:
接下来,通过 webpack-dev-server 实现自动刷新浏览器。
使用 webpack-dev-server
webpack-dev-server 提供了一个基本的 web server,并且具有 live reloading(实时重新加载) 功能。
命令行输入以下命令:
npm install --save-dev webpack-dev-server
安装完成:

修改webpack.config.js配置文件,告知 dev server,从什么位置查找文件:
const path = require('path')
const HtmlWebpackPlugin = require('html-webpack-plugin');

module.exports = {
  mode: 'development',
  entry: {
    index: './src/index.js',
    print: './src/print.js',
  },
  devtool: 'inline-source-map',
  devServer: {
    static: './dist',
  },
  plugins: [
    new HtmlWebpackPlugin({
      title: 'Development',
    }),
  ],
  output: {
    filename: '[name].bundle.js',
    path: path.resolve(__dirname, 'dist'),
    clean: true
  }
}
以上配置的作用:告知 webpack-dev-server,将 dist 目录下的文件 serve 到 localhost:8080 下。
webpack-dev-server会从output.path中定义的目录为服务提供 bundle 文件。也就是说,文件将可以通过
http://[devServer.host]:[devServer.port]/[output.publicPath]/[output.filename]进行访问。
webpack-dev-server 在编译之后不会写入到任何输出文件。而是将 bundle 文件保留在内存中,然后将它们 serve 到 server 中,就好像它们是挂载在 server 根路径上的真实文件一样。
接下来,添加一个可以直接运行 dev server 的 script:
修改package.json:
 {
  "name": "webpack-demo",
  "version": "1.0.0",
  "description": "",
  "private": true,
  "scripts": {
    "test": "echo \"Error: no test specified\" && exit 1",
    "watch": "webpack --watch",
    "start": "webpack serve --open",
    "build": "webpack"
  },
  "keywords": [],
  "author": "",
  "license": "ISC",
  "devDependencies": {
    "html-webpack-plugin": "^5.5.0",
    "webpack": "^5.69.0",
    "webpack-cli": "^4.9.2",
    "webpack-dev-server": "^4.7.4"
  },
  "dependencies": {
    "lodash": "^4.17.21"
  }
}
在命令行中运行 npm start,可以看到,浏览器会自动加载页面。
如果不用“start”,而是其他的名字,如“dev”:
 {
  "name": "webpack-demo",
  "version": "1.0.0",
  "description": "",
  "private": true,
  "scripts": {
    "test": "echo \"Error: no test specified\" && exit 1",
    "watch": "webpack --watch",
    "dev": "webpack serve --open",
    "build": "webpack"
  },
  "keywords": [],
  "author": "",
  "license": "ISC",
  "devDependencies": {
    "html-webpack-plugin": "^5.5.0",
    "webpack": "^5.69.0",
    "webpack-cli": "^4.9.2",
    "webpack-dev-server": "^4.7.4"
  },
  "dependencies": {
    "lodash": "^4.17.21"
  }
}
则在命令行要执行:
npm run dev
注意写法,执行npm dev是不可以的。
使用 webpack-dev-middleware
webpack-dev-middleware 是一个封装器(wrapper),它可以把 webpack 处理过的文件发送到一个 server。webpack-dev-server 在内部使用了它,然而,它也可以作为一个单独的 package 来使用,以便根据需求进行更多自定义设置。
接下来,练习使用 webpack-dev-middleware 配合 express server 。
首先,安装 express 和 webpack-dev-middleware,命令函输入:
npm install --save-dev express webpack-dev-middleware
安装完成:

修改webpack.config.js配置文件,以确保 middleware(中间件) 功能能够正确启用:
 const path = require('path')
const HtmlWebpackPlugin = require('html-webpack-plugin');

module.exports = {
  mode: 'development',
  entry: {
    index: './src/index.js',
    print: './src/print.js',
  },
  devtool: 'inline-source-map',
  devServer: {
    static: './dist',
  },
  plugins: [
    new HtmlWebpackPlugin({
      title: 'Development',
    }),
  ],
  output: {
    filename: '[name].bundle.js',
    path: path.resolve(__dirname, 'dist'),
    clean: true,
    publicPath: '/'
  }
}
接下来,在 server 脚本使用 publicPath,以确保文件资源能够正确地 serve 在 http://localhost:3000 下。
接下来,设置自定义 express server。
新建server.js,指定 port number(端口号):
const express = require('express')
const webpack = require('webpack')
const webpackDevMiddleware = require('webpack-dev-middleware')

const app = express()
const config = require('./webpack.config.js')
const compiler = webpack(config)

// 告知 express 使用 webpack-dev-middleware,
// 以及将 webpack.config.js 配置文件作为基础配置。
app.use(
  webpackDevMiddleware(compiler, {
    publicPath: config.output.publicPath
  })
)

// 将文件 serve 到 port 3000
app.listen(3000, () => {
  console.log('listening on port 3000!\n');
})
此时项目结构:
  webpack-demo
  |- package.json
  |- package-lock.json
  |- webpack.config.js
  |- server.js
  |- /dist
  |- /src
    |- index.js
    |- print.js
  |- /node_modules
现在,添加一个 npm script,以便更方便地运行 server:
修改package.json:
 {
   "name": "webpack-demo",
   "version": "1.0.0",
   "description": "",
   "private": true,
   "scripts": {
     "test": "echo \"Error: no test specified\" && exit 1",
     "watch": "webpack --watch",
     "start": "webpack serve --open",
    "server": "node server.js",
     "build": "webpack"
   },
   "keywords": [],
   "author": "",
   "license": "ISC",
   "devDependencies": {
     "express": "^4.17.1",
     "html-webpack-plugin": "^4.5.0",
     "webpack": "^5.4.0",
     "webpack-cli": "^4.2.0",
     "webpack-dev-middleware": "^4.0.2",
     "webpack-dev-server": "^3.11.0"
   },
   "dependencies": {
     "lodash": "^4.17.20"
   }
 }
执行 npm run server,打开浏览器,访问 http://localhost:3000:
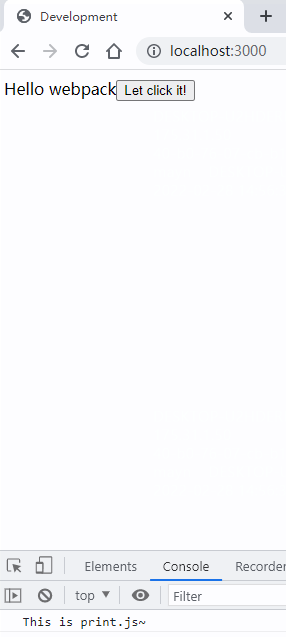
可以看到, webpack 应用程序已经运行。


 2088
2088


 被折叠的 条评论
为什么被折叠?
被折叠的 条评论
为什么被折叠?
 到【灌水乐园】发言


