


注:两个 _config.yml,一个是 站点配置文件,一个是 主题配置文件。
一、基本美化
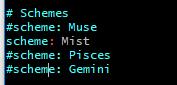
0. 更换主题风格
要更改的文件:主题配置文件
如果出现,本地的风格改变了,github 上的风格没改变
1. hexo clean # 清除
2. hexo g # 重新生成
3. hexo d # 上传
1. 语言
要更改的文件:站点配置文件
language: zh-Hans2. 基本信息修改
要更改的文件:站点配置文件
# Site
title: 柠泽の博客
subtitle:
description: 专属小可爱
keywords:
author: 柠泽
language: zh-Hans
timezone:
3、修改头像
要更改的文件:主题配置文件
1. 在source 下创建 images 文件夹
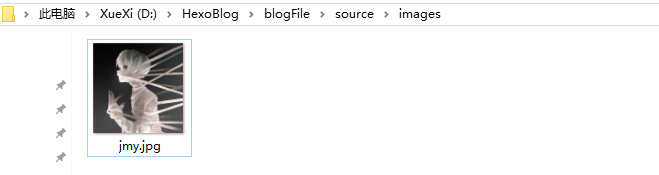
2. 主题文件,修改头像路径

4. 菜单栏
要更改的文件:主题配置文件
menu:
  home: / || home
  categories: /categories/ || th
  archives: /archives/ || archive
  tags: /tags/ || tags
  about: /about/ || user
  #schedule: /schedule/ || calendar
  #sitemap: /sitemap.xml || sitemap
#commonweal: /404/ || heartbeat但是点击进去,却报错:Cannot GET /categories/,404 不要慌,不能获取categories,创建一个就OK!
在根目录下运行 :
hexo new page 'categories' #创建categories子目录
hexo new page 'tags' #创建tags子目录
hexo new page 'about' #创建about子目录
5、搜索 Local Search
要更改的文件:站点配置文件,主题配置文件
1. 在根目录下运行:
添加百度/谷歌/本地 自定义站点内容搜索,安装 hexo-generator-searchdb
npm install hexo-generator-searchdb --save2. 站点文件,新增以下内容到任意位置:
search:
  path: search.xml
  field: post
  format: html
  limit: 10000
3. 主题文件,启用本地搜索功能:
# Local search
local_search:
  enable: true
6、设置侧栏
1. 设置侧栏的位置
left- 靠左放置right- 靠右放置

2. 设置侧栏显示的时机
post- 默认行为,在文章页面(拥有目录列表)时显示always- 在所有页面中都显示hide- 在所有页面中都隐藏(可以手动展开)remove- 完全移除
推荐使用默认,刚刚又改回来了

二、特效美化
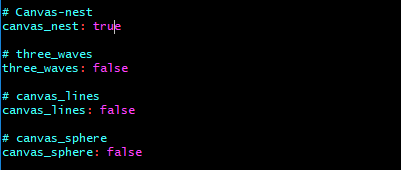
1. 动态背景
要更改的文件:主题配置文件
设置为 true 即可,推荐使用 canvas_nest
2. 添加顶部加载条
编辑 themes/hexo-theme-next/layout/_partials/head.swig
<script src="//cdn.bootcss.com/pace/1.0.2/pace.min.js"></script>
<link href="//cdn.bootcss.com/pace/1.0.2/themes/pink/pace-theme-flash.css" rel="stylesheet">
<style>
    .pace .pace-progress {
        background: #1E92FB; /*进度条颜色*/
        height: 1px;
    }
    .pace .pace-progress-inner {
         box-shadow: 0 0 10px #1E92FB, 0 0 5px     #1E92FB; /*阴影颜色*/
    }
    .pace .pace-activity {
        border-top-color: #1E92FB;    /*上边框颜色*/
        border-left-color: #1E92FB;    /*左边框颜色*/
    }
</style> 
3. 点击出现心形效果
编辑 themes/hexo-theme-next/layout/_layout.swig ,在末尾添加以下代码 ,小编未使用
js 文件如下:
!function (e, t, a) {
    function n() {
        c(".heart{width: 10px;height: 10px;position: fixed;background: #f00;transform: rotate(45deg);-webkit-transform: rotate(45deg);-moz-transform: rotate(45deg);}.heart:after,.heart:before{content: '';width: inherit;height: inherit;background: inherit;border-radius: 50%;-webkit-border-radius: 50%;-moz-border-radius: 50%;position: fixed;}.heart:after{top: -5px;}.heart:before{left: -5px;}"), o(), r()
    }

    function r() {
        for (var e = 0; e < d.length; e++) d[e].alpha <= 0 ? (t.body.removeChild(d[e].el), d.splice(e, 1)) : (d[e].y--, d[e].scale += .004, d[e].alpha -= .013, d[e].el.style.cssText = "left:" + d[e].x + "px;top:" + d[e].y + "px;opacity:" + d[e].alpha + ";transform:scale(" + d[e].scale + "," + d[e].scale + ") rotate(45deg);background:" + d[e].color + ";z-index:99999");
        requestAnimationFrame(r)
    }

    function o() {
        var t = "function" == typeof e.onclick && e.onclick;
        e.onclick = function (e) {
            t && t(), i(e)
        }
    }

    function i(e) {
        var a = t.createElement("div");
        a.className = "heart", d.push({
            el: a,
            x: e.clientX - 5,
            y: e.clientY - 5,
            scale: 1,
            alpha: 1,
            color: s()
        }), t.body.appendChild(a)
    }

    function c(e) {
        var a = t.createElement("style");
        a.type = "text/css";
        try {
            a.appendChild(t.createTextNode(e))
        } catch (t) {
            a.styleSheet.cssText = e
        }
        t.getElementsByTagName("head")[0].appendChild(a)
    }

    function s() {
        return "rgb(" + ~~(255 * Math.random()) + "," + ~~(255 * Math.random()) + "," + ~~(255 * Math.random()) + ")"
    }

    var d = [];
    e.requestAnimationFrame = function () {
        return e.requestAnimationFrame || e.webkitRequestAnimationFrame || e.mozRequestAnimationFrame || e.oRequestAnimationFrame || e.msRequestAnimationFrame || function (e) {
            setTimeout(e, 1e3 / 60)
        }
    }(), n()
}(window, document);
<!-- 页面点击小红心 -->
<script type="text/javascript" src="/js/love.js"></script>
三、页面美化
0. 在右上角或者左上角实现 fork me on github

<a href="https://github.com/you"><img style="position: absolute; top: 0; right: 0; border: 0;" src="https://s3.amazonaws.com/github/ribbons/forkme_right_gray_6d6d6d.png" alt="Fork me on GitHub"></a>1. 编辑 themes/hexo-theme-next/layout/_layout.swig
2. 放入到 <div class="headband"></div> 后面
3. 并把 href 改为自己的 Github 地址
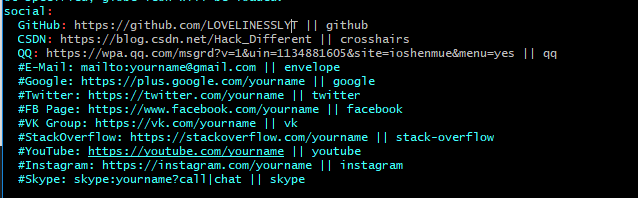
1. 侧边栏社交小图标
要更改的文件:主题配置文件
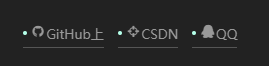
图标库,将图标名字复制在如下位置
GitHub(显示的名称):http://github.com/LOVELINESSLYT (跳转的链接)|| github(图标名字)
2. 修改网页底部的桃心
自定义图标,但会受分辨率的影响
Icon 图标库,将下载好的图片放入 source/images 下,推荐下载 16x16 或 18x18 的
编辑 themes/hexo-theme-next/layout/_partials/footer.swig

3. 添加可爱的 Live 2D 模型
要更改的文件:站点配置文件
1. 安装 live2d
npm install --save hexo-helper-live2d2. 模型列表 - 模型预览
live2d-widget-model-chitoselive2d-widget-model-epsilon2_1live2d-widget-model-gflive2d-widget-model-haru/01(usenpm install --save live2d-widget-model-haru)live2d-widget-model-haru/02(usenpm install --save live2d-widget-model-haru)live2d-widget-model-harutolive2d-widget-model-hibikilive2d-widget-model-hijikilive2d-widget-model-izumilive2d-widget-model-koharulive2d-widget-model-mikulive2d-widget-model-ni-jlive2d-widget-model-nicolive2d-widget-model-nietzschelive2d-widget-model-nipsilonlive2d-widget-model-nitolive2d-widget-model-shizukulive2d-widget-model-tororolive2d-widget-model-tsumikilive2d-widget-model-unitychanlive2d-widget-model-wankolive2d-widget-model-z16
3. 安装模型
npm install live2d-widget-model-koharu4. 修改文件,在最后面加入:
# Live2D
## https://github.com/EYHN/hexo-helper-live2d
live2d:
  enable: true
  scriptFrom: local # 默认
  pluginRootPath: live2dw/
  pluginJsPath: lib/
  pluginModelPath: assets/ # 模型文件相对与插件根目录路径
  tagMode: false
  debug: false
  model:
    use: live2d-widget-model-koharu
    # use: live2d-widget-model-hibiki
    # use: live2d-widget-model-z16
    scale: 1
    hHeadPos: 0.5
    vHeadPos: 0.618
  display:
    superSample: 2
    width: 100
    height: 175
    # position: left
    position: right
    hOffset: 0
    vOffset: 0
  mobile:
    show: true
    scale: 0.5
  react:
    opacityDefault: 0.7
    opacityOnHover: 0.2
4. 配置访问统计
要更改的文件:主题配置文件
找到enable: false 改成enable: true
# Show PV/UV of the website/page with busuanzi.
# Get more information on http://ibruce.info/2015/04/04/busuanzi/
busuanzi_count:
  # count values only if the other configs are false
  enable: true
  # custom uv span for the whole site
  site_uv: true
  site_uv_header: <i class="fa fa-user"></i> 访问人数
  site_uv_footer:
  # custom pv span for the whole site
  site_pv: true
  site_pv_header: <i class="fa fa-eye"></i> 总访问量
  site_pv_footer:
  # custom pv span for one page only
  page_pv: true
  page_pv_header: <i class="fa fa-file-o"></i> 阅读数
  page_pv_footer:
5. 主页文章添加阴影效果
打开 themes/hexo-theme-next/source/css/_custom/custom.styl 向里面加入:
// 主页文章添加阴影效果
 .post {
   margin-top: 60px;
   margin-bottom: 60px;
   padding: 25px;
   -webkit-box-shadow: 0 0 5px rgba(202, 203, 203, .5);
   -moz-box-shadow: 0 0 5px rgba(202, 203, 204, .5);
  }
6. 文章字数统计与阅读时间
要更改的文件:主题配置文件
1. 安装
npm install hexo-wordcount --save2. 修改
# Post wordcount display settings
# Dependencies: https://github.com/willin/hexo-wordcount
post_wordcount:
  item_text: true
  wordcount: true
  min2read: true
7. 让页脚的心脏图标跳动起来
1. 编辑 themes/hexo-theme-next/layout/_partials/footer.swig ,改为:
  <span class="with-love" id="heart">
    <i class="fa fa-heartbeat" aria-hidden="true"></i>
  </span>
2. 编辑 themes/hexo-theme-next/source/css/_custom/custom.styl ,在后面添加以下:
RGB颜色查询对照表 ,可以自己选择颜色
// 自定义页脚跳动的心样式
@keyframes heartAnimate {
	0%,100%{transform:scale(1);}
	10%,30%{transform:scale(0.9);}
	20%,40%,60%,80%{transform:scale(1.1);}
	50%,70%{transform:scale(1.1);}
}
#heart {
	animation: heartAnimate 1.33s ease-in-out infinite;
}
.with-love {
	color: #FF00FF;
}
效果如下,其实是动态的,嫌麻烦就截图了 :
![]()
8. 设置首页不显示全文
要更改的文件:主题配置文件

9. 修改首页文章间距
编辑 themes/hexo-theme-next/source/css/_schemes/Mist/_posts-expanded.styl ,在最后一行添加:
.posts-expand .post {
  margin-top: 30px;
  margin-bottom: 30px;
}
自己调到合适即可
10. 修改字体
要更改的文件:主题配置文件
font:
  enable: true
  # Uri of fonts host. E.g. //fonts.googleapis.com (Default)
  host: //fonts.css.network
  # Global font settings used on <body> element.
  global:
    # external: true will load this font family from host.
    external: true
    family: Lato
  # Font settings for Headlines (h1, h2, h3, h4, h5, h6)
  # Fallback to `global` font settings.
  headings:
    external: true
    family:
  # Font settings for posts
  # Fallback to `global` font settings.
  posts:
    external: true
    family:
  # Font settings for Logo
  # Fallback to `global` font settings.
  # The `size` option use `px` as unit
  logo:
    external: true
    family:
    size:
  # Font settings for <code> and code blocks.
  codes:
    external: true
    family: Iosevka
    size: 12
四、第三方插件集成
1. 回复功能 Valine
2. 统计功能 LeanCloud
3. 后台管理 Hexo-Admin
npm i hexo-admin --save 登录 http://localhost:4000/admin 即可看到我们所有的文章内容,并且在可视化界面中操作文章内容


 910
910


 被折叠的 条评论
为什么被折叠?
被折叠的 条评论
为什么被折叠?
 到【灌水乐园】发言


