


Bean的初始化和销毁有以下几种方式:
一、实现接口的方式
通过实现接口的方式来定制Bean的初始化和销毁方法。
初始化:实现InitializingBean接口,覆盖afterPropertiesSet()方法
销毁:实现DisposableBean 接口,覆盖destroy() 方法。
示例:
实现接口:
public class BeanScope implements InitializingBean,DisposableBean{

    public void afterPropertiesSet() throws Exception {
        System.out.println("Bean afterPropertiesSet");
    }

    public void destroy() throws Exception {
        System.out.println("Bean destory");
    }

    public void say() {
        System.out.println("BeanScope say:Hello World!");
    }

}
配置xml文件:这里注意要将bean的作用域设置为singleton,因为prototype的bean在返回给客户端后,bean不在由spring进行管理,其销毁前的方法不会执行。
<bean id="beanScope" class="com.spring.test.BeanScope" scope="singleton"></bean>
测试类:
public class App {
    public static void main(String[] args) {
        ClassPathXmlApplicationContext context = new ClassPathXmlApplicationContext("classpath:BeanScope.xml");
        BeanScope bScope = (BeanScope) context.getBean("beanScope");
        bScope.say();
        context.close();
    }
}
测试结果:

这种方式的缺点是,让 Bean 类实现 Spring 提供的接口,增加了代码与 Spring 框架的耦合度,因此不推荐使用。
二、为Bean配置属性的方式
在xml文件中为 < bean >配置init-method和destroy-method属性,method指定的是自己类中的方法。
示例:
在类中创建自己的初始化和销毁方法:
public class BeanScope{
public void init() {
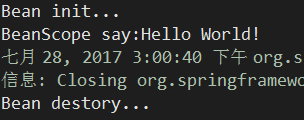
System.out.println("Bean init...");
}
public void destory() {
System.out.println("Bean destory...");
}
public void say() {
System.out.println("BeanScope say:Hello World!");
}
}
在xml中配置bean的init-method和destroy-method属性:
<bean id="beanScope" class="com.spring.test.BeanScope" init-method="init" destroy-method="destory"></bean>
测试类:
public class App {
    public static void main(String[] args) {
        ClassPathXmlApplicationContext context = new ClassPathXmlApplicationContext("classpath:BeanScope.xml");
        BeanScope bScope = (BeanScope) context.getBean("beanScope");
        bScope.say();
        context.close();
    }
}
测试结果:
三、为方法添加注解的方式
在指定方法上加上@PostConstruct或@PreDestroy注解来指定该方法是在初始化时还是销毁时调用。
示例:
public class BeanScope{
@PostConstruct
public void init() {
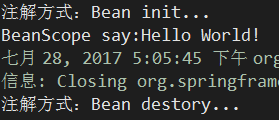
System.out.println("注解方式:Bean init...");
}
@PreDestroy
public void destory() {
System.out.println("注解方式:Bean destory...");
}
public void say() {
System.out.println("BeanScope say:Hello World!");
}
}
对应的配置文件:需要配置<context:annotation-config /> 来启用@PostConstruct和@PreDestroy 注解。
<?xml version="1.0" encoding="UTF-8"?>
<beans xmlns="http://www.springframework.org/schema/beans"
xmlns:xsi="http://www.w3.org/2001/XMLSchema-instance"
xmlns:context="http://www.springframework.org/schema/context"
xsi:schemaLocation="http://www.springframework.org/schema/beans
http://www.springframework.org/schema/beans/spring-beans-3.0.xsd
http://www.springframework.org/schema/context
http://www.springframework.org/schema/context/spring-context-3.0.xsd">

    <context:annotation-config />

    <bean id="beanScope" class="com.spring.test.BeanScope" ></bean>

</beans>
测试类:
public class App {
    public static void main(String[] args) {
        ClassPathXmlApplicationContext context = new ClassPathXmlApplicationContext("classpath:BeanScope.xml");
        BeanScope bScope = (BeanScope) context.getBean("beanScope");
        bScope.say();
        context.close();
    }
}
测试结果:
四、配置全局初始化和销毁方法
在< beans >中使用default-init-method和default-destroy-method配置全局的初始化和销毁方法。
示例:
创建自己的初始化和销毁方法:
public class BeanScope{

    public void init() {
        System.out.println("全局方式:Bean init...");
    }

    public void destory() {
        System.out.println("全局方式:Bean destory...");
    }

    public void say() {
        System.out.println("BeanScope say:Hello World!");
    }

}
配置xml文件:
<?xml version="1.0" encoding="UTF-8"?>
<beans xmlns="http://www.springframework.org/schema/beans"
xmlns:xsi="http://www.w3.org/2001/XMLSchema-instance"
xsi:schemaLocation="http://www.springframework.org/schema/beans
http://www.springframework.org/schema/beans/spring-beans-3.0.xsd"
default-init-method="init" default-destroy-method="destory">

    <bean id="beanScope" class="com.spring.test.BeanScope" ></bean>

</beans>
测试类:
public class App {
    public static void main(String[] args) {
        ClassPathXmlApplicationContext context = new ClassPathXmlApplicationContext("classpath:BeanScope.xml");
        BeanScope bScope = (BeanScope) context.getBean("beanScope");
        bScope.say();
        context.close();
    }
}
测试结果:


 395
395

 被折叠的 条评论
为什么被折叠?
被折叠的 条评论
为什么被折叠?
 到【灌水乐园】发言


