


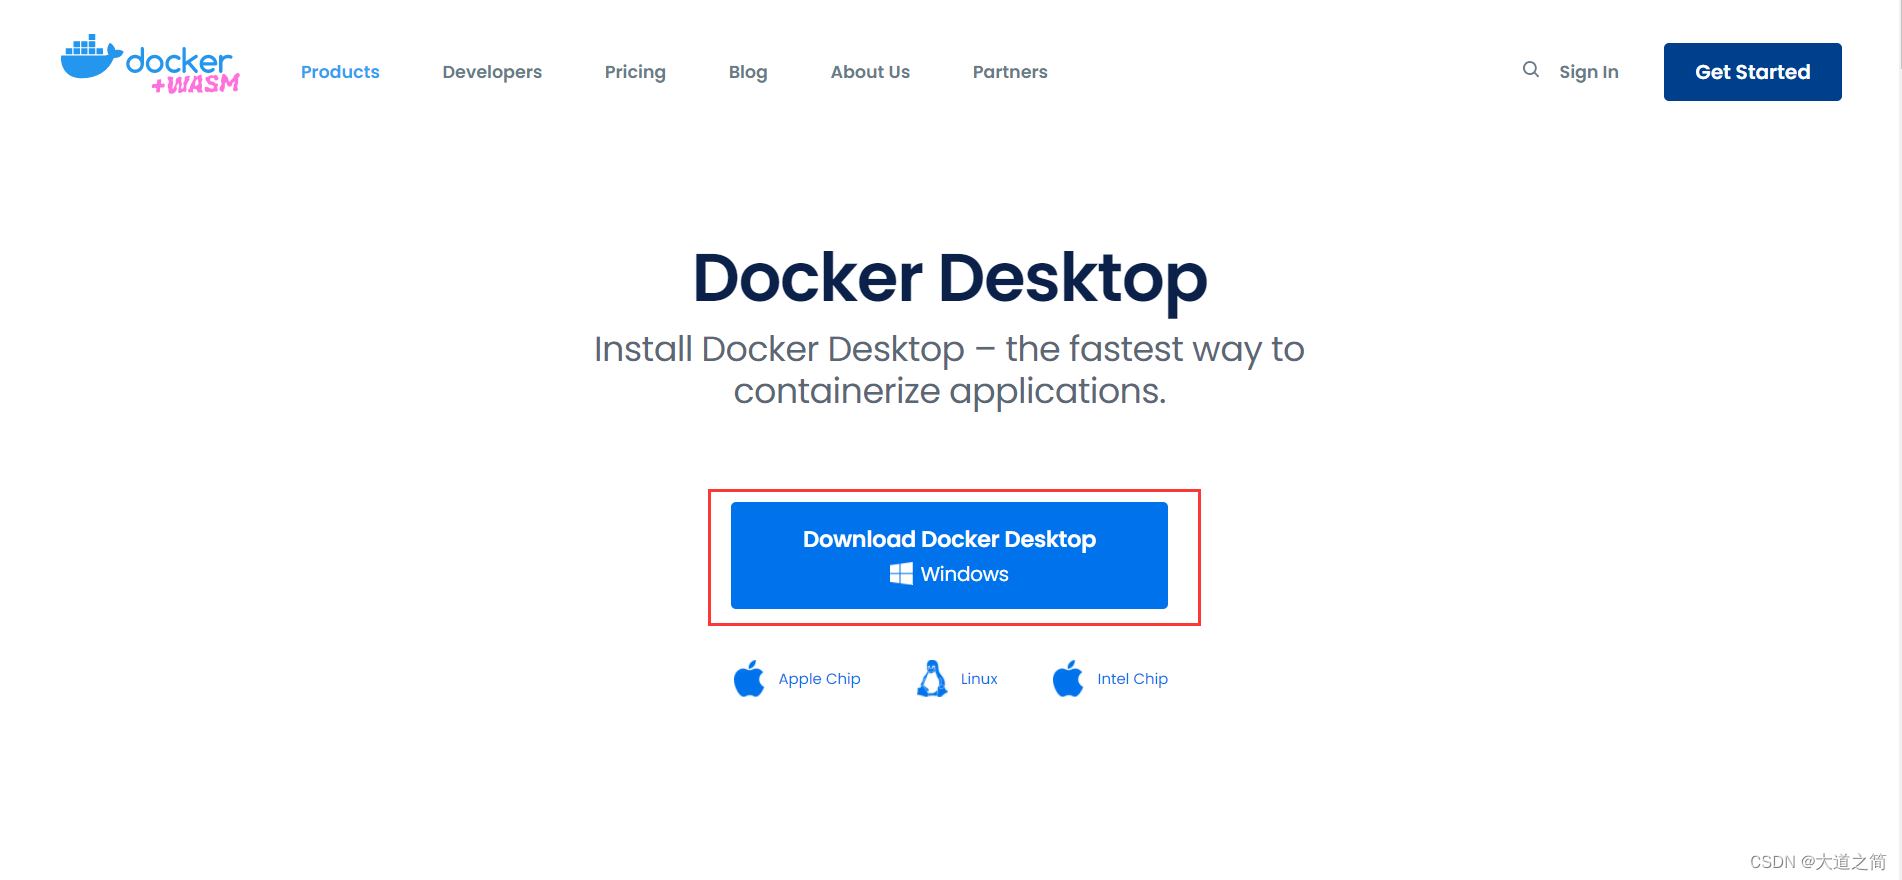
一、Docker下载
1、基于Docker Desktop安装即可
2、开启
①、开启Hyper-V(Windows10比较容易,本文基于Windows11)
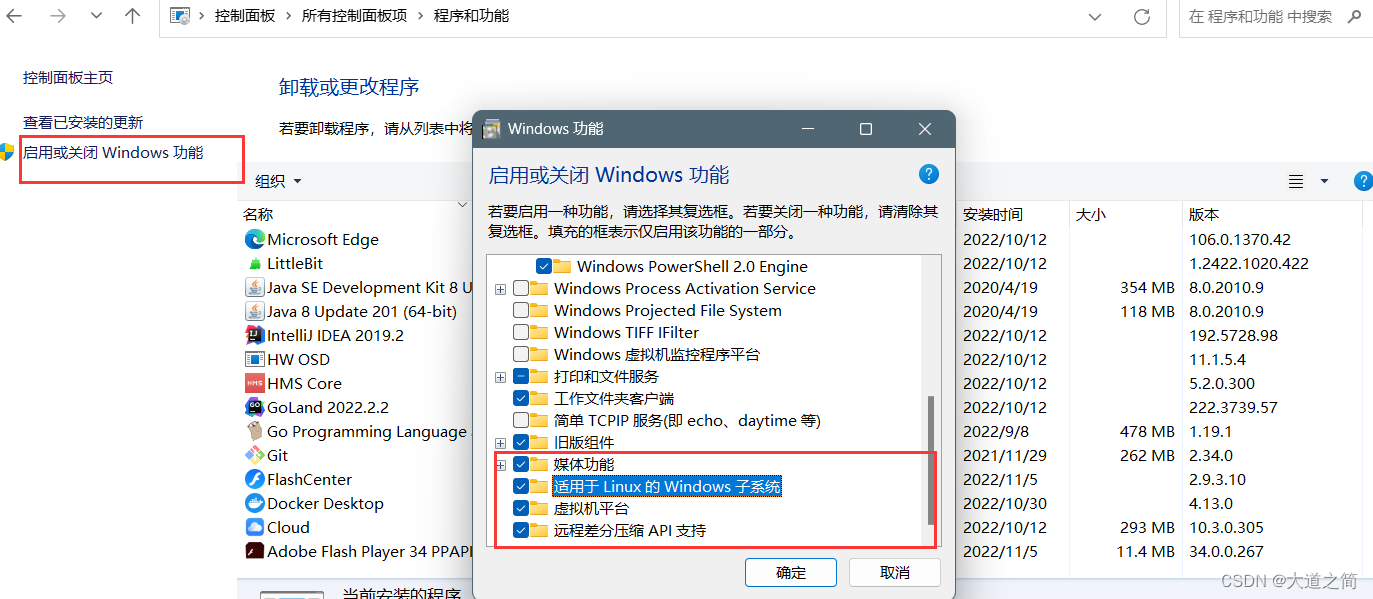

②、安装WSL2内核(Windows上运行Linux,支持Docker)
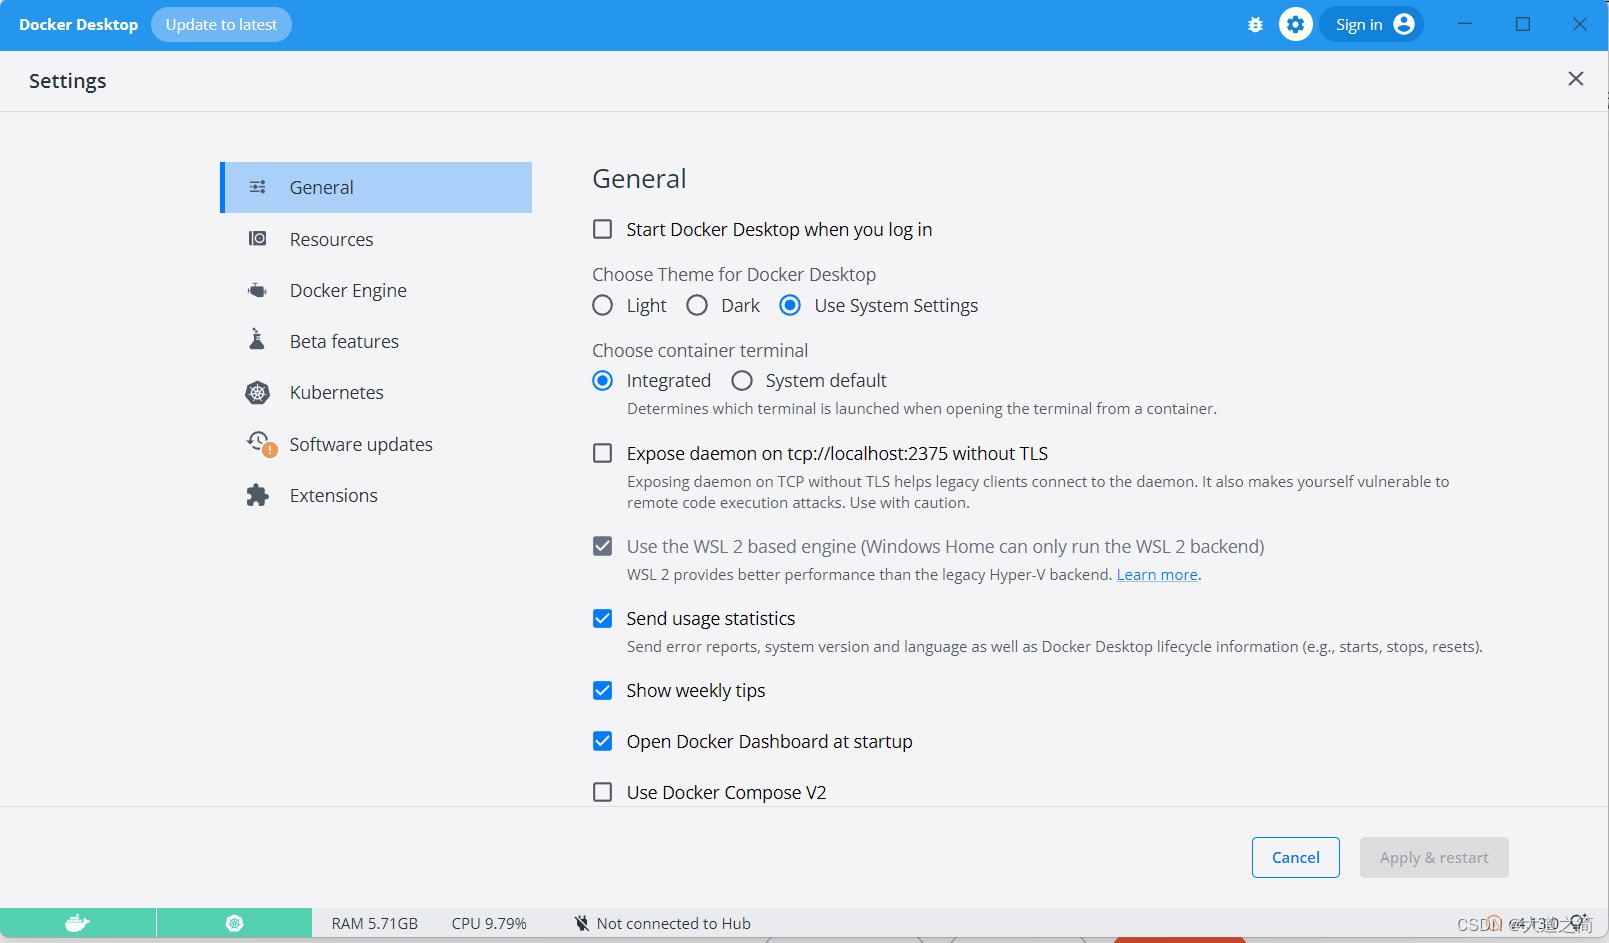
3、直接点击下载的文件安装即可
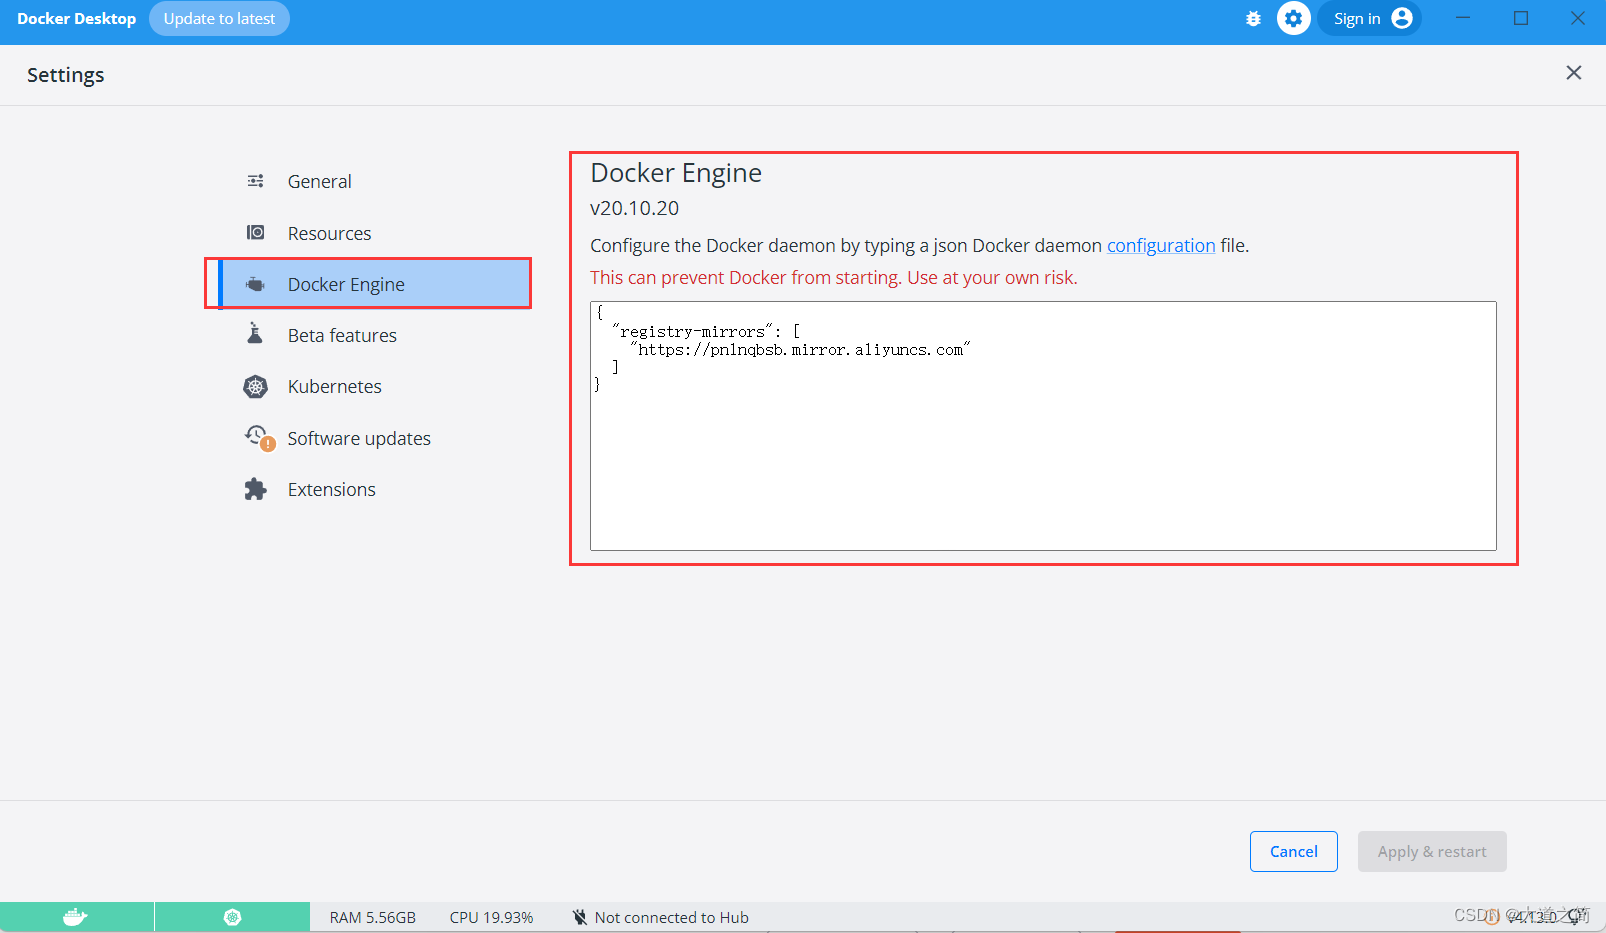
配置镜像加速器,这里使用阿里云的
{
  "registry-mirrors": [
    "https://pn1nqbsb.mirror.aliyuncs.com"
  ]
}
 界面修改
界面修改
二、安装k8s.
K8s是一个架构良好的分布式系统的例子,它将集群中的所有机器都视为单个资源池的一部分。K8s与其他成熟的分布式系统一样,主要是由控制节点(master)、工作节点(node)构成,每个节点上都会安装不同的组件。
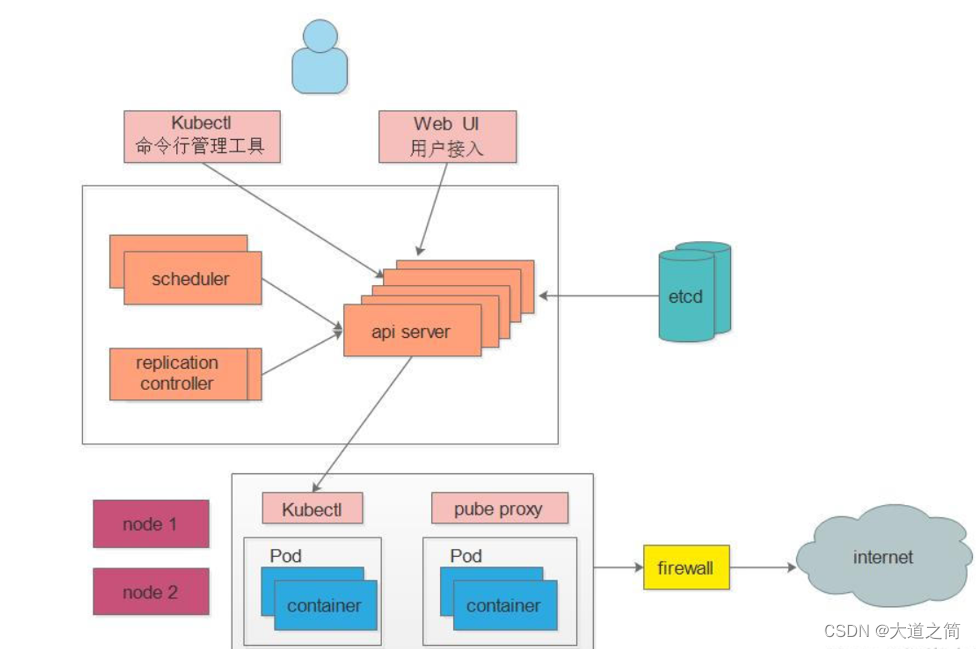
k8s架构图
k8s组件介绍
K8S中的Master是集群控制节点,负责整个集群的管理和控制
ApiServer : 资源操作的唯一入口,接收用户输入的命令,提供认证、授权、API注册和发现等机制,其他模块通过API Server查询或修改数据,只有API Server才直接和etcd进行交互;
Scheduler : 负责集群资源调度,通过API Server的Watch接口监听新建Pod副本信息,按照预定的调度策略将Pod调度到相应的node节点上;
ControllerManager : K8S里所有资源对象的自动化控制中心,通过 api-server 提供的 restful 接口实时监控集群内每个资源对象的状态,发生故障时,导致资源对象的工作状态发生变化,就进行干预,尝试将资源对象从当前状态恢复为预期的工作状态,常见的 controller 有 Namespace Controller、Node Controller、Service Controller、ServiceAccount Controller、Token Controller、ResourceQuote Controller、Replication Controller等;
Etcd: 是Kubernetes的存储状态的数据库(所有master的持续状态都存在etcd的一个实例中)
Node: 是K8S集群中的工作负载节点,每个Node都会被Master分配一些工作负载,当某个Node宕机时,其上的工作负载会被Master自动转移到其他节点上
Kubelet: 负责维护容器的生命周期,即通过控制docker,控制Pod 的创建、启动、监控、重启、销毁等工作,处理Master节点下发到本节点的任务;
KubeProxy : 负责制定数据包的转发策略,并以守护进程的模式对各个节点的pod信息实时监控并更新转发规则,service收到请求后会根据kube-proxy制定好的策略来进行请求的转发,从而实现负载均衡,总的来说,负责为Service提供cluster内部的服务发现和负载均衡;
Docker : 负责节点上容器的各种操作;
其他组件
Pod: kubernetes的最小控制单元,容器都是运行在pod中的,一个pod中可以有1个或者多个容器
Controller: 控制器,通过它来实现对pod的管理,比如启动pod、停止pod、伸缩pod的数量等等
Service: pod对外服务的统一入口,下面可以维护者同一类的多个pod
Label: 标签,用于对pod进行分类,同一类pod会拥有相同的标签
NameSpace: 命名空间,用来隔离pod的运行环境
1、https://github.com/AliyunContainerService/k8s-for-docker-desktop
k8s-for-docker-desktop
有时候当我们使用Git获取资源,会报“OpenSSL SSL_read: Connection was reset, errno 10054”的错误,出现该错误是因为服务器的SSL证书没有经过第三方机构的签署,如下图所示:

![]() git config --global http.sslVerify "false"
git config --global http.sslVerify "false"
 运行用管理员方式打开Windows PowerShell,cd 你的上面的安裝路径
然后執行:
.\load_images.ps1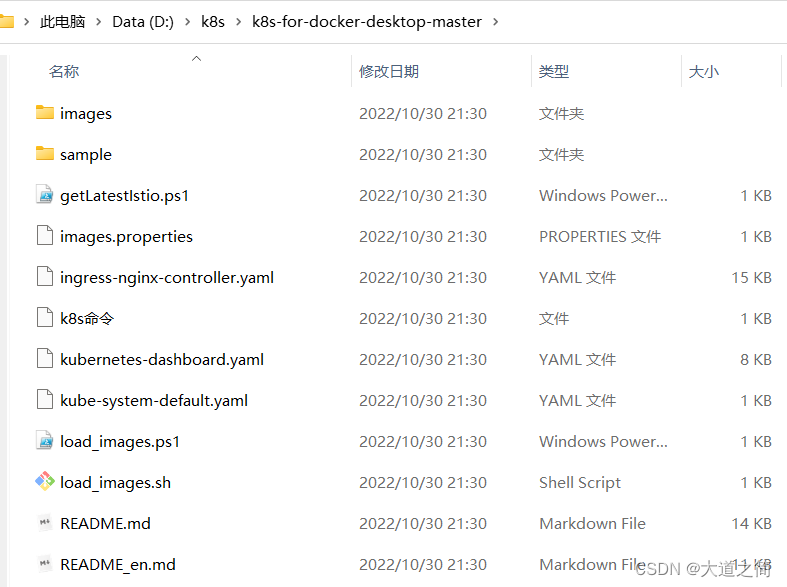
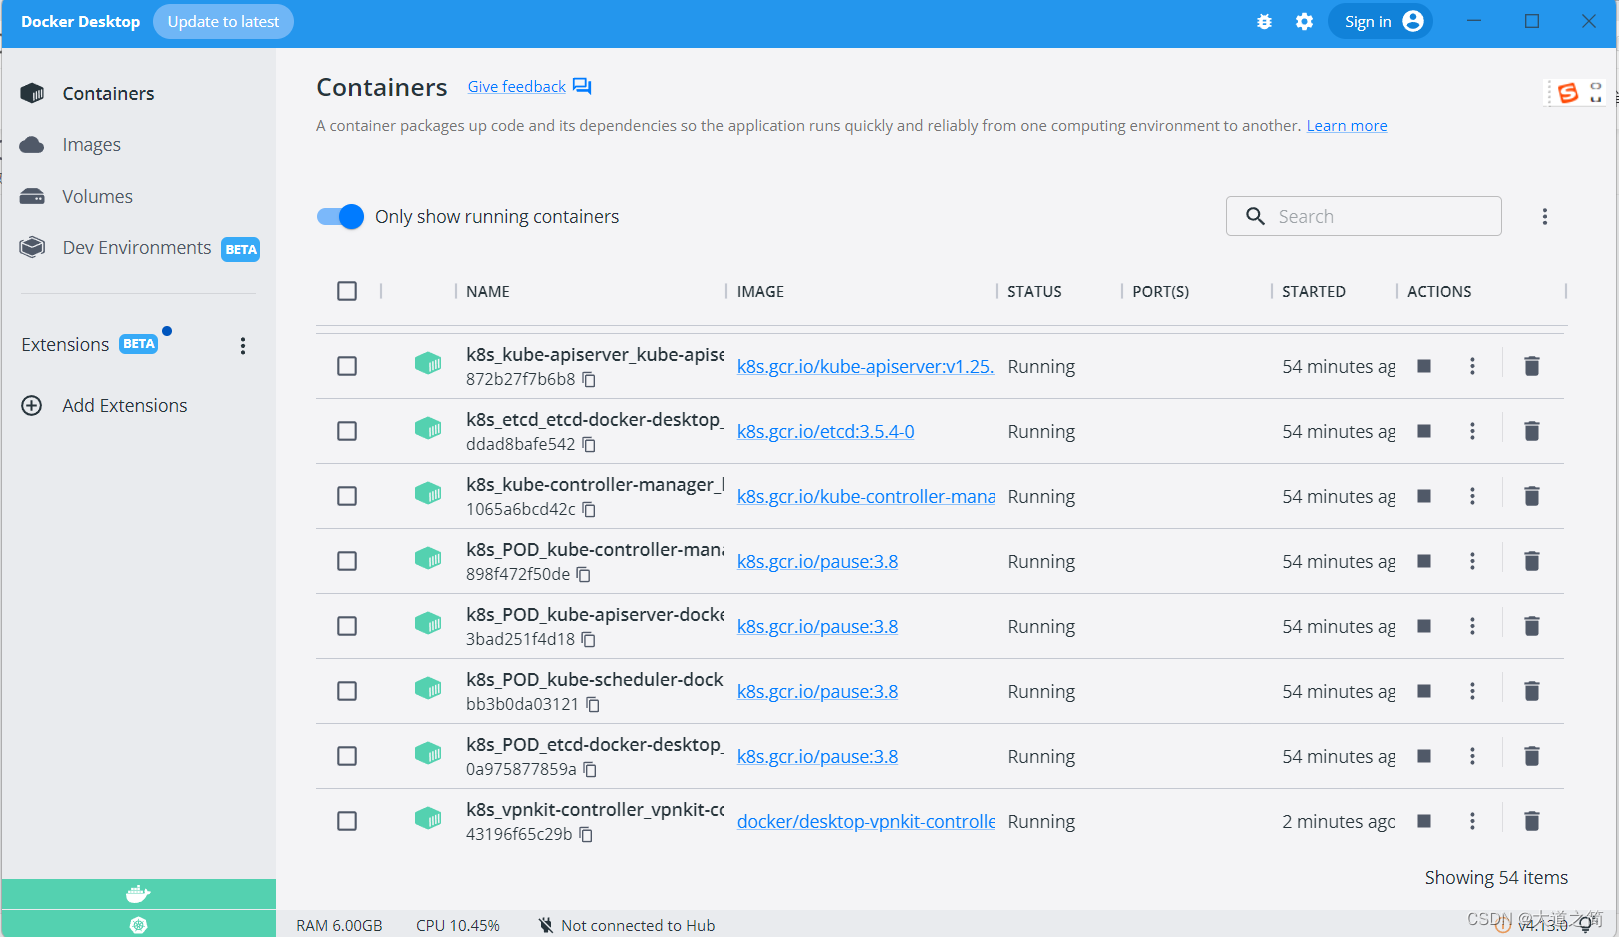
勾选k8s.

kubectl查看版本信息:kubectl version

2、安装dashboard面板,Dashboard实际就是一个网页版的管理工具,可以查看和管理K8S集群
切换到该目录下执行
kubectl.exe apply -f .\kubernetes-dashboard.yaml
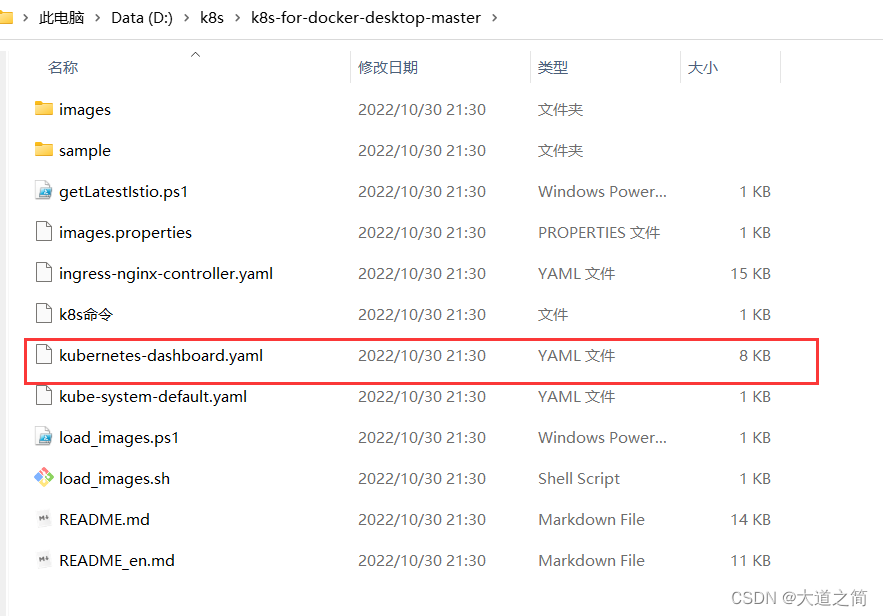
yaml配置文件如下
# Copyright 2017 The Kubernetes Authors.
#
# Licensed under the Apache License, Version 2.0 (the "License");
# you may not use this file except in compliance with the License.
# You may obtain a copy of the License at
#
#     http://www.apache.org/licenses/LICENSE-2.0
#
# Unless required by applicable law or agreed to in writing, software
# distributed under the License is distributed on an "AS IS" BASIS,
# WITHOUT WARRANTIES OR CONDITIONS OF ANY KIND, either express or implied.
# See the License for the specific language governing permissions and
# limitations under the License.

apiVersion: v1
kind: Namespace
metadata:
  name: kubernetes-dashboard

---

apiVersion: v1
kind: ServiceAccount
metadata:
  labels:
    k8s-app: kubernetes-dashboard
  name: kubernetes-dashboard
  namespace: kubernetes-dashboard

---

kind: Service
apiVersion: v1
metadata:
  labels:
    k8s-app: kubernetes-dashboard
  name: kubernetes-dashboard
  namespace: kubernetes-dashboard
spec:
  ports:
    - port: 443
      targetPort: 8443
  selector:
    k8s-app: kubernetes-dashboard

---

apiVersion: v1
kind: Secret
metadata:
  labels:
    k8s-app: kubernetes-dashboard
  name: kubernetes-dashboard-certs
  namespace: kubernetes-dashboard
type: Opaque

---

apiVersion: v1
kind: Secret
metadata:
  labels:
    k8s-app: kubernetes-dashboard
  name: kubernetes-dashboard-csrf
  namespace: kubernetes-dashboard
type: Opaque
data:
  csrf: ""

---

apiVersion: v1
kind: Secret
metadata:
  labels:
    k8s-app: kubernetes-dashboard
  name: kubernetes-dashboard-key-holder
  namespace: kubernetes-dashboard
type: Opaque

---

kind: ConfigMap
apiVersion: v1
metadata:
  labels:
    k8s-app: kubernetes-dashboard
  name: kubernetes-dashboard-settings
  namespace: kubernetes-dashboard

---

kind: Role
apiVersion: rbac.authorization.k8s.io/v1
metadata:
  labels:
    k8s-app: kubernetes-dashboard
  name: kubernetes-dashboard
  namespace: kubernetes-dashboard
rules:
  # Allow Dashboard to get, update and delete Dashboard exclusive secrets.
  - apiGroups: [""]
    resources: ["secrets"]
    resourceNames: ["kubernetes-dashboard-key-holder", "kubernetes-dashboard-certs", "kubernetes-dashboard-csrf"]
    verbs: ["get", "update", "delete"]
    # Allow Dashboard to get and update 'kubernetes-dashboard-settings' config map.
  - apiGroups: [""]
    resources: ["configmaps"]
    resourceNames: ["kubernetes-dashboard-settings"]
    verbs: ["get", "update"]
    # Allow Dashboard to get metrics.
  - apiGroups: [""]
    resources: ["services"]
    resourceNames: ["heapster", "dashboard-metrics-scraper"]
    verbs: ["proxy"]
  - apiGroups: [""]
    resources: ["services/proxy"]
    resourceNames: ["heapster", "http:heapster:", "https:heapster:", "dashboard-metrics-scraper", "http:dashboard-metrics-scraper"]
    verbs: ["get"]

---

kind: ClusterRole
apiVersion: rbac.authorization.k8s.io/v1
metadata:
  labels:
    k8s-app: kubernetes-dashboard
  name: kubernetes-dashboard
rules:
  # Allow Metrics Scraper to get metrics from the Metrics server
  - apiGroups: ["metrics.k8s.io"]
    resources: ["pods", "nodes"]
    verbs: ["get", "list", "watch"]

---

apiVersion: rbac.authorization.k8s.io/v1
kind: RoleBinding
metadata:
  labels:
    k8s-app: kubernetes-dashboard
  name: kubernetes-dashboard
  namespace: kubernetes-dashboard
roleRef:
  apiGroup: rbac.authorization.k8s.io
  kind: Role
  name: kubernetes-dashboard
subjects:
  - kind: ServiceAccount
    name: kubernetes-dashboard
    namespace: kubernetes-dashboard

---

apiVersion: rbac.authorization.k8s.io/v1
kind: ClusterRoleBinding
metadata:
  name: kubernetes-dashboard
roleRef:
  apiGroup: rbac.authorization.k8s.io
  kind: ClusterRole
  name: kubernetes-dashboard
subjects:
  - kind: ServiceAccount
    name: kubernetes-dashboard
    namespace: kubernetes-dashboard

---

kind: Deployment
apiVersion: apps/v1
metadata:
  labels:
    k8s-app: kubernetes-dashboard
  name: kubernetes-dashboard
  namespace: kubernetes-dashboard
spec:
  replicas: 1
  revisionHistoryLimit: 10
  selector:
    matchLabels:
      k8s-app: kubernetes-dashboard
  template:
    metadata:
      labels:
        k8s-app: kubernetes-dashboard
    spec:
      securityContext:
        seccompProfile:
          type: RuntimeDefault
      containers:
        - name: kubernetes-dashboard
          image: kubernetesui/dashboard:v2.5.1
          imagePullPolicy: IfNotPresent
          ports:
            - containerPort: 8443
              protocol: TCP
          args:
            - --auto-generate-certificates
            - --namespace=kubernetes-dashboard
            # Uncomment the following line to manually specify Kubernetes API server Host
            # If not specified, Dashboard will attempt to auto discover the API server and connect
            # to it. Uncomment only if the default does not work.
            # - --apiserver-host=http://my-address:port
          volumeMounts:
            - name: kubernetes-dashboard-certs
              mountPath: /certs
              # Create on-disk volume to store exec logs
            - mountPath: /tmp
              name: tmp-volume
          livenessProbe:
            httpGet:
              scheme: HTTPS
              path: /
              port: 8443
            initialDelaySeconds: 30
            timeoutSeconds: 30
          securityContext:
            allowPrivilegeEscalation: false
            readOnlyRootFilesystem: true
            runAsUser: 1001
            runAsGroup: 2001
      volumes:
        - name: kubernetes-dashboard-certs
          secret:
            secretName: kubernetes-dashboard-certs
        - name: tmp-volume
          emptyDir: {}
      serviceAccountName: kubernetes-dashboard
      nodeSelector:
        "kubernetes.io/os": linux
      # Comment the following tolerations if Dashboard must not be deployed on master
      tolerations:
        - key: node-role.kubernetes.io/master
          effect: NoSchedule

---

kind: Service
apiVersion: v1
metadata:
  labels:
    k8s-app: dashboard-metrics-scraper
  name: dashboard-metrics-scraper
  namespace: kubernetes-dashboard
spec:
  ports:
    - port: 8000
      targetPort: 8000
  selector:
    k8s-app: dashboard-metrics-scraper

---

kind: Deployment
apiVersion: apps/v1
metadata:
  labels:
    k8s-app: dashboard-metrics-scraper
  name: dashboard-metrics-scraper
  namespace: kubernetes-dashboard
spec:
  replicas: 1
  revisionHistoryLimit: 10
  selector:
    matchLabels:
      k8s-app: dashboard-metrics-scraper
  template:
    metadata:
      labels:
        k8s-app: dashboard-metrics-scraper
    spec:
      securityContext:
        seccompProfile:
          type: RuntimeDefault
      containers:
        - name: dashboard-metrics-scraper
          image: kubernetesui/metrics-scraper:v1.0.7
          ports:
            - containerPort: 8000
              protocol: TCP
          livenessProbe:
            httpGet:
              scheme: HTTP
              path: /
              port: 8000
            initialDelaySeconds: 30
            timeoutSeconds: 30
          volumeMounts:
          - mountPath: /tmp
            name: tmp-volume
          securityContext:
            allowPrivilegeEscalation: false
            readOnlyRootFilesystem: true
            runAsUser: 1001
            runAsGroup: 2001
      serviceAccountName: kubernetes-dashboard
      nodeSelector:
        "kubernetes.io/os": linux
      # Comment the following tolerations if Dashboard must not be deployed on master
      tolerations:
        - key: node-role.kubernetes.io/master
          effect: NoSchedule
      volumes:
        - name: tmp-volume
          emptyDir: {}
然后,添加默认账号,授权登录基于Token登录
kubectl apply -f kube-system-default.yaml

$TOKEN=((kubectl -n kube-system describe secret default | Select-String "token:") -split " +")[1]
kubectl config set-credentials docker-desktop --token="${TOKEN}"
echo $TOKEN
使用Token登录
启动服务
kubectl proxy


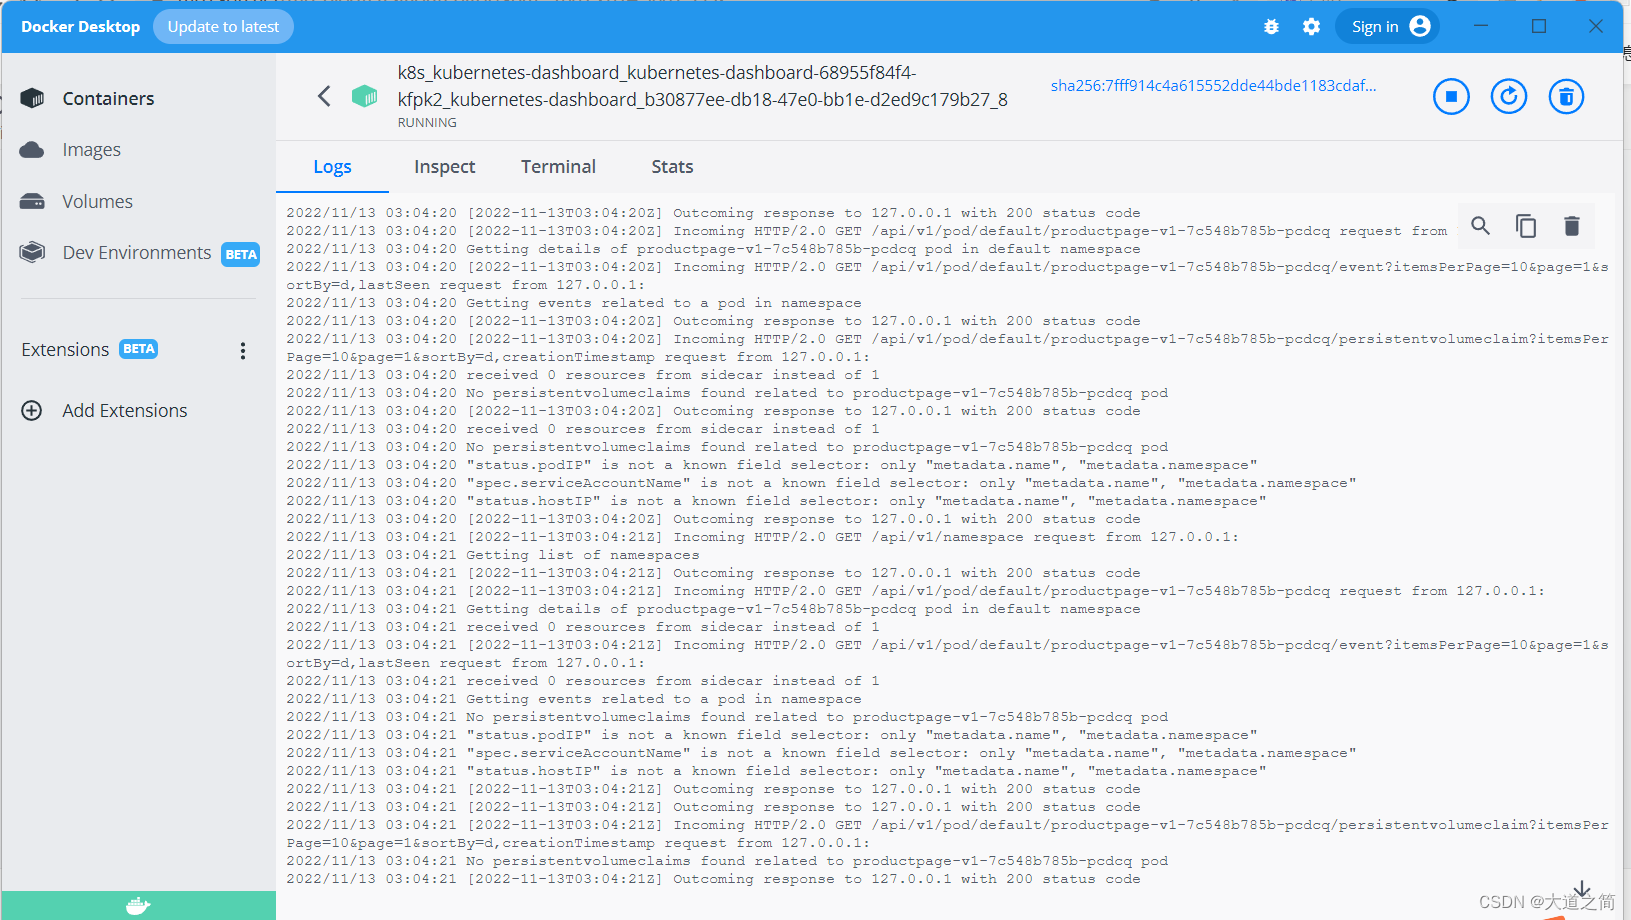
查看日志


三、k8s命令
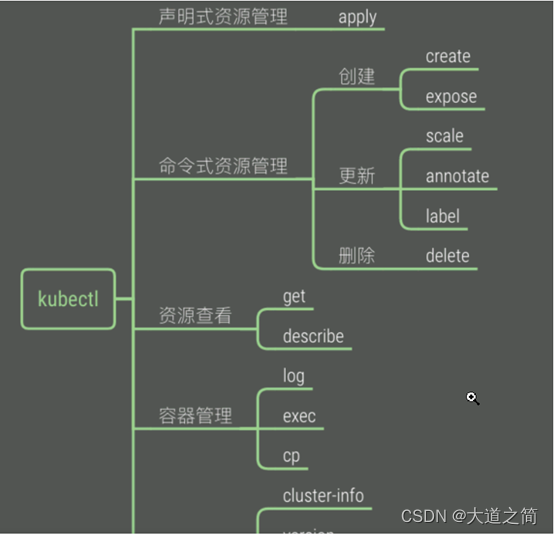
1、kubectl 命令行管理工具

# 查看集群状态信息
kubectl cluster-info

# 查看集群状态
kubectl get cs

# 查看集群节点信息
kubectl get nodes

# 查看集群命名空间
kubectl get ns


kubectl version

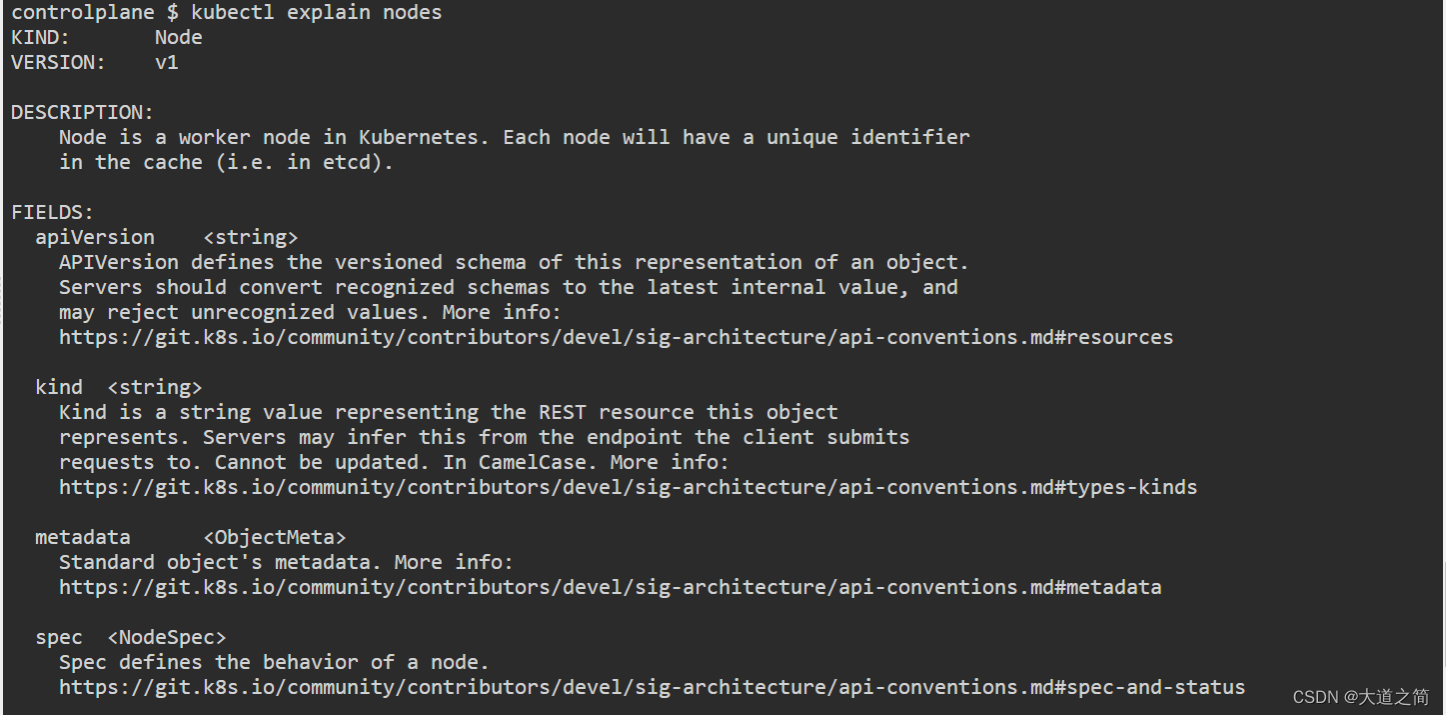
kubectl explain nodes【可以查看对象字段的说明文档】
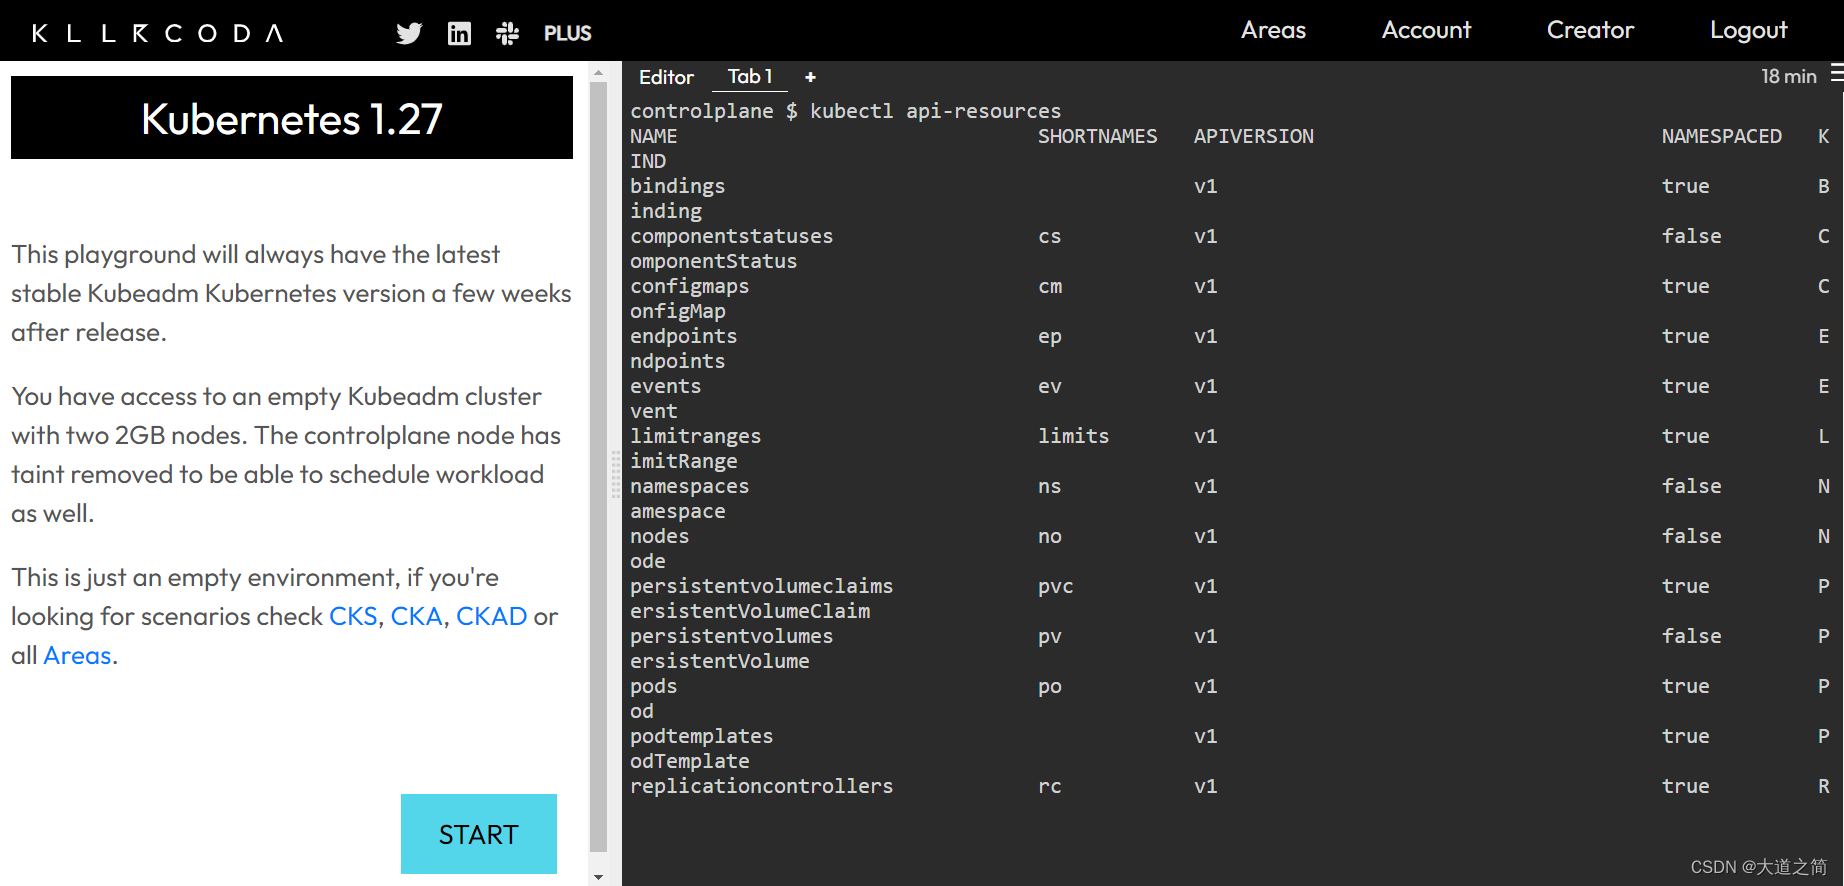
 kubectl api-resources【所有的API对象】

kubectl --help
PS D:\> kubectl --help
kubectl controls the Kubernetes cluster manager.

 Find more information at: https://kubernetes.io/docs/reference/kubectl/

Basic Commands (Beginner):
  create          Create a resource from a file or from stdin
  expose          Take a replication controller, service, deployment or pod and expose it as a new Kubernetes service
  run             Run a particular image on the cluster
  set             Set specific features on objects

Basic Commands (Intermediate):
  explain         Get documentation for a resource
  get             Display one or many resources
  edit            Edit a resource on the server
  delete          Delete resources by file names, stdin, resources and names, or by resources and label selector

Deploy Commands:
  rollout         Manage the rollout of a resource
  scale           Set a new size for a deployment, replica set, or replication controller
  autoscale       Auto-scale a deployment, replica set, stateful set, or replication controller

Cluster Management Commands:
  certificate     Modify certificate resources.
  cluster-info    Display cluster information
  top             Display resource (CPU/memory) usage
  cordon          Mark node as unschedulable
  uncordon        Mark node as schedulable
  drain           Drain node in preparation for maintenance
  taint           Update the taints on one or more nodes

Troubleshooting and Debugging Commands:
  describe        Show details of a specific resource or group of resources
  logs            Print the logs for a container in a pod
  attach          Attach to a running container
  exec            Execute a command in a container
  port-forward    Forward one or more local ports to a pod
  proxy           Run a proxy to the Kubernetes API server
  cp              Copy files and directories to and from containers
  auth            Inspect authorization
  debug           Create debugging sessions for troubleshooting workloads and nodes

Advanced Commands:
  diff            Diff the live version against a would-be applied version
  apply           Apply a configuration to a resource by file name or stdin
  patch           Update fields of a resource
  replace         Replace a resource by file name or stdin
  wait            Experimental: Wait for a specific condition on one or many resources
  kustomize       Build a kustomization target from a directory or URL.

Settings Commands:
  label           Update the labels on a resource
  annotate        Update the annotations on a resource
  completion      Output shell completion code for the specified shell (bash, zsh, fish, or powershell)

Other Commands:
  alpha           Commands for features in alpha
  api-resources   Print the supported API resources on the server
  api-versions    Print the supported API versions on the server, in the form of "group/version"
  config          Modify kubeconfig files
  plugin          Provides utilities for interacting with plugins
  version         Print the client and server version information

Usage:
  kubectl [flags] [options]

Use "kubectl <command> --help" for more information about a given command.
Use "kubectl options" for a list of global command-line options (applies to all commands).
kubectl logs - 打印 Pod 中容器的日志
kubectl logs -f nginx-76d6c9b8c-gcv2z
# 从 pod 返回日志快照。
kubectl logs <pod-name>

# 从 pod <pod-name> 开始流式传输日志。这类似于 'tail -f' Linux 命令。
kubectl logs -f <pod-name>
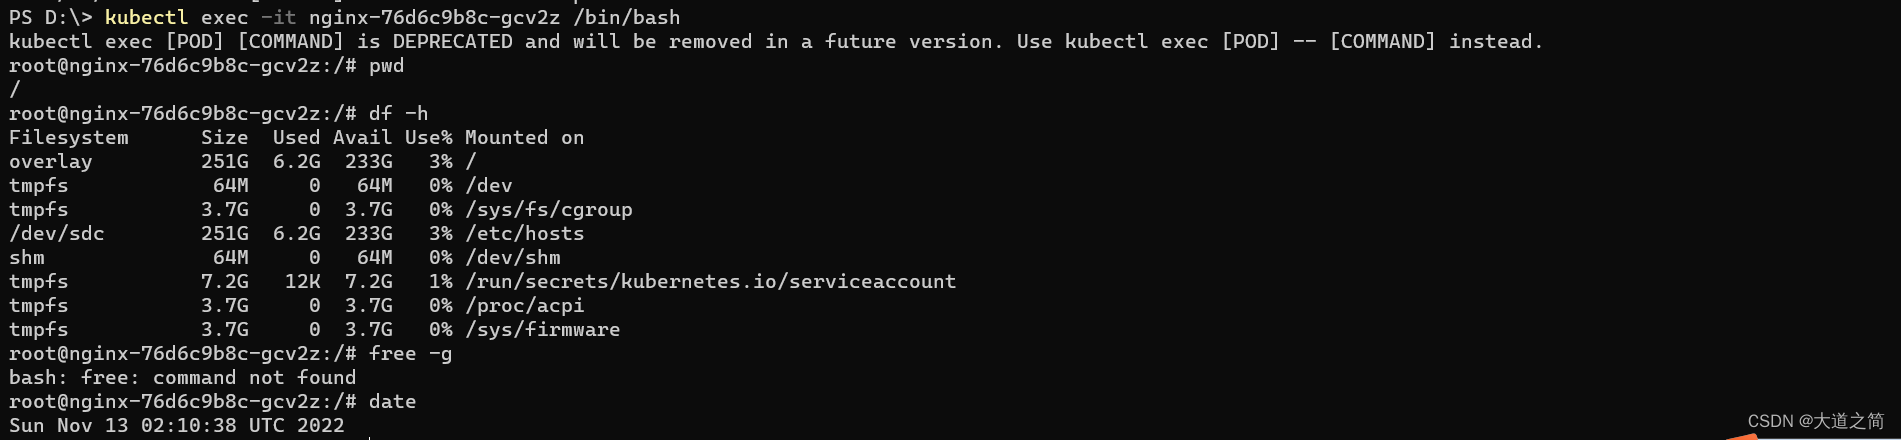
进入容器
kubectl exec -it nginx-76d6c9b8c-gcv2z /bin/bash
创建命名空间
kubectl create ns boot-dev
kubectl get ns

删除deployment

Pod状态
kubectl get pod -n kubernetes-dashboard


Pod的重启策略
Always:当容器失败时,由kubelet自动重启该容器.
OnFailure:当容器终止运行且错误码不为0时,由kubelet自动重启该容器.
Never:不论容器处在哪种状态,kubelet都不会重启该容器.

Pod的资源申请和资源申请上限
内存的写法和磁盘容量一样,使用 Ki、Mi、Gi 来表示 KB、MB、GB,比如 512Ki、100Mi、0.5Gi 等。
而CPU因为在计算机中数量有限,非常宝贵,所以Kubernetes允许容器精细分割CPU,即可以1个、2个地完整使用CPU,也可以用小数0.1、0.2的方式来部分使用CPU。这其实是效仿了UNIX“时间片”的用法,意思是进程最多可以占用多少CPU时间。
不过CPU时间也不能无限分割,Kubernetes里CPU的最小使用单位是0.001,为了方便表示用了一个特别的单位 m,也就是“milli”“毫”的意思,比如说500m就相当于0.5。
现在我们再来看这个YAML,你就应该明白了,它向系统申请的是1%的CPU时间和100MB的内存,运行时的资源上限是2%CPU时间和200MB内存。有了这个申请,Kubernetes就会在集群中查找最符合这个资源要求的节点去运行Pod。
apiVersion: v1
kind: Pod
metadata:
  name: ngx-pod-resources

spec:
  containers:
  - image: nginx:alpine
    name: ngx

    resources:
      requests:
        cpu: 10m
        memory: 100Mi
      limits:
        cpu: 20m
        memory: 200Mi
这个YAML文件定义了一个Nginx Pod,我们需要重点学习的是 containers.resources,它下面有两个字段:
- “requests”,意思是容器要申请的资源,也就是说要求Kubernetes在创建Pod的时候必须分配这里列出的资源,否则容器就无法运行。
- “limits”,意思是容器使用资源的上限,不能超过设定值,否则就有可能被强制停止运行。
内存的写法和磁盘容量一样,使用 Ki、Mi、Gi 来表示 KB、MB、GB,比如 512Ki、100Mi、0.5Gi 等。
而CPU因为在计算机中数量有限,非常宝贵,所以Kubernetes允许容器精细分割CPU,即可以1个、2个地完整使用CPU,也可以用小数0.1、0.2的方式来部分使用CPU。这其实是效仿了UNIX“时间片”的用法,意思是进程最多可以占用多少CPU时间。
不过CPU时间也不能无限分割,Kubernetes里CPU的最小使用单位是0.001,为了方便表示用了一个特别的单位 m,也就是“milli”“毫”的意思,比如说500m就相当于0.5。
现在我们再来看这个YAML,你就应该明白了,它向系统申请的是1%的CPU时间和100MB的内存,运行时的资源上限是2%CPU时间和200MB内存。有了这个申请,Kubernetes就会在集群中查找最符合这个资源要求的节点去运行Pod。
Pod的容器状态探针
Kubernetes为检查应用状态定义了三种探针,它们分别对应容器不同的状态:
- Startup,启动探针,用来检查应用是否已经启动成功,适合那些有大量初始化工作要做,启动很慢的应用。
- Liveness,存活探针,用来检查应用是否正常运行,是否存在死锁、死循环。
- Readiness,就绪探针,用来检查应用是否可以接收流量,是否能够对外提供服务。
你需要注意这三种探针是递进的关系:应用程序先启动,加载完配置文件等基本的初始化数据就进入了Startup状态,之后如果没有什么异常就是Liveness存活状态,但可能有一些准备工作没有完成,还不一定能对外提供服务,只有到最后的Readiness状态才是一个容器最健康可用的状态。
- 如果Startup探针失败,Kubernetes会认为容器没有正常启动,就会尝试反复重启,当然其后面的Liveness探针和Readiness探针也不会启动。
- 如果Liveness探针失败,Kubernetes就会认为容器发生了异常,也会重启容器。
- 如果Readiness探针失败,Kubernetes会认为容器虽然在运行,但内部有错误,不能正常提供服务,就会把容器从Service对象的负载均衡集合中排除,不会给它分配流量。
yaml中如何定义
startupProbe、livenessProbe、readinessProbe这三种探针的配置方式都是一样的,关键字段有这么几个:
- periodSeconds,执行探测动作的时间间隔,默认是10秒探测一次。
- timeoutSeconds,探测动作的超时时间,如果超时就认为探测失败,默认是1秒。
- successThreshold,连续几次探测成功才认为是正常,对于startupProbe和livenessProbe来说它只能是1。
- failureThreshold,连续探测失败几次才认为是真正发生了异常,默认是3次。
至于探测方式,Kubernetes支持3种:Shell、TCP Socket、HTTP GET,它们也需要在探针里配置:
- exec,执行一个Linux命令,比如ps、cat等等,和container的command字段很类似。
- tcpSocket,使用TCP协议尝试连接容器的指定端口。
- httpGet,连接端口并发送HTTP GET请求。
pod中三种探针的具体定义
apiVersion: v1
kind: Pod
metadata:
  name: ngx-pod-probe

spec:
  volumes:
  - name: ngx-conf-vol
    configMap:
      name: ngx-conf

  containers:
  - image: nginx:alpine
    name: ngx
    ports:
    - containerPort: 80
    volumeMounts:
    - mountPath: /etc/nginx/conf.d
      name: ngx-conf-vol

    startupProbe:
      periodSeconds: 1
      exec:
        command: ["cat", "/var/run/nginx.pid"]

    livenessProbe:
      periodSeconds: 10
      tcpSocket:
        port: 80

    readinessProbe:
      periodSeconds: 5
      httpGet:
        path: /ready
        port: 80
StartupProbe使用了Shell方式,使用 cat 命令检查Nginx存在磁盘上的进程号文件(/var/run/nginx.pid),如果存在就认为是启动成功,它的执行频率是每秒探测一次。
LivenessProbe使用了TCP Socket方式,尝试连接Nginx的80端口,每10秒探测一次。
ReadinessProbe使用的是HTTP GET方式,访问容器的 /ready 路径,每5秒发一次请求。
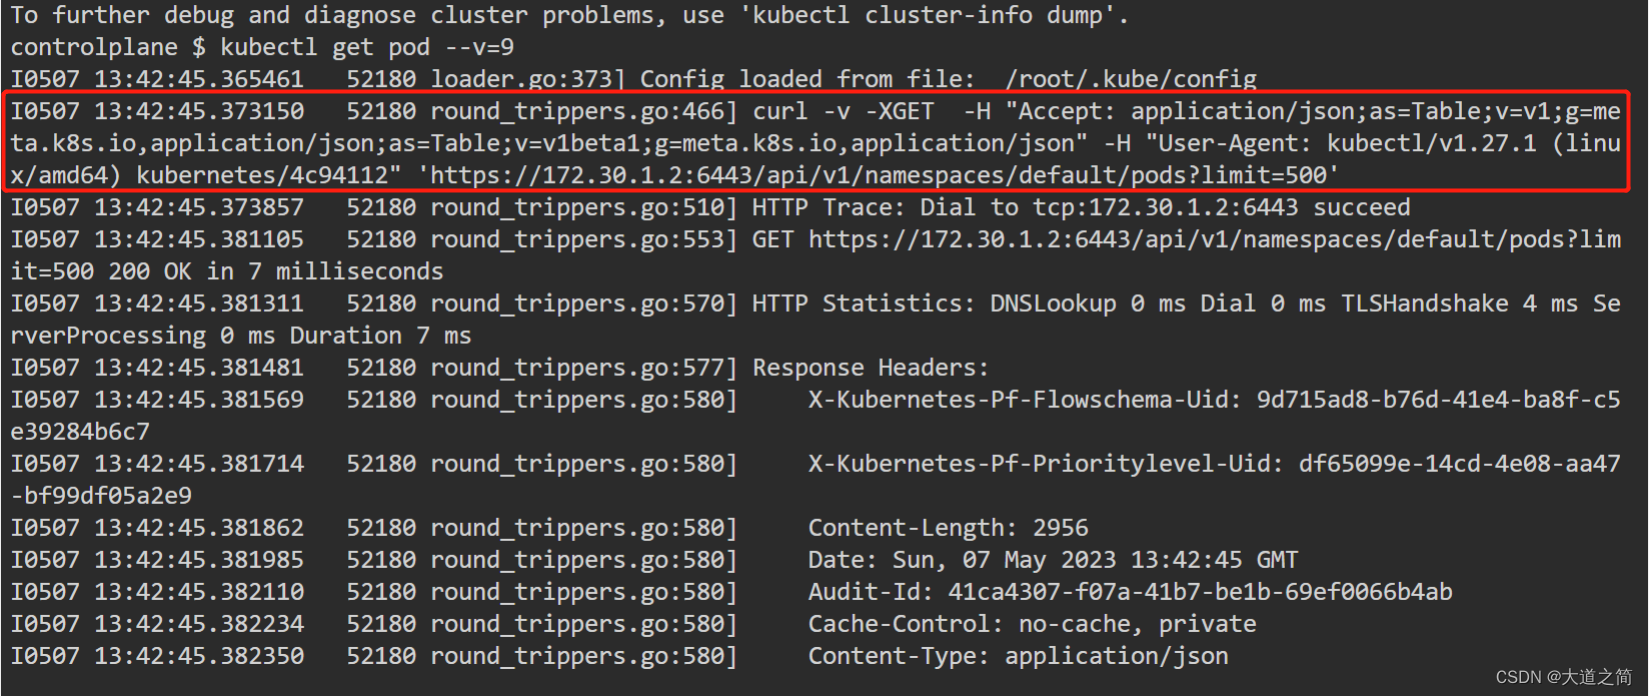
kubectl get pod --v=9[显示出详细的命令执行过程,清楚地看到发出的HTTP请]
目前的Kubernetes 1.23版本有50多种API对象,全面地描述了集群的节点、应用、配置、服务、账号等等信息,apiserver会把它们都存储在数据库etcd里,然后kubelet、scheduler、controller-manager等组件通过apiserver来操作它们,就在API对象这个抽象层次实现了对整个集群的管理
K8S的声明式.
因为API对象采用标准的HTTP协议,为了方便理解,我们可以借鉴一下HTTP的报文格式,把API对象的描述分成“header”和“body”两部分。
“header”包含的是API对象的基本信息,有三个字段:apiVersion、kind、metadata。
-
apiVersion表示操作这种资源的API版本号,由于Kubernetes的迭代速度很快,不同的版本创建的对象会有差异,为了区分这些版本就需要使用apiVersion这个字段,比如v1、v1alpha1、v1beta1等等。
-
kind表示资源对象的类型,这个应该很好理解,比如Pod、Node、Job、Service等等。
-
metadata这个字段顾名思义,表示的是资源的一些“元信息”,也就是用来标记对象,方便Kubernetes管理的一些信息。
apiVersion: v1 kind: Pod metadata: name: ngx-pod labels: env: demo owner: chrono
apiVersion、kind、metadata都被kubectl用于生成HTTP请求发给apiserver,你可以用 --v=9 参数在请求的URL里看到它们,比如
https://192.168.49.2:8443/api/v1/namespaces/default/pods/ngx-pod
Kubernetes把集群里的一切资源都定义为API对象,通过RESTful接口来管理。描述API对象需要使用YAML语言,必须的字段是apiVersion、kind、metadata。
四、部署应用
1、测试部署SpringBoot应用
环境准备:Kubenertes集群可用,docker环境、docker hub上创建了私有仓库,打包后推送至私有仓库.
Kubernetes集群部署SpringBoot项目常见配置及常用处理方式
五、k8s-集群里的三种IP
1、Node IP:Node节点的IP地址,即物理网卡的IP地址。
可以是物理机的IP(也可能是虚拟机IP)。每个Service都会在Node节点上开通一个端口,外部可以通过NodeIP:NodePort即可访问Service里的Pod,和我们访问服务器部署的项目一样,IP:端口/项目名
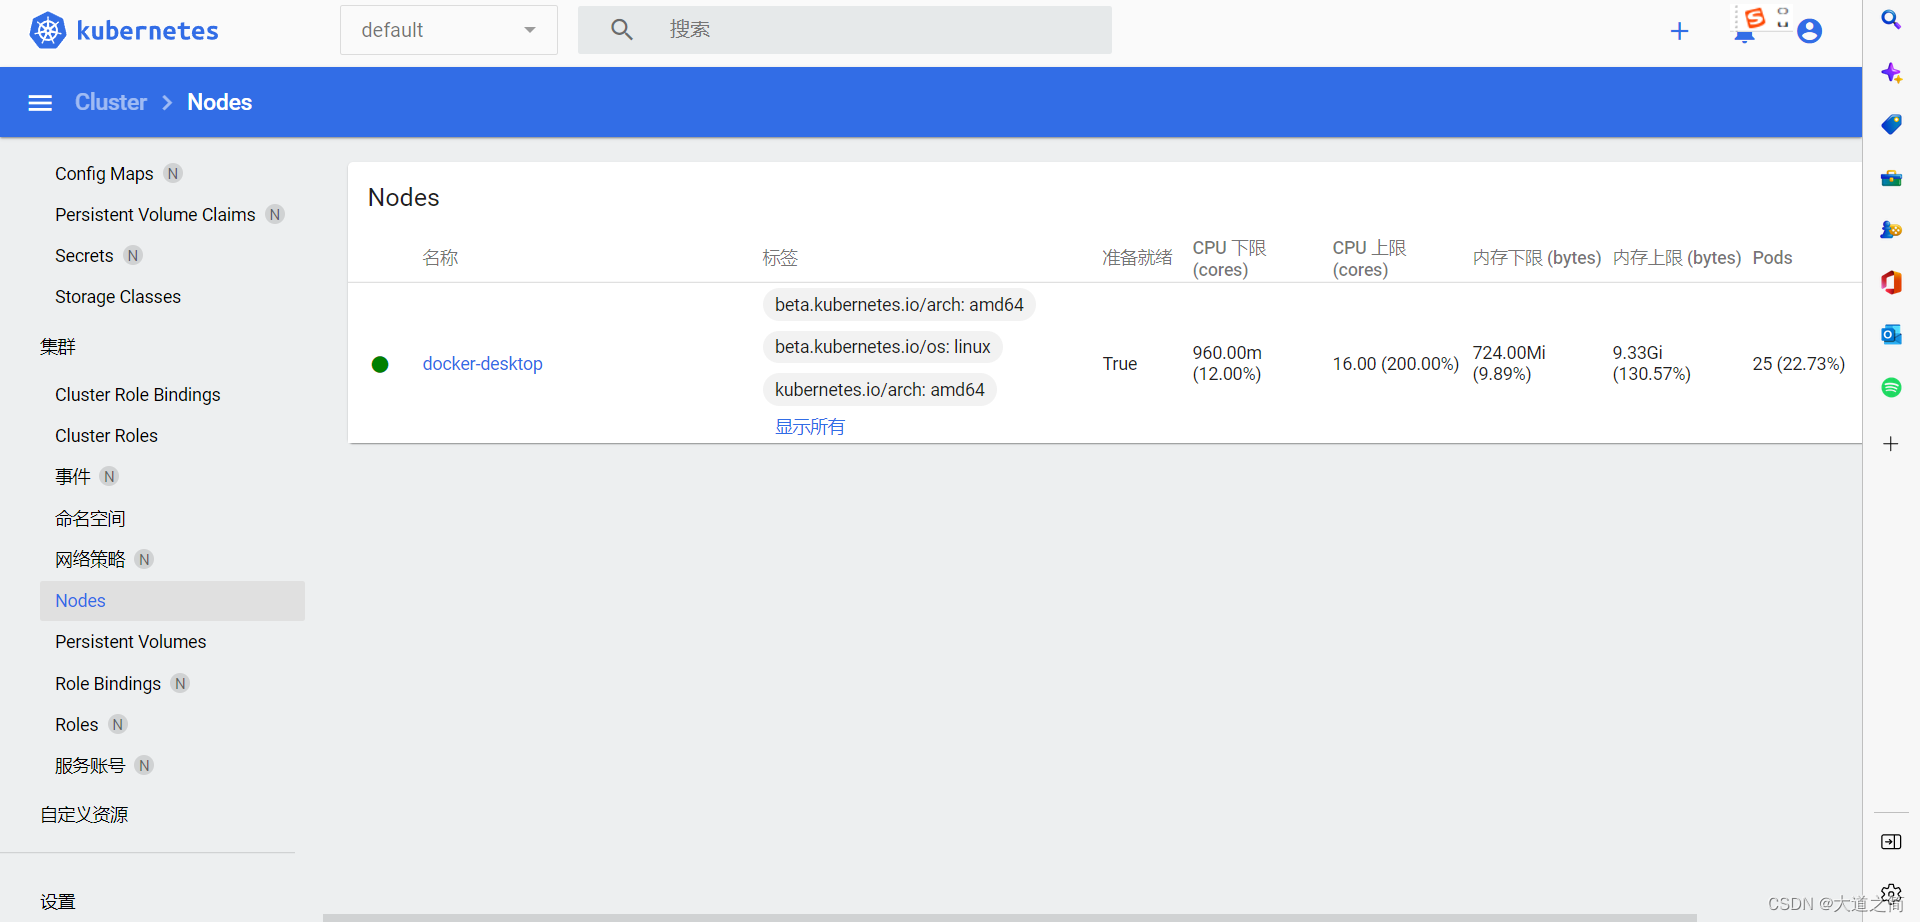
在kubernetes查询Node IP
①、kubectl get nodes
②、kubectl describe node nodeName
③、显示出来的InternalIP就是NodeIP
kubectl describe node dokcer-desktop


2、Pod IP是每个Pod的IP地址,他是Docker Engine根据docker网桥的IP地址段进行分配的,通常是一个虚拟的二层网络。
同Service下的pod可以直接根据PodIP相互通信
不同Service下的pod在集群间pod通信要借助于 cluster ip
pod和集群外通信,要借助于node ip
在kubernetes查询Pod IP
①、kubectl get pods
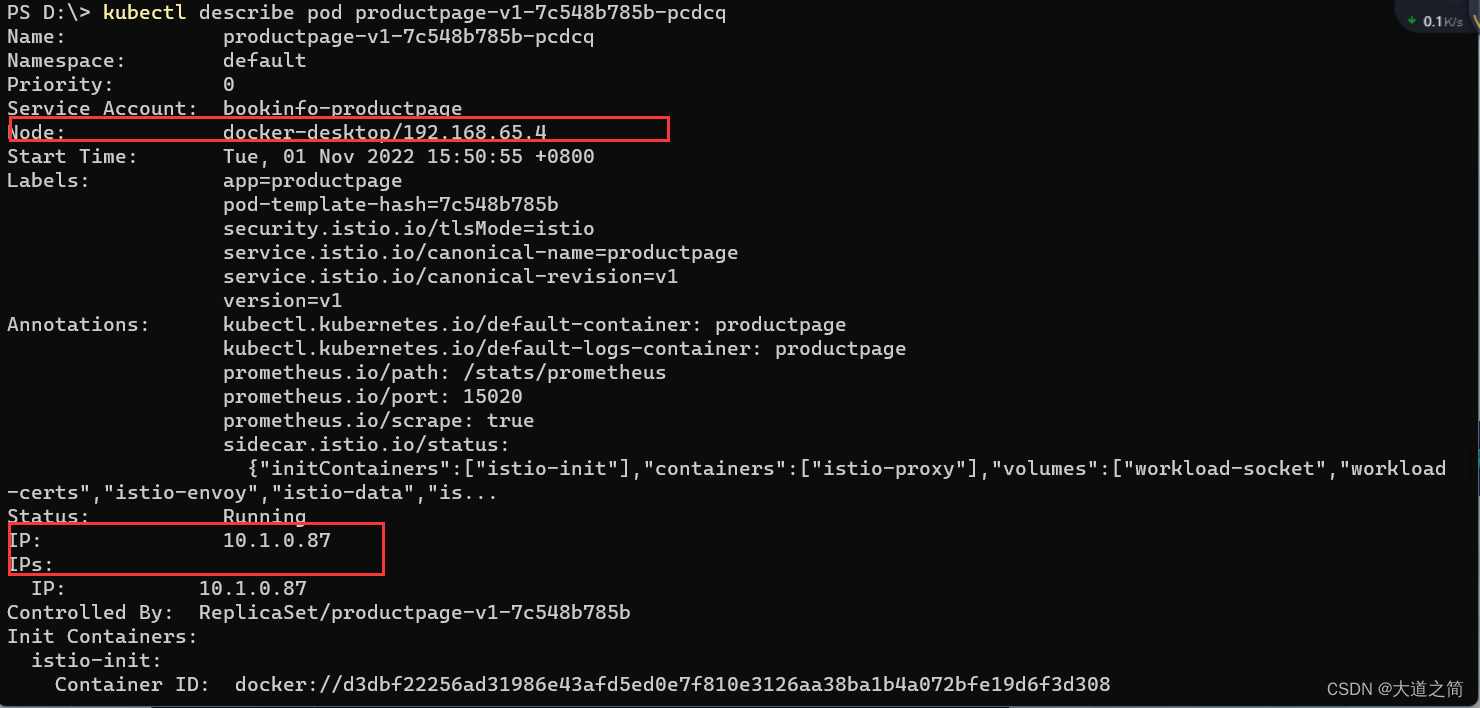
②、kubectl describe pod podName
kubectl describe pod details-v1-76778d6644-44h6v

kubectl describe pod productpage-v1-7c548b785b-pcdcq
3、Service的IP地址,此为虚拟IP地址。外部网络无法ping通,只有kubernetes集群内部访问使用
在kubernetes查询Cluster IP
kubectl -n 命名空间 get Service即可看到ClusterIP


IP是service ip,Endpoints是Service关联的Pod ip,对比上图.
Cluster IP是一个虚拟的IP,但更像是一个伪造的IP网络,原因有以下几点
Cluster IP仅仅作用于Kubernetes Service这个对象,并由Kubernetes管理和分配P地址
Cluster IP无法被ping,他没有一个“实体网络对象”来响应
Cluster IP只能结合Service Port组成一个具体的通信端口,单独的Cluster IP不具备通信的基础,并且他们属于Kubernetes集群这样一个封闭的空间。
在不同Service下的pod节点在集群间相互访问可以通过Cluster IP
service地址和pod地址在不同网段,service地址为虚拟地址,不配在pod上或主机上,外部访问时,先到Node节点网络,再转到service网络,最后代理给pod网络
Kubernetes在其所有节点上开放一个端口给外部访问(所有节点上都使用相同的端口号), 并将传入的连接转发给作为Service服务对象的pod。这样我们的pod就可以被外部请求访问到.
参看这种Node Ip:Node port的暴露服务的方式
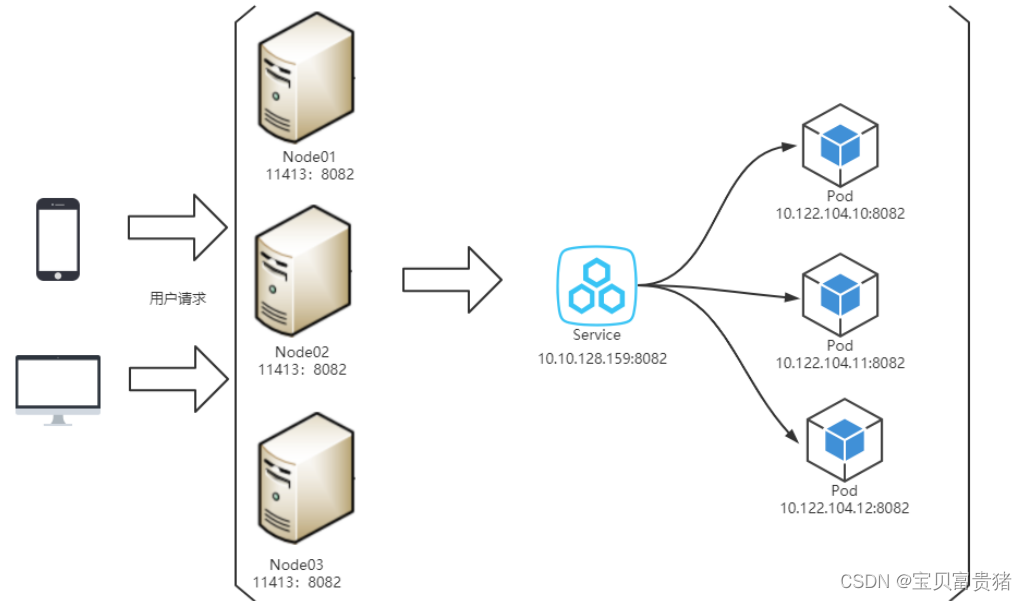
六、在线K8S环境
1、在线K8S环境


 2509
2509


 被折叠的 条评论
为什么被折叠?
被折叠的 条评论
为什么被折叠?
 到【灌水乐园】发言


