


加载TMS文件
		TMSOptions imagery;
		imagery.url() = "http://readymap.org/readymap/tiles/1.0.0/22/";
		m_pMap->addLayer(new ImageLayer("ReadyMap Imagery", imagery));
加载TIF、IMG等格式文件
	         GDALOptions gdal;
			 gdal.url() = pDataSource.strFile;
			 osg::ref_ptr<ImageLayer> pImageLayer = new ImageLayer(pDataSource.strName, gdal);
			 m_pMap->addLayer(pImageLayer);
加载XYZ格式文件
	osgEarth::Drivers::XYZOptions tileOptions;
	tileOptions.url() = "http://[abc].tile.openstreetmap.org/{z}/{x}/{y}.png";
	tileOptions.profile()->namedProfile()=("spherical-mercator");
	osgEarth::ImageLayerOptions options = ImageLayerOptions("debug", tileOptions);
	osg::ref_ptr<osgEarth::ImageLayer> layer = new ImageLayer(options);
	mapNode->getMap()->addImageLayer(layer);
加载MB格式文件
	 MBTilesTileSourceOptions pMBTiles;
			 pMBTiles.filename() = pDataSource.strFile;
			 pMBTiles.format() = ".png";
			 m_pMap->addLayer(new ImageLayer(pDataSource.strName, pMBTiles));
一些数据汇总
以下url中:
Z-瓦片层级,一般支持0-18级,越大代表越清晰;
X-瓦片列号,从西向东(0->360),依次0,1,2,……;
Y-瓦片行号,从北向南(有些也可能是从南向北),依次0,1,2,……;
1、arcgis
街道图:
https://map.geoq.cn/ArcGIS/rest/services/ChinaOnlineCommunity/MapServer/tile/{z}/{y}/{x}
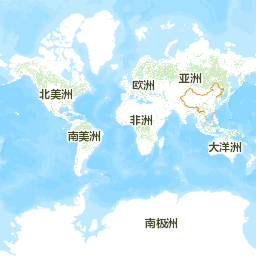
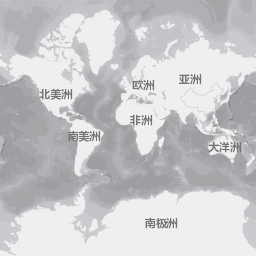
灰色图:
https://map.geoq.cn/ArcGIS/rest/services/ChinaOnlineStreetGray/MapServer/tile/{z}/{y}/{x}
深蓝夜色:
https://map.geoq.cn/ArcGIS/rest/services/ChinaOnlineStreetPurplishBlue/MapServer/tile/{z}/{y}/{x}

2、googlemap
lys参数可选值包括:h(街道图)、m(街道图)、p(街道图)、r(街道图)、s(影像无注记)、y(影像含注记)、t(地形图)
街道图:
https://www.google.cn/maps/vt?lyrs=m@189&gl=cn&x={x}&y={y}&z={z}
卫星图:
https://www.google.cn/maps/vt?lyrs=s@189&gl=cn&x={x}&y={y}&z={z}(或者http://mt1.google.cn/vt/lyrs=s&x={x}&y={y}&z={z})

3、Amap(高德地图)
街道:(z>=3才有数据)
https://webrd01.is.autonavi.com/appmaptile?lang=zh_cn&size=1&scale=1&style=8&x={x}&y={y}&z={z}

影像图:
https://webst01.is.autonavi.com/appmaptile?style=6&x={x}&y={y}&z={z}

4、OSM
街道图(国外服务器,访问较慢):
https://c.tile.openstreetmap.org/{z}/{x}/{y}.png

https://tile-b.openstreetmap.fr/hot/{z}/{x}/{y}.png

5、Mapbox
建筑图:(国内数据略陈旧)
https://b.tiles.mapbox.com/v3/osmbuildings.kbpalbpk/{z}/{x}/{y}.png

黑色底图:
https://a.basemaps.cartocdn.com/dark_all/{z}/{x}/{y}.png

需要token:
6、Mapbox
卫星图:
https://a.tiles.mapbox.com/v4/mapbox.satellite/{z}/{x}/{y}.png?access_token=

街道图:
https://a.tiles.mapbox.com/v4/mapbox.streets/{z}/{x}/{y}.png?access_token=
带区划黑底:
https://a.tiles.mapbox.com/v4/mapbox.dark/{z}/{x}/{y}.png?access_token=
7、天地图(http://lbs.tianditu.gov.cn/server/MapService.html)
影像图:(z>=1)
https://t0.tianditu.gov.cn/img_w/wmts?SERVICE=WMTS&REQUEST=GetTile&VERSION=1.0.0&LAYER=img&STYLE=default&TILEMATRIXSET=w&FORMAT=tiles&TILEMATRIX={z}&TILEROW={y}&TILECOL={x}&tk=

矢量底图:(z>=1)
https://t0.tianditu.gov.cn/vec_w/wmts?SERVICE=WMTS&REQUEST=GetTile&VERSION=1.0.0&LAYER=vec&STYLE=default&TILEMATRIXSET=w&FORMAT=tiles&TILEMATRIX={z}&TILEROW={y}&TILECOL={x}&tk=9a516b0f2a8179bb68f73172cff4bd22
注记:(z>=1)
https://t2.tianditu.com/cia_w/wmts?service=wmts&request=GetTile&version=1.0.0&LAYER=cia&tileMatrixSet=w&TileMatrix={z}&TileRow={y}&TileCol={x}&style=default&tk=

8、BingMap

https://ecn.t0.tiles.virtualearth.net/tiles/a1.jpeg?g=7234
https://ecn.t0.tiles.virtualearth.net/tiles/a13.jpeg?g=7234
https://ecn.t0.tiles.virtualearth.net/tiles/a130.jpeg?g=7234
从Level1开始,g=7234/100/-10……为任意正负整数


 4425
4425


 被折叠的 条评论
为什么被折叠?
被折叠的 条评论
为什么被折叠?
 到【灌水乐园】发言


