


This guide provides a sampling of how Spring Boot helps you accelerate application development. As you read more Spring Getting Started guides, you will see more use cases for Spring Boot. This guide is meant to give you a quick taste of Spring Boot. If you want to create your own Spring Boot-based project, visit Spring Initializr, fill in your project details, pick your options, and download a bundled up project as a zip file.
上述意思一句话概括:本文档就是想让各位老爷、少奶奶快速尝尝springboot的味道如何。重点我已经加粗了。
What You Will build
You will build a simple web application with Spring Boot and add some useful services to it.
废话,没啥意思,过。
What You Need
About 15 minutes
A favorite text editor or IDE
JDK 1.8 or later
You can also import the code straight into your IDE:
重点:这是告诉咱们使用springboot的前提条件:
1、需要各位大大话点时间搞一搞springboot的开发环境,大佬说需要大概15分钟,这是大佬用的时间,我们,呵呵,文档都这么卷。各位大大,大概花个把小时搞一搞。
2、需要一个称手的IDE,IDE是啥?如果不知道,卧槽,也没关系,英文全称"Integrated Development Environment",比如eclipse(老一辈程序员)idea(新生代搬砖工程师),没别的意思啊,经验之谈。
3、需要jdk1.8以上。
4、需要一个编译的工具:gradle4+或者maven3.2+
5、环境好了,直接上代码。
How to complete this guide
Like most Spring Getting Started guides, you can start from scratch and complete each step or you can bypass basic setup steps that are already familiar to you. Either way, you end up with working code.
To start from scratch, move on to Starting with Spring Initializr.
To skip the basics, do the following:
Download and unzip the source repository for this guide, or clone it using Git:
git clone https://github.com/spring-guides/gs-spring-boot.gitcd into
gs-spring-boot/initialJump ahead to Create a Simple Web Application.
When you finish, you can check your results against the code in
gs-spring-boot/complete.
上述就是说:springboot爸爸给了咱们样例代码,可以zip下载下来,也可以用git 克隆下来。
解压或者git clone 下来,用IDE引入,代码大概长这个鬼样子:
Learn What You Can Do with Spring Boot
Spring Boot offers a fast way to build applications. It looks at your classpath and at the beans you have configured, makes reasonable assumptions about what you are missing, and adds those items. With Spring Boot, you can focus more on business features and less on infrastructure.
The following examples show what Spring Boot can do for you:
Is Spring MVC on the classpath? There are several specific beans you almost always need, and Spring Boot adds them automatically. A Spring MVC application also needs a servlet container, so Spring Boot automatically configures embedded Tomcat.
Is Jetty on the classpath? If so, you probably do NOT want Tomcat but instead want embedded Jetty. Spring Boot handles that for you.
Is Thymeleaf on the classpath? If so, there are a few beans that must always be added to your application context. Spring Boot adds them for you.
These are just a few examples of the automatic configuration Spring Boot provides. At the same time, Spring Boot does not get in your way. For example, if Thymeleaf is on your path, Spring Boot automatically adds a
SpringTemplateEngineto your application context. But if you define your ownSpringTemplateEnginewith your own settings, Spring Boot does not add one. This leaves you in control with little effort on your part.
上述说:springboot大概能干点啥,主要是我加粗的部分。第一句话是说:用咱springboot你不用太关心底层的东东(当然面试啥的除外),你多关心关心业务。第二句加粗的是:springboot举了3个例子说明自己的牛逼:第一个例子是说,springboot是站在巨人的肩膀上,这个巨人是springmvc,所以说我们在使用springboot的时候回经常用到一些似曾相识的注解。同时他又说,springboot集成了tomcat容器,总之,他又说,tomcat容器还是之前springmvc中的bean都是自动装配,关于这个自动装配可以自行品品,其实就是想减轻我们的内卷劳动量(重复劳动,这个不是权威说法)。第二个例子是说:在启动springboot服务的时候如果你看不上tomcat,你也可以用jetty,jetty他也帮你集成好了。第三个例子:Thymeleaf 也帮您集成好了,关于Thymeleaf 是什么鬼,其实就是一个前端模板,用官方的说法就是“模板引擎”,多牛逼的字样,管网参考(https://www.thymeleaf.org/),我好贴心,关键的一段我给各位大大贴在下边了:关键字“Java template engine”
Thymeleaf is a modern server-side Java template engine for both web and standalone environments.
Thymeleaf's main goal is to bring elegant natural templates to your development workflow — HTML that can be correctly displayed in browsers and also work as static prototypes, allowing for stronger collaboration in development teams.
With modules for Spring Framework, a host of integrations with your favourite tools, and the ability to plug in your own functionality, Thymeleaf is ideal for modern-day HTML5 JVM web development — although there is much more it can do.
Starting with Spring Initializr
If you use Maven, visit the Spring Initializr to generate a new project with the required dependencies (Spring Web).
The following listing shows the
pom.xmlfile that is created when you choose Maven:
<?xml version="1.0" encoding="UTF-8"?>
<project xmlns="http://maven.apache.org/POM/4.0.0" xmlns:xsi="http://www.w3.org/2001/XMLSchema-instance"
	xsi:schemaLocation="http://maven.apache.org/POM/4.0.0 https://maven.apache.org/xsd/maven-4.0.0.xsd">
	<modelVersion>4.0.0</modelVersion>
	<parent>
		<groupId>org.springframework.boot</groupId>
		<artifactId>spring-boot-starter-parent</artifactId>
		<version>2.5.0</version>
		<relativePath/> <!-- lookup parent from repository -->
	</parent>
	<groupId>com.example</groupId>
	<artifactId>spring-boot-initial</artifactId>
	<version>0.0.1-SNAPSHOT</version>
	<name>spring-boot-initial</name>
	<description>Demo project for Spring Boot</description>
	<properties>
		<java.version>1.8</java.version>
	</properties>
	<dependencies>
		<dependency>
			<groupId>org.springframework.boot</groupId>
			<artifactId>spring-boot-starter-web</artifactId>
		</dependency>

		<dependency>
			<groupId>org.springframework.boot</groupId>
			<artifactId>spring-boot-starter-test</artifactId>
			<scope>test</scope>
		</dependency>
	</dependencies>

	<build>
		<plugins>
			<plugin>
				<groupId>org.springframework.boot</groupId>
				<artifactId>spring-boot-maven-plugin</artifactId>
			</plugin>
		</plugins>
	</build>

</project>
上述是:springboot需要的maven依赖,最基础版的。
If you use Gradle, visit the Spring Initializr to generate a new project with the required dependencies (Spring Web).
The following listing shows the
build.gradlefile that is created when you choose Gradle:
plugins {
	id 'org.springframework.boot' version '2.5.0'
	id 'io.spring.dependency-management' version '1.0.11.RELEASE'
	id 'java'
}

group = 'com.example'
version = '0.0.1-SNAPSHOT'
sourceCompatibility = '1.8'

repositories {
	mavenCentral()
}

dependencies {
	implementation 'org.springframework.boot:spring-boot-starter-web'
	testImplementation 'org.springframework.boot:spring-boot-starter-test'
}

test {
	useJUnitPlatform()
}
然后人家还提供了gradle的依赖。
Manual Initialization (optional)
If you want to initialize the project manually rather than use the links shown earlier, follow the steps given below:
Navigate to https://start.spring.io. This service pulls in all the dependencies you need for an application and does most of the setup for you.
Choose either Gradle or Maven and the language you want to use. This guide assumes that you chose Java.
Click Dependencies and select Spring Web.
Click Generate.
Download the resulting ZIP file, which is an archive of a web application that is configured with your choices.
这个是选择项,看关键字optional,其实就是教你怎么在线初始化一个springboot脚手架。
然后,他还给了一个note注释,说其实也可以用IDE自动生成一个。估计用IDE的大佬多一点吧。
If your IDE has the Spring Initializr integration, you can complete this process from your IDE.
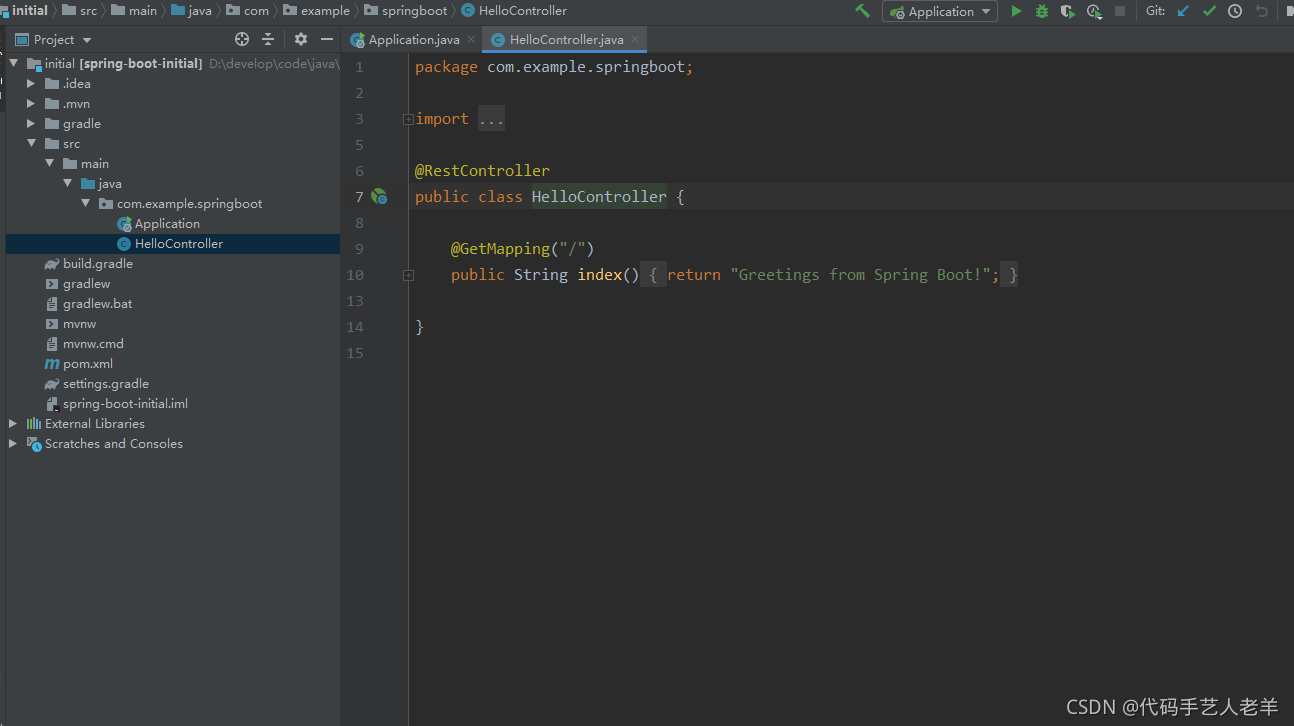
Create a Simple Web Application
Now you can create a web controller for a simple web application, as the following listing (from
src/main/java/com/example/springboot/HelloController.java) shows:
package com.example.springboot;

import org.springframework.web.bind.annotation.GetMapping;
import org.springframework.web.bind.annotation.RestController;

@RestController
public class HelloController {

	@GetMapping("/")
	public String index() {
		return "Greetings from Spring Boot!";
	}

}
关键是看看标题和代码,应该就看明白了,标题直接翻译应该是“创建一个简单的Web应用”,哈哈哈这个应该是全文翻译的最好的一句了。代码里边的两个注解@RestController和@GetMapping应该都熟悉的一批。
Create an Application class
The Spring Initializr creates a simple application class for you. However, in this case, it is too simple. You need to modify the application class to match the following listing (from
src/main/java/com/example/springboot/Application.java):
package com.example.springboot;

import java.util.Arrays;

import org.springframework.boot.CommandLineRunner;
import org.springframework.boot.SpringApplication;
import org.springframework.boot.autoconfigure.SpringBootApplication;
import org.springframework.context.ApplicationContext;
import org.springframework.context.annotation.Bean;

@SpringBootApplication
public class Application {

	public static void main(String[] args) {
		SpringApplication.run(Application.class, args);
	}

	@Bean
	public CommandLineRunner commandLineRunner(ApplicationContext ctx) {
		return args -> {

			System.out.println("Let's inspect the beans provided by Spring Boot:");

			String[] beanNames = ctx.getBeanDefinitionNames();
			Arrays.sort(beanNames);
			for (String beanName : beanNames) {
				System.out.println(beanName);
			}

		};
	}

}
这其实是springboot的核心内容之一,标题说的很简洁就是说创建一个Application class,这“Application class”他还说:“in this case,it is to simple”其实言外之意就是“简约而不简单”,这是springboot服务的启动入口,springboot的一切都是从这个main函数开启。
@SpringBootApplicationis a convenience annotation that adds all of the following:
@Configuration: Tags the class as a source of bean definitions for the application context.
@EnableAutoConfiguration: Tells Spring Boot to start adding beans based on classpath settings, other beans, and various property settings. For example, ifspring-webmvcis on the classpath, this annotation flags the application as a web application and activates key behaviors, such as setting up aDispatcherServlet.
@ComponentScan: Tells Spring to look for other components, configurations, and services in thecom/examplepackage, letting it find the controllers.The
main()method uses Spring Boot’sSpringApplication.run()method to launch an application. Did you notice that there was not a single line of XML? There is noweb.xmlfile, either. This web application is 100% pure Java and you did not have to deal with configuring any plumbing or infrastructure.There is also a
CommandLineRunnermethod marked as a@Bean, and this runs on start up. It retrieves all the beans that were created by your application or that were automatically added by Spring Boot. It sorts them and prints them out.
说明:为啥这个类叫“Application class”其实关键之处在于这个注解“@SpringBootApplication”,如果有大佬问你,springboot和spring有哪些注解不同的,你回答@SpringBootApplication,恭喜你60分到手,如果你把这句话看明白了“@SpringBootApplication is a convenience annotation that adds all of the following:”80分到手,意思就是说@SpringBootApplication这个注解自动装配了这3个注解:@Configuration、@EnableAutoConfiguration、@ComponentScan。如果顺道把这三个注解脱口而出,然后还解释说明一下这三个注解干了啥,你牛逼了。关于这三个注解干了啥,可以自行翻译下完事。还是说说吧@Configuration关键字“bean definition”是不是又是似曾相识,不错就是bean的定义,spring源码里边是不是见过,是的。如果你还能头头是道的说出@Configuration这个注解和spring的配置文件的关系,或者说区别,或者好处,卧槽,你牛批,恭喜你:你是个卷王之王。@EnableAutoConfiguration这注解看看我标的重点:告诉springboot要加载那些bean和那些配置项,如数据库连接等。@ComponentScan:包扫描。和spring包扫描差不多。
Run the Application
To run the application, run the following command in a terminal window (in the
complete)directory:
./gradlew bootRun
这是gradle怎么启动。
If you use Maven, run the following command in a terminal window (in the
complete) directory:
maven怎么启动。
You should see output similar to the following:
启动结束之后,样例代码的输出,当然用idea要更加方便点喽。
输出的结果:
Let's inspect the beans provided by Spring Boot:
application
beanNameHandlerMapping
defaultServletHandlerMapping
dispatcherServlet
embeddedServletContainerCustomizerBeanPostProcessor
handlerExceptionResolver
helloController
httpRequestHandlerAdapter
messageSource
mvcContentNegotiationManager
mvcConversionService
mvcValidator
org.springframework.boot.autoconfigure.MessageSourceAutoConfiguration
org.springframework.boot.autoconfigure.PropertyPlaceholderAutoConfiguration
org.springframework.boot.autoconfigure.web.EmbeddedServletContainerAutoConfiguration
org.springframework.boot.autoconfigure.web.EmbeddedServletContainerAutoConfiguration$DispatcherServletConfiguration
org.springframework.boot.autoconfigure.web.EmbeddedServletContainerAutoConfiguration$EmbeddedTomcat
org.springframework.boot.autoconfigure.web.ServerPropertiesAutoConfiguration
org.springframework.boot.context.embedded.properties.ServerProperties
org.springframework.context.annotation.ConfigurationClassPostProcessor.enhancedConfigurationProcessor
org.springframework.context.annotation.ConfigurationClassPostProcessor.importAwareProcessor
org.springframework.context.annotation.internalAutowiredAnnotationProcessor
org.springframework.context.annotation.internalCommonAnnotationProcessor
org.springframework.context.annotation.internalConfigurationAnnotationProcessor
org.springframework.context.annotation.internalRequiredAnnotationProcessor
org.springframework.web.servlet.config.annotation.DelegatingWebMvcConfiguration
propertySourcesBinder
propertySourcesPlaceholderConfigurer
requestMappingHandlerAdapter
requestMappingHandlerMapping
resourceHandlerMapping
simpleControllerHandlerAdapter
tomcatEmbeddedServletContainerFactory
viewControllerHandlerMapping
You can clearly see
org.springframework.boot.autoconfigurebeans. There is also atomcatEmbeddedServletContainerFactory.
Now run the service with curl (in a separate terminal window), by running the following command (shown with its output):
$ curl localhost:8080
Greetings from Spring Boot!
如果集成了tomcat,直接启动,就可以访问响应的controller的路由了。
Add Unit Tests
You will want to add a test for the endpoint you added, and Spring Test provides some machinery for that.
If you use Gradle, add the following dependency to your
build.gradlefile:
单元测试。
testImplementation('org.springframework.boot:spring-boot-starter-test')
gradle引用依赖。
If you use Maven, add the following to your
pom.xmlfile:<dependency>
<groupId>org.springframework.boot</groupId>
<artifactId>spring-boot-starter-test</artifactId>
<scope>test</scope>
</dependency>
maven引用依赖。
Now write a simple unit test that mocks the servlet request and response through your endpoint, as the following listing (from
src/test/java/com/example/springboot/HelloControllerTest.java) shows:
package com.example.springboot;

import static org.hamcrest.Matchers.equalTo;
import static org.springframework.test.web.servlet.result.MockMvcResultMatchers.content;
import static org.springframework.test.web.servlet.result.MockMvcResultMatchers.status;

import org.junit.jupiter.api.Test;

import org.springframework.beans.factory.annotation.Autowired;
import org.springframework.boot.test.autoconfigure.web.servlet.AutoConfigureMockMvc;
import org.springframework.boot.test.context.SpringBootTest;
import org.springframework.http.MediaType;
import org.springframework.test.web.servlet.MockMvc;
import org.springframework.test.web.servlet.request.MockMvcRequestBuilders;

@SpringBootTest
@AutoConfigureMockMvc
public class HelloControllerTest {

	@Autowired
	private MockMvc mvc;

	@Test
	public void getHello() throws Exception {
		mvc.perform(MockMvcRequestBuilders.get("/").accept(MediaType.APPLICATION_JSON))
				.andExpect(status().isOk())
				.andExpect(content().string(equalTo("Greetings from Spring Boot!")));
	}
}
单元测试样例代码。
Add Production-grade Services
If you are building a web site for your business, you probably need to add some management services. Spring Boot provides several such services (such as health, audits, beans, and more) with its actuator module.
If you use Gradle, add the following dependency to your
build.gradlefile:
springboot健康监测。需要加入依赖,gradle或者maven
implementation 'org.springframework.boot:spring-boot-starter-actuator'
maven:
<dependency>
<groupId>org.springframework.boot</groupId>
<artifactId>spring-boot-starter-actuator</artifactId>
</dependency>
JAR Support and Groovy Support
The last example showed how Spring Boot lets you wire beans that you may not be aware you need. It also showed how to turn on convenient management services.
However, Spring Boot does more than that. It supports not only traditional WAR file deployments but also lets you put together executable JARs, thanks to Spring Boot’s loader module. The various guides demonstrate this dual support through the
spring-boot-gradle-pluginandspring-boot-maven-plugin.On top of that, Spring Boot also has Groovy support, letting you build Spring MVC web applications with as little as a single file.
Create a new file called
app.groovyand put the following code in it:
@RestController
class ThisWillActuallyRun {

    @GetMapping("/")
    String home() {
        return "Hello, World!"
    }

}
直接翻译:springboot对jar的支持和groovy语法的支持。
Summary
Congratulations! You built a simple web application with Spring Boot and learned how it can ramp up your development pace. You also turned on some handy production services. This is only a small sampling of what Spring Boot can do. See Spring Boot’s online docs for much more information.
总结语言,意思是说恭喜咱们对springboot有了一个大概的印象,同时咧我们大致尝试了怎么搞一个springboot服务。
See Also
The following guides may also be helpful:
Want to write a new guide or contribute to an existing one? Check out our contribution guidelines.
最后是给了些我们可以看的相关文档。


 1664
1664

 被折叠的 条评论
为什么被折叠?
被折叠的 条评论
为什么被折叠?
 到【灌水乐园】发言


