


Spark一些简单功能的实现
1、批量改变列名
val frame = spark.createDataFrame(Seq(("zhangsan", 18, "nan"),("lisi",20,"nv"))).toDF("name", "age", "sex")

val str = "name:name1"

if(str == ""){
  frame.show()
}else{
  val map: Map[String, String] = str.split(",").map(data => {
    val arr = data.split(":")
    (arr(0), arr(1))
  })
    .toMap

  import org.apache.spark.sql.functions._

  val frame1: DataFrame = frame.select(frame.columns.map(c => col(c).as(map.getOrElse(c, c))): _*)
  frame1.show()
}
2、添加自增列
1)
val frame = spark.createDataFrame(Seq(("zhangsan", 18, "nan"),("lisi",20,"nv"))).toDF("name", "age", "sex")

val schema: StructType = SourceFrame.schema.add(StructField("SortId", LongType))

val dfRDD: RDD[(Row, Long)] = SourceFrame.rdd.zipWithIndex()

val rowRDD = dfRDD.map(tp => Row.merge(tp._1,Row(tp._2 + 1)))

spark.createDataFrame(rowRDD,schema).show()

2)
import org.apache.spark.sql.functions._
frame.withcolumn("id",monotonically_increasing_id() + 1)
3、读取csv文件的另一种格式(可以把第一列作为列名)
    spark.read
      //推断数据类型
      .option("inferSchema", "true")
      //可设置分隔符,默认,
      //.option("delimiter",",")
      //设置空值
//      .option("nullValue", "?")
      //表示有表头,若没有则为false
      .option("header", true)
      //文件路径
      .csv("D:\\software\\idea\\WorkSpace\\com.program.UserBehaviorAnalysis\\LogAnalysis\\src\\main\\resources\\UserBehavior.csv")
4、取出一个dataframe的前n行
val frame = SourceFrame.limit(10).toDF()
frame.show()
5、把一个dataframe按指定列拆分成两个dataframe
val selectArray:ArrayBuffer[String] = new ArrayBuffer[String]()
selectArray.+=("ClickCount").+=("aid")

val WriteFrame1 = SourceFrame.selectExpr(selectArray:_*)
WriteFrame1.show()

val array: Array[String] = SourceFrame.columns

val strings: Array[String] = array.diff(selectArray)

val writeFrame2 = SourceFrame.selectExpr(strings:_*)

writeFrame2.show()
6、算数计算,主要是方差
import org.apache.spark.sql.functions._
val Frame = SourceFrame.groupBy()
  .agg(
    max("ct").alias("maxnum"),
    min("ct").alias("minnum"),
    avg("ct").alias("avgnum"),
    var_pop("ct").alias("variance")//方差
  )
Frame.show()
7、Spark读取数据库操作
val frame = spark.read.format("jdbc")
.option("driver", "com.mysql.jdbc.Driver")//8.0以上是com.mysql.cj.jdbc.Driver
//.option("driver", "oracle.jdbc.driver.OracleDriver")
//.option("driver", "org.postgresql.Driver")postgresql数据库
  .option("url", "jdbc:mysql://192.168.216.201:3306/nshop")//高版本的mysql的url要在后面加上?serverTimezone=UTC
  .option("dbtable", "orders")
  .option("user", "root")
  .option("password", "123456")
  .load()
8、Java调用Spark jar包
import java.io.IOException;
import org.apache.spark.deploy.SparkSubmit;

public class UseJar{
    public static void main(String[] args) throws IOException {
        String [] arr=new String[]{
                "--master","spark://192.168.216.201:7077",//ip端口
                 "--deploy-mode","client",
                 "--name",“spark submit test”,
                 "--class",className,//运行主类main
                 "--executor-memory","2G",
                 "--total-executor-cores","10",
                 "--executor-cores","2",
                 "D:\software\idea\WorkSpace\JarTestProject\target\JarTestProject-1.0-SNAPSHOT.jar",//jar包的路径
                 "LR",
                  "20180817111111",
                   "66"//后边三行是jar中的参数
        };
        SparkSubmit.main(arr);
    }
}
//注:在idea的pom文件中导入的spark的版本要和虚拟机或者集群上的spark的版本一致,否则会出现反序列化的问题,困扰了好久,希望大家借鉴。
9、maven打包的pom文件内容
  <build>
        <plugins>

            <plugin>
                <!-- 这是个编译java代码的 -->
                <groupId>org.apache.maven.plugins</groupId>
                <artifactId>maven-compiler-plugin</artifactId>
                <version>3.2</version>
                <configuration>
                    <source>1.8</source>
                    <target>1.8</target>
                    <encoding>UTF-8</encoding>
                </configuration>
                <executions>
                    <execution>
                        <phase>compile</phase>
                        <goals>
                            <goal>compile</goal>
                        </goals>
                    </execution>
                </executions>
            </plugin>
            <plugin>
                <!-- 这是个编译scala代码的 -->
                <groupId>net.alchim31.maven</groupId>
                <artifactId>scala-maven-plugin</artifactId>
                <version>3.2.1</version>
                <executions>
                    <execution>
                        <id>scala-compile-first</id>
                        <phase>process-resources</phase>
                        <goals>
                            <goal>add-source</goal>
                            <goal>compile</goal>
                        </goals>
                    </execution>
                </executions>
            </plugin>
        </plugins>
    </build>
10、DataFrame写出为csv文件时带表头
frame
.coalesce(1)
.write
.mode(SaveMode.Overwrite)
.option("header",true)
.csv("hdfs://192.168.216.201:9000/output")
11、通过scala或者java代码在HDFS上创建文件夹
1)JavaAPI
//需要的包
import org.apache.hadoop.conf.Configuration
import org.apache.hadoop.fs.Path
import org.apache.hadoop.fs.FileSystem

public static void main(String[] args) throws IOException{
//指定操作Hadoop的用户
	System.setProoerty("HADOOP_USER_NAME","hdfs");
	Configuration conf = new Configuration();
	conf.set("fs.defaultFS","hdfs://192.168.216.201:9000");
	FileSystem hdfs = FileSystem.get(conf);
	boolean mk = hdfs.mkdirs(new Path("hdfs:/output/mk"));
	boolean delete= hdfs.deleteOnExit(new Path("hdfs:/output/mk"));
	boolean rename = hdfs.rename(new Path("hdfs:/output/mk"),new Path("hdfs:/output/mkdir"));
	hdfs.close;
}
2)Scala实现
//需要导包
import org.apache.hadoop.conf.Configuration
import org.apache.hadoop.fs.{FileSystem, Path}

  def main(args: Array[String]): Unit = {
    val conf = new Configuration
    conf.set("fs.defaultFS", "hdfs://Hadoop001:9000")
    val hdfs = FileSystem.get(conf)
    val isok = hdfs.mkdirs(new Path("hdfs:/input/data1"))
    val delete = hdfs.deleteOnExit(new Path("hdfs:/output/mk"))
    val reName= hdfs.rename(new Path("hdfs:/output/mk"),new Path("hdfs:/output/mkdir"))
    hdfs.close()
  }
12、Spark读取多个路径下相同类型文件
//以CSV为例,其他类型文件类似
//.read方法后的.json,.txt,.csv...查看源码时显示
 //def text(path: String): DataFrame = {text(Seq(path): _*)}
则说明是把所有路径放到了Seq中,并且查询所有Seq中所有路径
  def ReadCsv(spark:SparkSession,inpath:ArrayBuffer[String],outpath:String): Unit ={
    val frame = spark.read.csv(inpath:_*)
    frame.coalesce(1).write.mode(SaveMode.Overwrite).json(outpath)
    spark.close()
  }
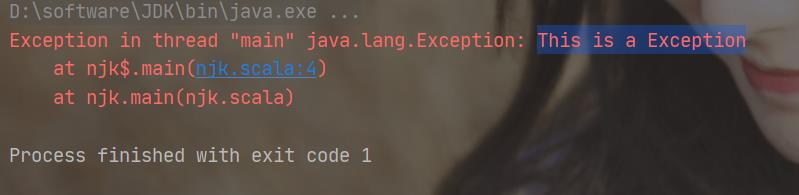
13、Scala的main方法抛出异常和java有所区别
  def main(args: Array[String]): Unit = {
    throw new Exception("This is a Exception")
  }
java的main方法异常抛出如下
public static void main(String[] args) throws IOException{
}
14、scala代码执行sql脚本(查询不显示结果,其他库表数据操作都支持)
object sqlOprate {
  def main(args: Array[String]): Unit = {
    try{
      val conn = getMysqlConnection
      val runner = new ScriptRunner(conn)
      Resources.setCharset(Charset.forName("utf-8"))
      runner.setLogWriter(null)
      //    val reader = new FileReader(new File("/sql/test.sql"))
      val reader = Resources.getResourceAsReader("sql/test.sql")
      runner.runScript(reader)
      runner.closeConnection()
      conn.close()
      println("sql执行完毕")
    }catch {
      case e:Exception =>{
        println("sql执行异常")
        e.printStackTrace()
      }
    }
  }

  def getMysqlConnection:Connection ={
    Class.forName("com.mysql.jdbc.Driver")
    val prop = Resources.getResourceAsProperties("db.properties")
    val url = prop.getProperty("url")
    val user = prop.getProperty("user")
    val password = prop.getProperty("password")
    DriverManager.getConnection(url,user,password)
  }
}
//properties文件内容
url = jdbc:mysql://localhost:3306/selftest
user = root
password = 123456

pom要有的依赖
        <dependency>
            <groupId>org.mybatis</groupId>
            <artifactId>mybatis</artifactId>
            <version>3.5.0</version>
        </dependency>
        <dependency>
            <groupId>org.springframework</groupId>
            <artifactId>spring-jdbc</artifactId>
            <version>3.2.18.RELEASE</version>
        </dependency>
 //需要导包
 import java.nio.charset.Charset
import java.sql.{Connection, DriverManager}
import org.apache.ibatis.io.Resources
import org.apache.ibatis.jdbc.ScriptRunner
15、SparkDataFrame的开窗操作
//求所有行的数据
    val w1 = Window.partitionBy("tenant").orderBy("price").rowsBetween(Window.unboundedPreceding, Window.unboundedFollowing)
	df.count().over(w1)//求所有数据的总条数
    //求截至到当前
    val w2 = Window.partitionBy("tenant").orderBy("price").rowsBetween(Window.unboundedPreceding, Window.currentRow)
	df.count().over(w1)//求截至到当前行所有数据的总条数
16、Spark读取mysql数据并写入ES
def main(args: Array[String]): Unit = {

    val conf = new SparkConf().setAppName("asd").setMaster("local[*]")
    conf.set("es.nodes","192.168.216.201")
    conf.set("es.port","9200")
    val spark = SparkSession.builder().config(conf).getOrCreate()

    val frame = spark.read.format("jdbc")
      .option("url", "jdbc:mysql://192.168.216.201:3306/nshop")
      .option("dbtable", "customer")
      .option("user", "root")
      .option("password", "123456")
      .load()

    EsSparkSQL.saveToEs(frame,"customer/test")

    spark.read.format("org.elasticsearch.spark.sql")
      .option("es.nodes","192.168.216.201")
      .option("es.port","9200")
      .load("customer/test")
      .show()

    spark.close()
  }


 678
678


 被折叠的 条评论
为什么被折叠?
被折叠的 条评论
为什么被折叠?
 到【灌水乐园】发言


