前言
- 在UI自动化测试中,经常需要在用例失败时保存截图,那么本篇来学习下在allure和html报告中添加失败用例的截图。
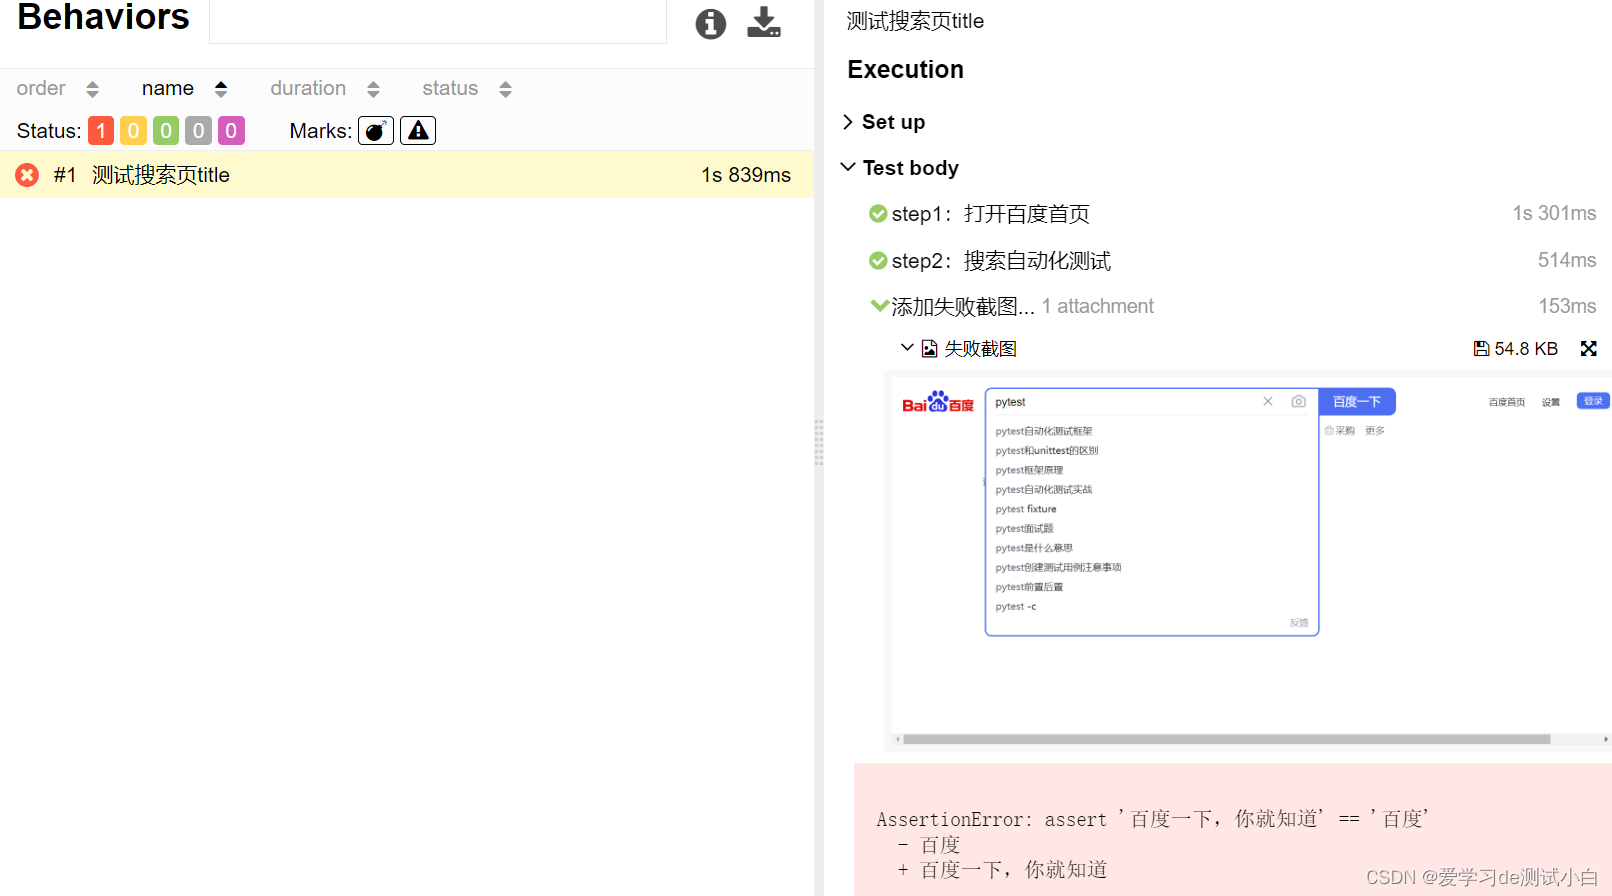
allure报告
import os
import allure
import pytest
from selenium import webdriver
driver = None
@pytest.mark.hookwrapper
def pytest_runtest_makereport(item, call):
outcome = yield
res = outcome.get_result()
if res.when == "call" and res.failed:
mode = "a" if os.path.exists("failures") else "w"
with open("failures", mode) as f:
if "tmpdir" in item.fixturenames:
extra = " (%s)" % item.funcargs["tmpdir"]
else:
extra = ""
f.write(res.nodeid + extra + "\n")
if hasattr(driver, "get_screenshot_as_png"):
with allure.step('添加失败截图...'):
allure.attach(driver.get_screenshot_as_png(), "失败截图", allure.attachment_type.PNG)
@pytest.fixture(scope='session')
def browser():
global driver
if driver is None:
driver = webdriver.Chrome()
yield driver
driver.quit()
import allure
import os
from selenium.webdriver.common.by import By
@allure.title("测试搜索页title")
def test_search(browser):
"""测试搜索页title"""
with allure.step("step1:打开百度首页"):
browser.get("https://www.baidu.com/")
with allure.step("step2:搜索自动化测试"):
browser.find_element(By.ID, "kw").send_keys("pytest")
print(browser.title)
assert browser.title == "百度"
if __name__ == '__main__':
os.system('pytest -s test_72.py --alluredir=./allure-data --clean-alluredir')
os.system('allure generate -c -o ./allure-report ./allure-data')
os.system('allure open ./allure-report')
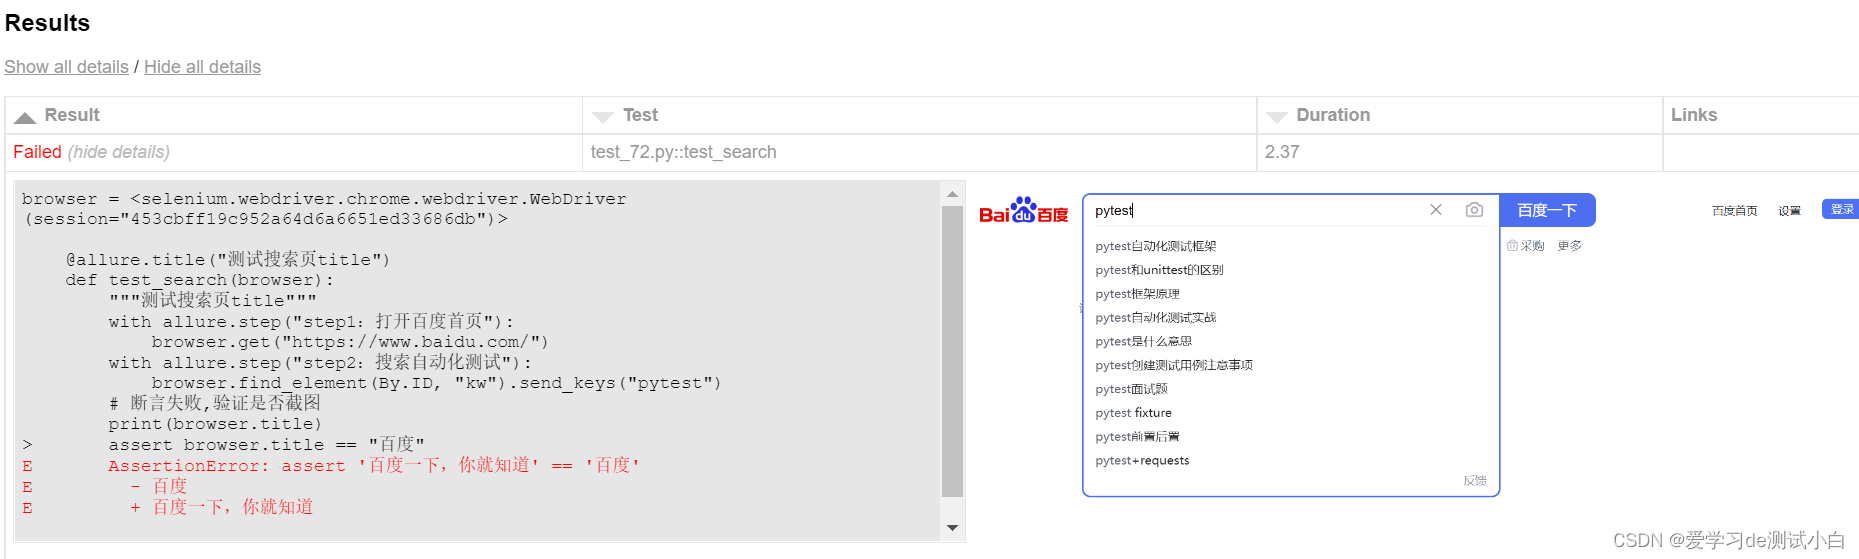
html报告
import pytest
from selenium import webdriver
@pytest.hookimpl(hookwrapper=True, tryfirst=True)
def pytest_runtest_makereport(item, call):
pytest_html = item.config.pluginmanager.getplugin('html')
outcome = yield
report = outcome.get_result()
extra = getattr(report, 'extra', [])
if report.when == 'call' or report.when == "setup":
xfail = hasattr(report, 'wasxfail')
if (report.skipped and xfail) or (report.failed and not xfail):
file_name = report.nodeid.replace("::", "_") + ".png"
screen_img = _capture_screenshot()
if file_name:
html = '<div><img src="data:image/png;base64,%s" alt="screenshot" style="width:600px;height:300px;" ' \
'οnclick="window.open(this.src)" align="right"/></div>' % screen_img
extra.append(pytest_html.extras.html(html))
report.extra = extra
@pytest.fixture(scope='session')
def browser():
global driver
if driver is None:
driver = webdriver.Chrome()
yield driver
driver.quit()
def _capture_screenshot():
"""截图"""
return driver.get_screenshot_as_base64()
import allure
import os
from selenium.webdriver.common.by import By
@allure.title("测试搜索页title")
def test_search(browser):
"""测试搜索页title"""
with allure.step("step1:打开百度首页"):
browser.get("https://www.baidu.com/")
with allure.step("step2:搜索自动化测试"):
browser.find_element(By.ID, "kw").send_keys("pytest")
print(browser.title)
assert browser.title == "百度"
if __name__ == '__main__':
os.system('pytest -s -v test_72.py --html=report.html --self-contained-html')


 681
681

 被折叠的 条评论
为什么被折叠?
被折叠的 条评论
为什么被折叠?
 到【灌水乐园】发言


