


使用Spring MVC来实现一组对User对象操作的RESTful API,
配合注释详细说明在Spring MVC中映射HTTP请求、传参、编写单元测试。
我们通过引入web模块,但是没有做其他的任何配置,就可以轻松利用Spring MVC的功能,完成对User对象的RESTful API的创建以及单元测试的编写。同时介绍Spring MVC中最为常用的几个核心注解:@Controller,@RestController, RequestMapping以及一些参数绑定的注解:@PathVariable,@ModelAttribute,@RequestParam等。
RESTful API具体设计如下:
1.User实体定义:
package com.lyd.entity;

public class User {

	private Long id;
	private String name;
	private Integer age;

	//get/set方法...
}
2.User对象的处理Controller:
package com.lyd.web;

import java.util.*;

import org.springframework.web.bind.annotation.ModelAttribute;
import org.springframework.web.bind.annotation.PathVariable;
import org.springframework.web.bind.annotation.RequestMapping;
import org.springframework.web.bind.annotation.RequestMethod;
import org.springframework.web.bind.annotation.RestController;

import com.lyd.entity.User;

/**
 *
 * <p>Title: UserController.java</p>
 * <p>Description: </p>
 * <p>Copyright: Copyright (c) 2017</p>
 * @author lyd
 * @date 2017年7月27日
 * @version 1.0
 */
@RestController
@RequestMapping(value="/users")
public class UserController {

	//创建线程安全的map
	static Map<Long, User> users =  Collections.synchronizedMap(new HashMap<Long, User>());

	/*
	 * 处理"/users/"的GET请求,用来获取用户列表
	 * 还可以通过@RequestParam从页面中传递参数来进行查询条件或者翻页信息的传递
	 */
	@RequestMapping(value="/", method=RequestMethod.GET)
	public List<User> getUserList(){
		List<User> u = new ArrayList<User>(users.values());
		return u;
	}

	/*
	 * 处理"/users/"的POST请求,用来创建User
	 * 除了@ModelAttribute绑定参数之外,还可以通过@RequestParam从页面中传递参数
	 */
    @RequestMapping(value="/", method=RequestMethod.POST)
    public String postUser(@ModelAttribute User user) {
        users.put(user.getId(), user);
        return "success";
    }

    /*
     * 处理"/users/{id}"的GET请求,用来获取url中id值的User信息
     * url中的id可通过@PathVariable绑定到函数的参数中
     */
    @RequestMapping(value="/{id}", method=RequestMethod.GET)
    public User getUser(@PathVariable Long id) {
        return users.get(id);
    }

    /*
     * 处理"/users/{id}"的PUT请求,用来更新User信息
     */
    @RequestMapping(value="/{id}", method=RequestMethod.PUT)
    public String putUser(@PathVariable Long id, @ModelAttribute User user) {
        User u = users.get(id);
        u.setName(user.getName());
        u.setAge(user.getAge());
        users.put(id, u);
        return "success";
    }

    /*
     * 处理"/users/{id}"的DELETE请求,用来删除User
     */
    @RequestMapping(value="/{id}", method=RequestMethod.DELETE)
    public String deleteUser(@PathVariable Long id) {
        users.remove(id);
        return "success";
    }
}
2.下面针对该UserController编写测试用例验证正确性。当然也可以通过浏览器插件等进行请求提交验证。:
package com.lyd;

import org.junit.Before;
import org.junit.Test;
import org.junit.runner.RunWith;
import org.springframework.boot.test.SpringApplicationConfiguration;
import org.springframework.http.MediaType;
import org.springframework.mock.web.MockServletContext;
import org.springframework.test.context.junit4.SpringJUnit4ClassRunner;
import org.springframework.test.context.web.WebAppConfiguration;
import org.springframework.test.web.servlet.MockMvc;
import org.springframework.test.web.servlet.RequestBuilder;
import org.springframework.test.web.servlet.request.MockMvcRequestBuilders;
import org.springframework.test.web.servlet.setup.MockMvcBuilders;

import com.lyd.web.HelloController;
import com.lyd.web.UserController;


import static org.hamcrest.Matchers.equalTo;
import static org.springframework.test.web.servlet.request.MockMvcRequestBuilders.*;
import static org.springframework.test.web.servlet.result.MockMvcResultMatchers.content;
import static org.springframework.test.web.servlet.result.MockMvcResultMatchers.status;

@RunWith(SpringJUnit4ClassRunner.class)
@SpringApplicationConfiguration(classes = MockServletContext.class)
@WebAppConfiguration
public class ApplicationTest {

	private MockMvc mvc;

	@Before
	public void setUp(){
		mvc = MockMvcBuilders.standaloneSetup(
				new HelloController(),
				new UserController()
			).build();
	}

	@Test
	public void getHello() throws Exception{
		mvc.perform(MockMvcRequestBuilders.get("/hello").accept(MediaType.APPLICATION_JSON))
			.andExpect(status().isOk())
			.andExpect(content().string(equalTo("Hello World")));
	}

	@Test
	public void testUserController() throws Exception{

		RequestBuilder request = null;

		// 1、get查一下user列表,应该为空
		request = get("/users/");
		mvc.perform(request)
			.andExpect(status().isOk())
			.andExpect(content().string(equalTo("[]")));

		// 2、post提交一个user
		request = post("/users/")
				.param("id", "1")
				.param("name", "测试1")
				.param("age", "20");
		mvc.perform(request)
			//.andDo(MockMvcResultHandlers.print())
			.andExpect(content().string(equalTo("success")));

		// 3、get获取user列表,应该有刚才插入的数据
		request = get("/users/");
		mvc.perform(request)
			.andExpect(status().isOk())
			.andExpect(content().string(equalTo("[{\"id\":1,\"name\":\"测试1\",\"age\":20}]")));

		// 4、put修改id为1的user
		request = put("/users/1")
				.param("name", "测试2")
				.param("age", "30");
		mvc.perform(request)
				.andExpect(content().string(equalTo("success")));

		// 5、get一个id为1的user
		request = get("/users/1");
		mvc.perform(request)
				.andExpect(content().string(equalTo("{\"id\":1,\"name\":\"测试2\",\"age\":30}")));

		// 6、del删除id为1的user
		request = delete("/users/1");
		mvc.perform(request)
				.andExpect(content().string(equalTo("success")));

		// 7、get查一下user列表,应该为空
		request = get("/users/");
		mvc.perform(request)
				.andExpect(status().isOk())
				.andExpect(content().string(equalTo("[]")));
	}
}
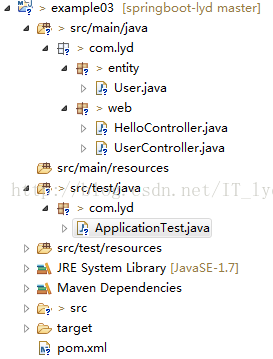
下面是完整项目结构:
源码下载:example03


 868
868

 被折叠的 条评论
为什么被折叠?
被折叠的 条评论
为什么被折叠?
 到【灌水乐园】发言


