


1 安装node.js
官网下载 (nodejs.cn
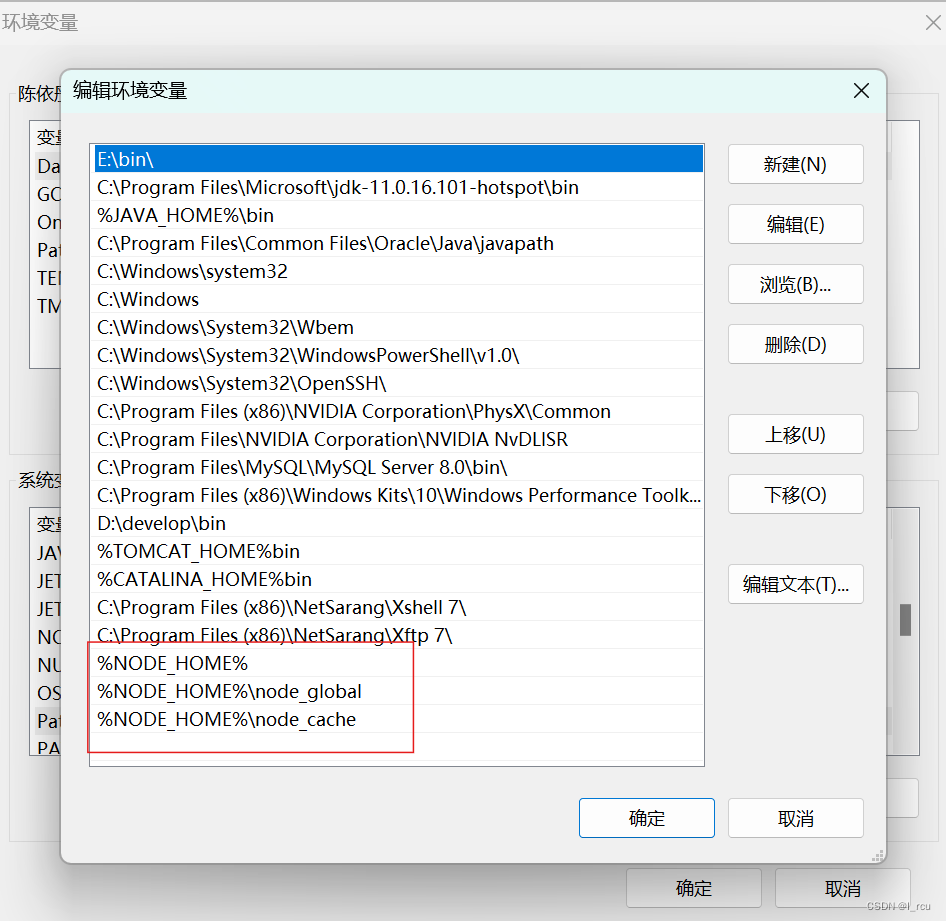
(并在根目录 新建两个文件:cache global)
npm已经在Node.js安装的时候顺带装好了。
配置环境变量:


2 设置淘宝镜像
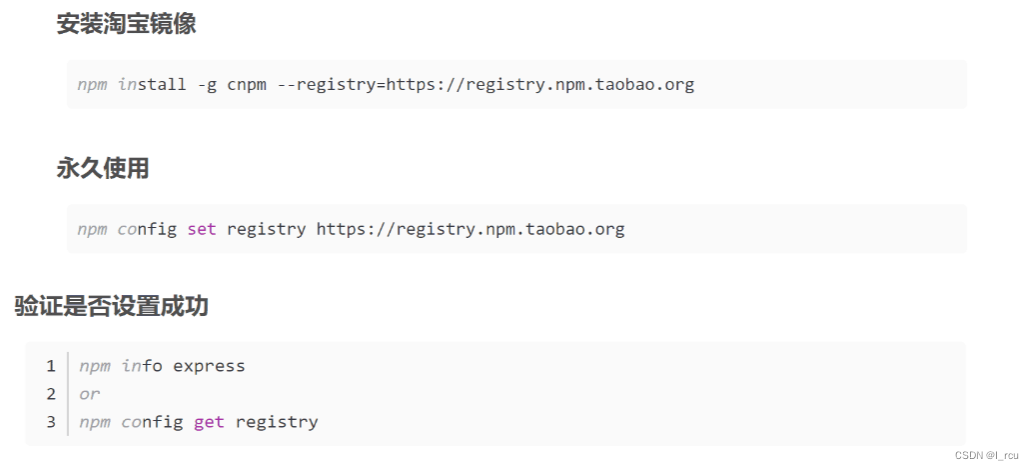
下载cnpm
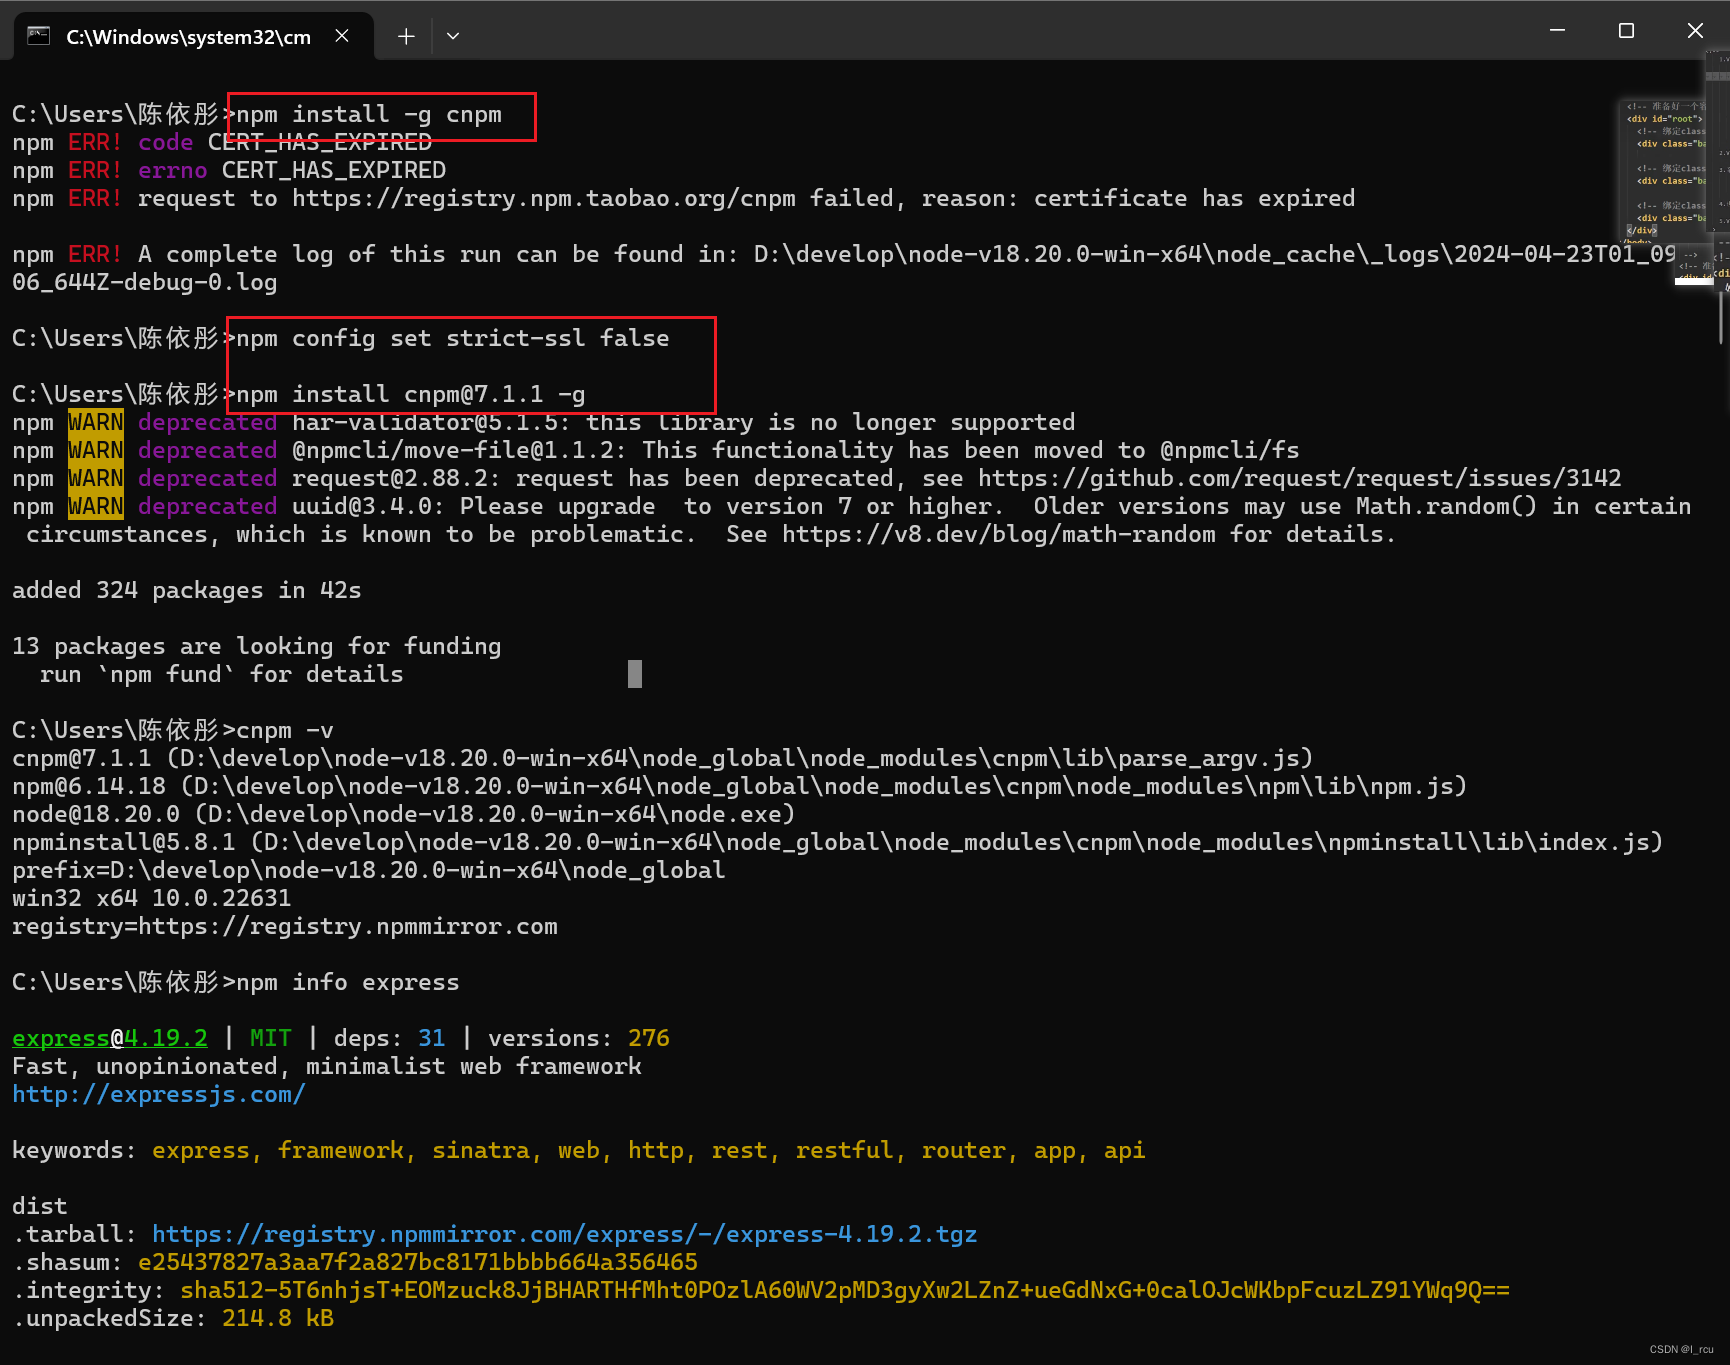
注意:

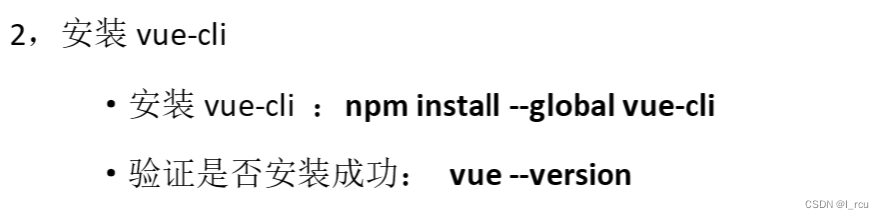
3 安装 vue-cli
4 创建第一个项目
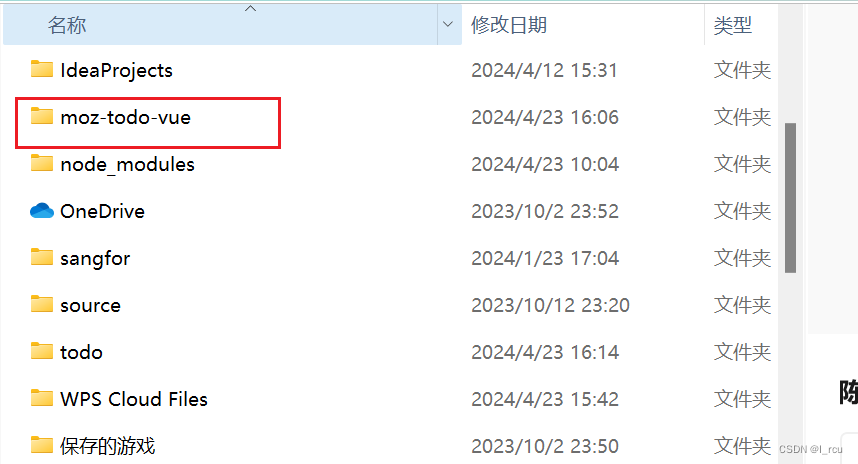
4.1 使用vue create创建,打开终端输入vue create +(项目名称)即可创建
(另外:)
4.2运行项目:npm run serve
(我在运行时出现报错,
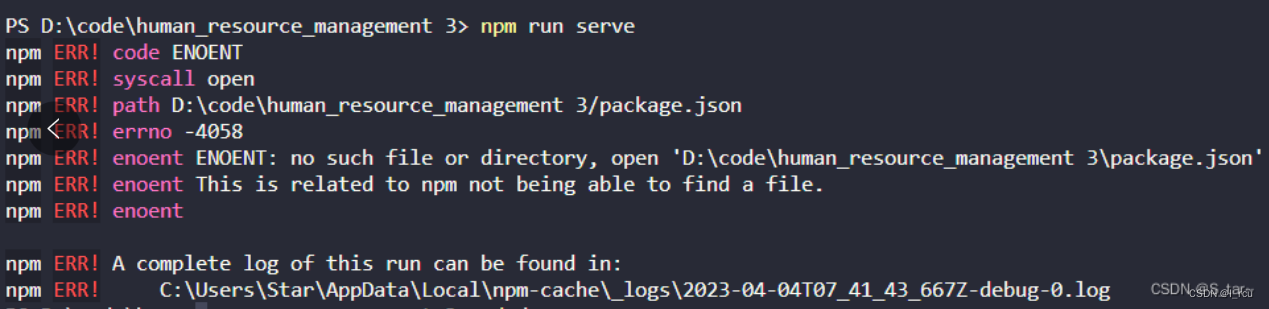
将项目名改为: cd name 便成功运行了
参考以下文献 http://t.csdnimg.cn/8j71h)
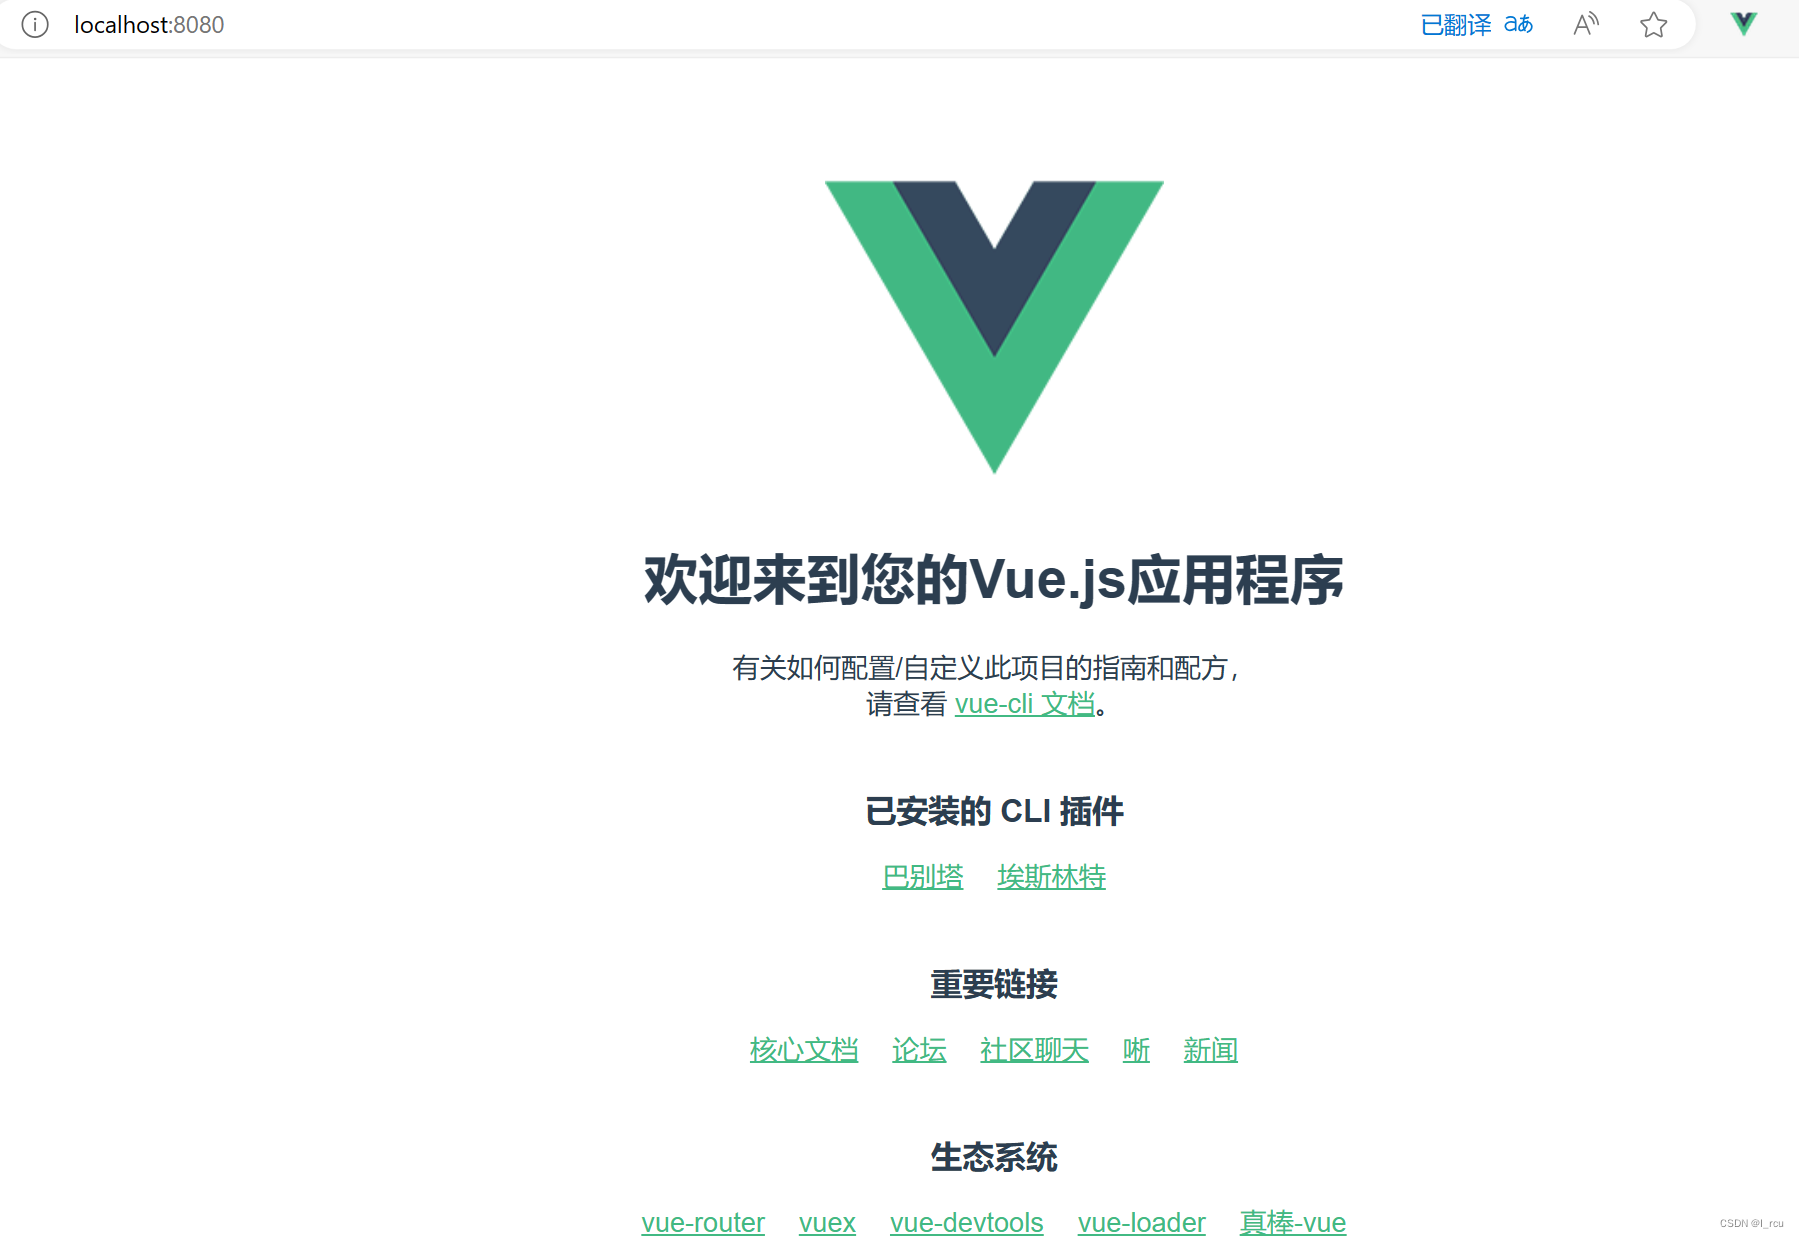
4.3打开Localhost,就可以看到VUE的Hello World界面
4.3 npm run build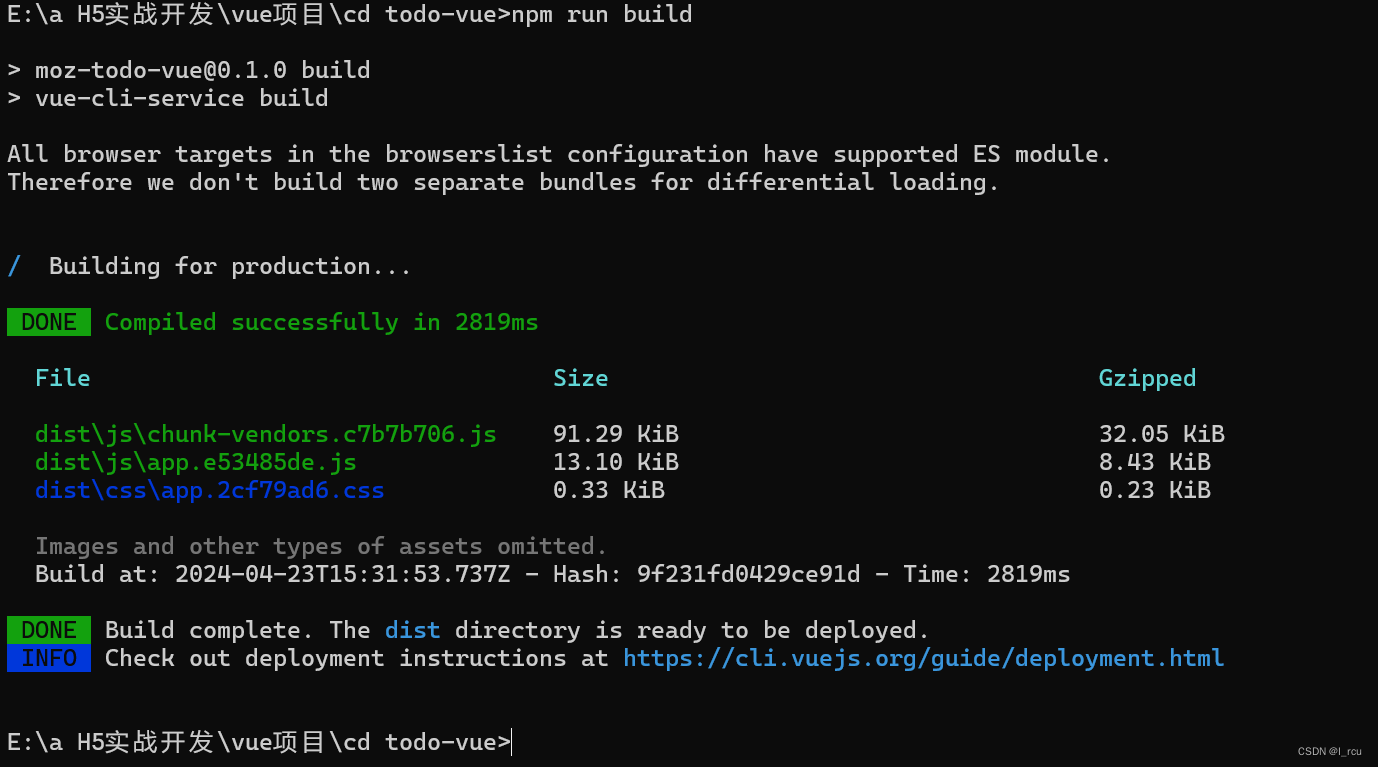
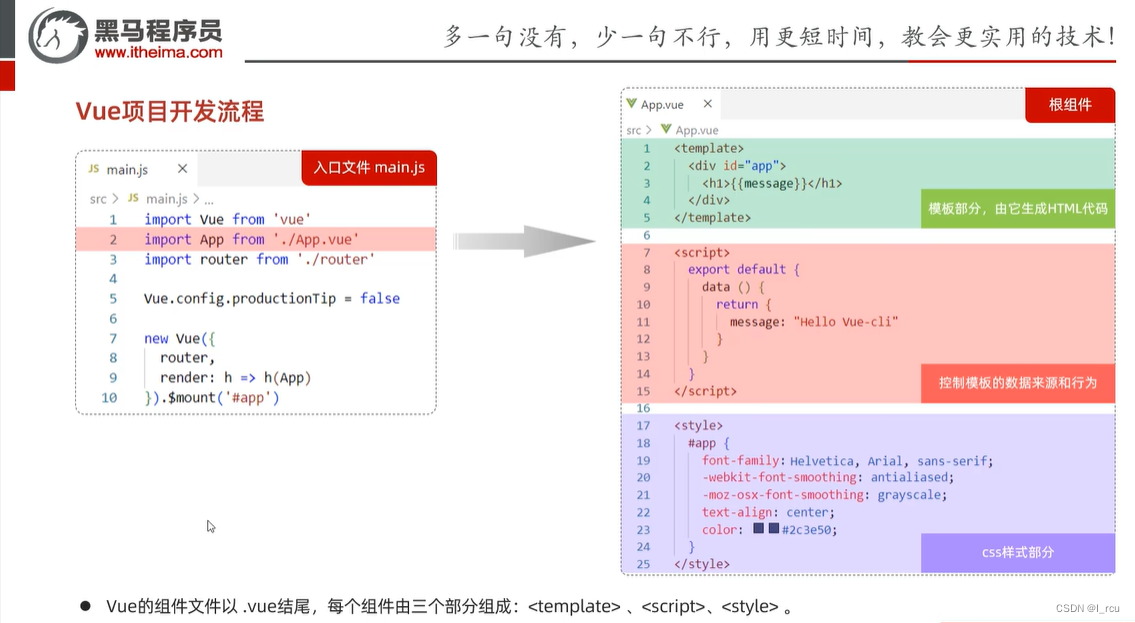
5 项目结构

5.1组件的组成部分
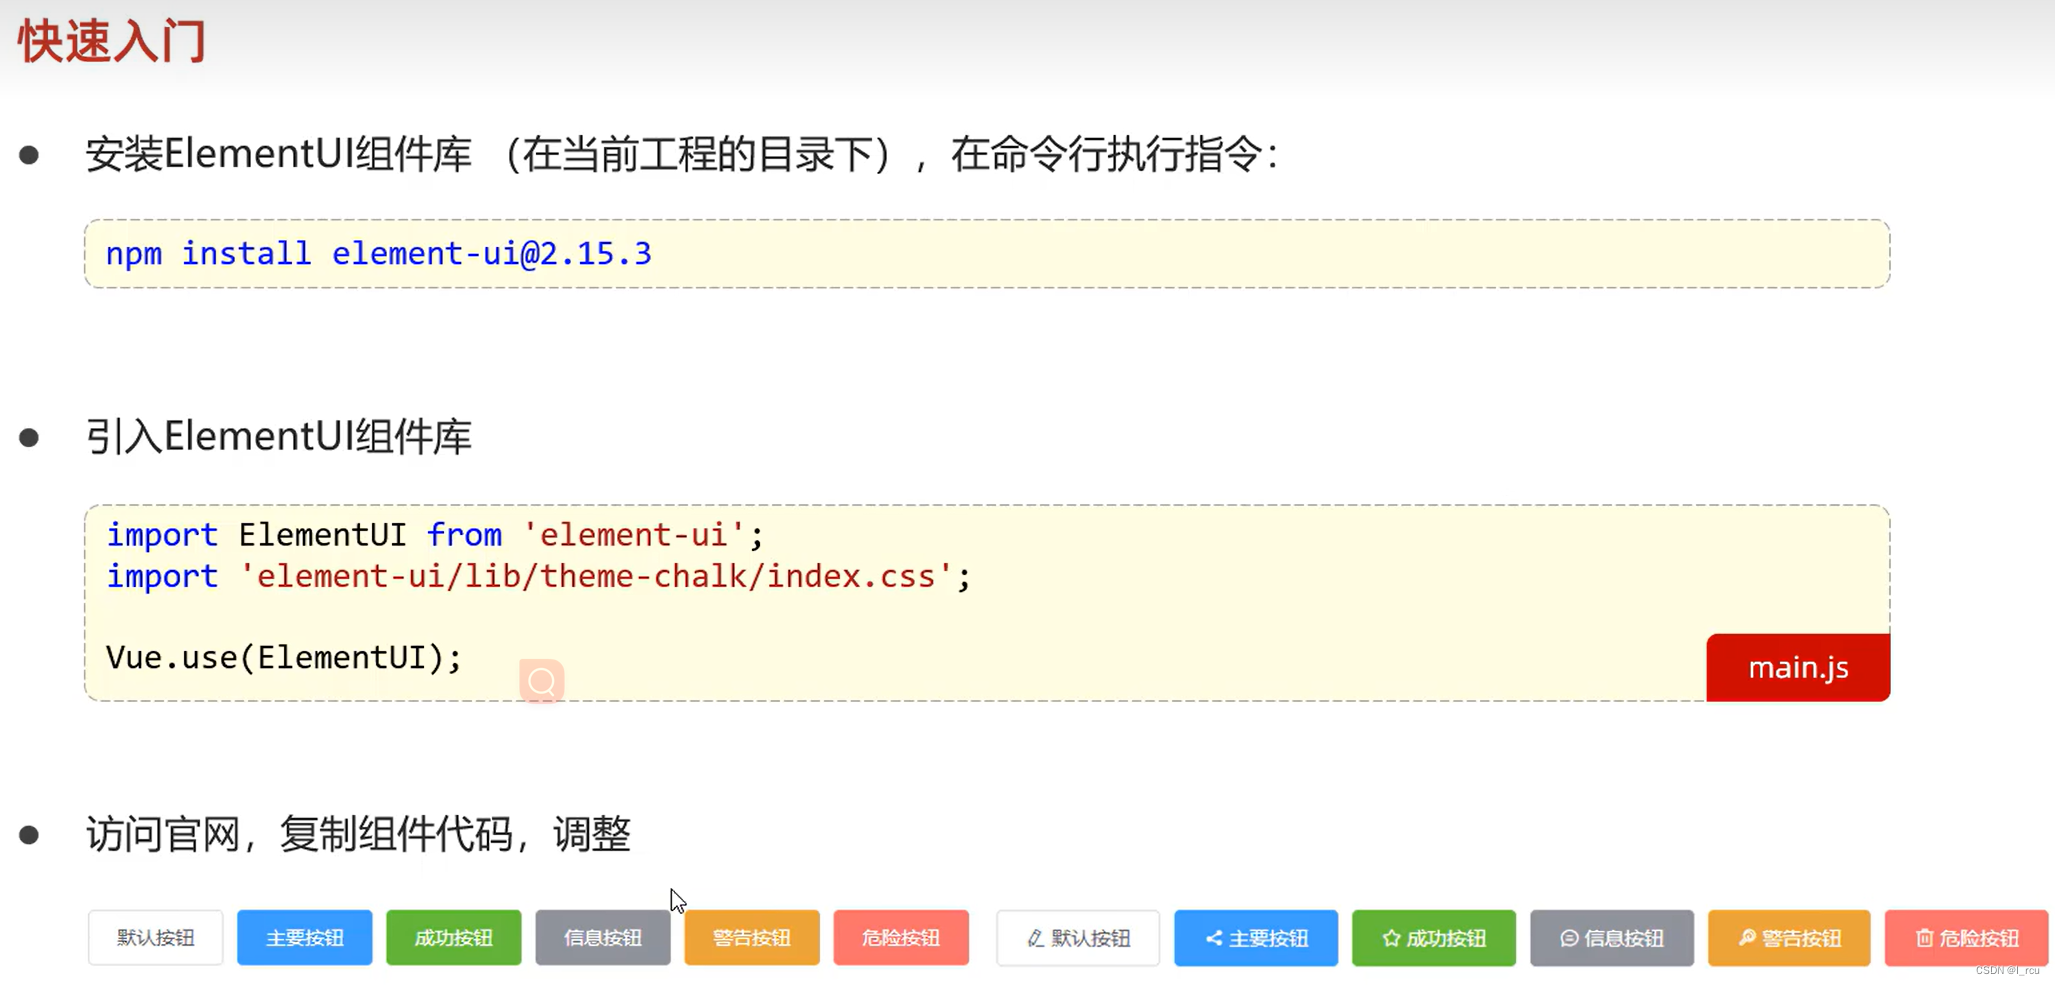
5.2 Element 快速入门
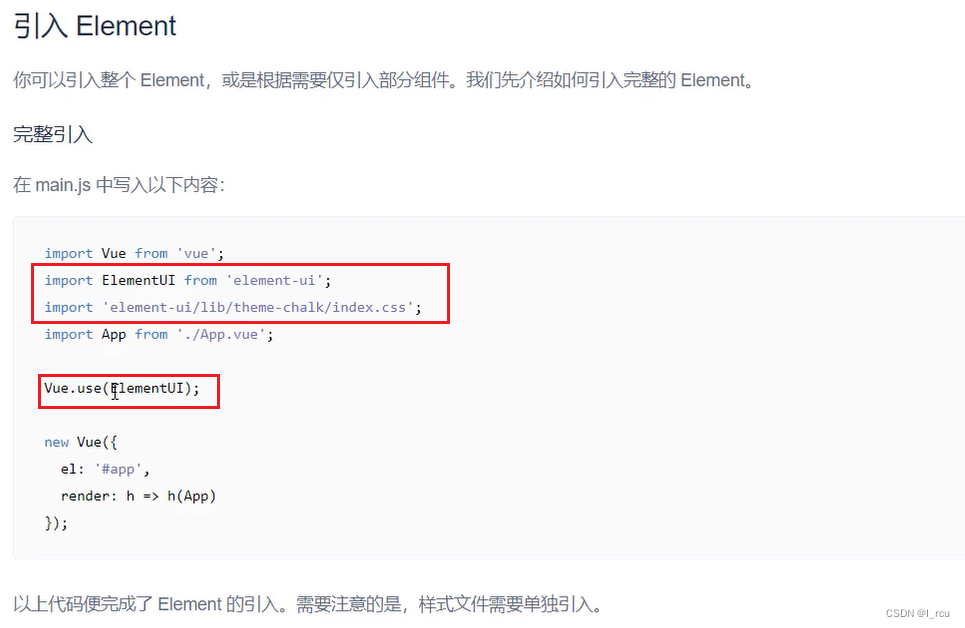
引入element


 213
213

 被折叠的 条评论
为什么被折叠?
被折叠的 条评论
为什么被折叠?
 到【灌水乐园】发言


