


当前项目中有要求需要适配多个数据库,于是需要对于apollo也需要适配多个数据库,因为apollo采用的是jpa而不是国内很多用的mybatis+mybatis plus,可能改造的地方有些不太一样,有些适配方案我是参考了这些链接,项目上的mysql迁移到DM默认schema、表名和字段名都会大写(目前apollo稳定版本是2.1.0):
apollo配置中心源码针对相关数据源切换(mysql,oracle,达梦)_apollo 替换oracle-CSDN博客
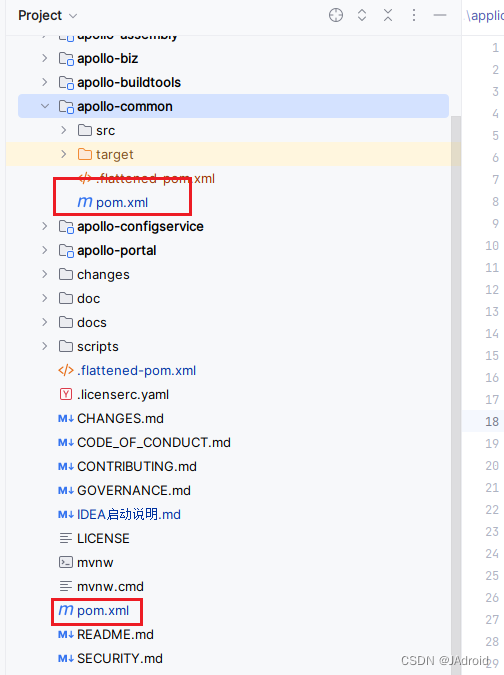
参考完后我做的修改如下:
1. pom修改
主要是对于这两个pom文件修改,增加两个依赖:
        <!-- 达梦数据库 -->
        <dependency>
            <groupId>com.dameng</groupId>
            <artifactId>DmJdbcDriver18</artifactId>
        </dependency>
        <!-- https://mvnrepository.com/artifact/com.dameng/DmDialect-for-hibernate5.6 -->
        <dependency>
            <groupId>com.dameng</groupId>
            <artifactId>DmDialect-for-hibernate5.6</artifactId>
        </dependency>
2.修改对应application-github.properties文件
apollo中三个服务对应都会有application-github.properties文件,在这个文件中加入一行数据源驱动配置:
spring.datasource.driver-class-name=${spring_datasource_driver}3.修改对应application.yaml文件
去掉默认的mysql初始化调试参数:
#  datasource:
#    hikari:
#      connectionInitSql: set names utf8mb4
4.修改AuthConfiguration.java、InstanceConfigRepository.java这两个文件
就是将`这个符号去掉,例如:
原始
 @Query(
      value = "select b.Id from `InstanceConfig` a inner join `Instance` b on b.Id =" +
          " a.`InstanceId` where a.`ConfigAppId` = :configAppId and a.`ConfigClusterName` = " +
          ":clusterName and a.`ConfigNamespaceName` = :namespaceName and a.`DataChange_LastTime` " +
          "> :validDate and b.`AppId` = :instanceAppId",
      countQuery = "select count(1) from `InstanceConfig` a inner join `Instance` b on b.id =" +
          " a.`InstanceId` where a.`ConfigAppId` = :configAppId and a.`ConfigClusterName` = " +
          ":clusterName and a.`ConfigNamespaceName` = :namespaceName and a.`DataChange_LastTime` " +
          "> :validDate and b.`AppId` = :instanceAppId",
      nativeQuery = true)
现在:
@Query(
      value = "select b.Id from InstanceConfig a inner join Instance b on b.Id =" +
          " a.InstanceId where a.ConfigAppId = :configAppId and a.ConfigClusterName = " +
          ":clusterName and a.ConfigNamespaceName = :namespaceName and a.DataChange_LastTime " +
          "> :validDate and b.AppId = :instanceAppId",
      countQuery = "select count(1) from InstanceConfig a inner join Instance b on b.id =" +
          " a.InstanceId where a.ConfigAppId = :configAppId and a.ConfigClusterName = " +
          ":clusterName and a.ConfigNamespaceName = :namespaceName and a.DataChange_LastTime " +
          "> :validDate and b.AppId = :instanceAppId",
      nativeQuery = true)
5.重写CamelCaseToUnderscoresNamingStrategy.java类
这个类是hibernate-core包下的,主要是针对schema、table、column等名称的转换,在之后的启动微服务中需要配置上对应的参数,要在这个
package org.hibernate.boot.model.naming;包下,在apollo-common这个模块添加,具体如下:
package org.hibernate.boot.model.naming;

import java.util.Arrays;
import java.util.List;
import java.util.Locale;

import org.hibernate.engine.jdbc.env.spi.JdbcEnvironment;

/**
 * Originally copied from Spring Boot as this strategy is popular there
 * (original name is SpringPhysicalNamingStrategy).
 *
 * @author Phillip Webb
 * @author Madhura Bhave
 */
public class CamelCaseToUnderscoresNamingStrategy implements PhysicalNamingStrategy {

//	private static final List<String> keywords = Arrays.asList("comment", "cluster", "reference", "percent");
	@Override
	public Identifier toPhysicalCatalogName(Identifier name, JdbcEnvironment jdbcEnvironment) {
		return apply( name, jdbcEnvironment );
	}

	@Override
	public Identifier toPhysicalSchemaName(Identifier name, JdbcEnvironment jdbcEnvironment) {
		return apply( name, jdbcEnvironment );
	}

	@Override
	public Identifier toPhysicalTableName(Identifier name, JdbcEnvironment jdbcEnvironment) {
		return apply( name, jdbcEnvironment );
	}

	@Override
	public Identifier toPhysicalSequenceName(Identifier name, JdbcEnvironment jdbcEnvironment) {
		return apply( name, jdbcEnvironment );
	}

	@Override
	public Identifier toPhysicalColumnName(Identifier name, JdbcEnvironment jdbcEnvironment) {
		return apply( name, jdbcEnvironment );
	}

	private Identifier apply(final Identifier name, final JdbcEnvironment jdbcEnvironment) {
		if ( name == null ) {
			return null;
		}
		/*StringBuilder builder = new StringBuilder( name.getText().replace( '.', '_' ) );
		for ( int i = 1; i < builder.length() - 1; i++ ) {
			if ( isUnderscoreRequired( builder.charAt( i - 1 ), builder.charAt( i ), builder.charAt( i + 1 ) ) ) {
				builder.insert( i++, '_' );
			}
		}
		return getIdentifier( builder.toString(), name.isQuoted(), jdbcEnvironment );*/
		return getIdentifier( name.getText().replace( '.', '_' ), name.isQuoted(), jdbcEnvironment );
	}

	/**
	 * Get an identifier for the specified details. By default this method will return an identifier
	 * with the name adapted based on the result of {@link #isCaseInsensitive(JdbcEnvironment)}
	 *
	 * @param name the name of the identifier
	 * @param quoted if the identifier is quoted
	 * @param jdbcEnvironment the JDBC environment
	 *
	 * @return an identifier instance
	 */
	protected Identifier getIdentifier(String name, final boolean quoted, final JdbcEnvironment jdbcEnvironment) {
		if ( isCaseInsensitive( jdbcEnvironment ) ) {
			name = name.toLowerCase( Locale.ROOT );
		}
		// 判断是否达梦,达梦大写
		if (jdbcEnvironment.getDialect().getClass().getName().equalsIgnoreCase("org.hibernate.dialect.DmDialect")) {
//			String finalName = name;
//			if (keywords.stream().anyMatch(str -> str.equalsIgnoreCase(finalName))) {
//				return new Identifier(name.toUpperCase(), true);
//			}
			return new Identifier(name.toUpperCase(), true);
		}
		return new Identifier( name, quoted );
	}

	/**
	 * Specify whether the database is case sensitive.
	 *
	 * @param jdbcEnvironment the JDBC environment which can be used to determine case
	 *
	 * @return true if the database is case insensitive sensitivity
	 */
	protected boolean isCaseInsensitive(JdbcEnvironment jdbcEnvironment) {
		return true;
	}

	private boolean isUnderscoreRequired(final char before, final char current, final char after) {
		return Character.isLowerCase( before ) && Character.isUpperCase( current ) && Character.isLowerCase( after );
	}

}
6.启动参数
在apollo-adminservice apollo-configservice这两个服务启动时添加的VM参数如下:
-Dspring_datasource_driver=dm.jdbc.driver.DmDriver -Dapollo_profile=github -Dspring.datasource.url=jdbc:dm://129.0.0.1:30236?ema=APOLLOCONFIGDB_2_1_0&characterEncoding=utf8&compatibleMode=mysql&clobAsString=true -Dspring.jpa.properties.hibernate.dialect=org.hibernate.dialect.DmDialect -Dspring.jpa.hibernate.naming.physical-strategy=org.hibernate.boot.model.naming.CamelCaseToUnderscoresNamingStrategy -Dspring.datasource.username=SYSDBA -Dspring.datasource.password=SYSDBA001 -Dspring.security.eureka.host=127.0.0.1 -Dspring.security.eureka.port=7761
在apollo-portal这个服务启动时添加的VM参数如下:
-Dspring_datasource_driver=dm.jdbc.driver.DmDriver -Dapollo_profile=github,auth -Ddev_meta=http://localhost:8080/ -Dapollo.meta=http://localhost:8080/ -Dserver.port=8070 -Dspring.datasource.url=jdbc:dm://127.0.0.1:30236?schema=APOLLOPORTALDB_2_1_0&characterEncoding=utf8&characterEncoding=utf8&compatibleMode=mysql&clobAsString=true -Dspring.jpa.properties.hibernate.dialect=org.hibernate.dialect.DmDialect -Dspring.jpa.hibernate.naming.physical-strategy=org.hibernate.boot.model.naming.CamelCaseToUnderscoresNamingStrategy -Dspring.datasource.username=SYSDBA -Dspring.datasource.password=SYSDBA001
如果是用的apollo自带的eureka,则在参数中不需要配置eureka相关参数,最后执行启动就可以了


 788
788


 被折叠的 条评论
为什么被折叠?
被折叠的 条评论
为什么被折叠?
 到【灌水乐园】发言


